Bathroom Fan With Light: Sizing, Noise, Ducting and Install
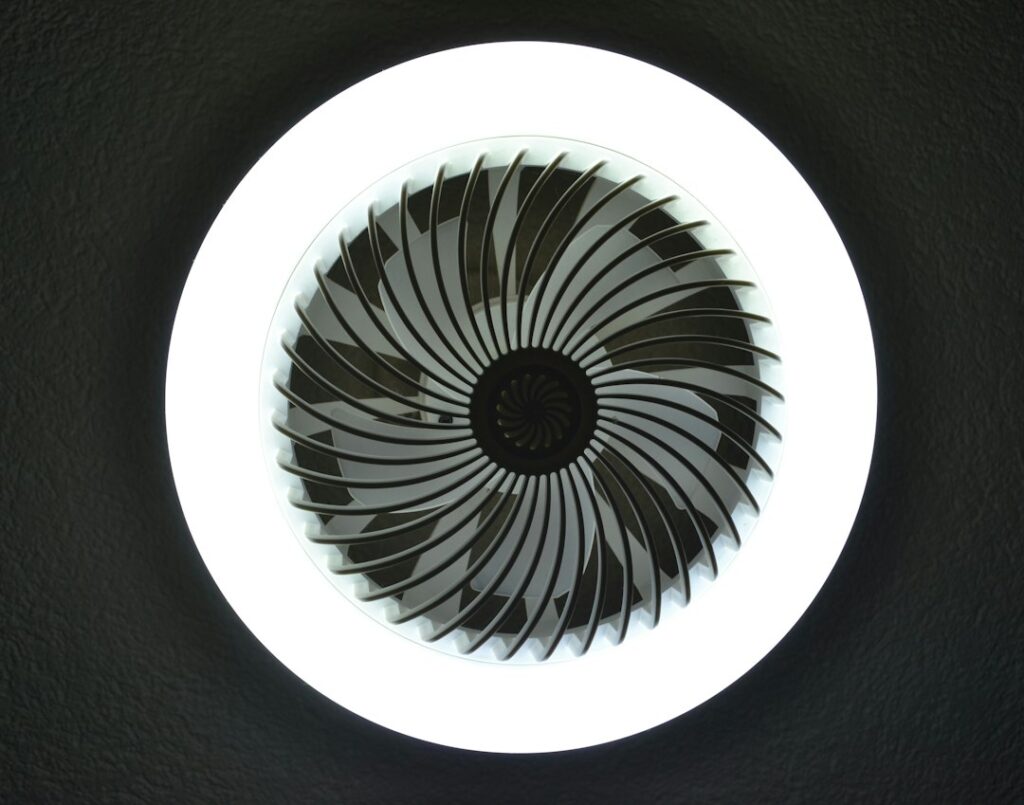
A bathroom fan with light is a combination exhaust fan and ceiling light fixture in one housing, so a single ceiling opening handles both ventilation and illumination. The light is the easy part. The fan is what protects the room, and it only works if it moves enough air for the space, is quiet enough that people actually run it and is ducted all the way outdoors. A combination unit is a sensible choice for most small and mid-sized bathrooms, especially when replacing an old fan in the same ceiling hole. This guide explains how to size the fan in cubic feet per minute (CFM), what sone ratings mean for noise, which models are rated for installation over a shower, how ducting and controls affect performance, what installation typically costs and what a home inspector checks. It reflects general guidance as of 2026; the fixture’s listing, the manufacturer’s instructions and local electrical and mechanical codes take priority.
Part of our Heating, Cooling & Ventilation guide — start there for the full picture →
Why the Fan Matters More Than the Light
A shower releases a surprising amount of water vapor into a small room. If that moisture is not removed, it condenses on mirrors, windows, painted ceilings and cold exterior walls, and it can soak into grout, drywall paper and wood trim. The EPA’s mold guidance is direct about this: the key to mold control is moisture control, and one of its recommended actions is to run the bathroom fan or open the window when showering. The EPA also suggests keeping indoor relative humidity below 60 percent, ideally between 30 and 50 percent.
That is why a combination unit should be chosen as a fan first. A beautiful light on a fan that is too small, too loud or vented into the attic does not solve the moisture problem. Our broader guide to the bathroom exhaust fan covers fan-only models, and the guide to a bathroom that smells like mildew explains what happens when ventilation falls short.
Types of Fan and Light Combinations
Fan with a standard light
The most common style: a fan housing with an integrated LED light behind a decorative or plain lens. Many use built-in LED modules rather than replaceable bulbs. Check whether the LED is replaceable and what the color temperature is before buying.
Fan with light and night light
Adds a low-wattage night light, usually on a separate switch circuit. Useful in hallways and kids’ bathrooms, but it requires an extra conductor in the wall or a multi-function control.
Fan, light and heater
Adds a heating element or heat lamp. These draw much more power and often need a dedicated circuit. They can be welcome in a cold Front Range bathroom in January, but they are a different installation from a simple fan-light swap. Compare the heater wattage with the circuit capacity before buying, and expect an electrician to confirm it.
Humidity-sensing and motion-sensing models
Some combination fans include a humidity sensor that turns the fan on when moisture rises and off when it drops, or a motion sensor for the light. Humidity sensing helps in households where people forget to run the fan, though in very dry Front Range air the trigger point may need adjustment.
Decorative and LED-panel styles
Some units look like a flush ceiling light with the fan grille hidden around the edge. They appeal in remodels but sometimes trade airflow for looks. Compare their CFM and sone ratings with conventional models.
How to Size a Bathroom Fan With Light
Fans are rated in cubic feet per minute. A widely used rule of thumb for bathrooms up to about 100 square feet is roughly 1 CFM per square foot of floor area, with a practical minimum around 50 CFM. For a 5-by-8 bathroom (40 square feet), a 50 CFM fan meets that rule; for a 10-by-10 primary bath, about 100 CFM. Larger bathrooms are often sized by fixture count instead, adding airflow for each toilet, shower and tub, with extra for a jetted tub or an enclosed toilet room that may need its own fan.
Several factors push the number up:
- Ceilings higher than eight feet, since there is more air volume to move.
- Long or twisting duct runs, which reduce real airflow below the rated number.
- Steam showers or large soaking tubs that release more moisture.
- Little or no window, leaving the fan as the only exhaust.
Local codes and the energy code set minimum exhaust rates, and inspectors in some jurisdictions verify them. Check with the local building department if a permit is involved.
Rated airflow vs. real airflow
Fan airflow is tested at a specified static pressure, which represents the resistance of the duct. ENERGY STAR’s ventilation fan criteria, for example, look at airflow at both 0.1 and 0.25 inches of water column, because real installations rarely match laboratory conditions. A fan rated at 80 CFM can deliver much less through a crushed, long or undersized duct. That is why the duct matters as much as the fan, as discussed below.
Noise: What Sone Ratings Mean
A sone is a measure of perceived loudness. Lower is quieter. As a rough guide:
- Around 0.3 to 1.0 sone: very quiet; often hard to tell the fan is running.
- Around 1.0 to 2.0 sones: quiet, similar to a refrigerator hum.
- 3 to 4 sones and up: noticeably loud, typical of older builder-grade fans.
Noise is not a luxury issue. A loud fan is a fan people turn off early or never turn on, so the moisture stays in the room. ENERGY STAR certification includes maximum allowable sound levels in sones, along with minimum efficacy in CFM per watt.
Energy Efficiency and Lighting
ENERGY STAR reports that certified ventilation fans use about 48 percent less energy than standard models, and that certified fans that include lighting use 70 percent less energy on average than standard models. Efficient units typically use better motors and blade designs, which also helps with noise and longevity.
For the light itself, look at:
- Brightness in lumens. A ceiling fan-light is often the main light in a small bathroom, so check that the output is adequate, or plan for a separate vanity light over the mirror for shadow-free grooming.
- Color temperature. Many people prefer roughly 2700K to 3000K for a warm look or 3500K to 4000K for clearer, more neutral grooming light.
- Dimming. Not every integrated LED dims, and dimmable models need a compatible dimmer control.
- Replaceability. Integrated LED modules last a long time, but if one fails, replacement parts or a whole new grille assembly may be needed.
Over the Shower: Wet-Location Ratings and Electrical Safety
If the fan-light will be installed inside a shower or above a tub, check that it is listed for that location. Many combination units are labeled as suitable for wet locations or for installation over a tub or shower when connected to a ground-fault circuit interrupter (GFCI) protected branch circuit. The manufacturer’s instructions spell out the conditions, and local electrical code adds its own requirements. A fixture that is not listed for the location should not be installed there.
Other electrical points worth knowing:
- Bathroom circuits often require GFCI protection for receptacles, and some fan-light installations need it as well. Our guide to the bathroom GFCI outlet explains how that protection works.
- Fan-light-heater combos may need a dedicated circuit.
- Separate switching for the fan and light usually requires an extra wire or a multi-function control at the wall.
- Turn off the breaker, not just the wall switch, before opening the housing.
In many jurisdictions, adding a new fixture, a new circuit or new ductwork requires a permit. Simple like-for-like replacements may not, but rules vary by city and county along the Front Range.
Ducting: Where the Moist Air Has to Go
The single most common problem inspectors find with bathroom fans is not the fan. It is where the air ends up. A bathroom fan must exhaust to the outdoors through a roof cap, wall cap or properly designed soffit termination. It should not dump into the attic, into a soffit cavity without a dedicated vent or into a wall.
Good ducting practice includes:
- The diameter the fan was designed for, commonly 4 or 6 inches, without reducing it along the way.
- The shortest, straightest run practical, with as few elbows as possible.
- Smooth or semi-rigid duct rather than long runs of crushed flexible duct.
- Sealed joints using foil tape or mastic, not cloth duct tape.
- Insulated duct through cold attics, so warm, moist air does not condense inside the duct and drip back into the fan or onto the ceiling.
- A backdraft damper at the fan or termination so cold air and wind do not flow back in.
- A slight slope toward the exterior where possible, so any condensation drains out rather than back.
Our guide to the bathroom fan duct covers materials, routing and termination in more detail.
Controls: Switches, Timers and Run Time
A fan only helps when it runs long enough. Many building scientists and ventilation guides suggest running the fan during the shower and for about 15 to 20 minutes afterward to clear remaining moisture. Few people remember to do that, which is why controls matter:
- Countdown timer switches let the user press a button and walk away.
- Humidity-sensing switches or fans run until moisture drops.
- Delay-off controls keep the fan running for a set time after the light is switched off.
- Separate fan and light switches allow the fan to run without the light.
Our guide to the bathroom fan timer compares those options.
Replacing an Old Fan With a Fan-Light Combo
Many bathroom fan with light purchases are retrofits: an old, loud fan or a plain ceiling fixture is swapped for a combination unit. A few practical points make that job go smoothly.
Measure the existing housing
Remove the grille and measure the housing opening and depth before shopping. Several manufacturers sell retrofit or “upgrade” units sized to fit common existing housings, which avoids enlarging the drywall opening. A unit that needs a larger hole means patching and repainting the ceiling, and a larger housing may not fit between the joists without reframing.
Check the duct size
Older fans were often connected to 3-inch duct. Many newer, higher-capacity fans have 4-inch or 6-inch outlets. Reducing a 4-inch fan outlet down to an old 3-inch duct chokes airflow, and the fan will deliver much less than its rating. When the duct is undersized, crushed or terminates in the attic, the retrofit is a good time to correct it.
Confirm the wiring
If the existing fan has one switch and the new unit has a fan, light and night light, there may not be enough conductors in the switch box to control each function separately. Options include a multi-function control designed by the fan maker, running a new cable or accepting a single switch for fan and light together. If the old fixture was a light only, adding a fan means adding ducting as well as power.
Look for signs of past moisture
With the old fan out, look at the ceiling drywall around the opening and, from the attic, at the duct and nearby framing. Brown staining, soft drywall, rusted housings and dark spotting on roof sheathing suggest the old fan was not removing moisture effectively. Fix the duct and termination, not just the fan.
Maintenance and Signs of a Failing Fan
Combination units need little care, but a few habits keep them working:
- Remove and wash the grille and lens every few months, since lint and dust reduce airflow.
- Vacuum the fan blades or blower wheel with the breaker off.
- Hold a square of toilet paper to the grille with the fan running. If it is not pulled firmly against the grille, airflow is weak.
- Listen for grinding, rattling or a slowing motor, which usually means the motor or bearings are wearing out.
- Check the exterior cap for a stuck damper, bird nests or lint buildup.
Persistent mirror fogging long after showers, peeling ceiling paint and a musty smell are all signs that the fan is undersized, poorly ducted or not running long enough.
Typical Costs
Costs vary by model, ceiling access and how much of the existing installation can be reused. As a typical national picture:
- The unit itself: basic fan-light combos often cost under one hundred dollars; quiet, ENERGY STAR certified or humidity-sensing models commonly run from roughly one hundred to several hundred dollars; fan-light-heater units sit at the upper end.
- Like-for-like replacement: when the new housing fits the old opening and the duct and wiring are reusable, professional labor is usually modest.
- New installation or upgrades: cutting a new ceiling opening, running new duct to a roof or wall cap, adding a switch leg or a dedicated circuit, or patching drywall can add several hundred dollars or more.
Attic access, roof pitch and whether a new roof penetration is needed are the main cost drivers. If the fan is part of a bigger project, our guide to bathroom remodel cost places ventilation in the overall budget.
Front Range Considerations
- Dry air does not remove the need. Colorado’s low outdoor humidity helps rooms dry faster, but a hot shower still pushes the bathroom to very high humidity for a while. The fan still needs to run.
- Cold attics and condensation. In winter, uninsulated duct runs through a cold attic can collect frost and condensation that later drips back. Insulated duct and a good damper help.
- Wind and backdrafts. Strong winds near the foothills can push air back through a weak damper, producing drafts and rattling. A quality wall or roof cap with a working damper is worth it.
- Snow on roof caps. Low-profile roof caps can be buried by snow on low-slope roofs. Wall terminations avoid this in some homes.
What a Home Inspector Checks
The ASHI Standard of Practice directs inspectors to inspect kitchen, bathroom, laundry and similar exhaust systems. During a typical inspection, an inspector may:
- Turn on the fan and confirm it runs and draws air
- Note excessive noise, vibration or a missing grille
- Look in the attic for ducts that terminate in the attic space, are disconnected or are crushed
- Look for staining, mold-like growth or frost around ducts and on roof sheathing near the fan
- Note bathrooms that lack both a fan and an operable window
- Note signs of moisture damage, such as peeling ceiling paint or swollen trim
An inspector does not usually measure CFM or verify a fixture’s listing for a wet location, and concerns are normally referred to an electrician or HVAC contractor. Our heating and cooling guides cover related ventilation topics.
References
- Ventilation Fans — ENERGY STAR
- A Brief Guide to Mold, Moisture and Your Home — U.S. Environmental Protection Agency
- Light Fixtures — ENERGY STAR
- ASHI Standard of Practice for Home Inspection — American Society of Home Inspectors
Frequently asked questions
What size bathroom fan with light does a bathroom need?
A common rule of thumb for bathrooms up to about 100 square feet is roughly 1 CFM per square foot of floor area, with about 50 CFM as a practical minimum. Larger rooms, high ceilings and long duct runs call for more airflow.
Can a bathroom fan with light go over a shower?
Only if it is listed for that location. Many models are rated for installation over a tub or shower when connected to a GFCI-protected circuit. Follow the manufacturer's instructions and local electrical code.
Is it OK to vent a bathroom fan into the attic?
No. A bathroom fan should exhaust outdoors through a roof, wall or properly designed soffit termination. Venting into the attic can wet insulation and roof sheathing and lead to mold and frost problems.
How quiet should a bathroom fan be?
Many homeowners look for about 1.0 sone or less for a quiet fan. Loud fans tend to get switched off early, which defeats their purpose.
How long should a bathroom fan run after a shower?
A common recommendation is to run it during the shower and for about 15 to 20 minutes afterward. A timer or humidity-sensing control makes that easy.
Not sure whether the bathroom fans in a home you are buying actually vent outdoors? Contact our team to connect with a Front Range home inspector.