Water Mold on Walls: Stain or Growth?
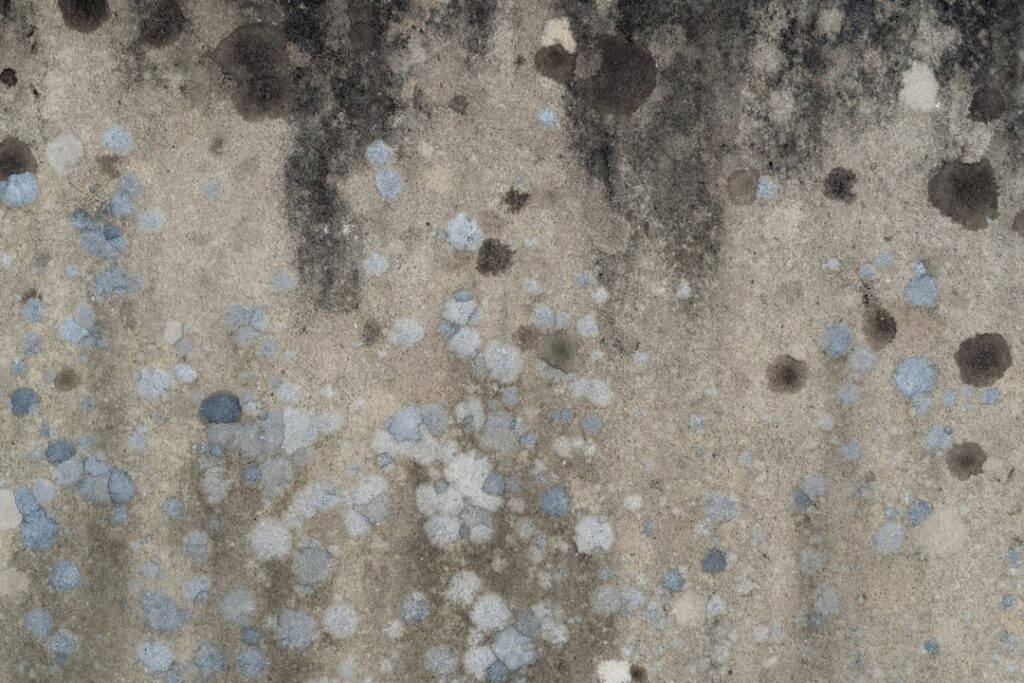
A dark or discolored patch on a wall raises a practical worry: is that a harmless water stain, or is it water mold on walls that needs real attention? The two can look alike at first glance, yet they call for different responses. Telling them apart, and tracing the moisture behind either one, is what this guide is about. It summarizes EPA and CDC guidance current as of 2026 and is informational only; consult your physician about health symptoms and a certified professional for testing or removal decisions.
Part of our Mold Around the Home guide — start there for the full picture →
Is this mold, asbestos, or water damage? Get a free instant screen
Upload a clear photo of the suspect area. You'll get an instant AI screening opinion and what to do next. This is screening guidance, not a professional determination.
Screening guidance only. AI can be wrong. Confirm asbestos, mold type, or lead with lab testing or a licensed professional before acting.
Water stain versus mold: the core difference
A water stain is the dried mark left where moisture passed through or evaporated from a wall. It is essentially a discoloration with no living organism. Mold, by contrast, is active growth that feeds on damp material. The key distinction is that a stain is static once the water stops, while mold is dynamic, it spreads, changes texture, and returns if dampness continues. Both signal that water reached the wall, but mold means the water stayed long enough for spores to take hold.
How to tell them apart
Several visual and physical checks separate a stain from mold on a wall.
Texture
Water stains are flat and smooth. Mold has texture, it may feel fuzzy, slimy, or raised, and it often looks three-dimensional under good light. Run a gloved finger lightly near the edge; a stain stays flat, while mold may smear or feel different from the surrounding surface.
Shape and edges
Water stains typically have a defined ring or tide line where the water dried, often brown or yellow. Mold spreads in irregular, blotchy clusters without a clean ring, frequently in greens, blacks, grays, or whites.
Smell
A plain stain has little odor. Active mold usually carries a musty, earthy smell. If the discolored area smells musty, lean toward mold.
Behavior over time
A stain does not grow once the leak is fixed. Mold keeps spreading or returns after cleaning if the moisture persists. Recurrence is one of the clearest signals you are dealing with growth, not a stain.
The water test for residue
On masonry walls, a white deposit can be efflorescence, mineral salt left by evaporating water, rather than mold. Spraying it with water dissolves efflorescence but not mold. This quick check rules out a harmless mineral stain on concrete or brick.
Reading the color of a wall mark
Color offers clues, though it is never conclusive on its own. Brown or yellow ringed marks usually indicate a water stain where moisture dried. Green, black, or gray blotchy growth without a clean ring points to mold. White crusty deposits on masonry suggest efflorescence. Pink or orange film in damp areas may be a bacterial slime rather than mold, though it still signals moisture. Combine color with texture, smell, and whether the mark spreads to reach a confident conclusion.
Why both point to a moisture problem
Whether you find a stain or mold, water got into that wall, and that is the issue to solve. A stain marks past or ongoing moisture; mold marks moisture that lingered. The EPA stresses that moisture control is the key to preventing mold, so addressing the water source protects you either way. Ignoring a stain because it is “just a stain” risks missing an active leak that will eventually grow mold. Our explainer on how water drives mold covers the connection in depth.
Why the same leak can cause both
A single moisture source often produces a stain in one spot and mold in another. Where water passed through and dried quickly, it leaves a stain. Where it lingered on a porous, organic surface, it grows mold. So finding a stain does not rule out mold nearby, and vice versa. Both are symptoms of the same underlying water intrusion, which is the real target. Treating only the visible mark while ignoring the source leaves the problem free to produce more of either.
Finding the moisture source
Tracing the water is the most valuable step. Look above and behind the discolored area for the likely path.
Plumbing leaks
Walls with pipes are common sources. A slow drip inside the wall can stain the surface and grow mold in the cavity. Check fixtures and supply lines on the other side of the wall.
Roof and window leaks
Water entering at the roof or around a window can travel down inside a wall and surface lower than its entry point. Stains near ceilings or below windows often trace to these paths.
Condensation and humidity
Cool exterior walls can collect condensation from humid indoor air, producing damp patches without any leak. Keeping humidity between 30 and 50 percent reduces this.
Step-by-step: confirming and addressing a wall mark
A methodical approach prevents both overreaction and neglect.
Inspect and test
Examine the mark for texture, smell, and edges. Spray white masonry deposits with water to check for efflorescence. Use a moisture meter to see whether the wall is currently damp.
Trace the source
Look above and behind the mark for plumbing, roof, or window paths, or signs of condensation. Fixing the source is the step that makes everything else last.
Treat appropriately
Repaint a dried stain with stain-blocking primer. Clean a small mold patch on a hard surface, discard moldy porous materials, and dry the area. Our guide to mold cleaning supplies lists the protective gear.
What to do about each
Your response depends on what you found.
If it is a water stain
Find and fix the leak, let the area dry completely, then prime and repaint with a stain-blocking primer. Confirm the stain does not return, which would mean the leak is still active.
If it is mold
Fix the moisture source first. For a small patch on a hard surface under about ten square feet, clean with detergent and water or an appropriate cleaner, wearing gloves, goggles, and an N95 respirator. Discard moldy porous materials. Dry thoroughly. Do not paint over mold, since that traps it.
Repainting a wall the right way
Whether you found a stain or cleaned a small mold patch, repainting must follow the correct steps or the mark returns. Confirm the area is fully dry, ideally with a moisture meter. Apply a stain-blocking primer so a water stain does not bleed through the new paint. For an area that had mold, make sure the growth is fully removed and the moisture source fixed before priming, since painting over mold traps it. Use a quality paint, and in damp-prone rooms consider a mildew-resistant formula. Skipping the drying or the source repair is the most common reason repainted walls re-stain or re-mold.
When growth is hidden in the wall
Surface mold sometimes signals more growth inside the cavity. If you smell mustiness, see returning stains, or find soft drywall, the wall may need to be opened by someone equipped to contain spores. Our overview of the mold inspection and testing hub explains how professionals confirm hidden growth with moisture meters and borescopes.
When a wall mark signals a bigger problem
Sometimes a surface mark is the visible edge of something larger inside the wall. A returning stain, a musty smell, soft or warped drywall, or elevated moisture readings all suggest cavity involvement. In those cases, cleaning or repainting the surface addresses only the symptom. The wall may need to be opened by someone equipped to contain spores, and the hidden moisture traced and fixed. Treating a persistent or recurring wall mark as potentially deeper, rather than purely cosmetic, prevents a small visible problem from masking a costly hidden one.
Front Range note
Colorado’s dry air helps walls dry once a leak is fixed, which can make a stained area stable and easy to repaint. The local risk is hidden cavity moisture in finished basements and after snowmelt or storms drive water against foundations. A moisture meter and attention to drainage help catch these before a stain becomes wall mold. Our guide to the signs of mold in walls can help you describe what you see.
Putting stain-versus-mold knowledge to work
The practical value of telling a stain from mold is that it points you to the right response without overreacting or underreacting. A confirmed dried stain from a fixed leak needs only drying and repainting. Confirmed mold needs removal and, above all, a moisture fix. Either finding sends you to the same essential question: where did the water come from, and is it still active? Answer that, and you address not just the mark on the wall but the condition that created it, which is what keeps the wall clear for good.
When to call a professional
Call an inspector when mold exceeds about ten square feet, returns after cleaning, follows flooding or sewage, or hides inside the wall, and when you cannot trace the water yourself. The CDC notes sensitive people can react more to mold, so households with asthma or allergies should lean toward professional handling. An inspector confirms the source and extent before any repair begins.
Using a moisture meter to settle the question
When the visual checks leave doubt, a moisture meter is the most decisive tool a homeowner can use. It reads dampness inside the wall without opening it, so an elevated reading near a mark confirms active moisture, while a dry reading on a discolored area points to an old, resolved stain. This single measurement often settles whether you are looking at a current problem or a historical one. Pairing the meter reading with the texture, smell, and color clues gives you a confident answer before deciding how to respond.
What to do while you investigate
If you are still tracing the source, a few interim steps limit damage. Improve ventilation and lower humidity to slow any active growth. Keep the area accessible rather than covering it with furniture. Avoid painting, wallpapering, or sealing over the mark, which would trap moisture and hide the problem. Note whether the mark changes with weather or water use, since that timing helps pinpoint the source. These measures buy time without making the situation worse while you work out where the water is coming from.
Preventing future wall marks
Once you have addressed a stain or mold, prevention keeps new marks from forming. Maintain indoor humidity between 30 and 50 percent so cool walls do not collect condensation. Keep gutters clear and grade soil away from the foundation to stop water reaching walls from outside. Inspect plumbing and around windows periodically for early leaks. Keep furniture slightly off exterior walls so air can circulate. These habits address the moisture pathways that produce both stains and mold, protecting your walls before any mark appears.
When uncertainty itself is the reason to call
Sometimes the honest answer is that you cannot tell, and that uncertainty is itself a good reason to bring in help. If the texture, color, smell, and moisture readings do not add up to a clear conclusion, or if a mark keeps returning despite your efforts, a qualified inspector can confirm what it is and trace the water with tools you may not have. Spending a little on certainty often prevents far greater spending on a misdiagnosed wall that keeps staining or molding.
Common look-alikes on walls
Beyond stains and mold, several things appear on walls and cause confusion. Efflorescence is white mineral salt on masonry that dissolves with water. Mineral scale from hard water leaves chalky deposits near fixtures. Soot and dust build up around vents and wipe away cleanly. Old adhesive or smoke residue can darken in patches. Each of these differs from mold in texture, location, and behavior. Working through the possibilities, with the water test for white deposits and a check for fuzziness and musty smell, prevents you from treating a harmless mark as mold.
Acting before a stain becomes mold
The most valuable use of stain-versus-mold knowledge is catching a problem at the stain stage, before mold forms. A fresh water stain marks active or recent moisture, and addressing the source then, while the area is merely discolored, prevents the growth that lingering dampness would eventually produce. Because mold can begin on damp materials within 24 to 48 hours, a stain is often an early warning rather than a settled outcome. Responding to it promptly keeps a cosmetic mark from turning into a cleanup and a moisture fix.
References
- Mold Cleanup in Your Home — U.S. Environmental Protection Agency
- A Brief Guide to Mold, Moisture, and Your Home — U.S. Environmental Protection Agency
- Mold, Dampness, and Health — Centers for Disease Control and Prevention
Frequently asked questions
How do I tell a water stain from mold on a wall?
Water stains are flat, smooth, and ringed, with little odor, and they stop spreading once the leak is fixed. Mold has texture, smells musty, spreads in irregular blotches, and returns if moisture continues.
Is a water stain on the wall a problem if there is no mold?
It can be, because it marks water intrusion that may still be active. The EPA stresses moisture control, so trace and fix the source even if no mold has grown yet.
Can I just paint over water mold on a wall?
No. Painting over mold traps the growth and hides the moisture issue. Fix the water source, remove the mold, dry the area, then repaint a clean surface with stain-blocking primer.
What if the white patch on my wall dissolves with water?
Then it is likely efflorescence, harmless mineral salt, not mold. Efflorescence dissolves when sprayed; mold does not. It still indicates water moved through masonry, so address the moisture.
If you are unsure whether that patch on your Front Range wall is a stain or mold, reach out through our contact page to connect with a vetted inspector who can tell you and trace the moisture.