Step Flashing: Where Roofs Meet Walls and Why It Leaks
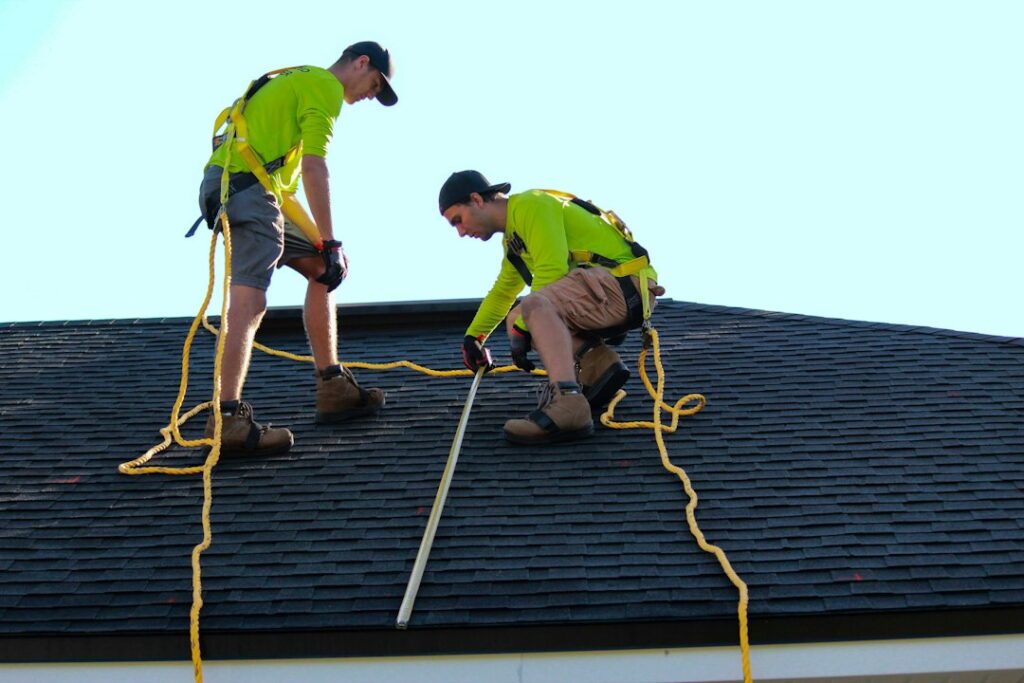
Wherever a sloped roof runs into a vertical wall, there is a seam that shingles alone cannot seal. A dormer cheek wall, the side of a second-story addition, a chimney, the wall of a garage that steps up to a taller house: each creates a joint where water running down the roof meets water running down the wall. Step flashing is the traditional answer, and when it is missing, mis-lapped or buried under caulk, the result is often a leak that shows up far from where the water actually gets in. This guide explains what a step flashing roof detail is, how it differs from continuous flashing, how counterflashing works at brick and stone, why reroofs are a common point of failure, what leaks and rot look like, how home inspectors approach flashing, and what repairs typically cost. Roof work involves fall hazards, so inspection from the ground or by a qualified professional is the safer route for most homeowners.
Part of our Structure & Exterior guide — start there for the full picture →
What Step Flashing Is and How It Works
Step flashing is a series of small, L-shaped pieces of metal, usually aluminum, galvanized steel or copper, installed one per shingle course along the side of a roof where it meets a wall. One leg of each piece lies flat on the roof deck under the shingle; the other leg turns up the wall. Each piece overlaps the one below it, the way the shingles themselves overlap, so water that reaches the joint is passed down the roof from piece to piece rather than into the framing.
The name comes from the stepped pattern: as each course of shingles goes on, a new flashing piece is laid on top of the shingle below, and the next shingle covers its roof leg. The result is a staircase of metal that is woven into the roof covering rather than simply laid on top of it. Exact piece sizes and laps depend on the shingle manufacturer’s instructions and local practice.
The vertical leg is only half of the system. It has to be covered by something that sheds water over it, usually the house wrap and siding, or a counterflashing at masonry. If the wall covering does not lap over the upturned leg, water running down the wall can slip behind the flashing and into the sheathing.
Why it is fastened the way it is
Each step flashing piece is typically fastened with a single nail high on the roof leg, near the top corner, and not into the wall leg. That lets the roof and wall move independently with seasonal expansion, settling and wood shrinkage without tearing the flashing. Fasteners driven low through the roof leg, or through the wall leg into framing, create holes in the very place water collects. That small detail is one reason flashing quality varies so much between installers.
Step Flashing vs. Continuous Flashing
Two kinds of flashing show up at roof-to-wall junctions, and they are not interchangeable. Which one belongs depends on the direction the roof slopes relative to the wall.
Sidewall junctions: step flashing
Where the roof slopes alongside the wall, so that the roof edge runs diagonally up the wall, step flashing is the conventional detail. Because water runs parallel to the wall, a single long strip would collect water at its top and channel it along the joint, where any gap in the sealant becomes a leak. Individual overlapping pieces avoid that by moving water onto the shingle surface at every course.
Headwall junctions: continuous flashing
Where the roof slopes down away from a wall, such as the top of a shed roof that butts into the house or the uphill side of a chimney, water runs straight away from the wall. Here a single continuous apron or headwall flashing is typical, with its roof leg lapped over the top shingle course and its wall leg tucked behind the siding or counterflashing. At chimneys and wide penetrations, the uphill side usually gets a cricket or saddle to split water around the obstacle.
Where problems start
The most common mistake is using a continuous strip along a sloped sidewall instead of individual steps. It can look tidy and may hold for a few years with fresh sealant, but it depends entirely on caulk, and caulk at a roof-to-wall joint has a short service life in Colorado sun. Another frequent issue is missing transitions where a sidewall ends at a gutter or eave. That spot needs a kick-out diverter, covered in our companion guide on kick-out flashing at roof-wall ends, so the last step flashing does not dump water behind the siding.
Counterflashing at Chimneys and Masonry Walls
Siding and house wrap can lap over step flashing, but brick, block and stone cannot. At masonry, a second layer of metal called counterflashing covers the upturned legs of the step flashing. Done properly, the counterflashing is set into a mortar joint, a cut reglet, or a groove sawn into the masonry, then bent down over the step flashing. The two pieces are not fastened together, which again allows independent movement.
On a chimney along a sloped side, counterflashing is often cut in a stepped pattern to follow the brick courses, with each section let into a different mortar joint. On a stone or stucco-faced wall, a surface-mounted counterflashing with a sealed top edge is sometimes used, but surface-mounted strips depend heavily on sealant and tend to need more attention.
Warning signs inspectors often note at masonry flashing include:
- Counterflashing that has pulled out of its mortar joint or reglet.
- Thick beads of roofing cement or caulk smeared over the joint instead of metal laps.
- Step flashing missing entirely, with shingles simply butted against the brick.
- Cracked or missing mortar at the counterflashing line.
- Water stains on the attic side of the chimney chase or on the ceiling near the fireplace.
Chimneys are a well-known source of roof leaks, and many of them trace back to these flashing details rather than to the brick itself. Our guide to diagnosing a roof leak and its likely sources covers how to trace water that appears away from its entry point.
Missing Step Flashing After a Reroof
Some of the most persistent sidewall leaks start during a reroof. Replacing step flashing correctly means removing or loosening the siding or counterflashing along the wall, pulling the old pieces, and weaving new ones in with the new shingles. That takes time, and it can mean disturbing siding, stucco or trim that the roofing crew is not responsible for.
The shortcuts that follow from this include:
- Reusing old step flashing. Sometimes reasonable if the metal is intact and can be properly re-lapped with the new shingle courses; often it is bent, corroded or nail-holed.
- Face-nailing new flashing over the siding. Pieces are slid onto the shingles and their wall legs are nailed and caulked to the face of the siding, which means the siding no longer laps over the flashing.
- Skipping it altogether. Shingles are bent up the wall or a bead of sealant is run along the joint.
- A continuous L-flashing along the sidewall. Faster than individual steps and dependent on sealant.
From the ground or a ladder at the eave, these problems can be hard to see. Telltale signs include exposed nail heads on the wall legs, a continuous bead of caulk along the joint, siding that stops well short of the roof, and flashing that sits on top of shingles rather than under them. Buyers reviewing a home with a recent roof replacement can ask the seller for the roofing contract and warranty details, including whether flashing was replaced or reused.
The stucco and stone complication
Along the Front Range, many homes have stucco or manufactured stone on walls that meet roofs. Properly replacing step flashing on these walls can require cutting back and patching the cladding, which raises the cost and often leads to surface-applied fixes. When stucco meets a roof, inspectors pay close attention to cracking, staining and soft spots below the roof line. Our stucco repair guide explains what those signs can mean and why patching the surface without fixing the water path rarely holds.
What Leaks and Rot Look Like
Water that gets past failed step flashing goes into the wall or roof assembly, not straight through the ceiling. That is why sidewall leaks often go unnoticed for years. Possible signs include:
- Ceiling stains in a room below a dormer or next to a two-story wall.
- Stains or bubbling paint on the interior side of the wall that meets the roof.
- Swollen, delaminated or soft siding and trim near the roof line.
- Peeling exterior paint in a diagonal band following the roof slope.
- Dark staining or soft sheathing visible from the attic along the wall.
Over time, repeated wetting can soften sheathing, rot the bottom of wall studs or the roof deck along the wall, and corrode fasteners. The hidden extent is often larger than the visible stain. Our wood rot repair guide covers how damaged framing and sheathing are evaluated, and our siding repair guide discusses replacing damaged cladding near roof lines.
Moisture and mold
The EPA states that the key to mold control is moisture control, and that drying water-damaged materials within 24 to 48 hours helps prevent mold growth in most cases. EPA guidance also notes that hidden mold can occur inside walls and in roof materials above ceilings where leaks occur. A slow flashing leak does not give materials that chance to dry. If staining, musty odors or visible growth show up near a roof-to-wall joint, fixing the water entry comes first, and EPA guidance suggests professional help for larger areas of mold.
Colorado conditions
Front Range roofs see intense UV exposure that dries out sealants, big temperature swings that work joints open and closed, and freeze-thaw cycles. Snow that drifts against a sidewall can sit for days, slowly melting into any gap in the flashing. Hail can also dent or crack flashing metal and dislodge the shingles that hold it in place. A flashing detail that depends on caulk tends to age faster here than one that relies on metal laps.
How Home Inspectors Evaluate Flashing
The American Society of Home Inspectors Standard of Practice lists flashing among the roofing items an inspector shall inspect, along with roofing materials, roof drainage systems, skylights, chimneys and roof penetrations. In the exterior section, it lists wall coverings, flashing and trim. The standard also requires the inspector to describe the methods used to inspect the roofing, which matters because many inspectors evaluate steep or high roofs from the ground, a ladder at the eave, or with a drone or camera pole rather than by walking them.
In practice, an inspector looking at a step flashing roof detail will typically check:
- Whether flashing is visible at each roof-to-wall junction.
- Whether siding or counterflashing laps over the wall leg.
- Whether the pattern is stepped or a continuous strip.
- Whether a kick-out diverter is present at the bottom of the sidewall.
- Excessive sealant, exposed fasteners and corrosion.
- Interior and attic signs of past or active water entry below the junction.
A home inspection is a visual, non-invasive evaluation. Inspectors do not normally remove siding or shingles to see concealed flashing, and moisture meters or infrared cameras, when used, give indications rather than a full picture. If findings suggest concealed damage, the report will usually recommend evaluation by a qualified roofer or contractor. For more on how inspections work and what they cover, see our guide to hiring a home inspector and the structure and exterior hub.
Related flashing details
Roof-to-wall flashing is one part of a larger water-management system. Other details that often come up in the same report include roof valleys, drip edge at eaves and rakes, and window flashing on walls below roof lines, which can be overwhelmed when sidewall water is directed onto them.
Repair Options and Typical Costs
Repairing step flashing ranges from a small fix to a significant project, depending on access, cladding and hidden damage. All figures below are general 2026 ranges for planning only; local pricing, roof pitch, materials and the extent of hidden damage vary widely, and written quotes are the only reliable number.
Spot repairs
Resetting a few loose pieces, replacing damaged shingles over the flashing, or refastening counterflashing is often a service-call repair. Many roofers charge a minimum trip fee and may land in the few-hundred-dollar range for a small, accessible area. Fresh sealant alone is usually a temporary measure, not a fix.
Replacing step flashing along a wall
Properly replacing step flashing along a sidewall means removing a course or two of siding, lifting or removing shingles along the wall, installing new step flashing course by course, and reinstalling or replacing the siding. For a single dormer or short wall with lap siding, costs can run from several hundred dollars to a low four-figure amount. Long walls, steep pitches, stucco or stone cladding and multiple stories push that higher.
Chimney flashing and counterflashing
Replacing flashing around a chimney, including a reglet cut for new counterflashing and possibly a cricket, commonly costs more than a straight sidewall because of the masonry work. Ranges from the high hundreds to a few thousand dollars are typical, with copper and complex chimneys at the upper end.
Hidden damage
Rotted sheathing, roof deck, wall studs or interior drywall and insulation add to the bill and are often not known until the wall is opened.
During a reroof
The most cost-effective time to fix step flashing is during a roof replacement. Ask whether the bid includes new step flashing at every sidewall, how siding or stucco will be handled, and whether kick-out flashing is included.
Practical Steps for Buyers and Homeowners
A few simple steps help catch step flashing problems early without climbing on the roof:
- Look from the ground with binoculars. Check each place a roof meets a wall. Look for metal visible along the joint, siding that comes down over it, and a kick-out at the bottom.
- Check the attic after heavy rain or snowmelt. Shine a flashlight along any wall that sits next to the roof, looking for stains, damp sheathing or rusty nails.
- Watch interior walls and ceilings. New stains under dormers, bay roofs or second-story walls deserve prompt attention.
- Keep gutters clear. Overflowing gutters at a sidewall can back water up behind siding near the flashing.
- Ask for details on any recent roof. Contracts, invoices and warranty documents often state whether flashing was replaced.
- Leave roof walking to professionals. OSHA’s fall prevention campaign notes that falls are the leading cause of death in construction and highlights falls from ladders and roofs. Homeowners can avoid most of that risk by evaluating from the ground and hiring a roofer for close-up work.
References
- ASHI Standard of Practice for Home Inspections — American Society of Home Inspectors
- A Brief Guide to Mold, Moisture and Your Home — U.S. Environmental Protection Agency
- Mold Cleanup in Your Home — U.S. Environmental Protection Agency
- OSHA’s Fall Prevention Campaign — Occupational Safety and Health Administration
Frequently asked questions
What is step flashing on a roof?
Step flashing is a series of L-shaped metal pieces installed one per shingle course where a sloped roof meets a sidewall. Each piece overlaps the one below, passing water down the roof instead of into the wall. The wall leg must be covered by siding or counterflashing.
Can step flashing be reused when replacing a roof?
Sometimes, if the metal is intact, uncorroded and can be properly re-lapped with the new shingles. Many roofers recommend new flashing because old pieces are often bent or nail-holed. Ask whether the bid includes new step flashing at every sidewall.
Is caulk a substitute for step flashing?
No. Sealant can help at some edges, but it ages quickly in strong sun and temperature swings. A roof-to-wall joint that depends only on caulk is a common source of hidden leaks.
How much does step flashing repair cost?
Small spot repairs may land in the few-hundred-dollar range, while replacing flashing along a full sidewall or around a chimney can reach the low thousands. Stucco, stone, steep roofs and hidden rot add cost. These are general 2026 ranges only.
Do home inspectors check step flashing?
Under the ASHI Standard of Practice, inspectors inspect roof flashing and wall flashing visually. They do not remove siding or shingles, so concealed flashing and hidden damage may need further evaluation by a roofer.
Buying a home with dormers, a chimney or stucco walls that meet the roof? Reach out through our contact page to connect with a Front Range inspector who looks closely at flashing and signs of hidden water.