Spray to Remove Mold: What Homeowners Need to Know
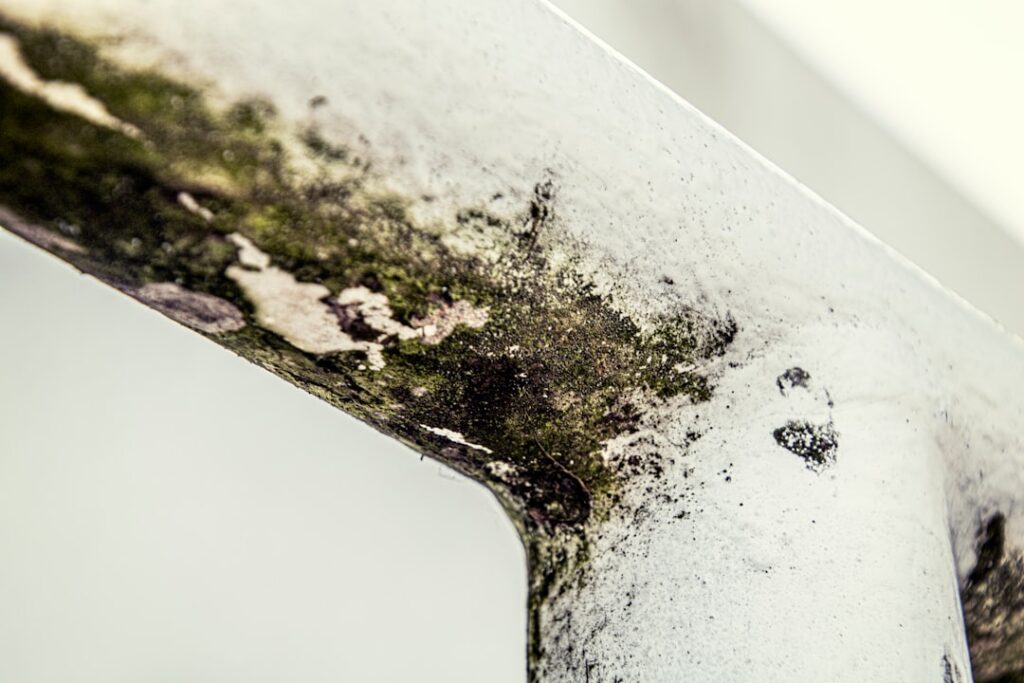
Reaching for a spray to remove mold is instinctive, but the bottle is only half the equation. The other half is how you use it. The same product can clear a stain completely or barely touch it depending on whether the surface was pre-cleaned, how long the spray was left to dwell, and whether the residue was actually removed afterward. Application technique is where most DIY mold cleanups quietly fail. This guide focuses on method: how to apply a mold spray correctly, surface by surface, with the right protective gear and the right follow-through. It summarizes EPA and CDC guidance current as of 2026; consult your physician about symptoms and a certified professional for serious contamination.
Part of our Mold Removal & Remediation guide — start there for the full picture →
Is this mold, asbestos, or water damage? Get a free instant screen
Upload a clear photo of the suspect area. You'll get an instant AI screening opinion and what to do next. This is screening guidance, not a professional determination.
Screening guidance only. AI can be wrong. Confirm asbestos, mold type, or lead with lab testing or a licensed professional before acting.
Preparing the Room and Protecting Yourself
Good technique begins before the spray leaves the bottle, with the setup of the room and your own protection. Clear the area of items that could be splashed or that block access, and lay down a drop cloth to catch runoff, since mold-laden residue should not be left to dry on a floor. Open a window to the outdoors to establish fresh air, and resist the temptation to point a fan at the wall, which spreads spores into clean rooms rather than removing them.
Personal protection is not optional even for a contained spot. The CDC and EPA recommend an N95 respirator that seals to the face, gloves that extend up the forearm, and goggles without ventilation holes. Spraying aerosolizes both spores and chemical mist, so these barriers protect your lungs, skin, and eyes during the work. Anyone with asthma, allergies, or a weakened immune system should not perform the task. Setting up the room and gearing up properly takes only a few minutes and turns a messy, hazardous job into a controlled one, which is itself part of applying a spray correctly.
Match the Spray to the Surface First
Before technique comes selection. A spray to remove mold works on the surface it can reach, which means nonporous and sealed surfaces are the right targets. Tile, glass, sealed metal, finished countertops, and painted or sealed walls hold mold on the surface where a spray and a wipe can lift it. Porous materials such as bare drywall, ceiling tile, carpet, and untreated wood absorb mold into their structure, and the EPA advises removing those rather than spraying them. Choosing a spray for a porous, saturated surface is the first technique mistake; the spray cannot reach what it cannot touch.
Why Application Beats Product Choice
Homeowners spend most of their attention choosing a product and almost none on how they apply it, which is backwards. Among the registered options, the differences in killing power are modest on the surfaces sprays suit. The differences in outcome from application are large. A premium product wiped off in ten seconds underperforms a budget product left for its full contact time. A spray that runs off a vertical wall before it works does nothing, regardless of its active ingredient. The variable that most determines success is technique, not brand.
This reframing is freeing, because technique is entirely in your control. You cannot change a product’s chemistry, but you can pre-clean the surface, keep it wet for the full dwell time, agitate textured areas, remove the residue, and dry thoroughly. Each of those steps adds more to the result than upgrading to a more expensive bottle. Once you internalize that the method carries the outcome, the product choice becomes a simple matter of matching the active ingredient and form to the surface, and the real effort goes where it pays off.
The Correct Application Method, Step by Step
Once you have the right surface and product, the method determines the result.
Prepare and Protect
Ventilate the room to the outdoors. Put on an N95 respirator, gloves, and sealed eye protection, as the CDC and EPA recommend for mold cleanup. Do not run a fan that blows across the moldy area toward clean rooms, which spreads spores. Lightly mist heavily contaminated areas with water first to reduce the spores that become airborne when you start.
Pre-Clean the Surface
Biocides bind to grease and grime and lose potency on a dirty surface. Wipe away soap scum, dust, and oil before applying the spray. This single step is the difference between a spray that works and one that sits uselessly on top of a film.
Apply and Let It Dwell
Spray to cover the area evenly. The most common error is wiping immediately. The active ingredient needs the label’s contact time, often several minutes, to kill the growth. Set a timer and let it work. Reapply if the surface dries before the dwell time ends.
Agitate and Remove
Scrub textured surfaces and grout with a stiff brush during the dwell period. Then wipe away the residue completely, because the EPA notes dead mold can still cause health effects and should be physically removed, not left in place. Rinse the surface.
Dry Thoroughly
Dry the area completely afterward with fans and low humidity. Residual moisture invites regrowth within days. This final step is as important as the spray itself.
Choosing the Spray Form for the Job
The spray’s physical form should match the surface as much as its active ingredient does. Ready-to-use trigger sprays are fast and convenient for flat, accessible surfaces, and they are the default for a quick countertop or tile cleanup. Their weakness is vertical surfaces, where they run off. Clinging gels and foaming sprays solve that by holding the active ingredient in place on walls, grout, and overhead corners for the full dwell time, which is why they outperform thin liquids on those surfaces.
Concentrates that you dilute and apply with a pump sprayer suit larger areas and lower the cost per square foot, at the price of careful mixing. For a small spot, a compact spray or even a dampened cloth is enough. The underlying rules never change with form, pre-clean, dwell, remove, dry, but the form determines whether the product stays where you put it long enough to work. Choosing it deliberately, rather than grabbing whatever is on hand, is a quiet part of good technique.
Common Technique Mistakes
Three errors account for most failures. Wiping the spray off immediately denies it the contact time it needs. Skipping the pre-clean lets the biocide bind to grime instead of the mold. And leaving the surface damp afterward hands the surviving spores exactly what they need. Avoiding these three turns a mediocre result into a clean one. For a broader comparison of which products suit which jobs, see our guide to choosing the right cleaner for mold.
Technique by Surface Orientation
Application technique changes with the orientation of the surface, a detail most guides skip. On a horizontal surface like a countertop or floor, a liquid spray pools and holds its contact time naturally, so a standard spray works well. On a vertical surface like a wall or shower panel, the same liquid runs down and off before the dwell time elapses, cutting the effective contact short. The fix is either a clinging gel or foam, or reapplying the spray repeatedly to keep the surface wet for the full labeled period.
Overhead surfaces, such as a ceiling corner, are the hardest. Spraying upward produces drips and a fine mist that you can inhale, so a foam applied with a brush or roller is safer and more effective than a fine spray, and eye protection becomes essential. Textured surfaces and grout lines need agitation with a stiff brush during the dwell period to release growth from the crevices. Adjusting the form and method to the orientation, rather than spraying everything the same way, is what makes the difference between a clean result and a streaked one.
A Repeatable Method You Can Trust
For a contained, cleanable area, a consistent routine produces reliable results. Set up first: ventilate to the outdoors, put on the N95, gloves, and goggles, and lay down protection for runoff. Mist heavily contaminated spots with water to suppress airborne spores. Pre-clean grease and soap scum so the biocide binds to mold. Apply the spray or gel to full coverage and start a timer for the label’s contact time. While it dwells, agitate textured areas and grout with a brush.
When the dwell time ends, remove the residue completely, since the EPA notes dead mold can still cause reactions, then rinse if the product requires it. Dry the surface thoroughly with fans and low humidity, and confirm it is genuinely dry before considering the job done. Watch the spot over the following weeks. If it returns, the method was not the failure; the moisture source is unresolved. Following the same sequence each time removes the guesswork and isolates the one variable that actually matters, the water.
Drying and Aftercare Once the Spray Is Done
The work is not finished when the residue is wiped away, because the drying and aftercare determine whether the result holds. A surface left damp after spraying hands surviving spores exactly what they need, so thorough drying is the closing step of good technique. Run fans and a dehumidifier to bring the surface and the surrounding air below the dampness that supports growth, and confirm dryness rather than assuming it from a quick touch. On a wall, a moisture meter gives a more honest reading than your hand.
Aftercare means watching the treated spot over the following weeks. If it stays clean, the application succeeded and the moisture was adequate. If growth returns, the spray did its job and the moisture source is unresolved, which is a signal to investigate the water rather than to spray again. Keeping the area ventilated and dry in the interim slows any recurrence while you track down the cause. This drying-and-watching phase is easy to skip in the relief of a clean surface, yet it is where a one-time success either holds or quietly unravels.
What the Spray Still Cannot Fix
Even flawless technique has a ceiling. A spray removes surface mold; it does not remove the moisture feeding it. The EPA is clear that biocides are not a substitute for moisture control. If you apply a spray perfectly and the mold returns, the problem is water, not your method. A bathroom that molds repeatedly needs better ventilation; a basement wall points to seepage. Our guide to the best way to remove mold from walls covers the surface-by-surface decisions that pair with good spray technique.
When Technique Is Not Enough
Some jobs are beyond any spray, however well applied. Call a professional when mold covers more than about 10 square feet, has spread inside wall cavities or HVAC ducts, involves sewage or flood water, or affects someone with a health condition. A remediation contractor uses containment, HEPA filtration, and negative air pressure to remove contaminated material without spreading spores. On the Front Range, where winter condensation and evaporative-cooler humidity drive much indoor mold, the mold inspection and testing hub explains how a professional locates the moisture source when surface treatment keeps failing.
References
- Mold Cleanup in Your Home — U.S. Environmental Protection Agency
- You Can Control Mold — Centers for Disease Control and Prevention
- A Brief Guide to Mold, Moisture and Your Home — U.S. Environmental Protection Agency
Frequently asked questions
How do you apply a spray to remove mold correctly?
Pre-clean the surface, apply the spray evenly, let it dwell for the label contact time instead of wiping immediately, scrub textured areas, then remove the residue and dry thoroughly. Wear an N95, gloves, and eye protection throughout.
How long should mold spray sit before wiping?
Follow the label dwell time, often several minutes. Wiping immediately is the most common mistake and denies the active ingredient the contact time it needs to kill the growth. Reapply if the surface dries first.
Why didn't my mold spray work?
Usually one of three reasons: you wiped it off too soon, you skipped pre-cleaning so it bound to grime, or you left the surface damp afterward. If the mold returns despite good technique, the moisture source is the real problem.
Can I spray mold on any surface?
No. Sprays work on nonporous and sealed surfaces. Porous materials like bare drywall and carpet absorb mold, and the EPA recommends removing those rather than spraying, since the spray cannot reach embedded growth.
Front Range homeowners whose spray technique keeps coming up short can get in touch via our contact page to reach a vetted local inspector who can find the moisture source.
Mold removal & cleanup picks
For a small, contained patch (under ~10 sq ft) these EPA-friendly removers handle surface mold. Larger or recurring growth warrants a professional assessment first.
| Product | Why | Buy |
|---|---|---|
 RMR-86 Instant Mold Stain Remover RMR-86 Instant Mold Stain Remover | Fast-acting on stains; ventilate and wear PPE. | Amazon — $29.99 |
 Concrobium Mold Control Concrobium Mold Control | No-bleach formula that also helps prevent regrowth. | Amazon — $11.26 |
 Mold Armor Mold & Mildew Remover Mold Armor Mold & Mildew Remover | Widely stocked bathroom/surface remover. | Amazon — $22.98 |