Sink Tailpieces: Lengths, Slip Joints, and Leak Fixes
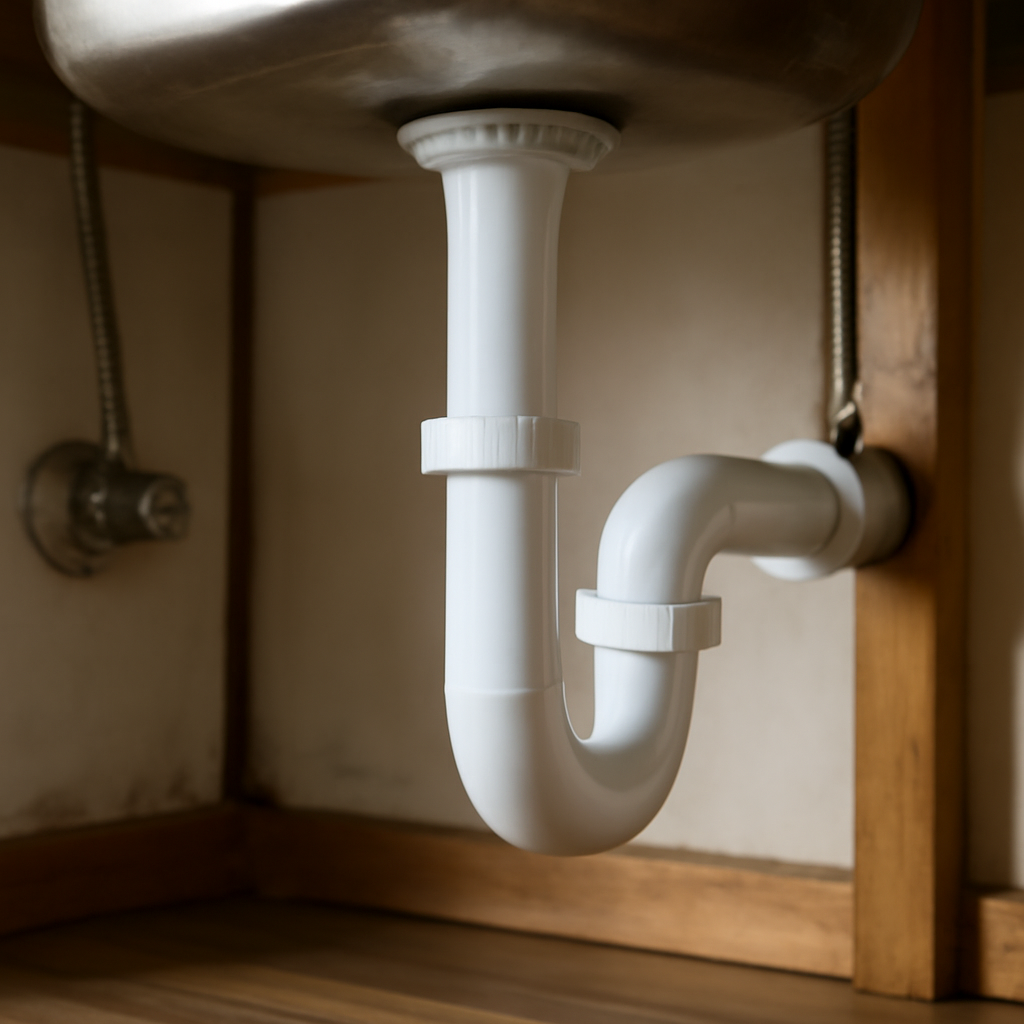
Under almost every sink there is a short, plain piece of pipe that rarely gets a second thought until it drips. The sink tailpiece is the straight section that drops from the bottom of the sink drain to the P-trap. It is cheap and simple, yet it is one of the most common places for slow leaks under kitchen and bathroom sinks, mostly because of the slip joints at either end. Its length also decides whether the trap lines up with the wall drain, and in kitchens it may carry a dishwasher connection. This guide explains what a tailpiece does, the standard diameters and lengths, extension and branch tailpieces, how slip-joint washers and nuts work, how to track down leaks, and how tailpieces fit with disposals and bathroom pop-up drains. It also covers typical costs and when a plumber is the better call for Front Range homeowners.
Part of our Plumbing & Water guide — start there for the full picture →
What a Sink Tailpiece Does
A sink drain assembly has several parts stacked together:
- The strainer or drain body sits in the sink opening. In a kitchen this is usually a basket strainer; in a bathroom it is usually a pop-up drain or a grid drain. See our sink strainer guide for kitchen styles.
- The tailpiece attaches to the bottom of the strainer or drain body and runs straight down.
- The P-trap connects to the bottom of the tailpiece and holds a small plug of water that blocks sewer gas. The P-trap guide covers how traps work and why they matter.
- The trap arm runs from the trap to the drain opening in the wall or floor.
The tailpiece is essentially a spacer and connector. It carries water from the sink down to the trap, and its length sets the vertical position of the trap. If the tailpiece is too short, the trap may sit above the wall drain. If it is too long, the trap may sit too low, forcing the trap arm to run uphill or making the connection awkward.
Most residential tailpieces are made of white or black plastic, usually PVC or polypropylene, or chrome-plated brass. Plastic is common, inexpensive and does not corrode. Chrome brass looks finished where the plumbing is visible, such as under a pedestal sink, but thin-wall brass can corrode from the inside over the years.
Standard Tailpiece Sizes and Lengths
Diameter
Two diameters cover almost all residential sinks:
- 1 1/2 inches is standard for kitchen sinks, laundry sinks and many bar sinks.
- 1 1/4 inches is standard for most bathroom lavatory sinks.
Reducing washers allow a 1 1/4-inch tailpiece to connect to a 1 1/2-inch trap, which is common in bathrooms. Going the other way, from a larger tailpiece into a smaller trap, is generally not acceptable because it restricts flow.
Length
Tailpieces are sold in a range of lengths, often from a few inches up to about a foot, and many can be cut to size. Extension tailpieces add length where the drain sits low or where the sink was replaced with a shallower or deeper model. Typical considerations:
- Sink depth. Swapping a shallow sink for a deep single bowl lowers the drain outlet, which may mean shortening the tailpiece or lowering the trap.
- Wall drain height. The trap arm generally needs to slope gently toward the wall drain. If the drain is high, the tailpiece may need to be shortened.
- Maximum distance. Plumbing codes commonly limit the vertical distance from a fixture’s drain outlet to the trap weir, often to around 24 inches, to keep the trap working properly. Requirements vary by code edition and jurisdiction.
Cut plastic tailpieces with a fine-tooth saw or tubing cutter and deburr the cut so the slip washer seats evenly. A ragged cut is a common cause of a joint that will not seal.
Slip-Joint Washers and Nuts
Most tailpiece connections are slip joints. A slip-joint nut slides onto the pipe, a tapered washer slides on after it, and the pipe is inserted into the fitting. Tightening the nut squeezes the washer between the pipe and the fitting to make a seal. No glue or solder is involved, which makes the assembly easy to take apart for cleaning or repair.
Getting slip joints right comes down to a few details:
- Washer direction. The beveled or tapered side of the washer normally faces into the fitting, toward the joint, so it wedges into the opening as the nut tightens. A washer installed backward is a classic cause of drips.
- Washer material. Polyethylene and rubber washers are both common. Rubber can conform to slightly imperfect surfaces; plastic washers resist compression set. Mixing old and new parts from different makers can lead to a poor fit.
- Alignment. The pipes must line up straight. A tailpiece forced at an angle into the trap will not seal evenly no matter how hard the nut is tightened.
- Tightening. Plastic slip nuts are usually hand-tightened, then given a small additional turn. Overtightening can crack plastic nuts or distort washers.
- Thread condition. Cracked or cross-threaded nuts should be replaced rather than reused.
The tailpiece’s top end is often different. Many kitchen basket strainers connect with a flanged tailpiece held by a coupling nut and a flat washer against the bottom of the strainer. Bathroom pop-up drains may have the tailpiece built into the drain body or threaded to it.
Finding and Fixing Tailpiece Leaks
A leak under the sink usually comes from one of a few points: the strainer seal, the tailpiece connections, the trap, the supply lines or the faucet. Narrowing it down saves time and avoids replacing parts that were not leaking. Our guide to a leak under the kitchen sink walks through the full process; for the tailpiece, these steps help:
- Dry everything. Wipe the tailpiece, trap and strainer completely dry with a paper towel.
- Fill and release. Fill the sink partly, then pull the stopper. Drain flow tests the joints under the most load.
- Watch the joints. Run a dry tissue around each connection. A drip that starts at the top of the tailpiece points to the strainer connection; one at the bottom points to the trap slip joint.
- Check the sink seal. If water appears around the strainer flange, the problem may be the putty or gasket between the strainer and the sink, not the tailpiece.
Common fixes for tailpiece leaks:
- Loosen, realign and retighten the slip nut.
- Replace a worn, flattened or reversed slip washer.
- Replace a cracked nut or a tailpiece with a damaged end.
- Replace a corroded chrome brass tailpiece, which can thin from the inside until pinholes form.
Leaks at the strainer itself usually mean resealing the strainer. That often involves plumber’s putty or a gasket under the flange, depending on the sink material and the manufacturer’s instructions.
Why small leaks matter
Slow drips under a sink can go unnoticed for weeks inside a cabinet, and the damage is often worse than the leak suggests. Particleboard cabinet floors swell and crumble when wet. The EPA’s guide to mold and moisture says it is important to dry water-damaged areas and items within 24 to 48 hours to prevent mold growth, and it advises fixing plumbing leaks and other water problems as soon as possible. The EPA’s WaterSense Fix a Leak Week page adds that household leaks can waste nearly 1 trillion gallons of water nationwide each year and that common leaks are often easy to fix with a few tools.
Dishwasher Branch Tailpieces
In many kitchens the tailpiece also receives the dishwasher’s drain water. A dishwasher branch tailpiece is a tailpiece with a small side inlet, often angled, where the dishwasher drain hose connects. Points to watch:
- High loop or air gap. The dishwasher drain hose is typically looped up high under the counter or routed through an air gap fitting before it reaches the branch tailpiece. This helps prevent dirty sink water from flowing back into the dishwasher. Local code determines which method is required.
- Hose clamp. The hose should be clamped securely on the branch inlet.
- Orientation. The branch inlet should sit above the trap, so dishwasher water enters before the trap seal.
Our dishwasher drain hose guide covers hose routing and common problems.
Tailpieces With Garbage Disposals
When a garbage disposal is installed, it replaces the basket strainer and tailpiece on that bowl. The disposal mounts to the sink flange and discharges through a side outlet elbow that connects to the trap. In that setup the dishwasher hose usually connects to an inlet on the disposal instead of a branch tailpiece.
Installing a disposal often changes drain heights. The disposal’s outlet sits lower than the old tailpiece’s bottom, which can put the trap below the wall drain. That may require lowering the wall connection or choosing a disposal with a different outlet height. Double-bowl sinks often use a continuous waste assembly to join both bowls before the trap. The garbage disposal installation guide goes through those layout choices, and the kitchen sink drain guide covers the full kitchen assembly.
Bathroom Sinks and Pop-Up Drains
Bathroom sinks typically use a pop-up drain assembly. The drain body runs through the sink, and the tailpiece below it often includes a side opening for the pivot rod that raises and lowers the stopper. Some designs have the tailpiece permanently attached to the drain body, while others thread together.
Tailpiece issues in bathrooms often involve:
- Pivot rod leaks. A worn pivot washer or loose pivot nut can drip from the side of the tailpiece.
- Length. Replacing a vanity or vessel sink can change the drain height and require a different tailpiece length.
- Hair and soap buildup. Clogs usually form at the stopper and pivot rod rather than in the tailpiece itself.
Our guides on the sink stopper and the bathroom sink drain cover stopper adjustment and drain body replacement.
What Home Inspectors Look For Under Sinks
The ASHI Standard of Practice directs inspectors to inspect interior water supply and distribution systems, including fixtures and faucets, and interior drain, waste and vent systems, including fixtures. Under a sink, an inspector typically runs water and watches the drain assembly. Common observations include:
- Active drips at tailpiece or trap slip joints.
- Staining, swelling or soft spots in the cabinet floor from past leaks.
- Corroded chrome brass tailpieces and traps.
- Improper traps, such as S-traps or flexible corrugated drain pipe, which many inspectors flag.
- Dishwasher hoses without a high loop or air gap.
- Mismatched or poorly aligned parts that suggest a do-it-yourself repair.
Most of these are inexpensive to fix, but signs of long-running leaks can point to hidden damage. Buyers may want any staining or soft cabinet floors evaluated before closing.
Replacing a Sink Tailpiece Step by Step
For a straightforward swap with no change to the wall drain, the job is usually short. Manufacturer instructions for the specific strainer, drain or disposal take priority over the general sequence below.
- Clear the cabinet and set out a bucket. The trap holds water, and some will spill when the joints are loosened. Towels on the cabinet floor help protect particleboard.
- Loosen the trap slip nut. Unthread the nut at the bottom of the tailpiece by hand or with large slip-joint pliers. On older chrome nuts, steady pressure works better than force, which can crush thin brass.
- Remove the top connection. Unscrew the coupling nut that holds the tailpiece to the strainer or drain body and lift the tailpiece out.
- Inspect the neighbors. With the tailpiece out, look at the strainer underside, the trap and the trap arm. Heavy corrosion, cracks or sludge buildup may justify replacing more than one part while everything is apart.
- Dry-fit the new tailpiece. Hold it in place to confirm length. If it needs trimming, mark it, cut it square and deburr it.
- Install with new washers. Use the flat washer at the strainer connection and a fresh tapered washer at the trap, facing the correct direction. Old washers are cheap to replace and often the real cause of a leak.
- Hand-tighten, then test. Snug the nuts by hand plus a small turn, run water, fill and drain the sink, and check every joint with a dry tissue. Check again the next day.
If the trap still will not line up with the wall drain after the swap, the problem is usually the trap arm or wall connection height. That is the point where many homeowners hand the job to a plumber rather than forcing parts together at an angle.
Sink Tailpiece Costs
Tailpiece work is usually among the cheapest plumbing repairs. General 2026 ranges for planning:
- Plastic tailpiece or extension. Often under $10 to around $15 at hardware stores.
- Dishwasher branch tailpiece. Usually a few dollars more than a plain tailpiece.
- Chrome brass tailpiece. Commonly $10 to $30 or more, depending on finish and gauge.
- Slip washers and nuts. Typically a few dollars per set.
- Plumber service call. A minimum service charge, often around $100 to a few hundred dollars, commonly covers a simple drain repair. Rebuilding the whole assembly under a double sink with a disposal may cost more.
Water damage repair is the real cost risk. Replacing a swollen cabinet floor or treating mold inside a cabinet can cost far more than the tailpiece that caused it.
When to Call a Plumber
Replacing a tailpiece is a reasonable homeowner task with basic tools. A plumber is the better choice when the trap does not line up with the wall drain, when the wall connection or trap arm needs changes, when a disposal installation changes drain heights, or when leaks keep returning after new parts are installed. Our hiring process overview covers vetting contractors, and the plumbing and water section lists questions to ask a plumber.
References
- Fix a Leak Week — U.S. Environmental Protection Agency, WaterSense
- A Brief Guide to Mold, Moisture and Your Home — U.S. Environmental Protection Agency
- ASHI Standard of Practice for Home Inspection — American Society of Home Inspectors
Frequently asked questions
What is a sink tailpiece?
It is the straight section of drain pipe that runs from the bottom of the sink strainer or drain body down to the P-trap. Its length sets the height of the trap.
What size tailpiece does a kitchen sink use?
Kitchen sinks typically use 1 1/2-inch tailpieces, while most bathroom sinks use 1 1/4-inch. Lengths vary, and many tailpieces can be cut to fit.
Which way does a slip-joint washer go?
The beveled or tapered side of the washer usually faces into the fitting, toward the joint. A reversed washer is a common cause of drips.
Why is my sink tailpiece leaking?
Common causes include a worn or reversed slip washer, a misaligned pipe, a cracked nut or a corroded brass tailpiece. Leaks at the top may actually come from the strainer seal.
Do I need a special tailpiece for a dishwasher?
If the sink has no disposal, the dishwasher drain hose often connects to a branch tailpiece with a side inlet above the trap. With a disposal, the hose usually connects to the disposal instead.
Seeing staining or soft spots under a sink in a home you are about to buy on the Front Range? Reach out to us and we will connect you with an inspector who can check the plumbing and look for hidden water damage.