Pictures of Mold: What Homeowners Need to Know
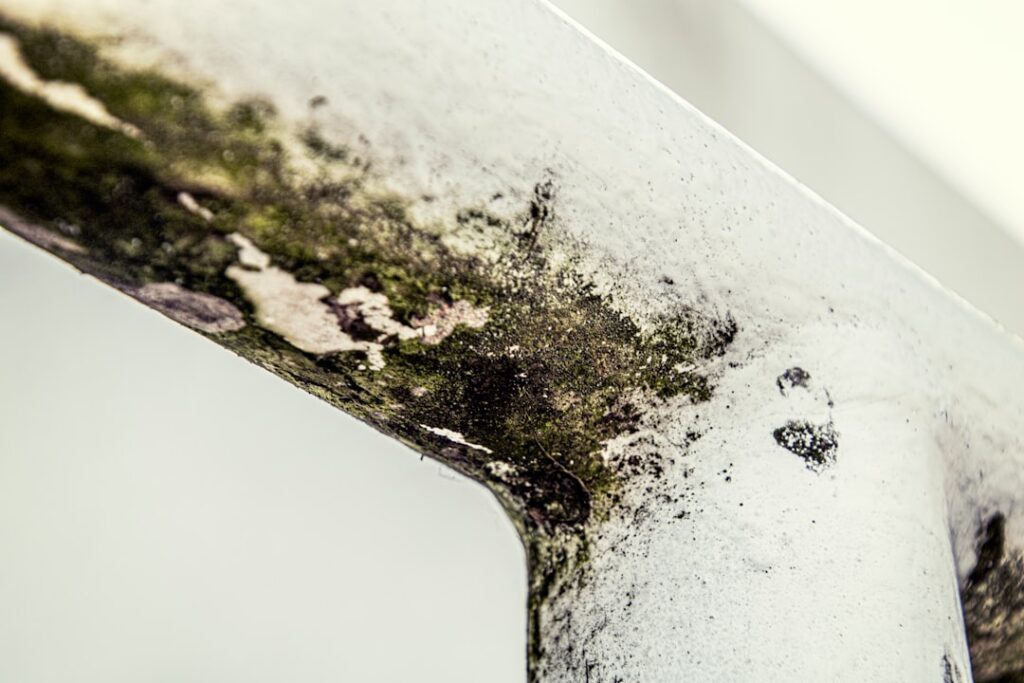
When homeowners find a strange spot on a wall or ceiling, the first instinct is often to search for pictures of mold to compare. That impulse makes sense, since seeing real examples helps the eye recognize growth that might otherwise be dismissed as dirt or a stain. But photos have real limits, and relying on them alone can mislead. This guide describes what mold looks like across its many forms, explains what pictures can and cannot tell you, and points to when testing is the smarter move. It summarizes EPA and CDC guidance current as of 2026 and is informational only.
Part of our Types of Mold guide — start there for the full picture →
Is this mold, asbestos, or water damage? Get a free instant screen
Upload a clear photo of the suspect area. You'll get an instant AI screening opinion and what to do next. This is screening guidance, not a professional determination.
Screening guidance only. AI can be wrong. Confirm asbestos, mold type, or lead with lab testing or a licensed professional before acting.
What Pictures of Mold Typically Show
Photos of household mold reveal just how varied it is. Mold appears in a wide range of colors, including black, green, white, gray, brown, orange, pink, and purple, and in textures that look fuzzy, slimy, powdery, or velvety. The common thread in most images is irregular, spreading patches on surfaces that have been damp.
That variety is the single most useful lesson pictures teach. Many homeowners expect only the classic black, furry growth, but a thin white film on a crawl space joist or a pink slime around a shower drain is also mold. The CDC notes there are many types of indoor mold with no single appearance. Seeing the range in photos broadens what you know to look for, which helps catch growth earlier.
For a closer look at how growth presents on real surfaces, our guide on how mold looks walks through the colors and textures in detail.
The Limits of Identifying Mold by Photo
Here is the catch that matters most: you cannot reliably identify a mold species, or judge how hazardous it is, from a picture. Color and texture vary within a single type and overlap between different ones. Two photos that look identical might show different molds, and the same mold can look different depending on the surface and how wet it is.
The EPA is direct on this point, advising against trying to assess health risk by appearance and recommending that all indoor mold be cleaned up regardless of type. So comparing your wall to an internet image can tell you that growth is probably present, but it cannot tell you the species or whether it is the “dangerous” kind. That distinction is where many homeowners go wrong, either panicking over a harmless-looking patch or dismissing a serious one.
Lab analysis is the only way to identify a mold type with confidence. Pictures are a starting point, not an answer.
What Photos Cannot Capture
Beyond species, pictures miss several things that matter for assessing a mold problem. The most important is hidden growth. Mold frequently grows where a camera cannot see it: behind drywall, under flooring, inside wall cavities, and beneath insulation. A clean-looking surface can sit in front of extensive hidden growth.
Photos also cannot convey smell. A musty, earthy odor is one of the strongest indicators of mold, and it often appears before visible growth or signals mold hidden out of sight. An image of a spotless room gives no hint of the musty smell that would tell an inspector to look behind the walls.
Finally, pictures cannot show the moisture source driving the growth. Identifying and fixing that source is the heart of any real solution, and it requires investigation, not a snapshot. Our overview of crawl space mold shows how growth in hidden areas develops out of view.
Common Mold Appearances by Location
Pictures from different parts of a home show recognizable patterns. Knowing what tends to appear where helps you check the right spots.
- Bathrooms: dark mold in grout and caulk, pink or orange slime near drains, fuzzy patches on steamy ceilings.
- Basements and crawl spaces: white, powdery growth or dark patches on joists, walls, and insulation.
- Walls and ceilings: blotchy black or green spots, often near leaks, windows, or roof penetrations.
- Window sills: dark growth along frames where condensation collects.
- Under sinks and around appliances: patches fed by slow plumbing leaks.
These location patterns are more reliable than color for narrowing down where to investigate, because mold follows moisture. A photo of growth on a north-facing window frame, for instance, points toward a condensation problem rather than a roof leak.
How to Tell Mold From Look-Alikes in Photos
Several things mimic mold in pictures, which adds to the confusion. Efflorescence, a white crystalline salt deposit on concrete and brick, looks like white mold but is a mineral that brushes off dry. Soot and dirt streak surfaces in dark patterns but lack the fuzzy or slimy texture of growth. Water stains leave flat brown or yellow rings without the dimensional, spreading quality of mold.
In a photo, the clues are texture and spread. Mold often looks three-dimensional, fuzzy, or wet, and grows in organic blotches. A flat, uniform mark is more likely a stain or deposit. Even so, photos make these distinctions harder than seeing the material in person, where you can check whether a spot is dry powder or living growth. When in doubt, treat it as possible mold and verify.
When to Move From Pictures to Testing
Comparing photos is a reasonable first step, but several situations call for moving beyond images to a professional assessment or lab testing. Test or call a professional when growth covers a large area, when it keeps returning after cleaning, when there is a strong musty smell without obvious growth, or when you suspect hidden mold behind walls or under floors.
The EPA generally recommends professional remediation for mold covering more than roughly 10 square feet, and notes that porous materials heavily contaminated with mold often need replacement. A professional can find the moisture source, gauge the true extent of growth, and, when useful, collect samples for lab analysis. That is the level of certainty a picture can never provide.
For small, clearly visible surface mold on hard materials, homeowners can often clean it themselves with proper precautions and correct the moisture. The decision hinges on scope and whether the problem is solved or merely surface-deep. A photo can help you decide whether a spot is small enough to handle, but it cannot confirm that there is nothing larger behind it, which is why a persistent or recurring problem should move to a professional regardless of how minor the visible portion looks.
Using Photos Wisely as a First Step
None of this means pictures are useless. Used correctly, they are a reasonable first step that helps a homeowner decide whether to investigate further. The key is to treat a photo comparison as a screening tool, not a verdict.
A good way to use images is to broaden your sense of what mold can look like, so you stop assuming only black fuzz counts. Once you recognize that white, gray, pink, and green growths are all possible, you are more likely to notice early growth on a basement joist or a window frame. That earlier detection is genuinely valuable, because catching a small problem beats discovering a large one.
Photos are also useful for documentation. Taking dated pictures of a suspect area lets you track whether it is spreading over time, which helps distinguish active mold from a static stain. If you do eventually call a professional, those photos give them a head start on understanding the history. The mistake is stopping at the photo and concluding you know the species or the danger. The image opens the investigation; it does not close it.
What a Professional Sees That a Camera Misses
The gap between a photo and a professional assessment is wide, and it is worth understanding what that gap contains. A trained inspector brings tools and methods that no image can substitute for, which is why scope and certainty come from an in-person evaluation.
Moisture meters let an inspector detect dampness inside walls and under floors, revealing the conditions that feed mold even where none is visible. The inspector follows the moisture to its source, which is the information that actually solves the problem, since cleaning growth without fixing the source guarantees its return. They can also assess whether growth has penetrated porous materials that need replacement rather than cleaning.
When useful, an inspector can collect samples for laboratory analysis, which is the only reliable way to identify a mold type. They can investigate hidden cavities, evaluate ventilation, and gauge the true extent of growth that a surface photo only hints at. The smell of a space, the feel of a room’s humidity, and the pattern of moisture across a structure all factor into a judgment a photograph cannot make. For anything beyond small, clearly visible surface growth, that in-person expertise is what turns a guess into an answer.
Front Range Considerations
Colorado’s dry climate leads many homeowners to discount mold, but indoor moisture problems do not depend on outdoor humidity. Plumbing leaks, ice dams, snowmelt intrusion, and poor bathroom ventilation create the damp conditions mold needs even in a dry state.
Hidden growth is especially common in crawl spaces and basements across Denver, Jefferson, Arapahoe, and Boulder county homes, exactly the places a photo from the living area would never reveal. If a Front Range home has a musty smell, a history of water intrusion, or suspect spots that resist cleaning, that is the cue to look past internet pictures and bring in a professional who can assess what the camera cannot.
This matters during home purchases in particular. A buyer reviewing listing photos or walking through a Front Range home may spot a suspect mark and try to judge it from the image alone, which simply cannot be done reliably. The smarter path is to treat any visible growth or musty odor as a prompt for a professional assessment that determines the moisture source and the true extent. Given how often the meaningful growth hides in crawl spaces and behind walls, a photo from a phone is the beginning of the inquiry, not the end. Letting a qualified inspector look in person turns guesswork into a clear picture of what is actually there and what it will take to resolve.
The Limits of Photos in Real Estate and Insurance
Pictures of mold come up in contexts beyond simple curiosity, particularly real estate transactions and insurance claims, and their limits matter even more in those settings. A photo can document that growth was present at a point in time, which is useful, but it cannot establish the species, the extent, or the cause on its own.
In a real estate context, a buyer who spots mold in listing photos or during a walkthrough has a reason to ask questions, not a basis for judging how serious the problem is. The responsible next step is a professional assessment that determines the moisture source and the true scope, since the visible growth may be a small symptom of a larger hidden issue or a minor surface problem that cleans up easily. Photos start that conversation; they do not settle it.
For documentation, dated images do have real value. Tracking whether a spot is spreading, recording conditions before and after a repair, and giving a professional a history all benefit from photographs. The mistake is treating the image as the final word on what the mold is or how dangerous it might be, when health authorities are clear that appearance does not establish either.
The consistent theme is that photos are evidence of presence and change, not of identity or hazard. They earn their keep as a screening and documentation tool that prompts proper investigation. When the stakes rise, whether in a purchase, a claim, or a health concern, the photo should hand off to a professional assessment and, where appropriate, lab testing. That hand-off is exactly where a picture’s usefulness ends and a professional’s begins.
References
- Mold Cleanup in Your Home — U.S. Environmental Protection Agency
- About Mold and Health — Centers for Disease Control and Prevention
- A Brief Guide to Mold, Moisture and Your Home — U.S. Environmental Protection Agency
Frequently asked questions
Can I identify mold from pictures online?
Pictures help you recognize that growth is probably present, but you cannot reliably identify the species or judge its hazard from a photo. Color and texture overlap between types. The EPA advises against assessing risk by appearance; lab analysis is the only way to identify a mold type.
Why can't a photo tell me if mold is dangerous?
Appearance does not indicate species or health risk, and the same mold can look different on different surfaces. Photos also miss hidden growth, smell, and the moisture source. Health authorities recommend cleaning up all indoor mold regardless of how it looks.
When should I test for mold instead of just comparing pictures?
Move to professional assessment or testing when growth covers a large area, keeps returning after cleaning, comes with a strong musty smell, or you suspect hidden mold behind walls or floors. The EPA suggests professional help for areas larger than about 10 square feet.
If a suspect spot in your Front Range home does not match a simple stain and you want certainty, get in touch here to connect with a vetted local inspector who can assess it in person.