Mold Remediation Overland Park: A Homeowner Guide
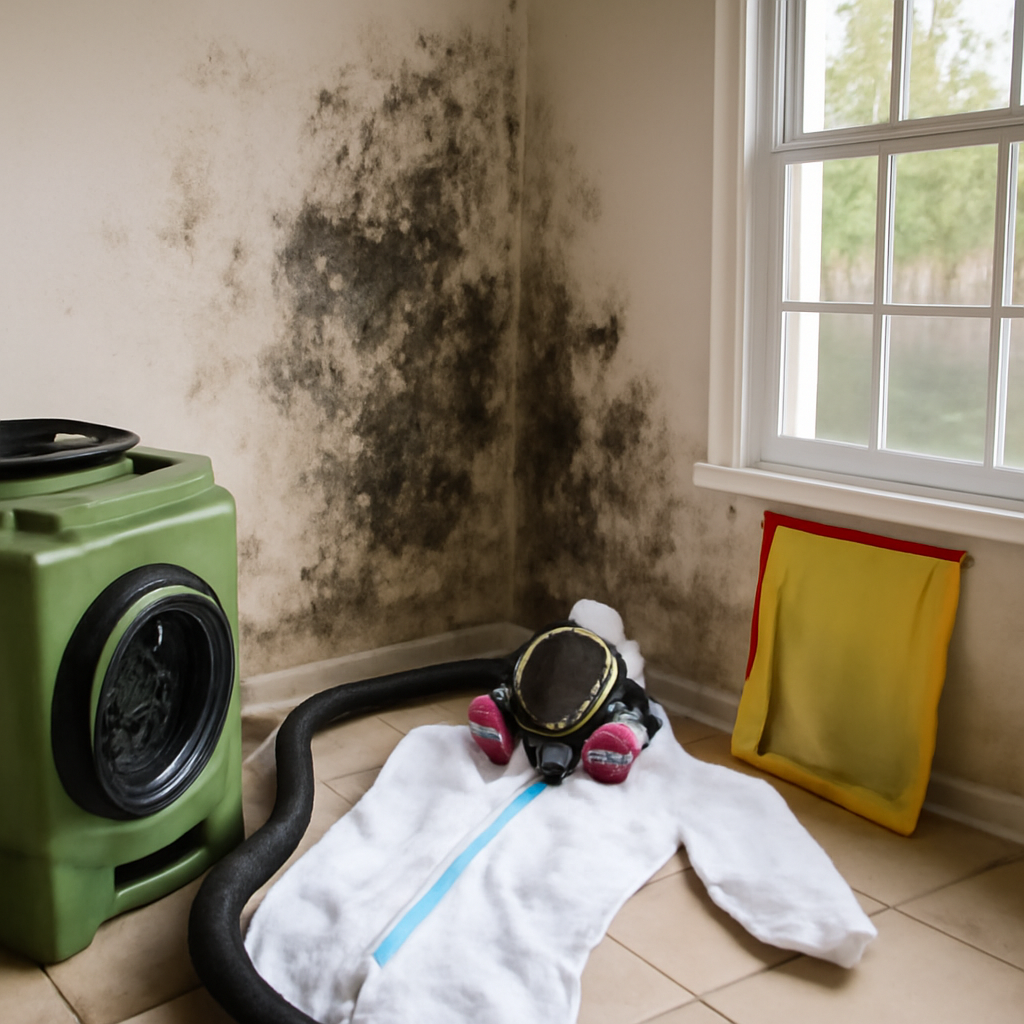
Mold problems do not announce themselves politely. A musty smell in a finished basement, a dark patch creeping along a closet wall, or a stain that returns after every spring rain often signals a moisture issue that has been quietly building for months. For households researching mold remediation Overland Park options, the first step is understanding what remediation actually involves, what drives the price, and how the humid Kansas City metro climate shapes the risk. This guide summarizes EPA, CDC, and HUD guidance current as of 2026; it is educational only, and decisions about testing or removal should rest with a certified professional and, for health symptoms, your physician.
Is this mold, asbestos, or water damage? Get a free instant screen
Upload a clear photo of the suspect area. You'll get an instant AI screening opinion and what to do next. This is screening guidance, not a professional determination.
Screening guidance only. AI can be wrong. Confirm asbestos, mold type, or lead with lab testing or a licensed professional before acting.
What Does Mold Remediation in Overland Park Involve?
Remediation is the controlled process of removing active mold growth, correcting the moisture source that fed it, and restoring affected materials to a clean, dry condition. It is broader than simple cleaning. The Environmental Protection Agency frames remediation as a combination of contamination cleanup and moisture control, because killing surface mold without fixing the underlying water problem almost guarantees a return.
In Overland Park, a typical project begins with an assessment of where moisture is entering the home. Contractors then contain the work area with plastic sheeting and negative air pressure, remove porous materials that cannot be salvaged, clean salvageable surfaces, and apply drying equipment. The Kansas City area sees warm, humid summers and heavy spring storms, so basements, crawl spaces, and north-facing walls are common trouble spots. A thorough remediation addresses both the visible growth and the conditions that allowed it.
Why Overland Park Homes Are Prone to Mold
The climate here is a meaningful driver. Summers in Johnson County regularly push dew points into the uncomfortable range, and indoor humidity follows. When relative humidity inside a home climbs above roughly 60 percent, mold spores that are present everywhere in the air gain the moisture they need to colonize drywall, wood, and insulation.
Housing stock matters too. Many Overland Park neighborhoods feature finished basements and walkout lower levels. These spaces sit partly below grade, where cool foundation walls meet warm interior air and produce condensation. Add a slow plumbing leak, a sump pump that lags during a downpour, or grading that slopes toward the foundation, and the conditions for mold are complete. Older homes with original windows or aging gutters concentrate the risk further.
Common Signs You Need Remediation
Visible growth is the obvious cue, but it is rarely the first. A persistent earthy or musty odor often appears before any staining shows. Warping baseboards, bubbling paint, and a chalky white efflorescence on basement walls all point to chronic moisture. Allergy-like symptoms that ease when occupants leave the house can also hint at an indoor air problem.
The CDC notes that sensitive individuals, including people with asthma or weakened immune systems, may react to mold exposure more strongly. That does not mean every spot of mildew is a health emergency, but it does mean that recurring growth deserves attention rather than repeated wiping. Homeowners weighing whether a stain is cosmetic or structural can review the cleanup steps in our overview of DIY mold remediation before deciding to call a contractor.
The Step-by-Step Remediation Process
A professional remediation generally moves through a predictable sequence. Understanding it helps homeowners ask the right questions and recognize a thorough job.
Assessment and Moisture Mapping
The contractor inspects the affected area, often using moisture meters and sometimes infrared cameras to find hidden dampness behind walls. The goal is to identify every wet zone, not just the visible mold, because spores travel and settle wherever moisture allows.
Containment
Work areas are sealed with polyethylene sheeting, and air scrubbers with HEPA filtration create negative pressure so spores do not migrate to clean parts of the home. This step is what separates remediation from casual scrubbing.
Removal and Cleaning
Porous materials with heavy growth, such as drywall, carpet pad, and insulation, are typically removed and bagged. Semi-porous and non-porous surfaces, like framing and concrete, are cleaned and treated. The EPA generally discourages relying on biocides alone and emphasizes physical removal of the mold.
Drying and Restoration
Dehumidifiers and air movers bring moisture levels back to normal, which can take several days. Only after surfaces are confirmed dry should rebuilding begin. Skipping verification is a frequent cause of recurrence.
How Much Does Mold Remediation Cost in Overland Park?
Cost depends on the size of the affected area, the type of materials involved, and how much demolition is required. Small, contained jobs limited to a single closet or bathroom wall sit at the low end. Whole-basement projects with significant drywall removal and structural drying climb substantially. Industry estimates commonly place small remediations in the low four figures and larger basement or crawl-space jobs several times higher.
Hidden factors add up: relocating to access mold behind cabinetry, addressing a failed sump system, or remediating a crawl space with limited clearance all increase labor. For a fuller breakdown of the variables that move a quote up or down, our guide to what it costs to remediate mold walks through the pricing logic in detail. Always request an itemized estimate so you can see what portion is cleanup versus restoration.
Testing and Inspection Before and After
Testing is not always necessary. The EPA points out that if mold is visible, sampling is often unneeded because the response is the same regardless of species: remove it and fix the moisture. Testing becomes useful when the source is hidden, when a buyer or seller needs documentation, or when occupants report health concerns and want to confirm conditions.
Post-remediation verification, sometimes called clearance testing, confirms the work succeeded. An independent inspector checks that surfaces are dry, growth is gone, and airborne spore counts have returned to a normal range relative to the outdoors. Keeping the assessment separate from the company doing the removal helps avoid a conflict of interest. The broader mold inspection and testing hub explains how sampling and clearance fit together.
Preventing Mold From Coming Back
Remediation without prevention is temporary. The single most important habit is controlling indoor humidity. A basement dehumidifier set to maintain roughly 45 to 50 percent relative humidity removes the fuel mold needs. Running it consistently through the humid Kansas summer pays off.
Outside the home, redirect downspouts at least several feet from the foundation, keep gutters clear, and regrade soil that slopes toward the house. Inside, fix plumbing drips promptly, vent bathrooms and the dryer to the exterior, and insulate cold pipes that sweat. After any water event, the EPA recommends drying affected materials within 24 to 48 hours to prevent colonization. These low-cost steps protect the investment a remediation represents.
Does Insurance Cover Mold Remediation in Overland Park?
Whether a policy pays depends almost entirely on the cause of the moisture. Many homeowners policies in Kansas cover mold that results from a sudden, accidental, covered event, such as a burst pipe or an overflowing appliance, while excluding mold that develops gradually from chronic humidity, deferred maintenance, or a long-ignored leak. Some policies also cap mold-related payouts at a fixed dollar amount regardless of the underlying cause.
The practical lesson is to document everything and act fast. Photograph the water source and the affected materials, record when the problem was discovered, and report a covered loss promptly. A delay that allows mold to spread can give an insurer grounds to argue the damage was preventable. Reviewing your specific policy language before a loss occurs is the best protection, because coverage terms vary widely between carriers. Do not assume reimbursement is automatic; confirm with your insurer before committing to a large remediation expecting the claim to pay.
How Long Remediation Takes and What to Expect
Timelines vary with scope, but knowing the general rhythm helps homeowners plan. A small, single-area job, such as a section of bathroom wall, can be assessed, contained, removed, and started on drying within a day. The drying phase then runs several days regardless of how small the removal was, because materials and the surrounding structure must reach a verified normal moisture level before anything is closed back up.
Larger basement projects stretch longer. Demolition of contaminated drywall and insulation may take a day or two, drying another three to five days depending on conditions, and restoration, the rebuilding of walls and finishes, can add a week or more on top. Homeowners should expect the affected area to be sealed off and noisy with air movers during the active phase. Pets and household members with sensitivities are usually better off staying clear of the containment zone. A contractor who gives a realistic, staged timeline, rather than promising a same-day fix for a large problem, is signaling a thorough process.
Mold in Basements and Crawl Spaces
Below-grade spaces deserve special attention in Overland Park because they account for the majority of local mold calls. A finished basement hides its framing and insulation behind drywall, so a slow seepage problem can grow for a season before a stain appears. The first sign is often a musty odor that intensifies during humid weather or after heavy rain, followed by a damp feel along the lower walls.
Crawl spaces present a different challenge. Bare soil under a home releases moisture continuously, and without an intact vapor barrier that moisture rises into the floor joists and subfloor. Insulation hanging in a crawl space can trap dampness against the wood, feeding growth on the very structure that supports the house. Remediating these areas usually means removing contaminated insulation, cleaning or treating framing, installing or repairing a vapor barrier, and adding dehumidification. Because clearance is tight and the materials are structural, crawl-space work frequently exceeds what a homeowner should attempt alone.
Why Drywall Often Cannot Be Saved
Homeowners often hope to clean moldy drywall in place to avoid demolition costs, but drywall is porous and mold roots into the paper facing and gypsum core. Surface cleaning leaves the embedded growth behind, which is why remediation contractors cut out and replace affected drywall rather than scrub it. The same logic applies to carpet padding, ceiling tile, and fiberglass insulation. Hard, non-porous materials like concrete foundation walls and framing lumber can usually be cleaned and dried, which is why a thorough assessment sorts materials into salvageable and disposable categories before any work begins.
Documentation and Why It Matters
A quality remediation produces a paper trail, and that documentation protects the homeowner in several ways. Moisture readings taken before and after the work demonstrate that the space was returned to a normal, dry condition. Photographs of the affected materials before removal record the scope. A written scope of work lists exactly what was removed, cleaned, and restored.
This record matters for resale, for insurance claims, and for peace of mind. If a future buyer’s inspector finds evidence of past moisture, documentation showing a professional remediation and verified drying answers the question before it becomes a negotiating point. It also helps if the problem ever recurs, because a clear baseline lets the next contractor see what was done and rule out a recurrence of the same source versus a new one. Homeowners should ask for this documentation as a standard deliverable, not an extra.
When to Call a Professional
The EPA offers a practical rule of thumb: cleanups smaller than roughly ten square feet can often be handled by a careful homeowner with proper protective gear. Larger areas, mold tied to sewage or contaminated water, growth inside HVAC systems, or any situation involving occupants with respiratory conditions warrant a professional.
Overland Park homeowners should look for contractors who follow recognized remediation standards, carry liability insurance, and provide written scopes of work. A reputable firm will explain containment, document moisture readings, and welcome independent clearance testing rather than discourage it. Comparing two or three written, itemized estimates is the best protection against both inflated pricing and corner-cutting, and it gives a clearer sense of what a fair local rate looks like.
References
- Mold Cleanup in Your Home — U.S. Environmental Protection Agency
- About Mold and Health — Centers for Disease Control and Prevention
- A Brief Guide to Mold, Moisture and Your Home — U.S. Environmental Protection Agency
- Healthy Homes Program Guidance — U.S. Department of Housing and Urban Development
If you are in the Overland Park area or the wider Kansas City metro and want a clear-eyed assessment before committing to a remediation, reach out through our contact page to connect with a vetted local inspector.