Mold Remediation Process: A Homeowner Journey Guide
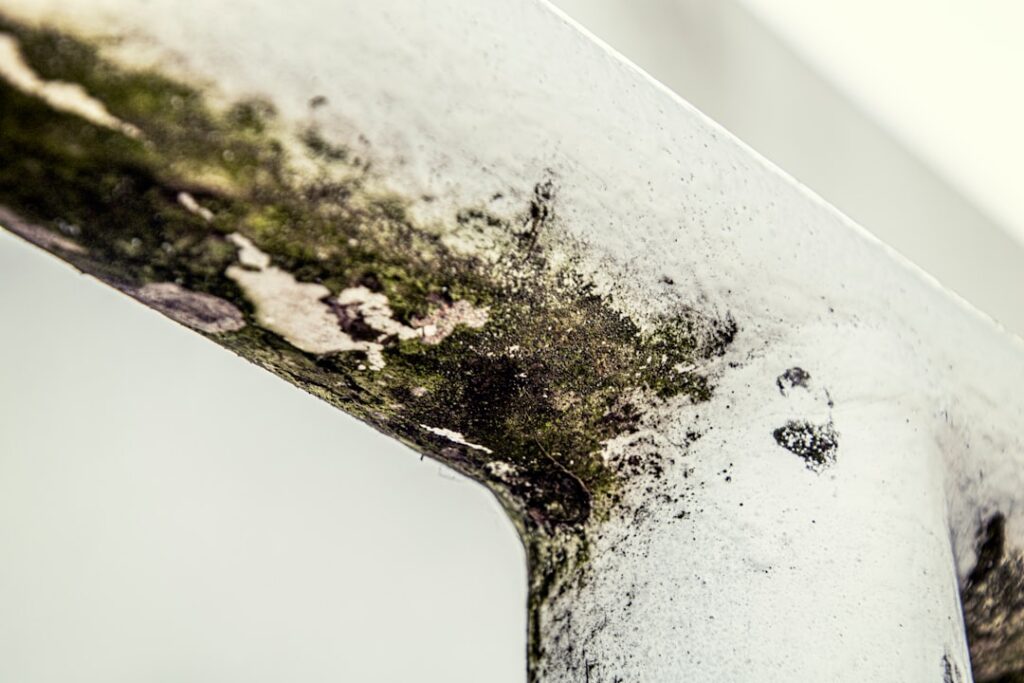
When a homeowner first encounters visible mold growth — a black streak above the bathtub, a fuzzy patch in the basement, or a musty smell wafting from a closet — the mind jumps immediately to the same set of questions: who do I call, how much will this cost, how long will my family be displaced, and what does cleanup actually involve? The mold remediation process answers those questions in sequence. This guide tells the story of remediation as a homeowner journey, walking through what happens at each milestone from the first phone call through the final clearance report. This guide summarizes EPA and CDC guidance current as of 2026 — consult a certified mold inspector for testing decisions and your physician for symptom evaluation.
Part of our Mold Removal & Remediation guide — start there for the full picture →
Is this mold, asbestos, or water damage? Get a free instant screen
Upload a clear photo of the suspect area. You'll get an instant AI screening opinion and what to do next. This is screening guidance, not a professional determination.
Screening guidance only. AI can be wrong. Confirm asbestos, mold type, or lead with lab testing or a licensed professional before acting.
The mold remediation process from a homeowner’s perspective
The professional remediation process spans roughly five phases, each with a clear start and finish that the homeowner can observe. Understanding the journey ahead of time makes the project less stressful and more controllable. The five phases — assess, contain, fix the source, remove and clean, verify — are based on EPA mold remediation guidance and align with IICRC S520, the trade association standard that most certified Front Range firms work to.
Phase 1: Assessment and scope definition
The journey starts with a phone call. A reputable remediation firm sends an inspector (sometimes the same person who will lead the cleanup, sometimes a separate assessor) to walk the home and document findings. The assessor measures the affected square footage, identifies the moisture source, photographs visible growth, takes moisture-meter readings on suspected wet framing, and may collect air samples for laboratory analysis. The output is a written scope of work that describes what will be cleaned, what will be removed, and what verification testing will occur.
Homeowners should request the assessor’s certification credentials. The IICRC Applied Microbial Remediation Technician (AMRT) credential is the most common professional qualification; some assessors also hold the Council-certified Microbial Investigator (CMI) credential or the InterNACHI mold inspector certification. A firm that cannot produce credentials on request is not the firm to hire.
What the homeowner does during assessment
The homeowner’s job during assessment is to share the history. When did the leak occur? How long was the carpet wet before it was extracted? Has anyone in the household developed coughing, headaches, or sinus symptoms in the last few months? Has the home been remediated before? Honest answers shape the scope; vague answers produce vague scopes. For the broader diagnostic picture, the mold inspection hub walks through the testing options that may accompany the assessment.
Phase 2: Containment setup
Phase 2 begins when crews arrive on the start date. The first day is typically containment day rather than cleaning day. Six-mil polyethylene sheeting goes up at every doorway, HVAC return, and supply vent in the affected zone. Critical containment seals the work area from the rest of the home so spores released during removal cannot migrate to clean rooms. On larger jobs, a second layer of sheeting forms an airlock chamber that workers pass through to gown up and gown down.
An air scrubber — a portable HEPA-filtered fan — gets positioned inside the containment and ducted to an exhaust outside the home or to a HEPA filter. The scrubber pulls 5 to 10 air changes per hour and creates negative pressure inside the containment. Homeowners can see the plastic billow inward; that visible inward pressure confirms the seal is working.
What the homeowner does during containment setup
The homeowner’s job during phase 2 is to clear the work area of personal belongings, valuables, and items that cannot be cleaned later. Furniture against the affected wall gets moved or wrapped. Soft furnishings (rugs, drapes, upholstered chairs) within the containment zone often need to be removed entirely because they cannot be HEPA-vacuumed effectively in place. Front Range homeowners with finished basements should plan for displacement of the contents, not just the demolition footprint.
Phase 3: Source repair
Phase 3 is the step most homeowners do not realize is part of remediation. EPA guidance is explicit: cleaning mold without fixing the moisture source is not remediation, because the colony will return. The remediation firm either handles source repair directly (most do roof flashing, plumbing fitting replacement, foundation crack sealing, and humidity control in-house) or coordinates with a licensed plumber, roofer, or HVAC contractor.
Common moisture sources on Front Range homes include ice-dam-related roof leaks during snowmelt, foundation seepage during spring rains, condensation on uninsulated crawlspace ductwork, and humidifier overuse during dry winter months. Each source has a different repair pathway, and each repair must be verified with moisture-meter readings before phase 4 begins.
What the homeowner does during source repair
This is often the negotiation phase. Some source repairs are clearly inside the remediation scope; others (a full roof reflashing, basement foundation waterproofing) are major work that the homeowner may want to bid separately. Getting a second roofer’s quote on a leak repair, for example, while the remediation team contains and waits, is sometimes worth the brief delay.
Phase 4: Removal and cleaning
Phase 4 is the longest and most visible phase. Crews in Tyvek suits and respirators enter the containment, cut out unsalvageable porous materials (drywall, carpet pad, insulation, ceiling tile) extending 12 inches past visible growth, double-bag the debris in six-mil contractor bags, and pass the bags out through the airlock. Salvageable surfaces — framing, concrete, tile, finished wood — get HEPA-vacuumed, damp-wiped with detergent solution, and HEPA-vacuumed a second time. EPA’s vacuum-wipe-vacuum sequence is deliberate and prevents resuspension of spores.
For homeowners working through cleanup on their own, the sequenced approach to ridding a house of mold covers the same phase 4 workflow at DIY scale. The principles are identical; only the equipment and worker protection scale up at professional level.
The drying sub-phase
After removal, dehumidifiers and air movers run inside the containment until pin-type moisture meter readings on framing drop below 16 percent. This sub-phase takes one to four days depending on starting wetness and ambient humidity. During spring snowmelt and summer monsoon weeks on the Front Range, drying takes longer because outdoor humidity reduces the dehumidifier’s efficiency. Crews monitor moisture readings daily and post them in the project log.
Phase 5: Clearance verification
Phase 5 is the milestone homeowners should care about most and often understand least. The remediation firm declares the work complete; that declaration is not the same as verification. Independent clearance — performed by a different party, not the firm that did the work — confirms the cleanup succeeded.
Clearance typically combines a visual inspection (no visible growth, no musty smell, debris removed, surfaces dry) with air sampling collected inside the cleared area and outside the home for comparison. A laboratory analyzes the samples and reports total spore counts plus species identification. The interpretation is straightforward: indoor counts should be lower than or comparable to outdoor counts, and indoor species should mirror outdoor species without elevated indicator molds like Stachybotrys or Aspergillus penicillioides.
If clearance fails, the remediation firm returns under their warranty to reclean and the test repeats. A reputable firm builds one round of recleaning into the original quote. A second failure indicates a missed moisture source and requires rescoping the project.
How long the entire journey takes
For a typical Tier 2 job (10 to 100 square feet, porous removal involved, single-room scope), the homeowner journey runs:
- Day 0 to 2: Phone call, assessment visit, written scope, signed contract
- Day 3 to 5: Crew start, containment setup, phase 2 complete
- Day 6 to 7: Source repair coordinated and verified
- Day 8 to 11: Removal and cleaning, drying begins
- Day 12 to 14: Drying complete, clearance testing collected
- Day 15 to 18: Laboratory results returned, clearance issued (or recleaning scheduled)
- Day 19 to 30: Rebuild — new drywall, paint, flooring — typically by a separate general contractor
What the journey costs in 2026
Front Range pricing for a Tier 2 remediation project (the most common scope) typically runs $2,500 to $5,500 not including rebuild. Add $750 to $1,500 for third-party clearance testing. Add $2,000 to $8,000 for typical rebuild scope (drywall, paint, baseboard, flooring). Total project budget for a single-bathroom or single-closet contamination usually lands between $5,000 and $15,000.
HVAC-involved remediation runs higher because duct cleaning, coil cleaning, and possibly air handler replacement add to scope. Whole-home contamination from a major water event runs $15,000 to $50,000 and frequently triggers temporary displacement of the household. Insurance coverage depends heavily on the moisture source: sudden water events are typically covered, chronic maintenance issues typically are not.
What goes wrong when phases are skipped
Skipping phase 3 (source repair) produces regrowth within months. Skipping phase 5 (clearance) leaves the homeowner without independent confirmation the work succeeded and without documentation that future buyers and insurers will increasingly require. The mold remediation company vetting guide covers questions to ask before signing — including the clearance verification question that filters out cosmetic-only operators.
Another common failure mode is rebuild that proceeds before clearance. A general contractor scheduled too tightly closes up new drywall on day 13 because the calendar said so, while the laboratory clearance results are still pending. If the results come back failed, the rebuild becomes demolition again. Sequencing rebuild after clearance — not parallel to it — protects the homeowner from this expensive scheduling mistake.
Documentation the homeowner should keep
The final deliverable from a complete remediation process should be a project file containing: the original assessment report, the signed scope of work, daily moisture-meter readings during drying, photos before and after removal, the antimicrobial product safety data sheet if used, and the independent clearance report. Homeowners increasingly need this packet when listing the home for sale, refinancing, or filing future insurance claims.
The clearance report in particular has growing market value. Front Range real estate transactions increasingly include mold disclosure questions, and a documented professional remediation with clearance verification answers those questions cleanly. Without documentation, the homeowner is left explaining a verbal history that buyers’ inspectors will probe and question.
How the process differs for occupied vs vacant homes
When the home is occupied during remediation, additional precautions kick in. Containment seals must hold continuously rather than during work hours only. Air scrubbers run 24 hours per day until clearance. Family members — especially children, elderly relatives, and anyone with respiratory illness — should be relocated to clean areas of the home or, for larger jobs, to alternative housing during the active removal phase.
Vacant homes simplify the process. Containment can be less aggressive, scheduling is flexible, and the timeline often compresses by several days because crews can work longer hours without disrupting occupants. Real estate transactions that uncover mold during inspection often choose the vacant-home pathway: remediate before closing, with the seller covering the cost, rather than after move-in.
Choosing between a one-firm and two-firm approach
Some homeowners use a single firm for assessment, remediation, and clearance. Others split the work: independent assessor sets the scope, remediation firm executes, a different independent assessor performs clearance. The two-firm approach costs $500 to $1,500 more in total but produces stronger documentation and removes the conflict of interest where the firm performing the work also declares the work successful.
For small Tier 1 projects under 10 square feet, the one-firm approach is reasonable. For Tier 2 and Tier 3 projects, the two-firm split is the standard recommended by EPA guidance and by most professional trade associations. Homeowners who plan to sell the home within two years should default to the two-firm approach because the independent documentation has resale value.
References
- EPA Mold Remediation in Schools and Commercial Buildings — U.S. Environmental Protection Agency
- CDC Homeowner's and Renter's Guide to Mold Cleanup — Centers for Disease Control and Prevention
- EPA Mold Cleanup in Your Home — U.S. Environmental Protection Agency
- InterNACHI Mold Inspection Standards — International Association of Certified Home Inspectors
Frequently asked questions
How long does the typical mold remediation process take?
A standard Tier 2 single-room job runs about three weeks from assessment to clearance, including drying and laboratory turnaround. Rebuild adds another one to two weeks. Whole-home jobs can stretch to six weeks or more.
What is the difference between assessment and clearance?
Assessment happens before remediation to define scope. Clearance happens after remediation to verify success. The two are typically performed by different parties to avoid conflict of interest.
Why does drying take so long in the mold remediation process?
Framing and substrate can hold moisture even after surfaces feel dry. Closing assemblies before moisture meters read below 16 percent traps water behind new drywall and triggers regrowth within weeks.
Is HVAC cleaning part of the standard mold remediation process?
Only if contamination is found in ducts or the air handler. If HVAC components show growth, duct cleaning and coil cleaning add to the scope and the timeline. Otherwise HVAC stays sealed during containment but does not need cleaning.
Front Range homeowners weighing remediation quotes and looking for a vetted contractor referral can connect with our team through the contact page for an introduction to certified local firms.