Mileseey Thermal Camera: What Homeowners Should Know
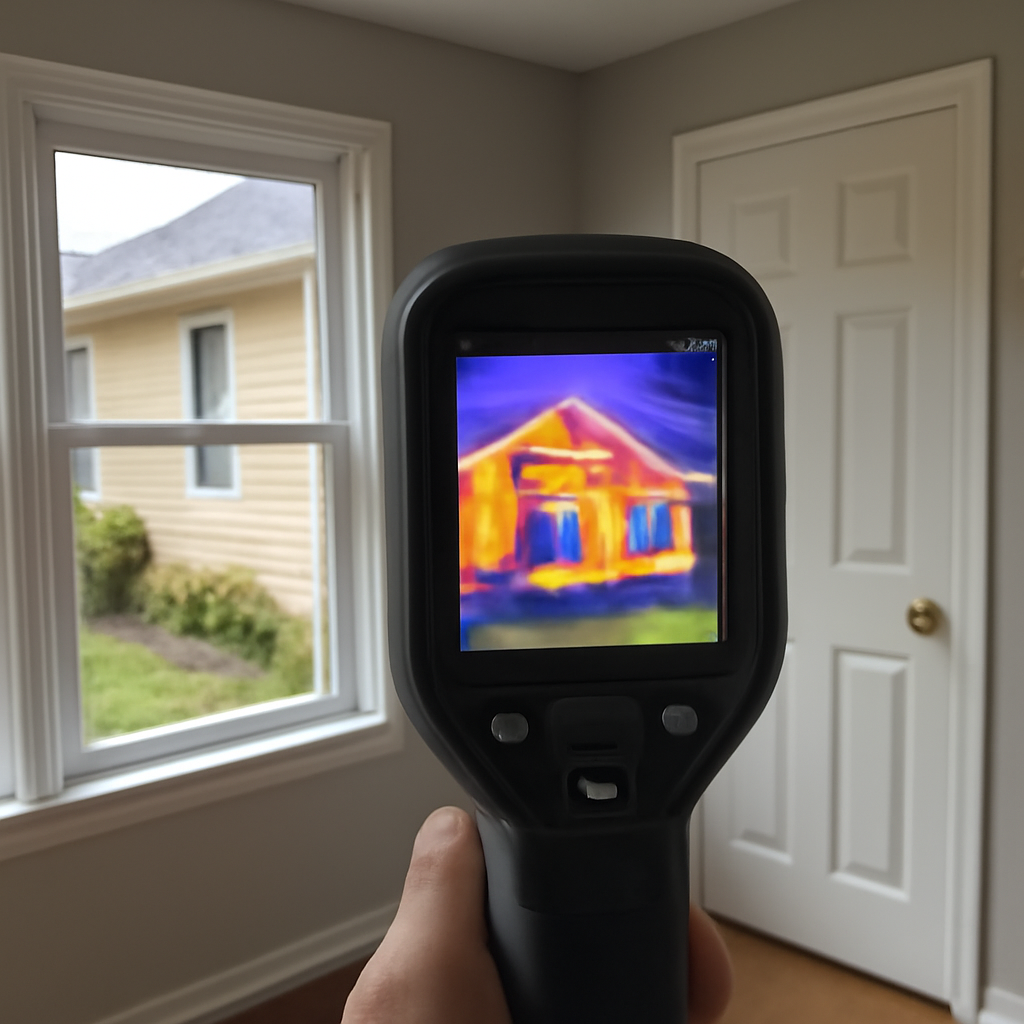
Budget thermal cameras have made infrared imaging affordable for ordinary homeowners, and the Mileseey thermal camera is one of the names that shows up in that lower price tier. For a fraction of what a professional inspection camera costs, devices like these promise to spot drafts, find missing insulation, and trace heat. The question is what a budget imager can actually do versus what its marketing implies. This guide draws on manufacturer specifications and home-inspection trade-association guidance current as of 2026 to set realistic expectations and explain where a Mileseey-class camera fits.
Part of our Thermal Imaging for Homes guide — start there for the full picture →
What is a Mileseey thermal camera?
Mileseey is a brand known for affordable measurement tools — laser distance meters, levels, and, more recently, entry-level thermal imaging cameras aimed at DIYers and tradespeople on a budget. A Mileseey thermal camera is a handheld infrared imager that displays surface-temperature differences as a color image on a small screen, often with a spot-temperature readout. Some models are standalone units; others plug into a smartphone. They occupy the consumer end of the market, well below professional cameras like the FLIR E-series.
The appeal is price and accessibility: a homeowner can scan a wall, an attic hatch, or a window for cold spots without hiring anyone. The trade-off, as with all budget imagers, is resolution and accuracy. Knowing that trade-off up front is the difference between a satisfying purchase and a disappointed one. Our broader handheld thermal imager guide covers the consumer category these fit into and how it differs from the professional tier.
Mileseey thermal camera specifications
Budget thermal cameras in this class typically carry native thermal sensors in the range of 96×96 to 256×192 pixels depending on the model, with the more capable units using a 256×192 detector and interpolating (software-upscaling) to a larger displayed image. Spec sheets sometimes advertise the interpolated number, so it is worth checking the native sensor resolution, which is what actually determines detail.
Other common specs include a temperature measurement range suitable for household use (often around -20°C to 550°C), a frame rate around 25 Hz on better units for smooth panning, multiple color palettes, a spot-temperature readout, adjustable emissivity on better models, and onboard image storage. Thermal sensitivity (NETD) on budget cameras is usually higher (worse) than professional units — meaning they detect only larger temperature differences — though the better Mileseey models have closed some of that gap. Prices generally fall in the rough range of $200 to $500, a fraction of the $2,500-plus professional tier. That price-to-capability ratio is the whole pitch.
Why native resolution matters most
The single most useful spec to compare is native sensor resolution. A 256×192 detector resolves far more detail than a 96×96 one, regardless of how large the displayed image is after interpolation. Interpolation invents pixels by averaging neighbors; it smooths the image but adds no real information. For a homeowner trying to distinguish a real cold spot from sensor noise, native resolution and thermal sensitivity decide whether the image is informative or just a colorful blur. Our explainer on infrared imaging technology and home uses covers how these numbers shape what you can see.
Standalone vs. phone-attached models
Mileseey offers both standalone cameras with their own screens and modules that plug into a phone’s charging port and use the phone’s display and processing. Phone modules can show a larger, sharper image and cost less because they offload the screen, but they tie the camera to a compatible phone and drain its battery. Standalone units work independently, survive jobsite conditions better, and do not depend on a phone’s operating system staying compatible. The choice comes down to how and where you will use it.
Real home use-cases for a budget thermal camera
A Mileseey-class camera is genuinely useful for several homeowner tasks where you need to spot a temperature difference rather than a precise reading:
- Finding drafts and air leaks. Cold air sneaking around windows, doors, and outlets shows clearly as cool streaks — handy for weatherizing before winter, as the Department of Energy describes for detecting air leaks.
- Locating missing insulation. Gaps in attic or wall insulation appear as temperature differences across a ceiling or wall, the same principle behind professional thermographic inspections.
- Tracing radiant heat lines or a warm pipe. Following in-floor heating loops or finding a hot-water line behind drywall.
- Spotting obvious electrical heat at a panel or outlet — though confirming an electrical fault is a job for a professional.
- Screening for possible moisture by finding cool patches, which a moisture meter must then confirm.
- Checking HVAC output by comparing supply registers room to room.
For each of these, the budget camera points you to where to look closer. That screening role is real value at the price, and for many homeowners it is all they ever need.
Limitations homeowners should expect
The honest limits matter as much as the uses. A budget thermal camera will not match a professional camera’s clarity, and several constraints apply to all infrared tools regardless of price:
- It does not see through walls, glass, or water. It reads surface temperatures only. Reflective surfaces like shiny metal or glass can fool it by mirroring nearby heat.
- Lower resolution blurs small anomalies. A hairline cold spot or a small wet patch may not register clearly.
- It finds anomalies, not causes. A cool wall could be moisture, a draft, or a thermal bridge — the camera cannot tell you which.
- Accuracy is approximate. Budget cameras have wider measurement tolerances, so treat the temperature numbers as guides, not lab values, and set emissivity where the model allows.
- Thermal contrast is required. On a mild day with little indoor-outdoor temperature difference, even a good camera reveals little.
The trades reinforce this. ASHI treats thermal imaging as a specialized add-on, and InterNACHI offers separate infrared certification because interpreting these images correctly is a skill. A budget camera in untrained hands can mislead as easily as inform, which is why reading our guide on how to read infrared images is worthwhile before relying on one for decisions.
How the Mileseey compares to alternatives
At the budget tier, a Mileseey thermal camera competes with smartphone-attachment imagers and other standalone entry cameras. The deciding factors are native resolution, thermal sensitivity, and whether you want phone dependence. Among budget brands, build quality and software polish vary more than at the premium tier, so recent buyer reviews carry weight.
Stepping up, professional cameras such as the FLIR thermal imaging cameras built for buildings offer 320×240 or higher detectors, far better sensitivity, calibrated radiometric data, and documentation features — at five to ten times the cost. For a homeowner doing occasional weatherization checks, the budget camera is the sensible buy; for diagnosing a property professionally, the gap is decisive. The full home inspection tools guide lays out where each tier belongs and why an inspector’s camera and a homeowner’s camera are different purchases for different jobs.
Buying and maintenance tips
If a budget thermal camera fits your needs, shop on native sensor resolution first (prefer 256×192 over lower), check thermal sensitivity, and confirm the temperature range covers your tasks. Decide between standalone and phone-attached based on how you will use it. Read recent buyer reviews for build quality and firmware reliability, since the budget tier varies more than the premium tier.
Maintenance is minimal. Protect the lens — even budget thermal cameras use a delicate infrared-transparent lens that scratches easily — and clean it only with approved methods. Let the camera acclimate to room temperature before scanning, since a unit just brought in from a cold car gives unstable readings. Keep firmware updated where the model supports it, charge the battery before it fully depletes to preserve its life, and store the camera dry. Set realistic expectations, use it for screening rather than final diagnosis, confirm any suspected moisture with a meter, and a Mileseey-class thermal camera earns its modest price for homeowner weatherization and troubleshooting.
Getting good results from a budget camera
A budget camera rewards technique more than an expensive one, because its narrower margins leave less room for sloppy scanning. The biggest lever is thermal contrast: the camera only shows differences, so scan when there is a temperature gap to reveal them. In Colorado, a cold winter morning is ideal for finding insulation gaps and drafts, because the warm interior and cold exterior create sharp boundaries the sensor can resolve. Running the heat or AC before a scan manufactures that contrast on milder days.
Beyond timing, a few habits sharpen results. Scan from straight on rather than at an angle, since reflective surfaces seen obliquely throw false readings. Take several passes and look for consistent patterns, not single odd pixels that may be noise on a budget sensor. Where the camera allows, set emissivity for the material you are scanning — most building surfaces are high-emissivity and read well, while bare metal reads poorly. And always treat a suspicious cool patch as a lead to confirm, not a conclusion: follow up with a moisture meter for possible water, or a closer look for an air leak. Used this way, even an inexpensive imager produces genuinely useful screening.
When to step up or hire instead
A budget camera has a clear ceiling, and recognizing it saves money in both directions. If your needs stay in the weatherization-and-curiosity range — finding drafts, checking attic insulation before adding more, tracing a warm pipe — a Mileseey-class unit is the right amount of tool, and spending professional-camera money would be waste. But if you find yourself trying to document a moisture problem for an insurance claim, diagnose a recurring leak you cannot locate, or make a buying decision on a home, the budget camera’s resolution and accuracy fall short of what the situation deserves.
At that point, the better value is not a pricier camera but a professional. A home inspector with a 320×240-or-higher camera, infrared training, and a moisture meter brings interpretation the hardware alone cannot, as our FLIR thermal imaging camera guide details. For a homeowner, the math usually favors owning a budget camera for routine checks and hiring out the high-stakes diagnostics, rather than buying an expensive camera that sits idle. Our home inspection tools guide lays out that division of labor across the whole diagnostic kit.
Reading a budget camera’s spec sheet honestly
Budget thermal cameras compete partly on numbers, and a few marketing habits are worth seeing through. The most common is leading with an interpolated resolution — a “256×192 enhanced to 50,000+ pixels” style claim — where the larger figure is software upscaling, not real sensor data. Always find the native detector resolution; that is the number that determines detail. Another is advertising a wide temperature measurement range that sounds impressive but exceeds anything a household task needs, since you are rarely measuring 500°C surfaces at home. A third is omitting thermal sensitivity (NETD) entirely, because budget sensors fare worse there, so its absence from a spec sheet is itself a mild signal.
None of this makes budget cameras a poor buy — it just means reading their specs with the same skepticism you would apply to any consumer electronics. Focus on native resolution, on whether emissivity is adjustable, and on recent buyer reviews for real-world reliability, and the marketing gloss falls away to reveal whether a given Mileseey-class model genuinely suits the weatherization and troubleshooting jobs you have in mind.
References
- ENERGY STAR: Seal and Insulate — U.S. Environmental Protection Agency (ENERGY STAR)
- Infrared Certified Thermography Program — InterNACHI
- Inspection Services and Ancillary Tools — American Society of Home Inspectors
Frequently asked questions
Is a Mileseey thermal camera good for home use?
For weatherization and troubleshooting, yes. It spots drafts, missing insulation, and obvious heat patterns at a budget price. It is a screening tool, not a professional diagnostic camera, so treat its temperature numbers as approximate guides.
What resolution does a Mileseey thermal camera have?
Models range roughly from 96×96 to 256×192 native pixels, with some interpolating to a larger displayed image. Check the native sensor resolution, not the interpolated number, since native resolution determines how much real detail you see.
Can a budget thermal camera see through walls?
No. Like all thermal cameras, it reads only surface temperatures. It cannot see through walls, glass, or water, and reflective surfaces can fool it. It reveals temperature differences that point you where to investigate further.
How does it compare to a professional thermal camera?
Professional cameras like the FLIR E-series offer 320×240 or higher resolution, better sensitivity, and calibrated data, at five to ten times the cost. A budget Mileseey is fine for occasional homeowner checks but not for professional property diagnosis.
Thermal imaging cameras
Infrared cameras reveal hidden moisture, missing insulation, and air leaks. Phone-attachment models are the budget entry point; standalone units have higher resolution.
| Product | Why | Buy |
|---|---|---|
 FLIR ONE Pro (phone) FLIR ONE Pro (phone) | Plugs into iPhone/Android; inspector favorite. | Amazon — $349.00 |
 Topdon TC001 Topdon TC001 | High-res phone module at a low price. | Amazon — $199.99 |
 FLIR C5 Compact FLIR C5 Compact | Standalone pocket camera with Wi-Fi. | Amazon — $611.50 |