How You Get Rid of Mold: A Plain-Language Guide
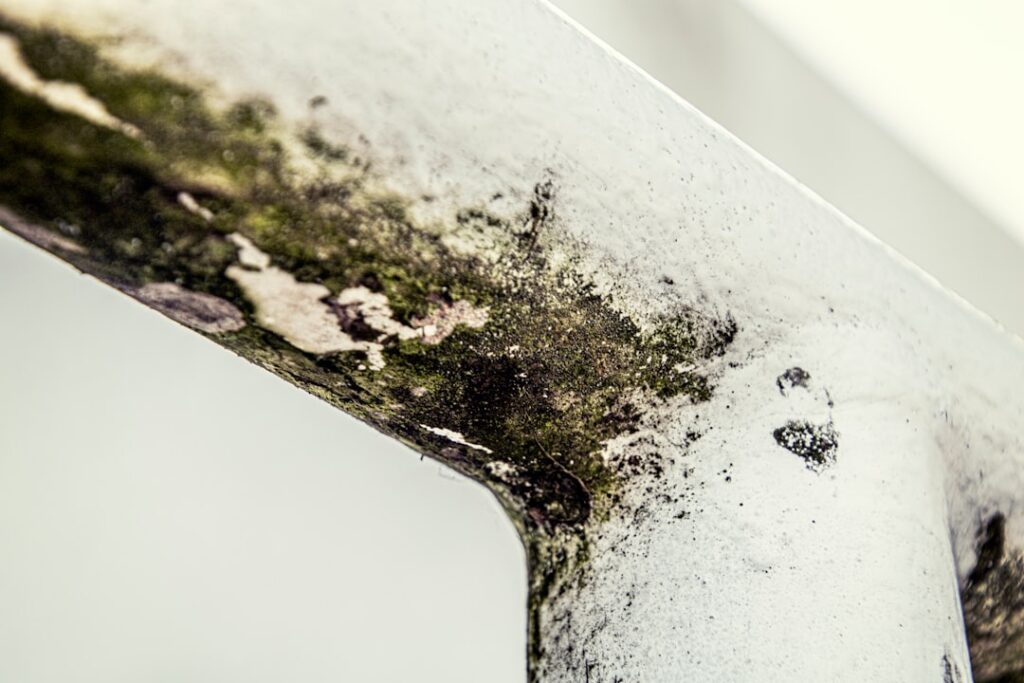
If you searched “how you get rid of mold,” you are probably standing in front of a stain on a bathroom ceiling, a basement wall, or a window sill and wondering whether a $9 spray bottle is enough. Sometimes it is. More often it is not, because mold is a moisture problem that wears the costume of a cleaning problem. This guide summarizes EPA and CDC remediation guidance current as of 2026 — consult a physician for respiratory symptoms and a certified remediator for growth larger than roughly ten square feet.
Is this mold, asbestos, or water damage? Get a free instant screen
Upload a clear photo of the suspect area. You'll get an instant AI screening opinion and what to do next. This is screening guidance, not a professional determination.
Screening guidance only. AI can be wrong. Confirm asbestos, mold type, or lead with lab testing or a licensed professional before acting.
The short answer: three things in order
Getting rid of mold means doing three things in the right sequence: stop the water, remove colonized material, and lower indoor humidity so spores stop finding hospitable surfaces. Skip any one and the colony comes back. Most DIY failures are sequence failures — homeowners scrub the visible stain first, never find the leak, and watch the same patch return within weeks.
Step 1: Diagnose the moisture source
Every active mold colony has a water source feeding it. Your job is to find that source before you touch the colony. The EPA is explicit that cleanup without moisture control will fail. Common sources in residential properties include:
- Plumbing leaks behind drywall (slow drips from supply lines, dishwasher hoses, ice maker tubing)
- Roof leaks creating ceiling stains, often visible after heavy snow or rain
- Foundation water intrusion in basements and crawl spaces
- Condensation on cold surfaces (ductwork, exterior walls, north-facing closets)
- Bath fans that dump humid air into attics instead of through roof jacks
- Dryer vents disconnected from exterior ductwork inside a wall cavity
A $20 hygrometer placed in the affected room reveals whether ambient relative humidity is sustained above 60%, which is the colonization threshold. A pinless moisture meter on suspect walls and floors tells you whether building materials still carry elevated readings days after the visible leak has stopped.
Step 2: Match scope to homeowner ability
Not every colony is a DIY job. The EPA uses ten square feet as the rough cutoff. Anything smaller, on a non-porous or semi-porous surface, in a household with no immunocompromised occupants, is generally fair game for an attentive homeowner. Beyond that line, hire a licensed remediator who carries containment equipment, HEPA-filtered negative-air machines, and post-job clearance testing.
Sibling guidance at DIY versus professional mold cleanup walks through the decision factors by square footage and material type.
Step 3: Set up containment before disturbing anything
The single biggest mistake homeowners make is dry-scraping a colony in an open room with the HVAC running. Disturbed mold releases millions of spores into the air, and those spores ride heating and cooling currents into clean parts of the house. For a single-room DIY job:
- Turn off the HVAC system serving the affected area.
- Tape 6-mil polyethylene sheeting over the doorway and any HVAC registers.
- Open an exterior window with a box fan exhausting outward — this creates negative pressure so air leaks out, not in.
- Wear an N95 respirator at minimum (P100 if available), nitrile gloves, and eye protection. Disposable Tyvek coveralls protect clothing.
Step 4: Clean non-porous surfaces with detergent
Tile, glass, metal, sealed concrete, plastic, and porcelain are non-porous. They clean well. The protocol is detergent and warm water, a stiff brush, and a rinse. The CDC notes that scrubbing with detergent removes mold from non-porous surfaces; chemical sanitizing is optional. If you want a sanitizing pass, the EPA accepts a dilute bleach solution of one cup bleach per gallon of water on hard surfaces only.
Skip the fogger products marketed as “mold bombs.” They aerosolize chemicals into the room without addressing colonized materials beneath the surface, and the residue often misleads homeowners into thinking the job is finished.
Step 5: Remove and bag porous materials
Porous materials usually cannot be salvaged once they are colonized. The EPA recommendation is to discard them, double-bagged, through normal trash channels in most jurisdictions. The most common porous materials needing replacement:
- Drywall — cut 12 inches beyond the visible margin and replace
- Carpet and carpet pad — usually a total loss when water-damaged for more than 48 hours
- Acoustic ceiling tile — replace any tile with visible staining
- Fiberglass batt insulation — bag and discard if colonized
- Upholstered furniture — usually unsalvageable from a substantial water event
Solid wood framing, hardwood flooring, and concrete are semi-porous. They can sometimes be saved through sanding, HEPA vacuuming, and detergent cleaning if the colony has not penetrated deeply. The judgment call belongs to a remediator if there is any doubt.
Step 6: HEPA filtration during and after
Run a HEPA-rated air scrubber or HEPA shop vac in the containment zone during demolition and for 24 to 48 hours afterward. Standard household vacuums lack the filter density to capture mold spores and will simply blow them back into the room.
After material removal, wipe every hard surface in the containment area with a damp microfiber cloth — walls, floors, sills, light fixtures, doorframes — and discard the cloth. This catches the settled spore load that fell during demolition.
Step 7: Verify before reconstruction
Closing the wall back up over damp framing is the most common cause of repeat colonization within a year. Before reconstruction, verify three readings:
- Framing moisture below 16% on a pinless meter
- Visual cleanliness with no remaining staining
- Ambient relative humidity below 55%
For larger projects, an independent post-remediation verification test from a third-party inspector is worth the $300 to $600 fee. The companion article on water damage and mold remediation covers verification protocols and clearance testing in depth.
Long-term: hold humidity between 30 and 50 percent
The single most important long-term action is humidity control. The EPA’s target indoor relative humidity range is 30% to 50%. For Front Range homeowners, summer storms and basement condensation are the typical risk windows, not the dry winters. Practical steps:
- Run a dehumidifier in basements and crawl spaces during the wet season
- Verify bath fans vent through the roof or sidewall, not into the attic
- Inspect HVAC drain pans every spring and clear condensate lines
- Check washing machine, dishwasher, and refrigerator supply lines every six months
- Caulk and re-seal exterior window flashings before the spring melt
What does not work
Several popular DIY tactics have no support in EPA or CDC guidance. Painting over visible mold with “mold-resistant” primer hides the problem temporarily but does not remediate the colony underneath. UV lamps marketed for HVAC ducts have limited published effectiveness against mold in residential ducting. Ozone generators create a respiratory hazard and are not endorsed for mold remediation by either EPA or OSHA. Spraying tea tree oil, vinegar, or hydrogen peroxide may reduce surface counts on small areas but does not substitute for material removal on colonized porous substrates.
When to call a remediator
Hire a professional if growth exceeds ten square feet, if HVAC components show contamination, if porous structural materials need removal, if anyone in the household has asthma or compromised immunity, or if you have already attempted DIY remediation in the same location and the mold returned. The pillar guide at our mold inspection and testing hub walks through how independent inspections and remediation differ and when each is worth the cost.
Common locations and what triggers growth in each
Mold tends to appear in predictable locations in residential properties, and each location has typical triggers worth understanding:
- Bathroom ceilings — usually from condensation on a cool ceiling above a hot shower; the fix is a properly sized and properly vented exhaust fan running 20 minutes after each shower
- Window sills — typically condensation on cold glass in winter; older single-pane windows or poorly insulated frames are the usual culprits
- Behind furniture on exterior walls — restricted air circulation against a cold wall creates a localized humidity pocket; moving furniture 2-3 inches from the wall often solves it
- Basement walls below grade — foundation water intrusion or hydrostatic pressure pushing moisture through concrete or block
- Closets on exterior walls — same restricted-air-flow issue as furniture against exterior walls; closet doors that stay closed can create persistent humidity
- Around toilet bases — wax ring failures or slow tank-to-bowl leaks dampen subfloor
- Under kitchen sinks — supply-line drips, garbage disposal leaks, or P-trap seepage
- Attic decking near roof penetrations — flashing failures around plumbing vents, chimneys, and skylights
- Around HVAC condensate lines — clogged or improperly sloped condensate drains overflow into pans and surrounding materials
- Behind washing machines and refrigerators — supply lines for ice makers and washing machines develop slow drips that go undetected for months
If you find mold in any of these locations, work backward from the colony to identify which trigger applies before starting cleanup. The fix often involves changing the underlying condition, not just cleaning the visible patch.
What success actually looks like
A successful homeowner mold cleanup has three measurable outcomes:
- Visual cleanliness — no remaining staining or growth on the cleaned surfaces
- Stable moisture — affected substrates dried to below 16% moisture content on a pinless meter, and ambient relative humidity in the room sustained below 55%
- No recurrence within 6-12 months — the real test of whether the moisture source was identified and corrected
If recurrence happens within a year, the diagnosis was incomplete. Continue investigating until the actual moisture source is identified before attempting another cleaning cycle.
References
- Mold Cleanup in Your Home — U.S. Environmental Protection Agency
- Mold Cleanup Guidance — Centers for Disease Control and Prevention
- A Brief Guide to Mold, Moisture, and Your Home — U.S. Environmental Protection Agency
- Mold and Health — National Institute of Environmental Health Sciences
Homeowners in the Denver metro or Front Range who want a vetted inspector to assess scope before paying for remediation can reach out through our contact page for a short scoping conversation.
Mold removal & cleanup picks
For a small, contained patch (under ~10 sq ft) these EPA-friendly removers handle surface mold. Larger or recurring growth warrants a professional assessment first.
| Product | Why | Buy |
|---|---|---|
 RMR-86 Instant Mold Stain Remover RMR-86 Instant Mold Stain Remover | Fast-acting on stains; ventilate and wear PPE. | Amazon — $18.38 |
 Concrobium Mold Control Concrobium Mold Control | No-bleach formula that also helps prevent regrowth. | Amazon — $13.48 |
 Mold Armor Mold & Mildew Remover Mold Armor Mold & Mildew Remover | Widely stocked bathroom/surface remover. | Amazon — $22.98 |