How Get Rid of Mold in House: A Plain-Language Guide
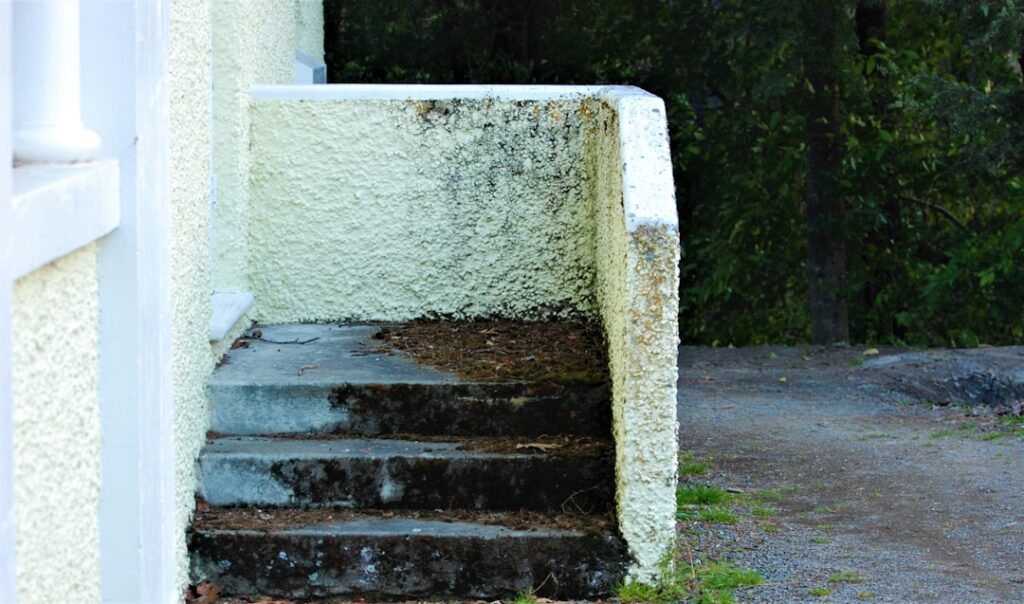
Search phrasings drop articles all the time — “how get rid of mold in house,” “how to get rid of mold in house,” “how do I get rid of mold in my house” — they all return the same answer. The missing “to” is just typing speed, and the homeowner workflow underneath does not change. This guide summarizes EPA and CDC guidance current as of 2026 — consult a certified mold inspector for testing decisions and your physician for symptom evaluation. Below is the same five-step framework that licensed remediators use, scaled to what a homeowner can reasonably do on a small patch under ten square feet on accessible non-porous surfaces.
Part of our Mold Removal & Remediation guide — start there for the full picture →
Is this mold, asbestos, or water damage? Get a free instant screen
Upload a clear photo of the suspect area. You'll get an instant AI screening opinion and what to do next. This is screening guidance, not a professional determination.
Screening guidance only. AI can be wrong. Confirm asbestos, mold type, or lead with lab testing or a licensed professional before acting.
The Five-Step Workflow
Five steps in order. Skipping any one of them is how the mold returns inside a season.
Assess. Measure the patch in square feet, identify the substrate, locate the moisture source. Under ten square feet on tile, glass, sealed concrete, or finished wood = DIY range. Larger, porous, or HVAC-involved = professional.
Contain. Close doors, plastic-sheet openings, box fan exhausting outside, wet towel on the threshold. Containment is not optional even on small jobs — aerosolized spores from cleanup can seed clean rooms elsewhere in the house.
Fix the moisture source. The plumbing pinhole, the roof flashing, the unvented bathroom, the basement seepage — whichever caused the colony has to be addressed before or during cleanup. Otherwise, the next humid week brings the mold back.
PPE and remove. N95 respirator minimum, nitrile gloves, safety glasses. Spray EPA-registered antimicrobial or 3% hydrogen peroxide, let dwell, scrub, wipe with disposable cloths into a contractor bag. Bag and dispose porous materials.
HEPA, treat, verify. Final HEPA-vacuum pass, second antimicrobial application if needed, moisture-meter check on substrate, two-week monitoring window.
Identifying the Patch and Its Substrate
Before reaching for products, look closely. Visible mold is typically colored (green, black, gray, white, or pink) and grows in a pattern that follows moisture — along a baseboard, around a window frame, across a ceiling stain, behind a piece of furniture against an exterior wall.
Look beyond the colored patch. Staining that extends into the surrounding substrate signals deeper colonization. Soft spots on drywall, swelling on particleboard, paint bubbles, and salt-like white deposits on masonry all change the cleanup scope.
Substrates matter because they take different treatments:
- Tile and grout: surface cleaning effective with peroxide or fungicide
- Sealed wood: antimicrobial plus light sand if pigment remains
- Drywall paper face colonized: usually cut-and-replace
- Insulation, carpet padding, ceiling tile: bag and dispose
- Bare concrete or masonry: antimicrobial works; deep porosity may hold spores
- Painted wood or sealed concrete: antimicrobial with longer dwell time
For wall-cavity decisions specifically, our mold in walls removal guide walks through the cut-and-replace workflow in detail.
The Moisture-Source Diagnosis
The hardest step is also the most important. Without the moisture fix, the rest of the work is cosmetic. Common Front Range moisture sources:
Plumbing-supply pinholes. Slow drips behind walls produce wet-but-not-flooded conditions ideal for Stachybotrys. Often invisible until mold appears on the drywall surface. Diagnose by water-meter test or by a plumber’s pressure check.
Roof leaks. Ice dams, flashing failure around chimneys and vents, aged shingles. Water can travel along framing before showing as a ceiling stain in a different room than the leak.
Window condensation. Single-pane or poorly sealed windows in winter produce dripping that runs into the sill and the wall cavity below. Common in older Front Range homes; often misdiagnosed as a roof leak.
HVAC condensate. A blocked condensate drain on a cooling coil floods the air handler pan, drips into the platform or surrounding floor, and saturates whatever absorbent material is nearby. Annual condensate-line clearing prevents the problem.
Basement seepage. Exterior grading sloped toward the foundation, gutter discharge near the wall, a saturated rain garden — all push water against basement walls. Visible as wet spots, efflorescence (white powder), or paint bubbles.
Unvented humidity. A bathroom without a working vent fan, a kitchen without a range hood, a laundry room with a dryer venting indoors — sustained humidity above 60% supports mold growth on cool surfaces.
PPE and Containment in Practice
Personal protective equipment for a homeowner job under ten square feet: N95 respirator (not a single-strap dust mask), nitrile gloves, and safety glasses. Step up to a P100 elastomeric respirator and a Tyvek suit for anything approaching the ten-square-foot threshold, on porous substrates, or in any room without effective external ventilation.
Containment for a small job is straightforward. Close the door. Tape 6-mil plastic sheeting over the door frame with a vertical slit as the entry. Put a box fan in a window, blowing outward, with cardboard sealing the rest of the frame. Lay a wet towel along the door threshold inside the room. Tape a second sheet of plastic over the HVAC return grille if there is one in the room. This setup contains spores for the few hours of active cleanup work.
For jobs near the ten-square-foot line, consider renting a HEPA air scrubber for the day — about $50 to $100 from a Front Range tool rental. Air scrubbers pull air through a HEPA filter and exhaust outside (or recirculate clean air back into the room), keeping airborne spore concentrations low during disturbance.
Cleaning, HEPA, and Verification
With containment up and PPE on, spray the visible patch with an EPA-registered antimicrobial or 3% hydrogen peroxide. Let dwell for the label time (usually 10 minutes). Scrub with a stiff brush in one direction to minimize aerosolization. Wipe with a disposable microfiber cloth, drop the cloth into a contractor bag positioned at the work area edge.
For drywall sections where the paper face is colonized, cut and remove. Use a utility knife to score around the affected area plus six inches of margin, pry the section out, and bag immediately. Inspect the back of the removed drywall and the framing behind — if framing shows growth or moisture, antimicrobial-treat the framing surface and let it dry fully before reconstruction.
After visible cleanup, HEPA-vacuum the entire work area: the floor three feet beyond the patch, any horizontal surfaces, the inside of the work area, and the exit pathway. Bag the HEPA filter if it shows debris. Apply a second antimicrobial pass on any stubborn pigmentation. Let the area dry fully before removing containment.
Verify with a moisture meter (below 15% on wood, in the dry indicator zone on a pinless meter for drywall and masonry), visual check (no remaining growth or staining beyond pre-existing substrate marks), and olfactory check (no musty smell after 48 hours of ventilation). Then monitor the area for two weeks.
When to Stop and Call a Professional
Six conditions push a job into professional territory:
- Patch exceeds ten square feet
- Porous structural materials extensively colonized
- HVAC system involvement
- Moisture source hidden or structural
- Any household member with elevated susceptibility (asthma, immune compromise, pregnancy)
- Mold returning after a previous homeowner cleanup
Front Range professional remediation pricing: small job (10 to 50 sq ft) $500 to $2,000; mid-sized (50 to 100 sq ft) $2,000 to $5,000; large (>100 sq ft or HVAC) $5,000 to $15,000+. Three written quotes with matching scope is the floor for any project over $1,500. The mold inspection hub covers the inspector role that often precedes hiring a remediator.
Preventing Mold From Returning
After cleanup is finished, prevention is what keeps the mold from coming back. Three controls matter most.
Humidity below 60%. A $15 hygrometer in basements, bathrooms, and any room with a history of mold growth gives an objective reading. Front Range homes typically run dry in winter (often under 30%) and can creep above 60% in summer or after wet weather. A whole-house humidifier in winter and a portable or whole-house dehumidifier in summer keep the readings inside the 30-50% sweet spot.
Ventilation in moisture-producing rooms. Bathroom vent fans should run during every shower and for at least 15 minutes after. The fan should be rated for the room volume (a 50 CFM fan handles a typical 50-square-foot bathroom; larger bathrooms need 80 or 100 CFM). Kitchen range hoods should vent outside, not recirculate. Dryers must vent outside, never into a basement or crawlspace.
Moisture-source maintenance. Annual gutter cleaning, semi-annual HVAC condensate-line inspection, periodic roof shingle and flashing inspection, plumbing-fixture seal checks under sinks and at toilets. Front Range freeze-thaw cycles are hard on flashing and caulking; what was sealed two years ago may have cracked.
Specific Front Range Scenarios
Three common Front Range mold situations and how the workflow applies.
Bathroom shower-corner mold. Surface mildew on grout or silicone. DIY range. Spray with hydrogen peroxide or fungicide, scrub, dry. Install or replace the bathroom vent fan if missing or undersized. Run the fan during and 15 minutes after every shower.
Finished-basement-wall mold after a wet spring. Often 20 to 40 square feet on drywall, sometimes extending behind baseboards. Borderline DIY at the low end of that range; over 30 square feet on drywall is usually professional. The moisture source is typically exterior — grading toward the foundation, gutter discharge near the wall, or window-well seepage. Fix the exterior issue first; the cleanup work is wasted otherwise.
Attic mold after ice-dam season. Visible on roof decking, insulation, and ceiling-side drywall. Almost always professional. The moisture source (ice dam) is seasonal and the affected area is rarely under ten square feet. Repair the roof flashing or add attic insulation/ventilation to prevent next winter’s ice dam.
Two-Week Monitoring Routine
Once cleanup is done, schedule three monitoring visits: day two, day seven, day fourteen. On each visit, look for new staining or growth on the cleaned surface, sniff for any returning musty smell, and re-meter the substrate moisture. If any of the three signals appears, the cleanup did not fully resolve the colonization or the moisture source has not been fixed — reopen the work or call a professional.
After the two-week mark, if all three checks are clean, the job is done. Document the result with a final set of photos and meter readings, and file the records with the original cleanup documentation. The packet matters at sale, in an insurance claim, or simply for the homeowner’s own records if mold recurs in a different part of the house years later. Saved records of past cleanups also help an inspector quickly identify whether new staining is regrowth or a fresh problem in a different location, which speeds diagnosis and saves a second site visit.
References
- A Brief Guide to Mold, Moisture, and Your Home — U.S. EPA
- Mold Cleanup and Remediation Guidance — Centers for Disease Control and Prevention
- Mold Remediation Guide — U.S. EPA
- Mold and Indoor Air Quality — Colorado Department of Public Health and Environment
Frequently asked questions
How get rid of mold in house starts with what step?
Step one is always assessment: measure the patch in square feet, identify the substrate, and locate the moisture source. The cleanup approach depends on all three. Under ten square feet on accessible non-porous surfaces is the homeowner window; above that or porous structural materials are professional work.
Can I just clean mold and skip the moisture-source repair?
No. Mold needs sustained moisture to grow. Removing visible growth without fixing the leak, condensation, or humidity source guarantees regrowth in the same spot within weeks to months. The moisture fix is the most important step in the workflow.
What products kill mold?
EPA-registered antimicrobials (with EPA registration numbers on the label) are the strongest homeowner option. Hydrogen peroxide 3% is effective on hard surfaces. White vinegar handles light surface mildew. Bleach is mostly cosmetic on porous surfaces and should be reserved for tile, glass, and fiberglass.
How long does mold cleanup take?
Active work on a small patch takes one to two hours. Antimicrobial dwell time is most of the clock. Drying takes 24 to 48 hours. The two-week monitoring window before declaring the job complete is the longest piece of the timeline.
Front Range homeowners unsure whether their mold problem is in the DIY range can connect with a vetted inspector through our contact page for an independent walkthrough before the cleanup begins.
Mold removal & cleanup picks
For a small, contained patch (under ~10 sq ft) these EPA-friendly removers handle surface mold. Larger or recurring growth warrants a professional assessment first.
| Product | Why | Buy |
|---|---|---|
 RMR-86 Instant Mold Stain Remover | Fast-acting on stains; ventilate and wear PPE. | Amazon — $29.99 |
 Concrobium Mold Control | No-bleach formula that also helps prevent regrowth. | Amazon — $11.26 |
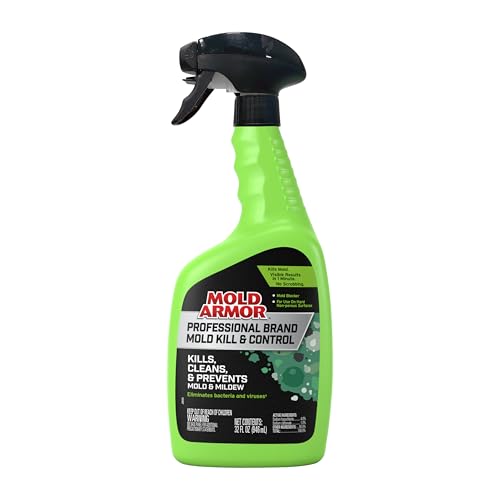 Mold Armor Mold & Mildew Remover | Widely stocked bathroom/surface remover. | Amazon — $22.98 |