How to Spot Mold: A Plain-Language Guide
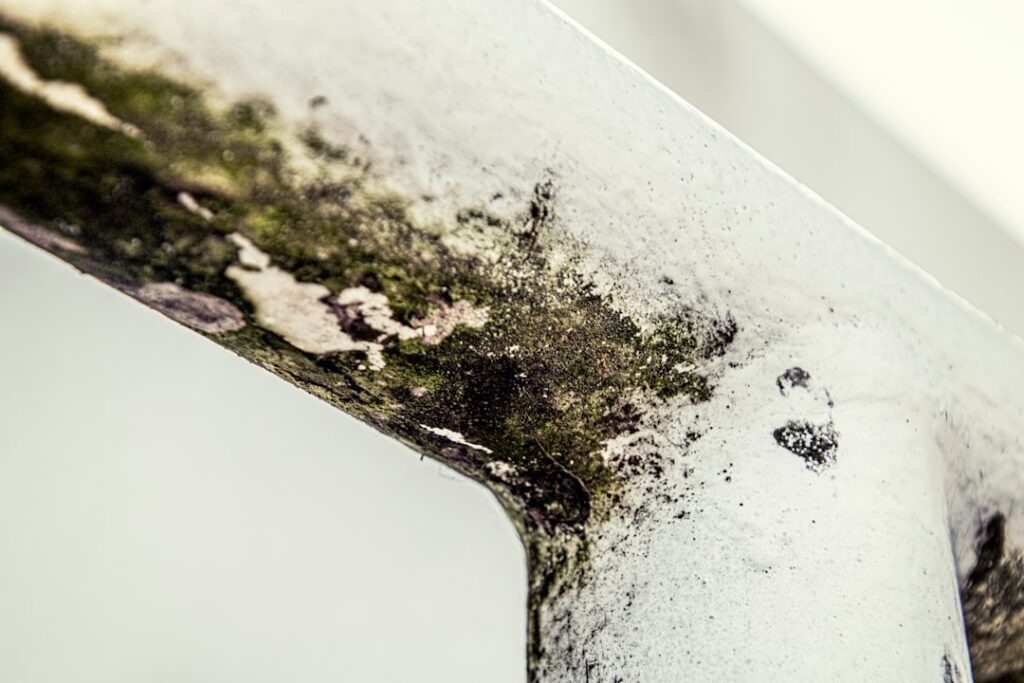
Knowing how to spot mold is a learned skill, not an intuition. Homeowners who train their eyes for the right shapes, colors, and textures catch problems weeks earlier than those who wait for an obvious patch on a ceiling. Spotting works best when paired with two other senses: smell, which often arrives first, and touch, where moisture confirms the conditions mold needs to grow. This guide summarizes EPA and CDC guidance current as of 2026 and is intended as a plain-language reference rather than medical or remediation advice — consult a physician for symptoms and a certified professional for testing decisions.
Part of our Types of Mold guide — start there for the full picture →
Is this mold, asbestos, or water damage? Get a free instant screen
Upload a clear photo of the suspect area. You'll get an instant AI screening opinion and what to do next. This is screening guidance, not a professional determination.
Screening guidance only. AI can be wrong. Confirm asbestos, mold type, or lead with lab testing or a licensed professional before acting.
What mold actually looks like on common surfaces
Mold rarely announces itself with a textbook black patch. On painted drywall it often appears as a halo of brown, gray, or olive discoloration with a slightly fuzzy edge. On wood it shows up as dark streaks running along the grain, often confused with water staining. On grout and caulk it grows pink, orange, or black depending on the species. On fabric it produces white or gray fuzz that smudges when brushed. On HVAC vents and registers it appears as soot-like dust that resists vacuuming.
Color is not a reliable identifier. The same species can present white, gray, green, or black depending on substrate, age, and moisture level. Stachybotrys chartarum, the species often called toxic black mold, is dark and slimy when wet but powdery and lighter when dry. Aspergillus and Penicillium are typically green or blue but can fade to white. Texture matters more than color: anything that looks fuzzy, slimy, or like dirty cotton candy on a building surface is suspect. The mold inspection hub covers visual identification in more depth.
The smell test: musty odors are diagnostic
Mold metabolizes organic material and releases volatile organic compounds called MVOCs as a byproduct. These produce the distinctive musty, earthy odor that homeowners describe as “old basement” or “wet cardboard.” MVOCs travel ahead of visible growth because they diffuse through walls, around door frames, and through HVAC returns long before a colony becomes large enough to see. A musty smell in one room, with no visible source, is the most underrated mold indicator in residential settings.
Train yourself to walk into a room and pause for ten seconds with your nose oriented. Notice the baseline odor on entry, then compare it to other rooms in the house. Closets, basements, the area under sinks, and behind appliances tend to hold odor longer because air circulation is weaker. If a closet always smells different from the bedroom it adjoins, that’s worth investigating with a moisture meter and a flashlight.
Where mold hides in a typical house
Visible mold is usually the small visible fraction of a larger hidden problem. Common hiding spots that homeowners miss on first walkthrough include behind toilets where the supply line meets the wall, under bathtub overflow plates, inside vanity cabinets at the back wall, behind refrigerators where condensate lines drip, in the drain pan beneath HVAC air handlers, on the back of drywall in finished basements that flooded once, inside window-mounted air conditioners, on the underside of carpet padding in below-grade rooms, in attic decking near roof penetrations, and on the back of wallpaper in older homes.
The pattern across these hiding spots is moisture plus poor air circulation plus organic substrate. Anywhere those three meet for more than 48 hours, mold can establish itself. A flashlight angled across a surface — rather than straight at it — reveals texture changes that direct light misses. Mirrors on extension handles help reach behind toilets and into HVAC plenums. For walls suspected to have hidden growth, the behind-wall detection guide covers infrared and boroscope methods.
Moisture clues that precede visible mold
Mold needs moisture. If you can find the moisture, you can predict where mold will appear next. Water staining on ceilings, even old and dry, marks past or ongoing leaks worth investigating from above. Efflorescence — the white powdery deposit on basement masonry — signals water moving through concrete and points to hidden wet zones nearby. Cupped or buckled hardwood floors mean elevated subfloor moisture. Peeling paint at the bottom of bathroom doorframes signals splash exposure. Bubbling caulk around tubs and showers indicates failed seals.
A pin-type or pinless moisture meter is the homeowner’s confirmation tool. Pin meters read electrical resistance between two probes, with anything over about 17 percent in wood worth investigation. Pinless meters use radio frequency to read through paint and finishes without damage. Both are available in the $30 to $80 range for consumer models. Run the meter across baseboards, lower drywall, around windows in winter, and inside cabinets that house plumbing.
Health symptoms as detection signals
Symptoms that improve when you leave the house and return when you come back point to indoor air quality issues, including but not limited to mold. Common mold-associated symptoms include nasal congestion, sneezing, eye irritation, persistent dry cough, skin rashes, and headaches. People with asthma, allergies, or compromised immune systems may experience stronger reactions and earlier onset. Children and infants in particular show effects sooner than healthy adults.
CDC guidance is clear that individual sensitivity varies widely. A house with measurable mold may produce no symptoms in one family and significant symptoms in another. The presence of symptoms in a single member of a household is enough to justify a closer look at the building, even if no one else feels effects. A physician can evaluate symptoms; a certified inspector can evaluate the building. The two diagnoses are separate but related.
When spotting becomes inspecting
A homeowner walkthrough can find obvious growth, follow smells, and identify moisture problems. What it cannot do is quantify airborne spore concentrations, identify species at the genus level, or evaluate hidden wall and HVAC cavities without disassembly. When visible growth covers more than ten square feet, when growth is in or near the HVAC system, when remediation will be funded through insurance, or when a real estate transaction is in play, a certified inspector should take over from spotting.
Industry practice uses spore-trap air sampling with calibrated pumps shipped to AIHA-accredited labs. Reports include indoor-outdoor comparison, marker-genus presence, and remediation scope recommendations. Plan on $400 to $900 for a typical two-sample inspection in most US markets, with post-remediation clearance testing adding another $200 to $500. The guide to having your house tested covers selecting an inspector.
Lighting techniques that reveal hidden growth
Standard room lighting often washes out the subtle color and texture changes that signal early mold growth. Three lighting techniques improve detection. Raking light — angling a flashlight nearly parallel to the surface rather than perpendicular — creates shadow-relief that reveals texture changes from blooming colonies before color changes become obvious. UV blacklight reveals certain mold species through fluorescence, though the method is unreliable for definitive identification because not all species fluoresce and many other building materials also fluoresce under UV.
Color-balanced LED flashlights at 5000K-6500K color temperature produce more accurate color reading on suspect surfaces than warm-white incandescent or cool fluorescent room lighting. Phone-camera flashes augmented with the camera’s photo mode capture suspect areas in high-detail images for later review and comparison. Some homeowners use macro-photography attachments on smartphones for close-up documentation of suspect spots before deciding whether to act. The combination of raking light plus high-color-quality LED illumination plus phone-camera documentation creates a homeowner-grade detection toolkit at minimal cost.
Common mold-spotting mistakes
Three patterns lead homeowners to miss mold during walkthroughs. First, looking only at obvious places — walls and ceilings — while skipping cabinet interiors, behind toilets, under tubs, and inside HVAC returns where most hidden growth lives. Second, treating one walkthrough as sufficient, when seasonal moisture cycles mean problems visible in summer may hide in winter and vice versa. Third, ignoring smell because the homeowner has lived with it long enough to stop noticing — visitors often comment on musty odors that residents have adapted to over months or years.
The fourth pattern: confusing similar visual signs with mold. Water staining without active growth is not the same problem. Soot from candles, fireplaces, or HVAC issues can produce dark patches that look like mold. Mineral efflorescence on masonry looks white-fuzzy but is salt, not biological. Lead-based paint can chip and discolor in patterns that resemble mold staining. Distinguishing these requires combining visual assessment with moisture metering and sometimes smell-based confirmation — a true mold problem almost always produces an organic odor signature that mineral and pigment problems do not.
What to do the moment you spot mold
The first step after spotting mold is not cleaning. The first step is finding the moisture source. Spraying bleach on visible growth without fixing the leak that fed it guarantees regrowth within months. Trace the water: where did it come from, is it still active, and what has it touched on the way? Roof leaks, plumbing leaks, foundation seepage, and condensation are the four common sources. The growth you see is downstream evidence of one of them.
For small areas under ten square feet on hard surfaces, EPA guidance permits homeowner cleanup with detergent and water (not bleach, which the EPA does not recommend for porous materials). Wear an N95 respirator, gloves, and eye protection. Discard porous materials that show growth — carpet, ceiling tile, drywall — because cleaning rarely penetrates the substrate. For larger areas, HVAC contamination, or anything in a finished basement that flooded, call a remediation contractor and verify their IICRC certification.
Front Range seasonal spotting patterns
Colorado’s Front Range produces seasonal mold-spotting patterns that homeowners benefit from understanding. Spring snowmelt drives basement seepage that often produces visible growth in May or June as wet wall cavities support colony development. Summer thunderstorms create episodic roof leaks where ceiling staining becomes apparent in late July or August. Winter ice-dam formation drives wall-cavity moisture that surfaces as visible growth in February through April as the moisture cycle completes.
Homeowner spotting walkthroughs aligned to these seasons catch most Front Range mold problems early. A spring walkthrough after snowmelt focuses on basements and lower walls. A late-summer walkthrough after thunderstorm season focuses on ceilings under roofs. A late-winter walkthrough focuses on upper-story exterior walls and the line where ice dams typically form. This timing-aware approach to spotting beats arbitrary quarterly inspections because it concentrates attention where each season produces the most likely moisture problems. Homeowners who build seasonal spotting habits typically catch most household mold problems at small scope, where homeowner cleanup under EPA’s ten-square-foot threshold remains viable. Homeowners who skip seasonal spotting often discover problems only after they’ve grown large enough to require contractor-grade remediation, which can cost five to ten times what early intervention would have cost.
References
- A Brief Guide to Mold, Moisture and Your Home — U.S. Environmental Protection Agency
- Basic Facts About Mold and Dampness — Centers for Disease Control and Prevention
- Mold and Your Indoor Air — National Institute of Environmental Health Sciences
- Mold Inspection Standards of Practice — InterNACHI
Frequently asked questions
What does mold smell like?
Mold has a distinctive musty, earthy odor often described as wet cardboard or old basement. The smell comes from microbial volatile organic compounds (MVOCs) released as mold metabolizes organic material. The odor often appears before visible growth becomes obvious.
Can you spot mold inside walls without cutting them open?
Indirectly. Moisture meters, infrared cameras, and borescopes can identify wet wall cavities and visible growth in cavities without major demolition. Confirming species and quantity still requires opening the wall or taking surface samples.
What color is dangerous mold?
Color alone is not a reliable safety indicator. Many species change color with moisture and age. The CDC recommends treating any indoor mold growth as a remediation candidate regardless of color, because individual health responses vary widely.
How fast does mold grow after a leak?
Mold can begin colonizing wet organic material within 24 to 48 hours under typical indoor temperature and humidity conditions. Visible growth usually appears within seven to ten days when conditions remain wet.
Front Range homeowners who have spotted suspected mold and want a second opinion can get in touch through our contact page for a connection to a vetted local inspector.