How to Get Mold Out: A Plain-Language Guide
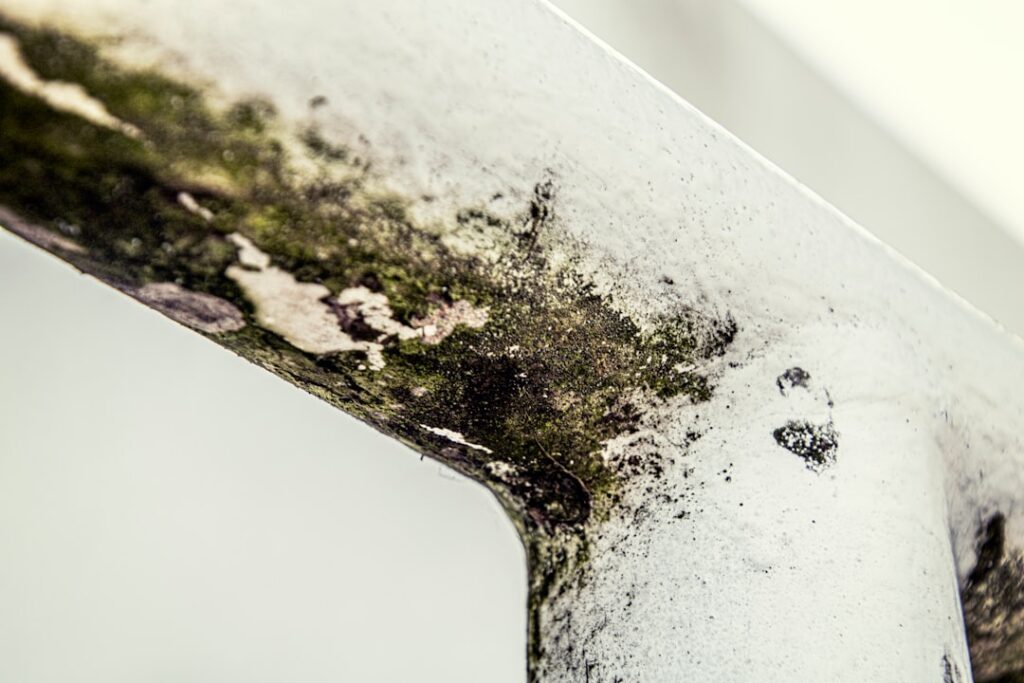
“Get it out of my house” is the most common framing homeowners use when they call about mold. The phrase captures something real — surface cleaning is not the same as eviction. How to get mold out of a home means removing the colony itself, the dead-spore debris, the moisture that sustained it, and any porous material the growth has penetrated. This guide walks the out-of-house removal sequence in plain language. This guide summarizes EPA and CDC guidance current as of 2026 — consult a certified mold inspector for testing decisions and your physician for symptom evaluation.
Part of our Types of Mold guide — start there for the full picture →
Is this mold, asbestos, or water damage? Get a free instant screen
Upload a clear photo of the suspect area. You'll get an instant AI screening opinion and what to do next. This is screening guidance, not a professional determination.
Screening guidance only. AI can be wrong. Confirm asbestos, mold type, or lead with lab testing or a licensed professional before acting.
What “Out” Actually Requires
To genuinely get mold out of a home, four conditions need to be met simultaneously:
- Visible growth physically removed from substrates.
- Settled spores captured from porous surroundings — carpet, fabric, dust on horizontal ledges.
- Moisture source corrected so colonies cannot re-establish.
- Affected porous materials replaced or sealed once dry.
Skip any one of these and the problem returns — sometimes within weeks, sometimes within months when the next humidity spike hits. The parent mold inspection and testing hub covers the diagnostic sequence that comes before removal.
Size and Scope Decision
The EPA’s published threshold is 10 square feet of contiguous visible growth. Below that, on hard non-porous surfaces, most homeowners can manage cleanup themselves with proper PPE. Above that, or anywhere with HVAC contamination, sewage contact, or hidden cavity growth, the work calls for a certified mold remediation contractor with negative-air containment.
Be honest about scope. A 6-inch surface stain on drywall often hides 24 inches of colony on the back side because paper-faced gypsum wicks moisture in all directions. When in doubt, treat the visible patch as the tip of a larger iceberg until a moisture meter and borescope say otherwise.
Best At Home Mold Test Kit: our top 3 picks
| Product | Best for | Key features | Price | Buy |
|---|---|---|---|---|
| Varify 6-Pack | All-round DIY plate kit |
| $15.99as of Nov 5, 2026 8:18 pm GMT+0000 | Buy now →Check current price |
| KAYENQO 12-Test | Testing many rooms |
| $28.99as of Nov 5, 2026 8:18 pm GMT+0000 | Buy now →Check current price |
| Detekt Indoor Air Quality Kit | HVAC vents |
| $39.99as of Nov 5, 2026 8:18 pm GMT+0000 | Buy now →Check current price |


Prices are Amazon’s listed prices as of the time shown and change often; check Amazon for today’s price. As an Amazon Associate we earn from qualifying purchases.
The Out-of-House Removal Sequence
1. Source-Moisture Correction First
Identify the leak, condensation, or humidity issue and fix it. Plumbing repair, gutter cleaning, downspout extension, dehumidifier installation, or HVAC condensate-line cleaning — whatever the cause, address it before or during removal. Skipping this step guarantees regrowth.
2. Containment
Close doors, cover registers in the work zone, and tape plastic sheeting across openings for jobs larger than a few square feet. Turn off the HVAC. A box fan blowing out a window provides crude negative pressure; a HEPA-filtered air scrubber does it properly.
3. PPE
N95 respirator minimum, P100 cartridges for larger work. Nitrile gloves, eye protection, disposable coveralls or designated work clothes that get bagged afterward. Never skip PPE — cleanup disturbs the colony and aerosolizes more spores than the original growth did.
4. Physical Removal
On non-porous surfaces, scrub with detergent and water until visibly clean, rinse, then apply an EPA-registered antimicrobial. On porous substrates — paper-faced drywall, ceiling tile, carpet pad, insulation — bag and discard rather than clean. The out-of-house removal workflow covers substrate decision logic in more detail.
5. HEPA Capture
This is the step homeowners most often skip. Surfaces around the visible growth — floors, ledges, walls, soft furnishings — hold settled spores. A HEPA vacuum pulls those particles out before they re-aerosolize. Pass slowly with overlapping rows. A HEPA air scrubber running 24 to 48 hours during and after the job cuts airborne load.
6. Dry Down
Run dehumidifiers and fans for 48 to 72 hours. Confirm under 20 percent moisture content on a pinless meter at the cleaned substrate before any encapsulation, repainting, or reconstruction. Closing up a damp wall restarts the cycle.
7. Verify
Sensory checks at 30 and 60 days for small DIY jobs. Post-remediation clearance air-spore sampling from a third-party tester for larger jobs, insurance claims, or sensitized occupants. The spore-cleanup verification guide explains how clearance results compare to outdoor baseline.
What Gets Replaced, What Gets Cleaned
Replace
- Paper-faced drywall with visible growth on the back side.
- Ceiling tiles with staining or odor.
- Carpet padding affected by water damage.
- Saturated fiberglass insulation.
- Moldy silicone caulk and grout in poor condition.
- HVAC flexible duct downstream of contamination.
Clean
- Sound wood framing — HEPA vacuum, damp wipe, sand if necessary, seal with shellac-based primer.
- Tile, glass, glazed ceramic, metal — detergent and water plus antimicrobial.
- Sealed concrete floors — pressure-wash or scrub with detergent.
- Hard furniture, finished wood — damp wipe and disinfect.
HVAC Considerations
If mold is suspected in ductwork or at the air handler, do not run the system during cleanup. Disturbed spores distribute throughout the house. HVAC duct cleaning by an NADCA-certified contractor uses negative-pressure capture and antimicrobial fogging. EPA guidance discourages routine duct cleaning but supports it when growth is confirmed inside the system.
Disposal
Bag contaminated material in 6-mil plastic, seal with tape, and wipe the outside of the bag with damp cloth before carrying through clean areas of the house. Most jurisdictions accept residential mold-cleanup waste in regular trash. Check local rules for larger quantities or commercial work.
What Doesn’t Get Mold Out
Habits that look like progress but don’t actually remove the problem:
- Painting over visible mold. Paint traps moisture; the colony grows through the film.
- Spraying bleach on porous substrates. Water soaks in; chlorine evaporates; mold often returns.
- Running a home air purifier without source removal. Filters trap a fraction of airborne spores but cannot touch surface colonies.
- “Mold-killing” foggers without physical removal. Surface chemistry alone leaves the dead-spore allergen load in place.
When to Stop and Call a Pro
If during DIY work the exposed colony turns out to extend more than 10 square feet, runs through framing into adjoining cavities, sits behind sewage backup, or covers HVAC components, stop. Bag what’s exposed, tape over the opening, and contact a remediator. Halfway-removed mold without containment puts more spores into the air than untouched mold. The first-person homeowner removal guide covers the same boundary from the DIY side.
Timeline for a Realistic Out-of-House Project
Homeowners often underestimate the time a real removal takes. A practical timeline for a small bathroom corner or under-sink cabinet:
- Day 1 morning — source-moisture diagnostic and repair (1 to 3 hours).
- Day 1 afternoon — containment setup, PPE prep, physical removal of porous material (2 to 4 hours).
- Day 1 evening through Day 3 — drying with dehumidifier and fans (48 to 72 hours continuous).
- Day 4 morning — moisture verification, HEPA capture pass, antimicrobial application (1 to 2 hours).
- Day 4 afternoon — reconstruction of removed substrate, primer, paint (2 to 6 hours plus dry time).
That puts a “small” mold removal at four days end-to-end. Underestimating the dry-down step is the single most common scheduling mistake.
The Replacement Decision Tree
Substrate-by-substrate replacement decisions:
Paper-Faced Drywall
Replace if back side shows growth, if visible patch exceeds one square foot, or if moisture content still reads elevated after drying. Surface cleaning of small (under a square foot) visible-only-surface stains can work but is rarely the right call.
Insulation
Wet fiberglass batts lose thermal value and harbor mold on settled dust within the matrix. Replace affected sections rather than attempting to dry and reuse. Closed-cell foam insulation can sometimes dry without replacement if the moisture event was brief.
Ceiling Tile
Replace any tile with visible staining, sagging, or musty odor. Drop-ceiling tile is cheap and grids accept replacement easily.
Carpet Pad
Pad almost always replaces after a significant water event. Carpet face fiber sometimes salvages if professionally extracted and dried within 48 hours.
Wood Subfloor
Sound wood with surface staining cleans and seals. Soft, delaminated, or visibly warped subfloor needs replacement by a contractor.
Cabinet Material
Particleboard cabinet bases that have absorbed water typically replace. Hardwood face frames and doors often clean and refinish.
Disposal Logistics
Contaminated material from a mold cleanup needs careful handling:
- Bag in 6-mil plastic. Tape closed.
- Wipe the outside of the bag with damp cloth before carrying through clean areas.
- Most jurisdictions accept residential mold cleanup waste in regular trash, but check local rules for larger quantities.
- Some recycling facilities accept clean drywall but reject mold-contaminated material — bag separately.
- Roll-off dumpsters for larger jobs need an explicit description of mold-contaminated content.
Working with Insurance
If the underlying water-damage event was sudden — a burst pipe, washing-machine hose failure, roof leak during a hailstorm — homeowner’s insurance often covers the remediation and reconstruction. Two practical points:
- Photograph everything before disturbing any material. Pre-cleanup photos with date stamps are the strongest documentation.
- File the claim promptly. Many policies have notification windows of 30 to 60 days from the water event.
Gradual leaks discovered after months or years usually fall outside coverage. The moisture-source guide covers how source-timing affects coverage decisions.
Air Quality After Removal
Even with thorough HEPA capture, indoor air takes 1 to 3 days to settle back to baseline after a removal job. Running HEPA air purifiers in adjacent rooms during and after the work pulls migrant spores out of circulation. For sensitized occupants, plan to be away from the home for the first 24 hours after the work completes. Wash bedding, vacuum carpets, and damp-wipe surfaces in adjoining rooms before bringing children and pets back into the space.
The Difference Between Getting Mold Out and Removing the Mold Patch
Getting mold out of a home and removing a visible mold patch are not the same operation. Patch removal is a single-location physical task. Getting mold out is a whole-home outcome that includes:
- No visible growth in the affected area.
- No active moisture source feeding the area.
- Indoor spore counts at or below outdoor baseline.
- No dead-spore allergen load in carpets, dust, or HVAC.
- Humidity reliably below 50 percent across zones.
- No persistent musty odor anywhere in the home.
- No occupant symptoms that correlate with home environment.
That whole-home outcome takes longer and costs more than a single patch removal but produces durable results.
Documentation Throughout the Process
Photo documentation matters at every stage:
- Pre-cleanup wide-angle photos showing room context.
- Close-ups of visible growth with measurement reference.
- Moisture-meter screen captures showing readings at affected substrates.
- In-progress photos of containment, removal, and disposal.
- Post-cleanup photos before reconstruction.
- Final reconstruction photos at completion.
This package supports insurance claims, real-estate disclosures, and any future questions about the work scope.
Pre-Sale Considerations
For homeowners considering selling a property where mold has been removed, several pre-sale steps streamline the transaction:
- Compile all documentation — moisture-source repair receipts, removal records, lab clearance results — in a single folder accessible to buyers and their inspectors.
- Disclose past mold issues per state-specific real estate disclosure rules.
- Address any visible residual signs of past water damage in adjacent areas.
- Maintain the source-moisture fix at peak condition through closing — buyer inspectors check for recurring conditions.
- Consider hiring an independent third party to verify the affected area is clear before listing.
Documented and disclosed remediation work supports buyer confidence and often allows the transaction to proceed smoothly. Hidden or undisclosed work tends to surface during inspection and complicate the deal.
References
- Mold Cleanup in Your Home — U.S. Environmental Protection Agency
- Mold Cleanup Guide — Centers for Disease Control and Prevention
- Mold Resource Guide — InterNACHI
- Mold Workplace Standards — Occupational Safety and Health Administration
Frequently asked questions
How do I get mold out of my house permanently?
Permanent removal requires fixing the moisture source first, physically removing visible growth, capturing settled spores with HEPA equipment, drying substrates below 20 percent moisture content, and replacing porous materials that cannot be cleaned. Skip any step and growth returns.
What's the biggest mistake homeowners make removing mold?
Painting over visible growth or skipping the HEPA capture step. Paint traps moisture and lets the colony continue. Cleaning visible surfaces without removing settled spores leaves the allergen load and seed for regrowth.
How long should a HEPA scrubber run after removal?
Most protocols run a HEPA air scrubber for 24 to 48 hours during and after physical removal. The goal is to bring suspended-spore counts below the outdoor baseline before reoccupying the cleaned area.
Do I need to test after cleanup?
Small DIY jobs can rely on sensory checks at 30 and 60 days. Larger jobs, insurance claims, or sensitized occupants benefit from third-party post-remediation air-spore sampling compared to outdoor baseline.
Front Range homeowners facing a removal job that looks bigger than expected can reach a vetted local inspector through our contact page for a scope assessment before signing a remediation contract.