Home Re Inspection After Repairs: Cost, Timing and What It Covers
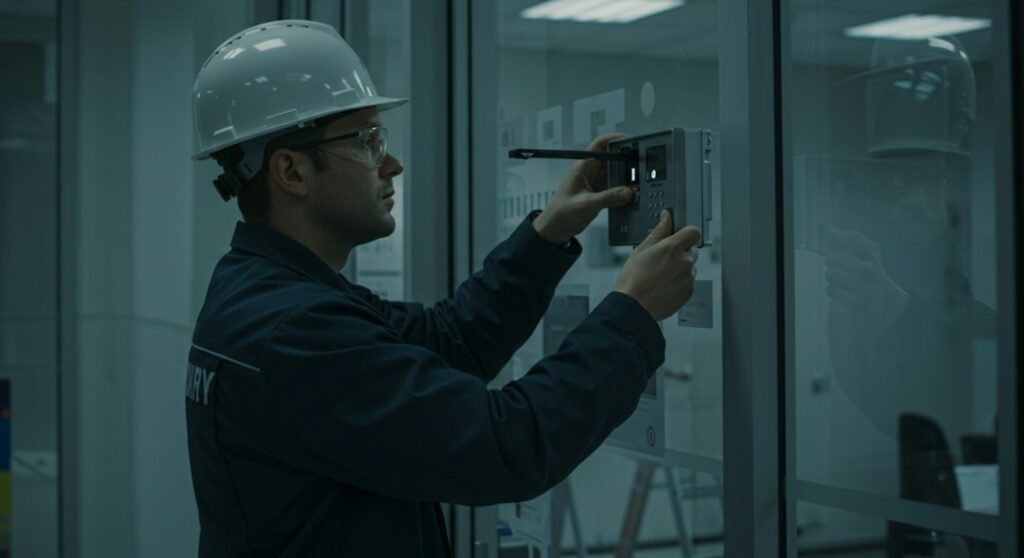
A home re inspection is a follow-up visit, usually by the same inspector, to confirm that repairs the seller agreed to make after the original inspection were actually completed and look properly done. It covers only the items on the negotiated repair list, it is typically paid for by the buyer, and it is scheduled after the seller says the work is finished but before the final walkthrough and closing. The visit is short and inexpensive compared with the original inspection, but it is often the only independent check a buyer gets on contractor work they did not choose. This guide explains how a reinspection fits into the purchase timeline, who usually pays, what the inspector does and does not check, the receipts and permits to ask for, typical fee ranges and what to do if the repairs turn out to be incomplete. It is general information for buyers as of 2026; your purchase contract and your real estate agent or attorney govern the specific deadlines and remedies in your transaction.
Part of our Home Inspections Explained guide — start there for the full picture →
What a Re-Inspection Is (and What It Is Not)
After a home inspection, buyers commonly ask the seller to repair specific defects, offer a credit, or reduce the price. When the parties agree on repairs, the agreement usually lists each item: replace the cracked water heater flue, add GFCI protection at the kitchen counters, repair the active roof leak over the back bedroom, and so on. The reinspection is the buyer’s way of checking that list.
Key points about scope:
- It is a focused visit. The inspector checks the agreed repair items, not the entire house. It is not a second full inspection of everything covered in our guide to what a home inspector looks for.
- It is visual. The inspector looks at the completed work and tests what can reasonably be operated, such as running a faucet over a repaired drain, tripping a new GFCI, or firing a furnace after a service call.
- It does not certify the work. The inspector can report that a repair appears complete, appears incomplete, or was done in a way that raises new concerns. The inspector does not warranty a contractor’s work or confirm code compliance.
- It cannot see inside finished surfaces. If a leak was repaired and the drywall was patched and painted, the inspector can look for moisture with a meter and note that the surface was repaired, but cannot see the pipe behind it.
The ASHI Standard of Practice for home inspection describes the original inspection as a visual review of readily accessible systems, and notes that the inspector is not required to determine the methods, materials or costs of corrections. A reinspection works within the same limits, just on a short list of items.
Where a Reinspection Fits in the Purchase Timeline
Every contract is different, but a typical sequence looks like this:
- Offer accepted. The inspection period or home inspection contingency starts.
- Home inspection. The inspector produces a written report listing deficiencies and safety issues.
- Repair negotiation. The buyer submits a repair request or objection notice; the seller agrees, counters or refuses. The final agreement should spell out each repair in specific terms.
- Seller completes repairs. The seller hires contractors, or sometimes does the work personally if the contract allows it.
- Seller provides documentation. Invoices, receipts, warranties and any permits or final inspection records.
- Reinspection. Ideally several days to a week or more before closing, so there is time to address problems.
- Final walkthrough. Usually within a day or two of closing, to confirm the home is in the agreed condition. Our guide to the final walkthrough explains what to check at that stage.
- Closing.
The Consumer Financial Protection Bureau’s overview of closing on your new home lists scheduling a home inspection as one of the action steps of that final phase, alongside reviewing documents and shopping for insurance. CFPB’s Closing Disclosure explainer notes that lenders are required to provide the Closing Disclosure three business days before closing. If repairs fall through and the parties switch to a credit or price change, that change has to make it onto the closing documents, which is one more reason not to leave the reinspection until the last day.
Why timing matters
Repairs often run late. Contractors get booked up, parts take time, and some sellers wait until the last week. If the reinspection happens the day before closing and something is unfinished, the buyer has few good options: delay closing, close anyway and hope, or negotiate a hurried credit. Building a “repairs complete by” date into the repair agreement, several days ahead of the walkthrough, gives everyone room.
Front Range timing wrinkles
A few local conditions regularly complicate reinspection schedules. Winter snow can cover a roof for days, so a roof repair finished in January may be impossible to see from above until it melts; the inspector may only be able to check the attic side and the contractor’s photos. Hailstorm seasons book up roofers for weeks, which pushes roof repairs past a tight closing date. Radon mitigation is common in Colorado, and a post-mitigation test typically needs to run for at least a couple of days after the system has been operating, so build that time in. Sewer line repairs often require a city or county permit and an excavation inspection, which adds its own scheduling.
How Colorado Contracts Handle Inspection Repairs
Most residential sales on the Front Range use the standard Colorado Real Estate Commission contract forms. Under that framework, the buyer typically delivers an Inspection Objection notice by the inspection deadline, listing the conditions the buyer wants addressed. The parties then try to reach a signed Inspection Resolution by the resolution deadline. If they do not, the contract generally gives the buyer a path to terminate. The specific deadlines are filled in on each contract, so they vary from deal to deal.
Two practical consequences follow. First, the Inspection Resolution is the document the reinspection checks against, so its wording matters. Vague language such as “seller to address roof” leaves room for a minimal fix; specific language naming the trade, the location and the expected outcome gives the inspector something concrete to verify. Second, by the time the reinspection happens, the inspection objection deadline has usually passed. A buyer who finds an incomplete repair at that stage is generally relying on the seller’s written promise in the resolution, not on the original right to walk away, which is why agents often add a “repairs complete and documented by” date and a remedy if they are not. Your agent or a real estate attorney can explain how the forms apply to your transaction.
Who Pays for a Re-Inspection?
In most transactions the buyer pays for the reinspection, because the buyer hired the inspector and the visit is for the buyer’s protection. That said, it is negotiable:
- Some buyers ask the seller to cover the reinspection fee as part of the repair agreement, especially for a long list.
- If the first reinspection finds incomplete or failed repairs, buyers sometimes negotiate that the seller pays for any additional return visit.
- Some inspectors include one short reinspection in a package price; most charge separately.
Whatever is agreed, put it in writing in the repair addendum rather than relying on a verbal understanding between agents.
Typical re-inspection fees
Reinspection fees are typically a fraction of the original inspection fee. Typical national ranges run from roughly one hundred to a few hundred dollars, with the main cost drivers being:
- Number of items on the repair list and how spread out they are (roof, crawl space and attic in one visit takes longer than three items in a kitchen).
- Travel distance, especially for mountain or rural properties.
- Specialty checks, such as re-running a sewer scope after a line repair, retesting radon after mitigation, or a moisture survey after a leak repair.
- Whether it is a repeat visit because items were not finished the first time.
Ask the inspector for the reinspection fee when you book the original inspection, so it is part of your budget from the start.
What the Inspector Checks on Common Repairs
The reinspection report usually goes item by item, marking each repair as completed, partially completed, not completed, or completed with new concerns. The table below shows what that typically involves for common repair requests.
| Repair item | What the inspector typically checks | Documents worth requesting |
|---|---|---|
| Roof leak or damaged shingles | Visible repair area from the ground or roof where safe, attic underside for staining and moisture, flashing at the repaired area | Roofer’s invoice with scope, any workmanship warranty |
| Electrical defects (open grounds, missing GFCI, double taps) | Tests outlets with a tester, trips GFCIs, removes the panel cover if safe to check corrected terminations | Licensed electrician’s invoice; permit if the work required one |
| Plumbing leaks | Runs water, checks under sinks and at the repaired fitting, uses a moisture meter on nearby surfaces | Plumber’s invoice |
| Furnace or water heater safety issues | Venting, flue connections, clearances, operation; does not perform a combustion analysis unless offered | HVAC service report, including any carbon monoxide or combustion readings |
| Radon mitigation | System installed, fan running, manometer reading, labeling | Post-mitigation radon test results; installer’s documentation |
| Sewer line repair | Visible cleanout and access; may re-scope if hired to | Sewer contractor invoice, camera video if available, permit for excavation |
| Grading and gutters | Slope near the foundation, downspout extensions, gutter attachment | Landscaper or gutter installer invoice |
| Structural repairs | Visible work only | Structural engineer’s letter and stamped repair design; permit and final inspection |
Paperwork to Ask For Before the Visit
Documentation is often more revealing than the visit itself, because it shows who did the work and exactly what they did. Ask the seller, through your agent, for the following at least a day or two before the reinspection:
- Itemized invoices or receipts from each contractor, showing the address, the date, and a description of the work that matches the repair list.
- Contractor license information for trades that require it, such as electrical and plumbing. In Colorado, electricians and plumbers are licensed by the state, and many cities and counties also require contractor registration.
- Permits and final inspection sign-offs for work that requires them, such as electrical panel changes, water heater or furnace replacement, structural repairs, and sewer line excavation. Ask the city or county building department to confirm status if anything is unclear.
- Warranties, especially for roofing, mechanical equipment and foundation work, with confirmation of whether they transfer to a new owner.
- Test results for environmental items, such as a post-mitigation radon test.
Be cautious about repairs listed as “done by owner” for anything electrical, gas-related, structural or roofing. Contracts often require licensed professionals for those items. If the agreement does not say so, consider adding that language during negotiation.
Reading the reinspection report
Reinspection reports are usually brief: a list of the agreed items with a status for each and a photo of the completed work. Read every line rather than skimming the summary. “Appears complete” means the work looked finished from what was visible on the day, not that it is guaranteed. “Recommend further evaluation” means the inspector saw something outside their scope or could not confirm the repair, and the next step is a qualified contractor. Send the report to your agent right away so any remaining issues can be raised with the seller while there is still time before closing.
What to Do If Repairs Are Incomplete or Poorly Done
Reinspections commonly find at least one item that is not quite right: a GFCI installed at the wrong outlet, a leak repaired at one fitting but not another, or caulk smeared over a flashing problem. Options generally include:
- Ask the seller to finish the work before closing, then schedule a second reinspection for the remaining items.
- Negotiate a credit or price reduction instead, based on a contractor’s estimate for completing the work. Our guide to asking for a price reduction after a home inspection covers how buyers usually support that request.
- Hold funds in escrow for the unfinished repair, if your lender and title company allow it.
- Extend closing by written amendment to give the seller time.
- Walk away if the contract and your contingency deadlines still allow it and the problem is serious. Our guide on when to walk away after a home inspection discusses the factors buyers usually weigh.
Each of these depends on your contract’s terms and deadlines. Talk to your agent, and to a real estate attorney for higher-stakes disputes, before closing on a home with unresolved repairs. Once you sign, leverage drops sharply.
Common reasons repairs fail a reinspection
Some patterns come up again and again:
- Wrong location. The repair was made, but not at the spot the report described, such as a GFCI added in the garage when the report called out the bathroom.
- Symptom treated, cause ignored. A ceiling stain was painted over, but the roof flashing above it was never touched.
- Partial completion. Three of five missing downspout extensions were added, or one of two double-tapped breakers was corrected.
- Handyman work on licensed-trade items. Gas, electrical and structural repairs done without the licensed trade or permit the agreement required.
- New defects created by the repair. A replaced water heater with an improperly sloped vent connector or a missing discharge pipe on the relief valve.
- No documentation. The work may look fine, but there is no invoice to show who did it or what they did.
New problems found during the reinspection
Occasionally the repair itself reveals something new, such as water damage found when a contractor opened a wall, or a furnace technician finding a cracked heat exchanger. The inspector will usually note it. Whether the buyer can negotiate over a new issue depends on where the contract stands, so raise it with your agent right away.
Reinspections Outside Home Purchases
The term also shows up in other settings. City or county building inspectors do re-inspections when a permitted project fails an inspection and the contractor fixes the problem, and some jurisdictions charge a re-inspection fee for that return trip. Insurers sometimes re-inspect after a claim or a required repair. Rental housing programs in some cities include re-inspections after code violations. The idea is the same in each case: verify that a specific list of corrections was made.
Tips for a Smooth Reinspection
- Write specific repair requests. “Repair roof” is hard to verify; “Licensed roofer to repair active leak above rear bedroom and replace damaged flashing at the chimney, with invoice” is easy.
- Use the original report as the checklist. Give the inspector the final repair addendum, not the full original request, so the visit covers what was actually agreed. Our guide to the home inspection report explains how findings are usually organized.
- Make sure utilities are on and the areas are accessible, including the attic hatch, crawl space and electrical panel.
- Attend if you can. A short walkthrough with the inspector helps you understand what was fixed and what to watch.
- Keep the records. Invoices, warranties and permits belong in your home file after closing.
When to Call a Pro
Book the reinspection with the inspector who wrote the original report whenever possible; they know the house and the original findings. For complex repairs such as foundation work, sewer replacement, or major electrical upgrades, consider having the relevant specialist review the completed work as well. If you need a reinspection after repairs, or a full inspection on a Front Range home you are buying, contact our team to schedule a visit.
References
- ASHI Standard of Practice for Home Inspection — American Society of Home Inspectors
- Closing on Your New Home — Consumer Financial Protection Bureau
- Closing Disclosure Explainer — Consumer Financial Protection Bureau
- Buying a House: Tools and Resources for Homebuyers — Consumer Financial Protection Bureau
Frequently asked questions
What is a re-inspection after a home inspection?
It is a short follow-up visit, usually by the original inspector, to check whether repairs the seller agreed to make were completed. It covers only the items on the repair agreement, not the whole house, and it is visual rather than a warranty of the work.
Who pays for a home reinspection?
The buyer usually pays, because the buyer hired the inspector. It is negotiable, and some repair agreements require the seller to cover the fee or to pay for a return visit if repairs are incomplete.
How much does a reinspection cost?
Typical fees run from roughly one hundred to a few hundred dollars. The number of repair items, travel distance, specialty checks such as a sewer re-scope, and repeat visits are the main cost drivers.
When should the reinspection happen?
After the seller confirms repairs are finished and provides receipts, and ideally several days or more before closing. That leaves time to fix incomplete work or negotiate a credit before the final walkthrough.
What if the seller did not finish the repairs?
Common options are asking the seller to complete them and scheduling another visit, negotiating a credit or price reduction, holding funds in escrow if the lender allows, extending closing, or walking away if the contract still permits it. Talk to your agent before closing.
Need a reinspection after seller repairs on a Front Range home? Get in touch with our team to book a visit before closing.