Cleaning White Mold: A DIY Methodology That Works
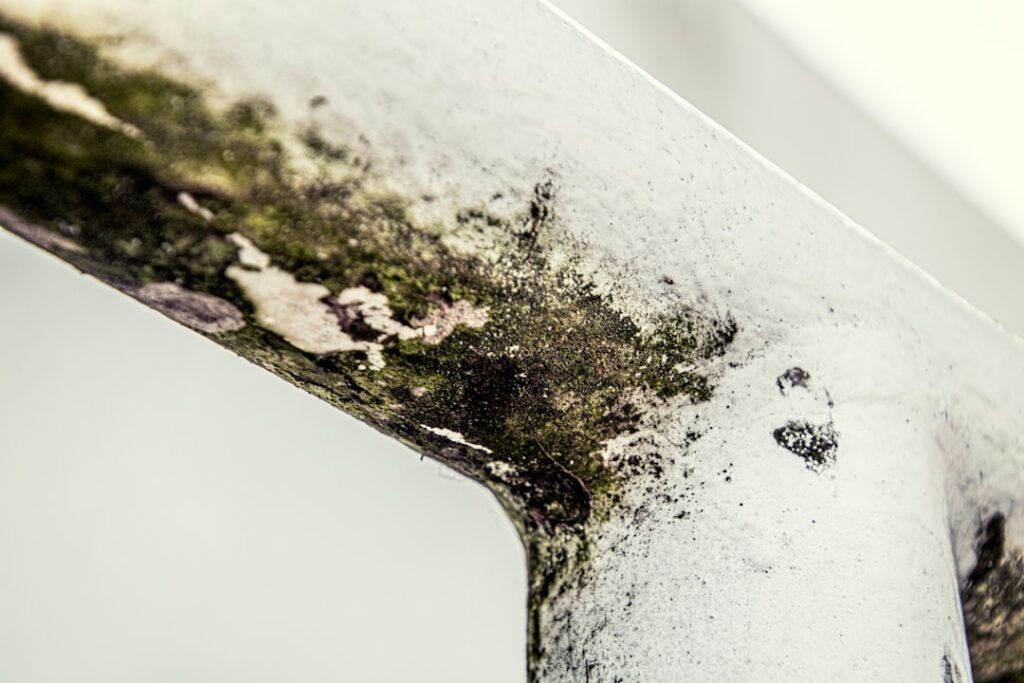
Cleaning white mold yourself is reasonable for small affected areas on non-porous surfaces or lightly affected wood, provided the moisture source can be addressed and no household members are in a vulnerable health category. The methodology matters — using the wrong cleaning agent or skipping containment can broadcast spores throughout the home and create a larger problem than the original colony. This guide walks through the cleaning sequence the EPA and CDC recommend, with specifics on antimicrobial choice, PPE, and the disposal rule for porous materials. It summarizes EPA and CDC guidance current as of 2026 — consult a certified mold inspector for testing decisions and your physician for symptom evaluation.
Part of our Mold Removal & Remediation guide — start there for the full picture →
Is this mold, asbestos, or water damage? Get a free instant screen
Upload a clear photo of the suspect area. You'll get an instant AI screening opinion and what to do next. This is screening guidance, not a professional determination.
Screening guidance only. AI can be wrong. Confirm asbestos, mold type, or lead with lab testing or a licensed professional before acting.
Confirm It Is Actually Mold First
Before any cleaning starts, confirm that the white deposit is actually mold and not efflorescence — the mineral salt deposits that look identical to the eye but are not biological. Spray water on the suspect area; efflorescence dissolves in seconds while white mold does not. The two require completely different responses, and using mold-cleaning protocols on efflorescence wastes time. Efflorescence is treated as a moisture-migration symptom: clean off with a wire brush, address the foundation or masonry moisture source, and seal the surface if appropriate.
If the water test confirms mold, proceed with the cleaning methodology below. The companion guide on white mold removal covers the species identification and where white mold most commonly appears.
The DIY Threshold
The EPA’s general guidance places the DIY threshold at 10 square feet of affected area on non-porous or lightly affected surfaces, with a few additional conditions. The moisture source must be identifiable and addressable. The occupants must not include infants, elderly residents, immunocompromised individuals, or people with diagnosed asthma. The cleaner must have access to proper PPE and be physically capable of the work. The substrate must be cleanable — porous materials over two square feet of significant white mold contamination should be discarded rather than cleaned.
If those conditions hold, DIY cleaning is reasonable. If any of them fail, the right response is a professional remediator. The 10-square-foot threshold is the most widely cited single criterion and is consistent across EPA, CDC, and IICRC guidance.
The PPE Setup
Personal protective equipment matters for white mold cleanup because the cleaning process itself disturbs the colony and releases spores. Required equipment includes an N95 respirator (P100 for larger jobs or for cleaners with respiratory sensitivities), nitrile or rubber gloves, sealed safety goggles (not safety glasses — sealed protection prevents spores from reaching the eyes), and ideally a disposable Tyvek coverall or old clothing that will be laundered immediately after the work. Long sleeves and long pants are minimum even on small jobs.
Tape gloves to sleeves with painter’s tape to prevent skin exposure at the wrist. Tape the bottom of pant legs to socks. The goal is to prevent spores from finding gaps in the protective barrier. After cleaning, remove PPE in the work area, bag disposable items, and shower immediately. Clothing that is not disposable goes directly into a washer for a hot-water cycle with detergent.
Containment Setup
For affected areas over a few square feet, set basic containment before disturbing the colony. Plastic sheeting (6 mil minimum) covers the doorway from floor to ceiling, taped with painter’s tape on all four sides. Cut a vertical slit in the sheeting for entry and exit, secured with zipper tape if available. A box fan in a nearby window blowing outward creates negative pressure inside the work area, drawing air out rather than letting it spread into the rest of the home.
For small patches (a few square feet at most) in well-ventilated rooms, a less formal setup may be acceptable — closing the door, opening a window, and running an exhaust fan. The judgment call is whether the cleaning method will significantly disturb the colony. HEPA vacuuming followed by gentle spray-and-wipe usually does not release substantial spores. Aggressive scrubbing of a large area does.
HEPA Vacuum First, Then Antimicrobial
The order of operations matters. HEPA vacuum the affected area first to remove loose spores before introducing moisture. A standard shop vacuum without HEPA filtration broadcasts spores back into the room through its exhaust and should not be used for mold cleanup. HEPA-equipped shop vacuums (around $150 to $400) and rented HEPA vacuums from tool rental stores both work. Vacuum slowly, holding the nozzle near the surface, moving in overlapping passes.
After HEPA vacuuming, apply the antimicrobial cleaning solution. The most common effective options for residential white mold include hydrogen peroxide 3% (the standard concentration sold at pharmacies), white vinegar applied undiluted, a borax solution (one cup borax per gallon of water), or an EPA-registered antimicrobial cleaner. Each has trade-offs — hydrogen peroxide leaves no residue and works well on most non-porous surfaces, vinegar penetrates slightly better into porous surfaces but leaves a smell, borax is highly effective on wood but requires rinsing afterward, EPA-registered antimicrobials follow specific dwell-time and application instructions on the label.
Bleach is generally not recommended for porous mold cleanup. The CDC and EPA both note that bleach’s active ingredient (sodium hypochlorite) does not penetrate porous materials effectively and that bleach is mostly water — adding moisture that can support regrowth. On non-porous surfaces (tile, glass, sealed metal) bleach can be effective for surface staining, but it is not the right tool for porous-substrate mold.
The Cleaning Sequence
The standard sequence for white mold cleanup runs as follows. PPE on. Containment in place. HEPA vacuum the colony and adjacent surfaces. Apply antimicrobial solution generously, ensuring full surface contact. Allow ten minutes of dwell time without scrubbing — the chemical needs contact time to work. Scrub gently with a soft-bristle brush or a microfiber cloth, applying enough pressure to disrupt the colony without damaging the substrate. Wipe with disposable cloths or paper towels. Bag the used cloths immediately. Apply the antimicrobial a second time, allow drying without wiping. HEPA vacuum the area once more after drying to capture any remaining spores released during scrubbing.
The total time for a small white-mold cleanup job (a few square feet) is typically 30 to 60 minutes of active work, with the dwell time being mostly waiting.
The Two-Square-Foot Porous Rule
For porous materials with white mold contamination over approximately two square feet, the EPA’s recommendation is to discard rather than clean. Cardboard boxes, paper goods, books, particleboard furniture, paper-faced insulation, fabric upholstery, and carpet pad all fall in this category. The colony has typically penetrated the material in ways surface treatment cannot reach, and the labor cost of attempting cleanup usually exceeds the replacement value.
Smaller porous patches (under two square feet) can sometimes be cleaned with hydrogen peroxide application, but expect that the surface will remain stained even after the biological material is removed. Disposal is the cleaner outcome for most porous items, and the cost of replacing affected cardboard storage or books is usually low.
After Cleaning: Drying and Monitoring
The post-cleaning phase determines whether the work holds. Dry the cleaned area completely. Run fans, open windows, or use a dehumidifier as needed to bring substrate moisture to safe levels. Wood should read below 16% moisture content; drywall below 1%. Confirm with a moisture meter rather than guessing.
Monitor the area visually for the next four to six weeks. White mold regrowth typically appears within weeks if the moisture source has not been corrected or if the cleaning did not reach the entire colony. Recurring growth in the same spot is the clearest signal that the moisture source needs more attention. The mold inspection hub covers how to escalate when DIY cleanup repeatedly fails to hold.
Antimicrobial Choice in More Detail
Because antimicrobial choice is the single most-asked question among homeowners doing their own mold cleanup, it deserves a longer look. The trade-offs between the common options break down as follows.
Hydrogen peroxide 3% is the most widely recommended household antimicrobial for surface mold. It is inexpensive (around $1 per bottle at any pharmacy), leaves no residue, breaks down into water and oxygen, and works on a broad range of fungal species. It does have a short active life once exposed to air, so it should be applied from a fresh bottle and used within a few months of purchase. It can lightly bleach some fabrics and surfaces, so spot-test on an inconspicuous area first.
White vinegar at undiluted strength has been used as a household mold cleaner for generations. It is effective on a wide range of surfaces, very inexpensive, and food-safe. Downsides include a strong smell that lingers for hours, slightly less effectiveness than hydrogen peroxide on dense colonies, and the acidic pH may dull some natural stone finishes.
Borax solution at one cup borax per gallon of warm water works well on wood specifically because borax penetrates the wood grain and provides residual mold resistance after the cleanup. It does require rinsing afterward and leaves a white residue if not rinsed thoroughly. Borax is widely available in laundry sections of grocery stores at $5 to $8 per box.
EPA-registered antimicrobials with specific mold claims (sold under various brand names at hardware stores) follow specific dwell-time and application protocols on their labels. They are typically the most expensive option but offer documented performance data and clear instructions. Follow the label precisely — these products are regulated and the label directions reflect the conditions under which they were tested.
Common Mistakes Worth Avoiding
Several patterns reduce the effectiveness of DIY white mold cleaning. Skipping HEPA vacuuming before applying antimicrobial means the cleaning solution mostly hits airborne dust and surface dirt rather than the colony itself. Using a non-HEPA shop vacuum broadcasts spores into the room through the exhaust. Scrubbing too aggressively without dwell time releases spores before the antimicrobial has acted on them. Mixing bleach and ammonia (or bleach and vinegar) creates toxic gas. Cleaning without PPE exposes the cleaner to spore inhalation. Painting over moldy surfaces hides the issue temporarily but does not address it. Each of these is a documented failure mode that EPA and CDC guidance specifically warns against.
One more habit worth noting: do not start cleaning if you are not feeling well. Mold cleanup is physical work that involves bending, kneeling, lifting, and sustained respirator use. Doing the job while sick increases the chance of mistakes, exposes a weakened immune system to spore loads, and produces inferior results. Reschedule for a day when you are physically up to the work.
References
- A Brief Guide to Mold, Moisture, and Your Home — U.S. Environmental Protection Agency
- Basic Facts About Mold and Dampness — Centers for Disease Control and Prevention
- Mold Remediation in Schools and Commercial Buildings — U.S. Environmental Protection Agency
- Mold Inspection Guidance — International Association of Certified Home Inspectors
Frequently asked questions
What is the best cleaner for white mold?
For non-porous surfaces, hydrogen peroxide 3% is effective and leaves no residue. For wood, a borax solution penetrates well. White vinegar undiluted works on most surfaces but leaves a smell. EPA-registered antimicrobials are reliable when applied per label directions. Bleach is generally not recommended for porous-substrate mold.
Can I use bleach to clean white mold?
Bleach is mostly water and does not penetrate porous materials effectively. On non-porous surfaces it can address surface staining but is not the recommended choice for biological cleanup. The CDC and EPA both note that bleach is the wrong tool for most household mold scenarios.
Do I need a HEPA vacuum?
For best results, yes. Standard shop vacuums broadcast spores through their exhaust. HEPA-filtered vacuums capture the fine particles. HEPA shop vacuums can be purchased for $150 to $400 or rented from tool rental stores for $30 to $50 per day.
What if the white mold comes back after cleaning?
Regrowth within weeks indicates the moisture source has not been resolved or the colony was deeper than the cleanup reached. Re-cleaning without addressing the underlying issue produces the same result. Escalate to a professional inspector to identify the moisture source.
How long does white mold cleaning take?
A small affected area (a few square feet) takes 30 to 60 minutes of active work, with most of that being dwell time for the antimicrobial. Larger areas with containment setup can run two to four hours. Verification monitoring continues for four to six weeks afterward.
If DIY cleaning has not held and white mold keeps returning in your Front Range home, reach out through our contact page to be connected with a qualified local inspector who can find the underlying moisture issue.