How Do I Clean Mold: A Homeowner DIY Guide
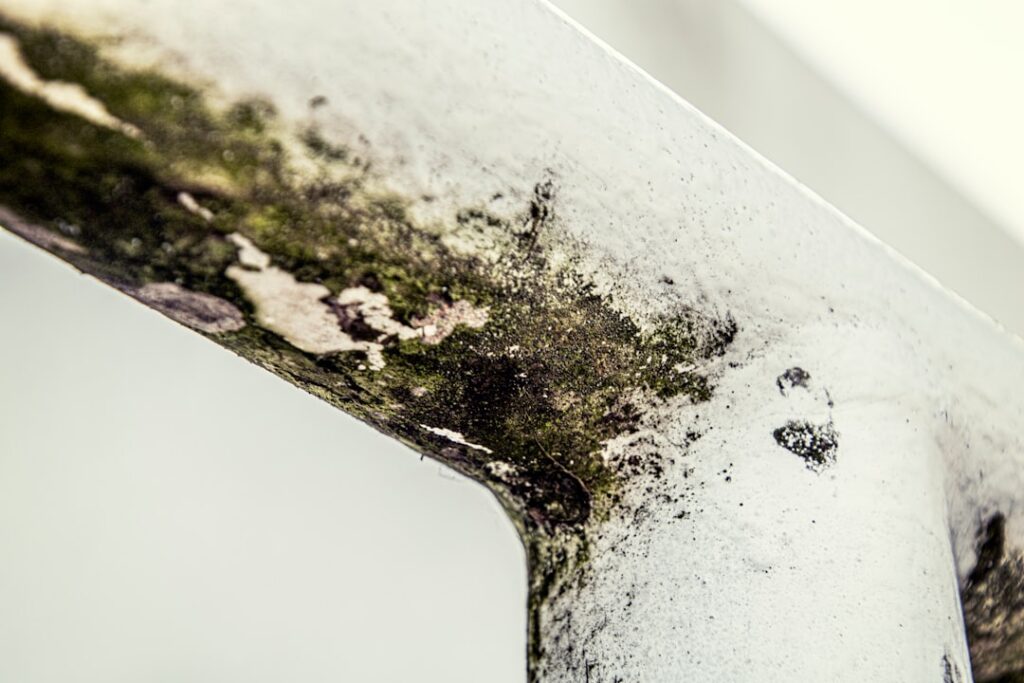
The question most Front Range homeowners ask after spotting a fuzzy patch on a bathroom ceiling or a damp basement wall is simple: how do I clean mold without making things worse? The honest answer depends on three variables — the size of the patch, the surface it sits on, and whether the moisture source has actually been fixed. This guide walks through a DIY-friendly protocol for small finds, names the products that actually work, flags the conditions that push the job beyond a homeowner’s reach, and explains how to verify the cleanup held. This guide summarizes EPA and CDC guidance current as of 2026 — consult a certified mold inspector for testing decisions and your physician for symptom evaluation.
Part of our Mold Removal & Remediation guide — start there for the full picture →
Is this mold, asbestos, or water damage? Get a free instant screen
Upload a clear photo of the suspect area. You'll get an instant AI screening opinion and what to do next. This is screening guidance, not a professional determination.
Screening guidance only. AI can be wrong. Confirm asbestos, mold type, or lead with lab testing or a licensed professional before acting.
How Do I Clean Mold Myself? The EPA Ten-Square-Foot Rule
The Environmental Protection Agency draws a clear DIY line at roughly ten square feet of contiguous growth. Anything smaller than a standard bath towel laid flat, on a non-porous surface, with a known and corrected moisture source, falls inside the homeowner-safe zone. Above that threshold, or anywhere porous materials like drywall and carpet are involved, the agency recommends professional remediation.
The reason for the cutoff is not arbitrary. Bigger jobs generate more airborne spores during cleaning, demand containment with plastic sheeting and negative air pressure, and often hide deeper damage behind the visible patch. A homeowner with a spray bottle and a sponge cannot replicate those controls. So the first honest question to ask before reaching for products is whether the patch is genuinely small and whether the surface is genuinely non-porous.
One more pre-check matters. If the visible patch sits on the back side of a wall — meaning the surface staining bleeds through from behind drywall, behind a vanity panel, or under a window sill — the colony you see is the smallest fraction of what is actually there. Surface cleaning a back-side finding leaves the bulk of the growth feeding on the cavity side. That scenario is automatically a professional job regardless of visible square footage.
The Five-Step Homeowner Protocol
For a qualifying small find, the workflow is repeatable across bathrooms, basements, kitchens, and laundry rooms. Suit up with an N95 respirator, nitrile gloves, and eye protection that seals around the temples. Open a window for cross-ventilation and close the door to adjacent rooms to keep stirred spores contained. Mist the patch lightly with water before scrubbing — wet spores travel less than dry ones. Scrub with a stiff brush and a chosen cleaning agent. Wipe the area with a damp microfiber cloth and let it dry fully before reassessing under bright light.
Step One: Confirm the Moisture Source Is Fixed
Cleaning mold without correcting the leak, condensation, or humidity issue that fed it is a wasted afternoon. The patch returns within weeks or months. Check the area with a moisture meter; aim for wood readings under fifteen percent and drywall under one percent on a pinless scale. Common Front Range moisture drivers include unsealed basement penetrations, bathroom fans vented into attics instead of outside, condensation behind vinyl wallpaper, and ice-dam meltwater entering through soffit details. Each one demands a different fix, but every one must be addressed before cleaning begins.
Step Two: Pick a Cleaning Agent That Matches the Surface
On hard non-porous surfaces — tile, glass, sealed metal, glazed ceramic — an EPA-registered antimicrobial such as Concrobium, Sporicidin, or Moldstat delivers the best result. Three percent hydrogen peroxide from the pharmacy works as a homeowner-friendly second choice. Bleach diluted at one cup per gallon of water kills surface organisms but does not penetrate porous substrates, so its effectiveness drops sharply on drywall, grout, or wood. Distilled white vinegar handles light shower-tile mildew and nothing deeper. Tea-tree oil and baking soda sit at the bottom of the effectiveness curve and should be treated as cosmetic.
Step Three: Scrub, Then Wipe, Then Inspect
Mechanical removal matters as much as the chemistry. Allergenic fragments remain even after a fungus is dead, so the scrub-and-wipe step physically extracts spores from the surface. Inspect under good light afterward. If staining remains on a porous surface, the colony is likely subsurface and the material needs to be cut out rather than cleaned in place. Drywall with hyphae visible on the back paper is a removal job, not a cleaning job.
Step Four: Bag the Waste and Vacuum with HEPA
Used cloths, brushes, and scrubbing pads go into a sealed plastic bag for outdoor trash disposal, not the indoor wastebasket. A HEPA-filtered vacuum captures the settled spores around the work zone — a standard shop vacuum without true HEPA filtration recirculates spores back into the room and makes the air quality measurably worse. Wipe nearby horizontal surfaces with a damp microfiber cloth to capture any spores that traveled during scrubbing.
Step Five: Let It Dry, Then Reassess
Walk away for forty-eight hours. The substrate needs to dry completely before any honest assessment can happen. Returning the next morning to inspect a still-damp wall produces false reassurance. After two days, look at the spot under direct light and recheck moisture readings. A clean dry surface with no return of staining means the job held. If staining returns or a faint musty smell persists, the moisture source was either misidentified or only partially addressed, and another diagnostic pass is needed before any additional cleaning. Treat that second-look moment as a planned step rather than a sign of failure — even seasoned remediation contractors verify their own work with a delayed reinspection before declaring a job closed.
What Products Belong Under the Kitchen Sink?
A practical Front Range homeowner kit for small mold jobs costs under fifty dollars. An EPA-registered spray antimicrobial covers most non-porous work. A bottle of three percent hydrogen peroxide handles tile grout. A box of N95 respirators rated NIOSH covers respiratory protection — surgical masks do not. A dozen microfiber cloths and a stiff nylon brush round out the kit. A pinless moisture meter, available for around forty dollars, lets a homeowner confirm the substrate has actually dried after the cleaning. Skip the fogger devices marketed on social media; the Centers for Disease Control and Prevention does not endorse fogging as a primary remediation method.
One product to demote rather than promote: undiluted chlorine bleach. The Occupational Safety and Health Administration treats it as a respiratory irritant, the EPA notes its water content can actually feed mold in porous substrates, and the chlorine fumes irritate occupants who have asthma. For homeowners learning how to clean mold for the first time, hydrogen peroxide is a gentler entry point with comparable efficacy on non-porous surfaces and far less respiratory risk in a small bathroom with the door closed.
When the DIY Protocol Becomes Unsafe
Several conditions push even a small patch out of the homeowner-DIY zone. Recurrence after a prior cleaning suggests a hidden moisture source the eye cannot see. Visible growth on or behind HVAC components risks distributing spores through the entire house if disturbed. Anyone in the household with asthma, an immune-compromising condition, or an infant under one year should default to professional remediation regardless of patch size, per CDC guidance. Sewage or category-three water as the moisture source falls under IICRC S500 restoration territory and requires licensed help.
The other escalation trigger is the smell test. A musty odor without visible growth means the colony is hidden behind a surface — wallboard, subfloor, the back of a vanity. Cleaning what is visible misses what is feeding it. A certified mold inspector can use moisture mapping, infrared imaging, and air sampling to find the source. Homeowners on the Front Range mold inspection and testing hub can review what an inspection covers before booking. A typical inspection finds growth in two to three locations a homeowner had not identified visually.
Front Range Conditions That Matter
Colorado’s semi-arid climate creates a misleading sense that mold cannot establish here. The exterior humidity stays low for much of the year, but interior microclimates tell a different story. Basement humidity behind a vapor barrier, bathrooms without exhaust fans, kitchens venting into attics rather than outside, and ice-dam meltwater intruding through soffit details all generate the localized moisture that mold needs. Denver and Boulder homes built before modern energy codes are particularly prone to bathroom and basement growth despite the dry outside air.
Seasonal patterns matter too. Spring snowmelt drives basement seepage along the Front Range foothills. Late-summer afternoon thunderstorms push wind-driven rain past aging window flashing. Winter humidifier use combined with poorly insulated exterior walls produces condensation that homeowners often mistake for paint failure. Each of these triggers the same cleaning question — but the underlying fix differs in every case, and the cleaning is wasted if the underlying driver remains.
Common Mistakes Homeowners Make on the First Attempt
The recurring failure pattern across DIY mold jobs is the same handful of mistakes. Scrubbing dry, which aerosolizes spores into the room. Using a household sponge that absorbs and redistributes the colony into the next surface it touches. Reaching for bleach on drywall and assuming the missing visible staining means the job is done. Skipping the respirator because the smell is not strong. Closing the work-zone door but leaving the HVAC return open, so the air-handler distributes disturbed spores through every supply register in the house.
A subtler mistake is treating the first cleaning as a one-and-done. Even with perfect technique, a small patch on a previously damp substrate sometimes needs a second pass once the substrate fully dries and any residual subsurface growth reactivates. Plan to recheck the spot at two-week and two-month intervals. If the staining reappears at either checkpoint, the moisture source is still feeding the colony and a deeper diagnostic is warranted before another round of surface cleaning.
How to Verify the Job Worked
A finished mold cleanup has three signs. The surface looks visually clean under bright direct light. The moisture meter reading on the substrate returns to dry baseline within forty-eight hours. The musty odor — if there was one — disappears completely and stays gone for at least two weeks. Any of those three failing means either the cleaning was incomplete or the moisture source was not corrected. Recheck at one month and again at three months, since some hidden moisture issues only resurface seasonally.
For larger jobs that homeowners hand off to remediation contractors, third-party post-remediation verification testing is the gold standard. An independent inspector takes air samples and direct surface swabs after the contractor finishes but before containment comes down. Failed clearance means the contractor re-cleans on their dime. Homeowners reviewing options can also read about the full mold removal workflow for context on what a larger remediation looks like in practice.
References
- Mold Cleanup in Your Home — U.S. Environmental Protection Agency
- Cleanup and Remediation — Centers for Disease Control and Prevention
- Mold Standards and Worker Protection — Occupational Safety and Health Administration
- Mold Health Topic — National Institute of Environmental Health Sciences
Frequently asked questions
Can I clean mold with just soap and water?
Soap and water remove dirt but do not kill mold organisms or extract spores from porous surfaces. The EPA recommends a registered antimicrobial or three percent hydrogen peroxide for non-porous small jobs. Mechanical scrubbing matters as much as the chemistry.
Is bleach the best product for cleaning mold?
Bleach is not the EPA's preferred recommendation. It kills surface organisms on non-porous materials but does not penetrate porous substrates like drywall or wood. Hydrogen peroxide or an EPA-registered antimicrobial usually delivers better results with less respiratory irritation.
How do I know if the mold patch is too big to clean myself?
The EPA cutoff is roughly ten square feet — about the area of a standard bath towel laid flat. Above that size, anywhere porous materials are saturated, or anywhere HVAC components are involved, professional remediation is the safer call.
Does cleaning mold actually remove the health risk?
Cleaning removes the visible colony and most settled spores, which lowers exposure for sensitized occupants. It does not eliminate all spores from a building, since spores exist naturally in outdoor air. Fixing the moisture source matters more for long-term health protection than any single cleaning.
If you are on the Front Range and the patch keeps coming back or you suspect hidden growth behind a wall, connect with a vetted local mold inspector through our contact page for a moisture mapping and air-sampling assessment.