What Is a Radon Mitigation System: Complete 2026 Q&A Guide
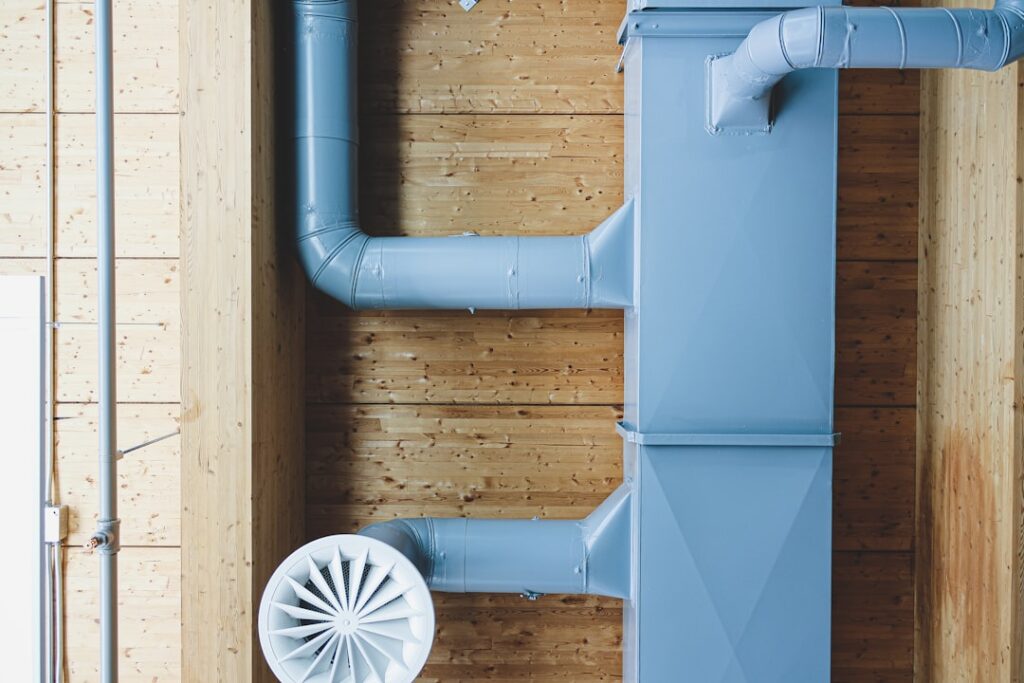
The question what is a radon mitigation system has a precise engineering answer: a sub-slab depressurization (SSD) setup that creates a low-pressure zone beneath the home’s foundation slab, captures radon-laden soil gas before it enters the building, and exhausts it above the roof line where it dilutes harmlessly into outdoor air. A standard system has six core components, follows the EPA ASD-1995 design standard, costs $1,000 to $2,500 installed in the Front Range market, and reduces measured indoor radon by 90 to 99% within 24 to 48 hours of activation. This guide is the complete answer — components, methods, costs, contractor selection, and verification. This guide summarizes EPA and CDPHE guidance current as of 2026 — consult a certified Mitigation Specialist for decisions specific to your property.
Part of our Radon Mitigation Systems guide — start there for the full picture →
What is a radon mitigation system?
A radon mitigation system is an engineered ventilation system designed to prevent radon-laden soil gas from entering the home, or to dilute it after entry. The dominant design in 2026 — recommended by EPA and used in 90%+ of residential installations — is sub-slab depressurization (SSD). The system creates suction beneath the foundation slab using an inline fan, drawing soil gas from a gravel layer or open area below the slab and venting it through PVC piping that runs from the suction point up through the structure and exhausts above the roof line.
The physics is straightforward. Radon enters homes by pressure-driven flow — soil gas migrates from higher-pressure zones beneath the foundation into lower-pressure zones inside the home (stack effect from warm indoor air rising, wind effects, mechanical ventilation imbalances). The mitigation system reverses that pressure relationship. By creating a low-pressure zone beneath the slab, the system pulls soil gas down and out before it can enter the building. Inside the home, the foundation acts as a barrier rather than a pathway.
The six core components of a sub-slab depressurization system
1. Suction point
The suction point is where the system connects to the sub-slab area. The installer cores a 4-inch hole through the slab — usually in a basement utility closet, mechanical room, or other low-visibility location — and excavates a small “suction pit” beneath the slab to create a void that draws gas from a wide area. The pit is typically 18 inches in diameter and 12 inches deep, removing roughly two cubic feet of subsoil.
For homes with crawlspaces rather than basement slabs, the suction approach shifts. Sub-membrane depressurization (SMD) uses a sealed polyethylene membrane over the crawlspace floor, with the suction point drawing from beneath the membrane. The effect is similar — creating a low-pressure zone that captures soil gas before it enters the home’s living spaces.
2. Sub-slab gravel layer
A continuous gravel layer beneath the slab provides the high-permeability pathway that lets the suction point draw gas from a wide area. Most homes built after the mid-1990s have a 4 to 6 inch gravel layer specified by building code, which makes mitigation straightforward. Older homes may have less permeable subsoil; in those cases, the installer may need multiple suction points or design adjustments to achieve adequate coverage.
3. Perforated PVC suction piping
The suction point connects to a 3 or 4-inch PVC pipe that rises vertically through the building. The pipe passes from the basement to the upper floor utility space (often inside a closet or chase), then through the attic and roof to an outdoor termination point above the roof line. PVC schedule 40 is the standard pipe material because of its smooth interior (low flow resistance) and compatibility with the radon-bearing gases.
4. Inline fan
The inline fan provides the suction force. Standard residential mitigation fans run 50 to 150 watts, draw a few cubic feet per minute of soil gas, and operate continuously. The fan is installed outside the conditioned space — typically in the attic or on the exterior of the home — so that any leakage from the fan housing exits to outdoor air rather than into the home. Fan service life is 5 to 10 years; replacement is a simple labor task.
5. Manometer (U-tube pressure gauge)
The manometer is a simple U-shaped tube containing colored liquid, installed on the visible portion of the PVC pipe in the basement. When the fan is operating correctly, the liquid level in one side of the U is higher than the other side — typically by 0.5 to 1.5 inches — indicating active suction. If the levels equalize, the fan has failed or the system has lost suction. The manometer gives the homeowner a 5-second visual confirmation that the system is working.
6. Roof-line exhaust termination
The PVC pipe terminates above the roof line, where the radon-laden exhaust dilutes harmlessly into outdoor air. EPA’s design standard specifies the termination must be at least 10 feet above ground level, at least 12 inches above the roof surface at the point of penetration, and at least 10 feet horizontally from any operable window, door, or air intake opening. These setbacks prevent radon-laden exhaust from re-entering the home through windows or HVAC intakes.
What standard does the EPA recommend?
EPA’s National Radon Action Plan and the AARST/ANSI radon mitigation standards (ASD-1995 and successor revisions) define design and installation requirements for residential mitigation. The standards cover suction-point design, pipe sizing, fan selection, termination geometry, sealing of foundation penetrations, manometer installation, post-installation testing, and homeowner documentation. Certified Mitigation Specialists are trained on these standards and design systems to comply with them.
State-level requirements layer on top of the national standards. Some states require Mitigation Specialist licensing (Florida, Illinois, New Jersey, and others). Colorado does not currently license radon mitigators at the state level, so Front Range mitigation contractors typically hold NRPP or NRSB Mitigation Specialist certification as their primary credential.
How much does a radon mitigation system cost in 2026?
Front Range mitigation pricing for a standard single-family home with basement slab construction runs $1,000 to $2,500 for a complete installation. The lower end ($1,000 to $1,500) typically reflects a straightforward installation with a single suction point, easy interior pipe routing, and accessible roof penetration. The higher end ($1,800 to $2,500) reflects more complex installations — multiple suction points, finished basements requiring careful pipe routing, or roof-line constraints that complicate exhaust termination.
Larger or more complex homes can run higher. Homes with multiple foundation types (basement plus crawlspace, or split-level construction with multiple slab levels) often need two or three suction points and run $2,500 to $4,500 total. Homes with extensive sub-slab utility runs that prevent clean suction-pit installation can require creative design and pricing reflects that.
Operating cost is modest. The continuous fan draws 50 to 150 watts, costing $50 to $150 per year in electricity at Front Range rates. Fan replacement every 5 to 10 years runs $200 to $400 including labor. Total lifetime ownership cost over 15 years is typically $1,500 to $3,500.
How fast does mitigation work?
Properly designed and installed mitigation systems reduce measured indoor radon by 90 to 99% within 24 to 48 hours of activation. A home starting at 12 pCi/L typically reads below 2 pCi/L after the system runs for two days. Post-installation testing — performed by an independent certified Measurement Specialist, not the mitigation contractor — confirms the reduction.
The fast response time reflects the system’s mechanism. The suction immediately reverses the pressure relationship between sub-slab and indoor air, and any radon already in indoor air ventilates out over the home’s normal air-exchange period (typically half-a-day to two days for most homes). Long-term performance depends on the fan running continuously, which is why the manometer pressure indicator is a critical homeowner-visible component.
How do you choose a Mitigation Specialist?
Three credentials matter. First, NRPP or NRSB Mitigation Specialist certification (separate from the Measurement Specialist credential). The certification requires initial training, a proctored exam, and continuing education to maintain. Verify the credential through the NRPP or NRSB lookup tools.
Second, business insurance specific to radon mitigation. General contractor liability may exclude environmental work; specialized policies cover the foundation penetration and ventilation work involved in mitigation. Ask for the certificate of insurance before signing a contract.
Third, a written design that matches the home’s specific foundation and floor plan. Beware of “one-size-fits-all” pricing that does not include a site visit. A reputable Mitigation Specialist walks the property before quoting because the suction-point location, pipe routing, and exhaust termination all depend on the building.
The Colorado radon testing pillar guide covers the full measurement-to-mitigation workflow. The what does a radon mitigation system do guide covers the operating physics in more depth, and the radon home system overview covers configuration variants.
What does post-installation verification look like?
Within 24 to 48 hours after fan activation, the homeowner should arrange independent post-installation testing by a certified Measurement Specialist different from the mitigation contractor. The 48-hour CRM test under closed-house conditions confirms the system reduced radon below the EPA action level of 4 pCi/L — ideally below 2 pCi/L for a healthy margin. Cost is $125 to $300 for the test.
The post-installation test is the homeowner’s quality check on the contractor’s work. If the test reveals radon still above 4 pCi/L, the contractor is typically responsible for system adjustments under warranty. Most reputable Mitigation Specialists guarantee their system performance to below 4 pCi/L (some to below 2 pCi/L) and will modify the installation at no additional cost to meet the guarantee.
Ongoing verification happens through the manometer and periodic retesting. EPA recommends retesting every two years post-mitigation to confirm continued performance. A consumer continuous radon monitor in the home provides daily visibility into the system’s effectiveness.
What does long-term ownership and maintenance look like?
An installed radon mitigation system runs continuously for the life of the home. The visible maintenance burden is small. The homeowner should glance at the manometer monthly to confirm the fan is still creating suction (the U-tube liquid levels should be visibly different in the two arms). The exterior exhaust termination should be inspected after major weather events to ensure no debris has blocked the exit.
The fan is the primary wear item. Standard residential mitigation fans last 5 to 10 years before requiring replacement. Symptoms of fan failure include the manometer equalizing (loss of suction), unusual vibration or noise, or rising radon readings on a consumer continuous monitor. Replacement is a straightforward labor job — typically 1 to 2 hours by an experienced contractor with the fan parts costing $150 to $300 and labor adding $100 to $200.
The PVC piping and roof penetration require minimal maintenance. If the roof is replaced, the roofer should be alerted to the radon vent stack so they can re-flash the penetration properly. If the home is significantly renovated, the mitigation contractor should be consulted before any work that affects foundation, slab, or exhaust routing.
How does mitigation interact with HVAC and home weatherization?
Modern weatherization (additional insulation, air sealing, more efficient windows) tightens the home and reduces air exchange. In a non-mitigated pre-existing home, weatherization typically raises measured radon because indoor air does not ventilate out as fast. A home that measured 6 pCi/L before weatherization might measure 9 or 10 pCi/L afterward.
This dynamic is why post-renovation radon retesting is important. A home that passed a baseline test years ago may exceed the action level after weatherization. The mitigation system, if installed, continues to function regardless of weatherization — the sub-slab depressurization captures soil gas before it enters indoor air, so the indoor air-exchange rate matters less.
HVAC modifications can also affect mitigation system performance in subtle ways. Adding a powerful range hood, a clothes dryer vented to outdoors, or a high-CFM bathroom fan can create temporary negative pressure inside the home that competes with the mitigation system’s sub-slab suction. Properly designed mitigation systems handle these competing pressures, but installations near the design margin may see brief radon increases during high-exhaust events. Annual retesting confirms continued performance.
What if your home is not a good candidate for SSD?
A small subset of homes are not good candidates for sub-slab depressurization. Homes built on highly permeable bedrock with no sub-slab gravel layer may not develop adequate suction for SSD; alternative approaches like crawlspace ventilation or whole-house pressurization may work better. Homes with very high baseline radon (above 20 pCi/L) may need multi-point systems or supplementary mitigation. Homes with significant foundation cracks or unsealed slab penetrations may need substantial preparatory sealing before SSD will be effective.
A site-specific design consultation with a certified Mitigation Specialist is the practical assessment. The specialist evaluates the foundation, baseline radon level, and home characteristics, and designs an appropriate system. Front Range homes with conventional basement construction almost always work with standard SSD.
If you are in the Front Range and want a referral to a vetted NRPP-certified Mitigation Specialist for system design, installation, or post-installation verification, reach out through our contact page.
References
- EPA Consumer’s Guide to Radon Reduction — U.S. Environmental Protection Agency
- CDPHE Radon Mitigation Information — Colorado Department of Public Health and Environment
- CDC Protect Your Home From Radon — Centers for Disease Control and Prevention
- American Lung Association Radon Resource — Lung.org
Frequently asked questions
What is a radon mitigation system?
An engineered ventilation system designed to prevent radon-laden soil gas from entering the home. The standard design is sub-slab depressurization with a suction point under the foundation, PVC piping running up through the structure, an inline fan, a manometer pressure gauge, and exhaust termination above the roof line.
How much does a radon mitigation system cost in 2026?
Standard installation in the Front Range market runs $1,000 to $2,500 for a single-family home with basement construction. Complex installations with multiple suction points or finished basements can run $2,500 to $4,500. Annual operating cost is $50 to $150 in electricity.
How fast does a radon mitigation system work?
Properly designed and installed systems reduce measured indoor radon by 90 to 99% within 24 to 48 hours of fan activation. A home starting at 12 pCi/L typically reads below 2 pCi/L after two days of operation. Post-installation testing by an independent certified Measurement Specialist confirms performance.
What credentials should a radon mitigation contractor have?
NRPP or NRSB Mitigation Specialist certification is the primary credential. Verify through the certification body's lookup tool. The contractor should also carry business insurance specific to radon mitigation work and provide a written site-specific design before installation.
Front Range homeowners can connect with a vetted certified Mitigation Specialist for system design, installation, and post-installation verification through our directory.
Radon mitigation fans & parts
If a sub-slab depressurization system is the fix, the inline fan is the heart of it. Match the fan to your soil and pipe diameter — or have a certified installer size it.
| Product | Why | Buy |
|---|---|---|
 RadonAway RP145 Inline Fan RadonAway RP145 Inline Fan | Common 4-in. SSD workhorse fan. | Amazon — $152.00 |
 Fantech Rn2 Radon Fan Fantech Rn2 Radon Fan | Quiet operation; energy-efficient. | Amazon — $154.03 |
 Radon U-Tube Manometer Radon U-Tube Manometer | Confirms the system is pulling suction. | Amazon — $8.95 |