Stain-Blocking Primer: Water Stains, Smoke and Tannins
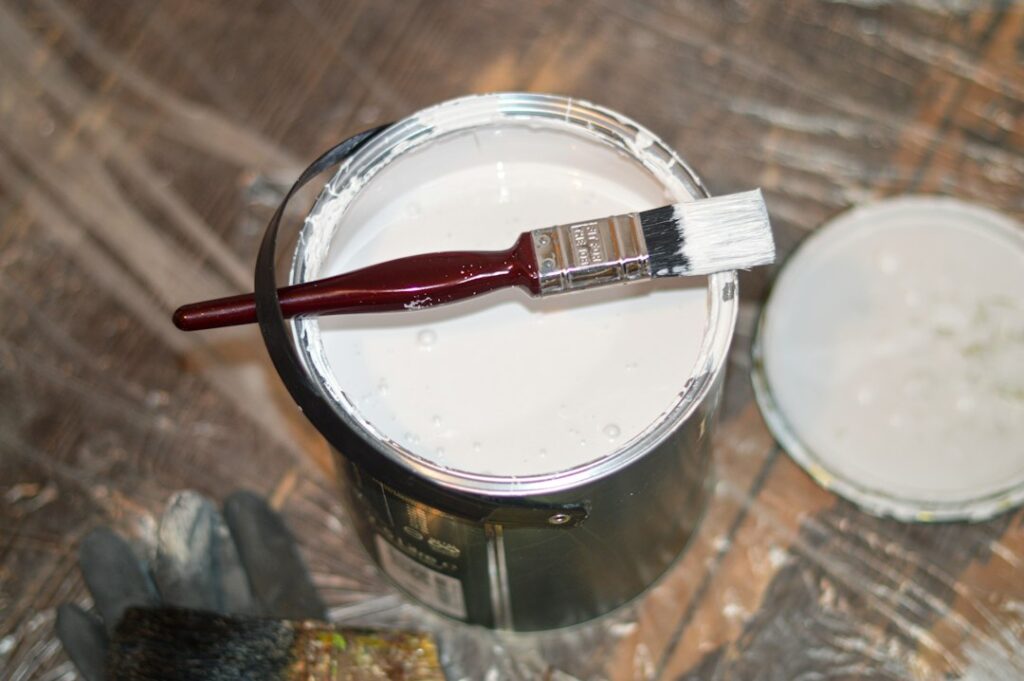
Some stains refuse to stay covered. A brown ring on a ceiling, yellow haze on walls in a former smoker’s home, knots that bleed through white trim, marker on a child’s bedroom wall: paint goes on, looks fine for a day, and then the stain reappears. That happens because many stains are water-soluble or contain oils and resins that migrate into fresh paint as it dries. A stain blocking primer is designed to lock those compounds in place so the topcoat stays clean. It is one of the most useful products in a painter’s kit, but it is also easy to misuse. Primer can cover the sign of a problem without fixing the cause, and a freshly painted ceiling in a home for sale can hide a leak that is still active. This guide explains what stain-blocking primers do, the different types and their tradeoffs, how to handle water stains, smoke, tannins and mold, VOC and safety considerations, what an inspector notices and what the work typically costs.
Part of our Structure & Exterior guide — start there for the full picture →
What a Stain-Blocking Primer Does
Ordinary primer improves adhesion and evens out porosity so the topcoat looks uniform. A stain blocker does that and also forms a barrier against substances that would otherwise bleed through. Stains fall into a few broad groups:
- Water-soluble stains. Water damage rings, some markers, coffee and many food stains. Water in latex paint can redissolve these and carry them to the surface.
- Oil- and resin-based stains. Smoke and nicotine residue, soot, crayon, grease and some inks. These can bleed through water-based coatings.
- Tannins. Natural compounds in woods such as cedar, redwood and knotty pine, which bleed as orange or brown discoloration, especially through water-based paints.
- Odors. Smoke, pet and fire odors trapped in drywall, plaster and wood. Some primers are marketed for sealing odors as well as stains.
Stain blockers work by forming a film that the stain cannot pass through, or by using solvents and resins that do not redissolve the stain in the first place. No single product handles every stain equally well, which is why painters keep more than one type on hand.
Oil, Shellac and Water-Based Primers
Oil-based (alkyd) primers
Oil-based stain blockers have long been the standard for water stains and many oily stains. They seal well, adhere to a wide range of surfaces and handle tannin bleed on wood. Drawbacks include a strong solvent odor, longer drying times, cleanup with mineral spirits and higher VOC content. Some areas restrict higher-VOC coatings, which has reduced availability of traditional formulations in some markets.
Shellac-based primers
Pigmented shellac primers are widely considered among the strongest general-purpose stain blockers. They dry very fast, often within an hour, seal knots and sap, block smoke and fire damage and are frequently recommended for sealing odors. They are alcohol-based, with a strong odor while wet and cleanup with denatured alcohol or ammonia solutions. They are generally intended for interior use or spot priming, and their film is less flexible than other types, so they may not suit large exterior areas.
Water-based stain blockers
Modern acrylic and hybrid stain blockers have improved substantially. They have low odor, clean up with water and dry quickly, making them attractive for occupied homes. They work well on many light stains, marker and some water damage, but heavy water stains, smoke residue and tannin bleed may require multiple coats or a solvent-based product. Some water-based products are formulated specifically for tannins and are suitable for exterior wood.
Product labels and data sheets list which stains each primer is designed for, dry and recoat times, and whether a second coat is recommended. Following those instructions closely matters more than brand loyalty.
Water Stains: Fix the Leak First
A brown ring on a ceiling is one of the most common reasons people buy a stain-blocking primer, and it is also the situation where priming too soon causes the most trouble. A water stain is evidence that water reached that spot. Before it is painted, someone should determine whether the source has been fixed and whether the materials behind the stain are dry and sound.
Common sources include roof leaks, failed flashing, ice dams, plumbing leaks from bathrooms above, condensation from HVAC equipment and ducts in attics, and leaking supply lines to refrigerators or fixtures. Our guide to ceiling water stains explains how to trace the source and what different patterns suggest.
A practical sequence:
- Find and repair the source. A stain that grows, darkens after rain or shower use, or feels damp is not ready to paint.
- Check the drywall or plaster. Sagging, soft, crumbling or delaminated material should be cut out and replaced rather than primed.
- Let it dry. A moisture meter helps confirm that materials are back to normal levels.
- Clean the surface. Remove dust and any loose material so the primer can bond.
- Prime the stain. Apply the blocker over and slightly beyond the stain; one or two coats as directed.
- Paint the whole surface. Ceiling paint ages and yellows, so touching up only the primed patch often leaves a visible spot.
Some ceiling paints are sold as combined stain-blocking ceiling coatings and may be adequate for light, old stains. Darker or recurring stains usually need a dedicated primer first.
Smoke, Soot and Odors
Cigarette smoke, fireplace soot and fire damage leave residue that bleeds through ordinary paint as yellow or brown discoloration and carries odor that lingers. Painting is usually the final step in smoke remediation, not the first.
- Clean surfaces thoroughly. Washing walls and ceilings with an appropriate cleaner removes much of the residue. Painting over sticky nicotine film can cause adhesion problems.
- Address other sources. Carpet, padding, HVAC ducts and filters, window coverings and cabinets often hold more odor than painted walls. Cleaning or replacing them matters.
- Use a primer designed for smoke and odor. Shellac-based and some solvent-based primers are commonly recommended for heavy smoke and fire damage; some water-based products also claim odor-blocking performance for lighter situations.
- Ventilate. Fresh air during and after the work helps clear both residual odor and primer fumes.
Our guide to smoke smell in a house covers where odors hide and how to plan a full cleanup before priming.
Tannin Bleed on Wood
Cedar, redwood, mahogany and knotty pine contain tannins and resins that migrate into paint, causing tan or reddish discoloration and sometimes sticky spots at knots. Tannin bleed is more pronounced with water-based paints and on new or freshly sanded wood. A primer formulated for tannin blocking, whether oil-based, shellac-based or a tannin-specific water-based product, is the usual solution, with spot-priming of knots on interior trim. On exterior siding, primer selection should account for flexibility and weather exposure. Sometimes a second coat of primer is needed where bleed still shows after the first. Tannin stains can also reappear months later when moisture moves through the wood, which is one more reason to keep exterior trim caulked, flashed and drained so water does not keep driving fresh tannins to the surface.
Mold and Mold-Killing Primers
Mold-resistant and mold-killing primers contain additives that inhibit mold growth on the dried film. They have a place, especially in bathrooms and other damp areas, but they are not a mold cleanup method and cannot fix a moisture problem. Our guide to mold-killing primer explains what those products can and cannot do.
The EPA’s guide to mold and moisture is direct on this point: do not paint or caulk moldy surfaces; clean up the mold and dry the surfaces before painting, and note that paint applied over moldy surfaces is likely to peel. The guide also states that the key to mold control is moisture control, that cleaning mold without fixing the water problem will most likely let it come back, and that dead mold may still cause allergic reactions in some people, so it is not enough to simply kill mold; it must also be removed. EPA advises that if the moldy area exceeds about 10 square feet, or there has been a lot of water damage, homeowners consult its remediation guidance, and that mold may be difficult or impossible to remove completely from porous materials such as drywall.
A practical approach is to fix the moisture source, remove and replace mold-damaged porous materials, clean and dry what remains, and only then apply a primer, choosing a mold-resistant formulation where future humidity is likely.
VOCs, Ventilation and Lead
Many stain-blocking primers, particularly oil-based and shellac-based ones, contain substantial solvents. The EPA’s guidance on volatile organic compounds lists paints, paint strippers and other solvents among household sources of VOCs and notes that health effects can include eye, nose and throat irritation, headaches, loss of coordination and nausea, among others. EPA reports that VOC levels indoors can be higher than outdoors and can stay elevated after the activity ends. Its recommended steps include increasing ventilation when using products that emit VOCs, following label precautions, using products outdoors or in areas with exhaust fans when labels call for good ventilation, and buying only what will be used soon.
In practice, that means opening windows, using box fans to exhaust air outside, taking breaks, keeping children and pets away and following the label’s respirator and ventilation instructions. Low-VOC water-based stain blockers reduce exposure where they are adequate for the stain.
Older homes add another consideration. In homes built before 1978, existing paint may contain lead. The EPA’s Renovation, Repair and Painting Rule requires paid contractors who disturb painted surfaces in those homes to be certified and use lead-safe work practices. Light cleaning and priming over intact paint is low risk, but scraping, sanding or patching around stains disturbs paint. See our guide to painting over lead paint for safe preparation.
Matching the Primer to the Stain
Because no primer is best at everything, a quick decision guide helps. These are general tendencies; the product label is the final authority.
- Old, dry water stain on a ceiling: oil-based or shellac-based spot primer, or a heavy-duty water-based blocker for light stains, followed by ceiling paint over the whole ceiling.
- Heavy smoke or fire residue: thorough cleaning, then a shellac-based or solvent-based primer marketed for smoke and odor.
- Light nicotine haze after cleaning: a quality water-based stain blocker may suffice; test a section first and watch for bleed.
- Knots and sap in pine trim: shellac-based spot priming over knots, then a full prime coat.
- Exterior cedar or redwood: a primer rated for exterior use and tannin blocking, with flexibility suited to wood movement.
- Marker, crayon and grease on walls: clean what comes off, then a solvent-based or shellac-based spot primer for what remains.
- Glossy or slick surfaces: a bonding primer with stain-blocking properties, after cleaning and light scuffing.
- Bathrooms and other damp rooms: fix ventilation first, then consider a mold-resistant primer and topcoat.
Application Tips That Make Primer Work
Even the right primer can fail if it goes on poorly. A few habits improve results:
- Start clean and dull. Primer bonds best to clean surfaces. Wash greasy kitchens and smoke-stained walls, rinse cleaner residue and lightly scuff glossy paint.
- Test a small area. Prime a patch, let it dry fully and apply topcoat. If the stain shows through after the recommended dry time, a second coat or a different primer type is needed.
- Feather the edges. On ceilings, extending the primer slightly beyond the stain and feathering the edges reduces the visible outline under the topcoat.
- Respect dry and recoat times. Topcoating too early can let stains migrate before the primer has cured enough to block them.
- Mind the tint. Some primers can be tinted toward the topcoat color, which helps coverage with deep colors.
- Protect yourself. Wear eye protection when rolling overhead, and follow the label’s ventilation and respirator guidance, especially with solvent-based products.
- Store and dispose properly. Close containers tightly, store them away from living spaces and take leftover solvent-based products to a household hazardous waste collection site.
What a Home Inspector Notices
Inspectors routinely look at ceilings and walls for staining, and freshly primed or painted patches draw attention, especially below bathrooms, near chimneys, under roof valleys and around skylights. An inspector may use a moisture meter on suspect areas, look in the attic above a ceiling patch, and note whether stains appear active or old. A fresh patch of paint on an otherwise aged ceiling is not proof of a hidden problem, but it is a reason to ask the seller about past leaks and repairs and to request documentation.
An inspector cannot see through paint or primer, so a well-covered stain on a dry ceiling may not be detected. Seller disclosures, repair invoices and roof or plumbing records fill that gap. For what an exterior and structural inspection covers, see our structure and exterior inspections section, and for choosing an inspector, see our guide to hiring a home inspector.
Stain-Blocking Primer Costs
These are rough 2026 ranges; prices vary by brand, region and product type.
- Spray cans for spot priming: inexpensive and convenient for small ceiling stains and knots.
- Quarts and gallons: water-based stain blockers are often the least expensive per gallon; oil-based and shellac-based products typically cost more.
- Do-it-yourself spot repair of a ceiling stain: commonly under a hundred dollars in primer and paint if the drywall is sound.
- Professional ceiling stain repair and repaint: often a few hundred dollars for a single room, more if drywall replacement or texture matching is needed.
- Whole-house smoke remediation and repaint: can run into thousands of dollars, depending on cleaning, priming, number of rooms and other materials replaced.
Our guide to interior painting cost covers labor and pricing factors for the topcoat, and our paint sheen guide helps with finish selection once the primer is down.
More Questions About Stain-Blocking Primer
How many coats of stain-blocking primer are needed?
One coat of stain-blocking primer is usually enough for light water rings, marker or tannin spots, but heavy smoke, soot or dark water stains often need two coats. If the stain shows through after the first coat dries, apply a second before painting.
Spot-priming the stain alone can leave a visible patch under some finishes, so many painters prime the whole wall or ceiling plane. A tinted primer close to the final color can also reduce the number of topcoats needed.
How long does stain-blocking primer need to dry before painting?
Stain-blocking primer typically needs about 1 hour for shellac-based products, 1 to 3 hours for water-based products and several hours or overnight for oil-based primers before topcoating. Cool temperatures and high humidity slow drying.
The label’s recoat time is the guide to follow. Painting too soon can trap solvents or reactivate the stain, letting it bleed through the topcoat. Shellac and oil primers usually block stains more reliably than water-based ones, which is why the extra dry time is often worth it.
Can stain-blocking primer be used outdoors?
Some stain-blocking primers are rated for exterior use, but many shellac-based products are designed for interior use or spot priming outdoors only, because they can become brittle in sun and weather. Oil-based and certain water-based exterior primers are typically used for siding and trim.
Exterior tannin bleed from cedar and redwood is a common reason to use a stain-blocking primer outside. Check the label for exterior suitability, apply on a dry surface within the recommended temperature range and topcoat with an exterior paint.
Does stain-blocking primer cover crayon, marker and grease?
Yes, stain-blocking primers generally cover crayon, ink, marker and grease stains, with shellac-based and oil-based primers usually performing best on these oily or solvent-based marks. Water-based primers may let some markers bleed through.
Clean as much of the residue as possible first, using a degreaser for grease, and let the surface dry. Scuff glossy areas lightly so the primer bonds. Test a small spot: if the stain reappears after the primer dries, add a second coat or switch to a shellac-based product.
References
- Volatile Organic Compounds’ Impact on Indoor Air Quality — U.S. Environmental Protection Agency
- A Brief Guide to Mold, Moisture and Your Home — U.S. Environmental Protection Agency
- Lead Renovation, Repair and Painting Program — U.S. Environmental Protection Agency
Frequently asked questions
What is the best stain blocking primer for water stains?
Oil-based and shellac-based primers are traditionally the most reliable for water stains, though some modern water-based blockers handle lighter stains. Fix the leak and let materials dry completely before priming.
Can I paint over a water stain without primer?
Usually not successfully. Water-soluble stains tend to bleed through latex paint. A stain-blocking primer seals the stain so the topcoat stays clean.
Will a stain-blocking primer get rid of smoke smell?
Shellac-based and some solvent-based primers are commonly used to seal smoke odor, but only after walls are cleaned and other odor sources like carpet, ducts and fabrics are addressed.
Can I use mold-killing primer instead of removing mold?
No. EPA advises not painting over moldy surfaces; clean up the mold, fix the moisture problem and dry the area first. Mold-resistant primer can help prevent future growth, but it is not a cleanup method.
Are stain blocking primers safe to use indoors?
They can be with proper ventilation and label precautions. Oil and shellac primers release more VOCs; open windows, exhaust air outdoors and keep children and pets away. Low-VOC water-based blockers reduce exposure where suitable.
Can stain-blocking primer be tinted?
Many stain-blocking primers can be tinted, usually to light or mid-tone colors and often only to a limited percentage. Tinting toward the topcoat color improves coverage, especially under deep colors. Shellac-based primers have tighter tinting limits, so check the label or ask the paint store.
Can stain-blocking primer be used as ceiling paint?
Stain-blocking primer is not a substitute for ceiling paint. Primers are formulated to seal and bond, not to provide a durable, uniform finish, and they can look patchy or chalky. Prime the stain, then apply a flat ceiling paint over the whole ceiling for even color.
Can you use stain-blocking primer over wallpaper?
Stain-blocking primer, particularly oil-based or shellac-based, is sometimes used over well-bonded wallpaper to seal it before painting, since water-based paint can loosen the paper. Removing wallpaper is usually the better long-term approach, because loose seams and edges tend to show through.
Seeing a freshly painted patch on a ceiling in a house you are considering? Ask us about connecting with a Front Range inspector who checks for moisture behind stains and the leaks that cause them.