Mavic 3 Thermal Camera: What Homeowners Need to Know
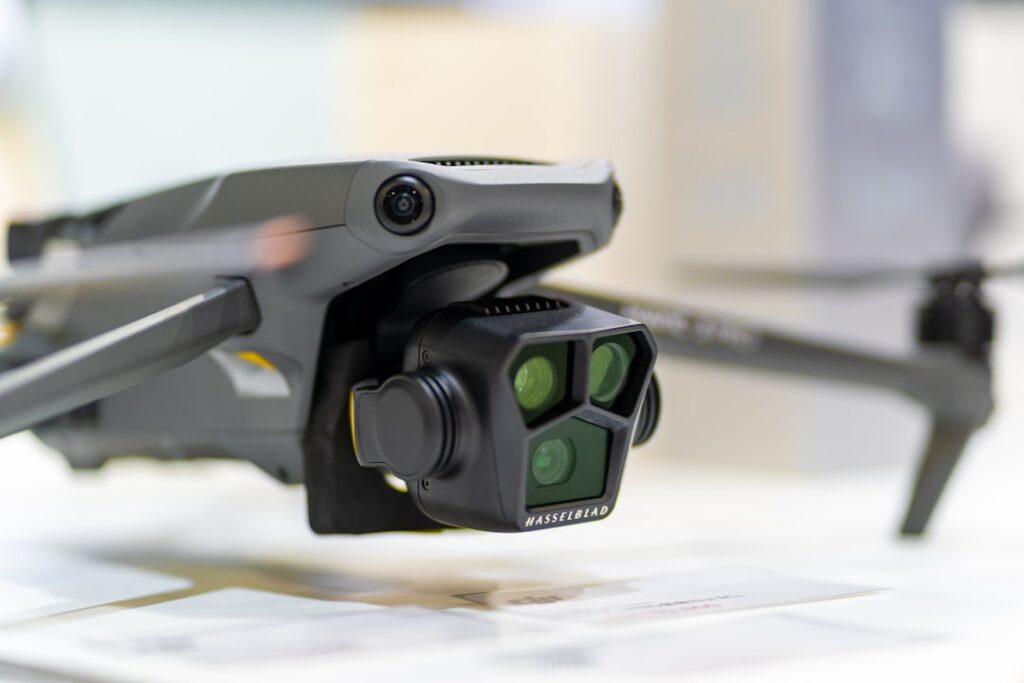
The Mavic 3 thermal camera (Mavic 3T) sits at the entry point of professional thermal drones, bundling a radiometric 640×512 thermal sensor with a 4/3 CMOS visible-light camera in a folding airframe homeowners and small-business inspectors can actually handle. Pricing typically lands around the mid-five-figure range when packaged with the DJI RC controller and standard accessories, which is roughly an order of magnitude above hobbyist drones and an order of magnitude below the multi-rotor industrial platforms used for utility inspections. This guide walks through what the platform actually does in residential inspection contexts, where it fits in the broader DJI lineup, and the limitations homeowners should weigh before treating it as the right tool for a one-time investigation.
Part of our Thermal Imaging for Homes guide — start there for the full picture →
Mavic 3 Thermal Camera: The Product Context
The Mavic 3T is part of the Mavic 3 Enterprise series. The thermal payload provides a 640×512 thermal sensor with radiometric capability (each pixel is a temperature reading, not just a color), and the visible-light camera uses a 4/3 CMOS sensor with a 48 MP photo capability and 4K video. The combination matters for inspection because thermal and visible streams can be reviewed together; a thermal anomaly seen on a roof can be matched against the visible image to identify whether the heat signature corresponds to a vent, a skylight, or a saturated patch of underlayment. The home inspection tools pillar covers how thermal capability fits into the broader inspector toolkit.
The platform’s residential-inspection sweet spot is moisture-tracing on roofs, building-envelope thermal-anomaly surveys on large or multistory buildings, and post-event documentation after hail, wind, or wildfire smoke exposure. For a single-story tract home in good condition, a handheld thermal imager and a ladder cover most needs at a fraction of the cost. For a 4,000-square-foot multistory home with a complex roof and visible damage, the aerial perspective can make a meaningful difference.
What the Sensor Specifications Actually Mean
The thermal sensor’s 640×512 resolution is at the upper end of consumer-accessible thermal imaging. Each frame contains roughly 327,000 individual temperature measurements. For comparison, common entry-level handheld thermal imagers run at 80×60 or 160×120 (5,000 to 19,000 pixels), and even higher-end handheld units like the FLIR E96 reach 640×480. Higher resolution matters for thermal imaging more than it does for visible photography because thermal “pixels” are wider in angular terms; small temperature differences require enough pixels-on-target to render meaningfully.
Thermal Sensitivity (NETD)
The Mavic 3T’s noise-equivalent temperature difference (NETD) is reported in the range of approximately 50 millikelvin, meaning the sensor can resolve temperature differences down to about 0.05 degrees Celsius. That matters for residential thermography because the heat signatures of moisture intrusion, missing insulation, and air leakage are often in the 1 to 5 degree range from surrounding surfaces, well within sensor capability.
Radiometric Versus Non-Radiometric
Radiometric means every pixel records an actual temperature value, not just a color. This is necessary for any quantitative analysis (calculating R-value loss, comparing surface temperatures across a roof, generating heat-loss reports). Non-radiometric thermal sensors look like thermal images but record only relative warmth and cannot be analyzed quantitatively post-flight.
Where the Platform Helps in Residential Inspection
The aerial thermal capability earns its keep in four residential contexts.
Roof Moisture Surveys
Wet roof underlayment retains heat differently from dry underlayment during evening cool-down. Flying thermal sweeps an hour or two after sunset on a clear day reveals moisture patterns that are not visible from ground level. This is particularly useful on low-slope roofs over conditioned space, large single-family homes, and commercial-residential buildings with complex rooflines. The Department of Energy’s documentation on building thermography covers the underlying physics.
Building Envelope Surveys
Thermal differences on exterior wall surfaces under a temperature differential (winter operation, summer cooling) reveal missing insulation, air-leakage paths, and thermal bridging. Aerial perspective lets a single flight capture the entire envelope of a house, including elevations difficult to access from ground level.
Post-Event Documentation
After a hail event, wind damage, or wildfire smoke exposure, aerial thermal and visible imagery together document the condition of roofs and elevated assemblies that would otherwise require ladder work or a third-party drone hire. For insurance claims, the data quality matters; radiometric thermal imagery from a recognized platform is more defensible than non-radiometric video.
Large or Inaccessible Properties
Large lot homes, properties with steep terrain, and multistory buildings benefit from the aerial perspective both in safety (no ladder work on second-story slopes) and in coverage speed.
Where the Platform Is Overkill
The Mavic 3T is not the right choice for many homeowners. A short list of cases where simpler tools win.
Single-story homes with simple gable or hip roofs that can be safely walked from a ladder. A handheld thermal imager (FLIR C5 class) covers most needs.
One-time inspections rather than recurring work. The Mavic 3T’s cost depreciates poorly over a single use; renting one or hiring a Part 107 commercial pilot for the specific job is usually more economical.
Homeowners without Part 107 certification. The FAA requires Part 107 certification for any commercial use of a drone, and even recreational use has registration and airspace restrictions. Anyone planning to use thermal drone data for an insurance claim, a buyer’s report, or any commercial purpose needs to operate under Part 107 rules.
Properties in restricted airspace. Front Range homeowners near DIA, around Buckley Space Force Base, or in temporary flight restrictions need to verify airspace clearance before each flight. A broader homeowner guide to drones with thermal cameras covers when aerial thermography makes sense versus handheld.
Operating Considerations
A few practical points worth understanding before treating the Mavic 3T as a magic wand.
Time of Day Matters
Roof thermography is most informative an hour or two after sunset on a clear day with at least 15 to 20 degrees of differential between interior and exterior. Bright midday sun overwhelms the thermal contrasts of interest. Heavy cloud cover during the day removes the solar-loading differential roofs depend on for moisture surveys.
Weather Constraints
Wind limits are typically reported around 12 m/s for the platform; sustained winds above that range degrade both flight safety and image quality. Precipitation prohibits flight entirely. Cold weather degrades battery life; below 0 degrees Celsius, expect significantly reduced flight time per battery.
Pilot Skill Curve
Thermal imagery is genuinely harder to interpret than visible photography. False positives (a heat signature that looks like a leak but is a vent), false negatives (a small wet area that does not yet show contrast), and over-interpretation (assuming any cool spot is a defect) are common new-pilot patterns. NACHI and ASHI publish thermography training resources that help.
Data Workflow
Radiometric thermal images are stored in formats (R-JPEG, TIFF) that need specific software to analyze quantitatively. DJI’s software handles basic measurement; full thermography reports usually require dedicated analysis software. Plan for the post-flight workflow before the first flight.
Total Cost Beyond the Drone
The Mavic 3T sticker price is the start. Realistic total cost for a homeowner or small-business buyer typically includes the drone and standard accessories, additional batteries, a Part 107 study and exam, liability insurance for commercial flights, analysis software, replacement props and small consumables, and ongoing FAA registration. The full annual cost of ownership for a working-pilot residential inspector lands meaningfully above the drone price itself.
The Decision Framework for Homeowners
For most homeowners, the right path is not to buy a Mavic 3T. The decision tree usually runs: identify the inspection question (roof condition, energy efficiency, post-event damage), evaluate whether a handheld thermal imager and ladder access can answer it, then if aerial thermal data is genuinely required, hire a Part 107 commercial operator for the specific job. Hiring is typically a few hundred dollars per inspection and includes the analysis and report.
Homeowners who own multiple properties, conduct frequent inspections (real estate investors, property managers), or are themselves working inspectors are the buyer profile where the Mavic 3T makes financial sense. For everyone else, it remains an impressive specification list attached to a piece of equipment that depreciates faster than the inspections justify.
References
- ENERGY STAR: Seal and Insulate — U.S. Environmental Protection Agency (ENERGY STAR)
- InterNACHI thermal imaging training and standards — International Association of Certified Home Inspectors
- ASHI standards and education — American Society of Home Inspectors
- ASHRAE building envelope and HVAC guidance — American Society of Heating, Refrigerating and Air-Conditioning Engineers
Frequently asked questions
Do I need Part 107 to use a Mavic 3T at my own home?
Personal recreational use does not require Part 107 certification, but if the imagery is used for any commercial purpose (insurance claim documentation, a buyer's report, paid inspection work), Part 107 certification is required. FAA registration and airspace rules still apply to recreational flights.
Is the Mavic 3T worth buying for a single home inspection?
Usually no. For a one-time need, hiring a Part 107 commercial operator typically costs a fraction of buying the platform and avoids the learning curve, registration, and insurance overhead.
How does the Mavic 3T compare to handheld thermal imagers?
It provides much higher thermal resolution (640x512 versus 80x60 or 160x120 on entry handhelds) and the aerial perspective. A handheld imager is more practical for accessible interior surfaces and small exterior areas; the drone earns its keep on roofs and large or multistory envelopes.
Thermal imaging cameras
Infrared cameras reveal hidden moisture, missing insulation, and air leaks. Phone-attachment models are the budget entry point; standalone units have higher resolution.
| Product | Why | Buy |
|---|---|---|
 FLIR ONE Pro (phone) FLIR ONE Pro (phone) | Plugs into iPhone/Android; inspector favorite. | Amazon — $349.00 |
 Topdon TC001 Topdon TC001 | High-res phone module at a low price. | Amazon — $199.99 |
 FLIR C5 Compact FLIR C5 Compact | Standalone pocket camera with Wi-Fi. | Amazon — $611.50 |