How to Kill Mold: Methods That Actually Work
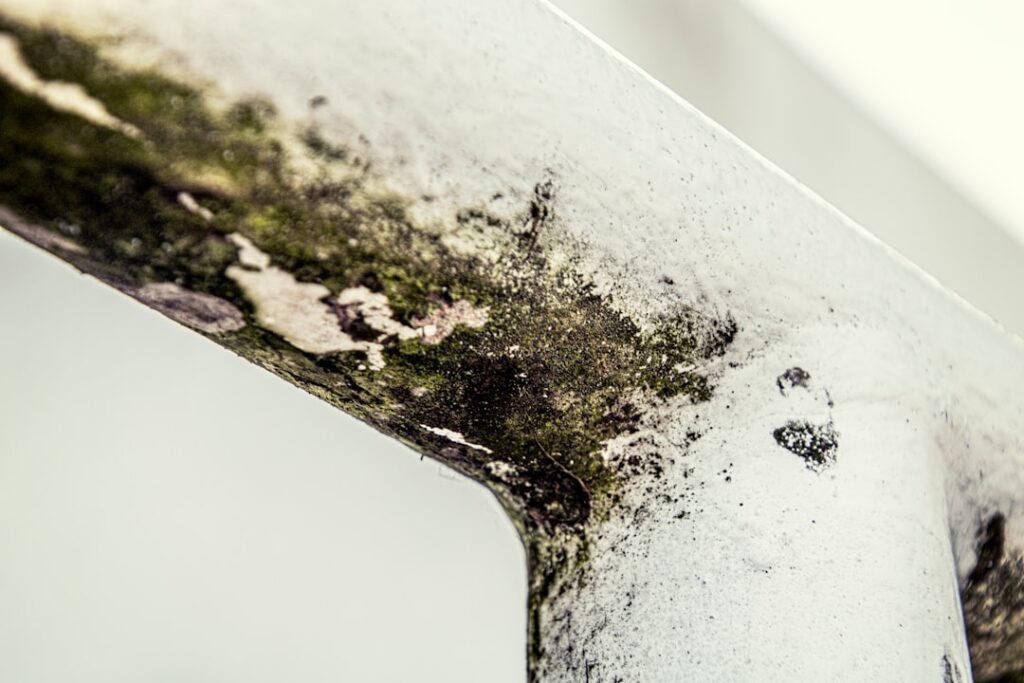
How to Kill Mold: Methods That Actually Work
If you want to know how kill mold effectively, the first thing to understand is that “killing” it is only part of the solution and arguably not even the most important part. The U.S. Environmental Protection Agency (EPA) makes a point that surprises many homeowners: dead mold can still cause health effects and dead mold will simply be replaced by new growth if moisture remains. So the goal is to remove mold and control the water that feeds it, not merely to kill spores. This guide walks through the methods that work on each surface, alongside the EPA caveat that killing alone is never enough. It is general guidance, not medical or professional remediation advice; large or hidden infestations need a qualified specialist.
Part of our Mold Removal & Remediation guide — start there for the full picture →
Is this mold, asbestos, or water damage? Get a free instant screen
Upload a clear photo of the suspect area. You'll get an instant AI screening opinion and what to do next. This is screening guidance, not a professional determination.
Screening guidance only. AI can be wrong. Confirm asbestos, mold type, or lead with lab testing or a licensed professional before acting.
The Killing-Versus-Removing Distinction
Plenty of products advertise that they “kill 99.9% of mold,” and that claim is technically achievable. The problem is that dead mold residue can still trigger allergic reactions, and the dead colony does nothing to address why mold grew there in the first place. The EPA’s guidance emphasizes physical removal of mold and correction of the moisture source over chemical killing. Think of killing as a minor step inside a larger removal-and-prevention workflow.
Methods That Work on Hard, Non-Porous Surfaces
Tile, glass, metal, sealed countertops, sinks, and bathtubs are the easiest surfaces to treat because mold cannot root deeply into them.
Detergent and Water
For most hard surfaces, the EPA states that scrubbing with soap and water followed by thorough drying is sufficient. Physical scrubbing removes the colony, which matters more than chemically killing it. This is the safest and cheapest method.
Hydrogen Peroxide
A 3% hydrogen peroxide solution kills many mold species and lightens staining. Spray it on, let it dwell for ten minutes, then scrub and wipe. It breaks down into water and oxygen, leaving no harsh residue, which makes it a favorite for kitchens and bathrooms.
Chlorine Bleach (Limited Use)
Bleach can kill surface mold on non-porous materials and whiten staining, but the EPA notes it is generally unnecessary. Reserve it for hard surfaces where appearance matters, dilute it properly, never mix it with ammonia, and ventilate the area well.
Methods for Porous Surfaces
Drywall, wood, grout, and fabric absorb moisture and let mold root below the surface, which changes the approach.
White Vinegar
Undiluted distilled white vinegar penetrates porous surfaces and kills many common molds. Apply it, let it sit for an hour, scrub, and dry. Vinegar is often more effective than bleach on porous materials precisely because it reaches the rooted growth instead of sitting on top.
Borax
A borax-and-water solution kills mold and inhibits regrowth, and because it does not off-gas the way some chemicals do, many remediation guides favor it for scrubbing porous surfaces. Leave the dried borax residue in place to discourage return.
When Removal Means Replacement
Some porous materials cannot be reliably saved. The EPA advises discarding moldy porous items such as carpet, ceiling tiles, drywall, and insulation once mold has penetrated, because no amount of killing removes the embedded growth.
The EPA Caveat: Killing Mold Alone Fails
This is the heart of the matter. Even a perfect kill leaves you with two unsolved problems. First, the dead spores and fragments can still provoke allergic and respiratory reactions, which is why the EPA stresses removal rather than just disinfection. Second, and more importantly, the moisture that allowed the mold to grow is still there. Kill the colony today and a new one establishes within days if the surface stays damp. Controlling moisture is what the EPA calls the key to mold control.
Fix the Moisture First
Before or immediately after killing mold, repair the leak, lower the humidity, or improve the ventilation that created the damp surface. The EPA recommends keeping indoor humidity below 60 percent and drying wet materials within 24 to 48 hours. Without this step, every killing effort is temporary.
Protect Yourself During the Job
The CDC recommends wearing an N95 respirator, non-vented goggles, and gloves when disturbing mold, since killing and scrubbing it releases spores into the air. Ventilate to the outdoors and contain the work area so spores do not migrate into clean rooms.
A Safe Step-by-Step Killing and Removal Process
Killing mold safely follows a clear order. First, fix or at least identify the moisture source, since killing a colony on a surface that stays wet accomplishes nothing lasting. Next, ventilate the area to the outdoors and seal it off from clean rooms so spores do not spread when disturbed. Put on an N95 respirator, gloves, and non-vented goggles before touching anything. Apply your chosen agent, give it adequate dwell time, then scrub to physically remove the growth rather than leaving dead residue behind. Bag porous debris immediately. Finally, dry the area completely, because residual moisture lets new spores colonize the same spot within days.
Dwell Time Matters
Most killing agents need contact time to work. Spraying and immediately wiping rarely kills effectively. Hydrogen peroxide typically needs around ten minutes, vinegar about an hour, and borax solutions can be left to dry in place. Respecting dwell time is the difference between killing the colony and merely disturbing it.
Products and Mixtures to Avoid
Some combinations are dangerous and some are simply ineffective. Never mix bleach with ammonia or with vinegar, as the resulting fumes are hazardous. Avoid using bleach on porous materials, where its water content can soak in and feed regrowth while the disinfectant stays on the surface. Skip painting over mold to “seal” it, since the growth bleeds back through. And do not rely on fragrance sprays or ozone gadgets that mask odor without removing the colony. Sticking to proven agents used correctly is safer and more effective than chasing novelty products.
What Killing Mold Cannot Fix
It is worth being blunt about the limits. Killing mold does not repair the water damage that allowed it, does not remove the allergenic residue dead spores leave behind, and does not restore porous materials that the growth has penetrated. For those reasons, the EPA frames the goal as removal plus moisture control rather than disinfection. Treating “kill it” as the finish line, instead of one step inside a larger process, is the mistake that sends homeowners back to the same wall a month later.
Matching the Killing Method to the Surface
The most effective killing method depends entirely on the material. On hard, non-porous surfaces like tile, glass, and sealed countertops, physical scrubbing with detergent and water, or a quick pass with hydrogen peroxide, clears the colony completely because nothing has rooted below. On porous surfaces like drywall, wood, and grout, vinegar or borax penetrates to reach growth that surface disinfectants miss, though heavily affected porous materials are often best replaced rather than treated. Choosing the method for the material is what separates a real kill from a cosmetic one that leaves living growth behind.
Why Replacement Sometimes Beats Killing
For deeply colonized porous materials, no amount of killing solution reaches the embedded growth, and the EPA advises discarding moldy porous items such as carpet, ceiling tiles, drywall, and insulation. Trying to kill mold in these materials wastes effort and usually leads to recurrence. Recognizing when a material is beyond saving is part of doing the job correctly.
Common Myths About Killing Mold
Several persistent myths lead people astray. The first is that bleach is the strongest mold killer; in reality the EPA calls it generally unnecessary and notes it performs poorly on porous surfaces. The second is that killing mold removes the health concern, when dead spores and fragments can still trigger reactions. The third is that a quick spray-and-wipe kills mold, when most agents need dwell time. The fourth is that sealing or painting over mold neutralizes it, when growth simply bleeds back through. Discarding these myths leads to a more effective approach.
Verifying the Job Is Done
After killing and removing mold, confirm the result over the following weeks. The area should stay dry, look clean, and smell neutral. A returning musty odor or fresh staining means either the removal was incomplete or, more likely, the moisture source remains active. Placing a hygrometer nearby helps you catch rising humidity before it lets new growth establish. The true measure of success is not that the mold died today, but that it stays gone because the moisture is controlled.
Natural Versus Chemical Killing Agents
Homeowners often weigh natural options against stronger chemicals, and both have a place. Natural agents like white vinegar, hydrogen peroxide, and borax kill many common molds, are safer around children and pets, and avoid harsh fumes, which makes them appealing for routine household use. Chemical disinfectants can be effective on hard surfaces but carry handling cautions and, in the case of bleach, the EPA’s note that they are generally unnecessary. For most household mold on the surfaces homeowners encounter, the gentler agents do the job well, especially when paired with thorough physical scrubbing and proper dwell time. Reserving stronger chemistry for situations that genuinely call for it is a sensible default.
Why Physical Removal Outweighs the Agent
Across every method, the physical act of scrubbing and removing the colony matters more than which solution you spray. A modest cleaner applied with thorough scrubbing usually beats a powerful one applied carelessly. This is why the EPA emphasizes removal over disinfection: clearing the mold from the surface, and discarding porous materials it has penetrated, accomplishes more than chemically killing growth that stays in place.
Protecting Indoor Air While You Work
Killing and scrubbing mold disturbs it, releasing spores into the air, so protecting indoor air quality is part of the job. The CDC recommends an N95 respirator, gloves, and non-vented goggles during the work. Ventilate the space to the outdoors, seal it off from clean rooms with plastic where practical, and consider running a HEPA air purifier to capture airborne spores. Bag debris promptly and clean surrounding surfaces afterward. These steps keep the act of killing mold from spreading it to parts of the home that were never affected.
When to Call a Professional
The EPA recommends professional remediation when mold exceeds roughly 10 square feet, when it is inside HVAC systems, or after sewage backups or flooding. Professionals not only remove mold safely but also locate and correct the moisture source, the factor that ultimately keeps it from coming back. For more depth, see our mold inspection resources, learn what helps get rid of mold, and review how to prevent mold growth long term.
Frequently Asked Questions
Frequently asked questions
What kills mold instantly?
No product kills mold truly instantly, but hydrogen peroxide, vinegar, and bleach can kill surface mold within minutes of dwell time. Killing it, however, does not address the moisture that lets it return.
Does killing mold remove the health risk?
Not entirely. The EPA notes that dead mold and its fragments can still trigger allergic and respiratory reactions, which is why physical removal matters more than chemical killing alone.
Is bleach the best way to kill mold?
Bleach kills surface mold on hard, non-porous surfaces but the EPA says it is generally unnecessary, and it performs poorly on porous materials like drywall and wood.
Why does mold grow back after I kill it?
Because killing the colony does nothing about the moisture that fed it. If the surface stays damp, new spores settle and grow within days, so the moisture source must be fixed.
References
- EPA: Mold Cleanup in Your Home
- EPA: A Brief Guide to Mold, Moisture and Your Home
- CDC: About Mold and Health
Dealing with stubborn or widespread mold? Reach out to our specialists for help.
Mold removal & cleanup picks
For a small, contained patch (under ~10 sq ft) these EPA-friendly removers handle surface mold. Larger or recurring growth warrants a professional assessment first.
| Product | Why | Buy |
|---|---|---|
 RMR-86 Instant Mold Stain Remover RMR-86 Instant Mold Stain Remover | Fast-acting on stains; ventilate and wear PPE. | Amazon — $29.99 |
 Concrobium Mold Control Concrobium Mold Control | No-bleach formula that also helps prevent regrowth. | Amazon — $34.27 |
 Mold Armor Mold & Mildew Remover Mold Armor Mold & Mildew Remover | Widely stocked bathroom/surface remover. | Amazon — $22.98 |