To Kill Mold: The 5-Step Protocol Homeowners Should Follow
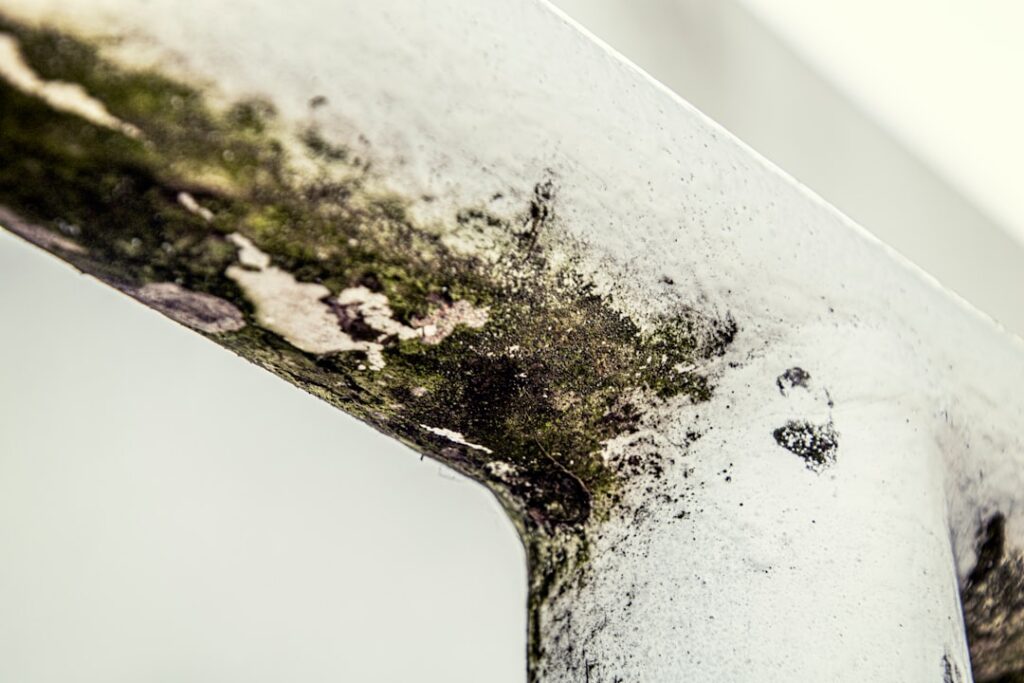
The verb “kill” suggests a single action, but to kill mold in a home is actually a five-step protocol that homeowners frequently shortcut at the wrong step. The cleaning agent gets all the attention because it is the most visible part of the work; identification, containment, moisture correction, removal, and verification get less attention even though they decide whether the mold returns. This guide walks through the full kill sequence in order so the cleanup result lasts past the first humid week. This guide summarizes EPA and CDC guidance current as of 2026 — consult a certified mold inspector for testing decisions and your physician for symptom evaluation.
Is this mold, asbestos, or water damage? Get a free instant screen
Upload a clear photo of the suspect area. You'll get an instant AI screening opinion and what to do next. This is screening guidance, not a professional determination.
Screening guidance only. AI can be wrong. Confirm asbestos, mold type, or lead with lab testing or a licensed professional before acting.
To Kill Mold You Have to Do More Than Kill It
The single most useful idea in home mold work is that dead spores are still allergenic. A surface treatment that kills the organism but leaves the spore mass in place can still produce respiratory symptoms in sensitized occupants. The CDC and EPA both recommend physical removal of the killed material rather than killing in place and leaving the residue. This is why the standard professional protocol pairs HEPA vacuuming with antimicrobial application — the killing step neutralizes the organism, the vacuuming step removes the biomass.
This also explains why bleach is a poor primary choice on porous surfaces. Bleach lightens the pigment, which makes the staining disappear visually, but the dead biomass remains embedded in the substrate. A homeowner can clean the same wall four times with bleach and still have an allergen load high enough to trigger symptoms, simply because the cleaning was killing without removing.
Step 1: Identify the Type, Size, and Substrate
Before any cleaner comes out, the colony needs three quick assessments. Type: is it a fuzzy white-gray surface colony characteristic of Cladosporium or Penicillium, or is it the olive-to-dark-black slime characteristic of Stachybotrys, or is it something else entirely? Size: is the visible growth under one square foot, between one and ten square feet, or larger? Substrate: is the surface non-porous like tile or glass, semi-porous like sealed wood, or porous like paper-faced drywall, plaster, or unsealed lumber?
These three answers determine almost everything about the cleanup. Stachybotrys on wet drywall over ten square feet is a remediator job and an evacuation question for sensitized occupants. Cladosporium on bathroom tile is a fifteen-minute homeowner job. Penicillium on a stored cardboard box in a basement is a trash-the-box-and-find-the-leak job. The cleaner is not the variable that changes; the protocol is. The broader visual-identification framework is laid out in how to identify toxic black mold, which covers the color, texture, and substrate clues that point toward species.
Step 2: Isolate the Area Before You Start
Containment is the step homeowners skip most often because the visible colony looks small. The problem is that scrubbing releases dust at concentrations many times higher than the static colony, and any spores released into open air travel through the HVAC system, settle on furnishings in adjacent rooms, and germinate wherever they land on damp surfaces. The EPA guidance for residential cleanup recommends sealing off the work area and turning off the central air handler during the work.
The practical setup for a homeowner job is straightforward. Close the door to the room. Tape a sheet of plastic across any return-air grille in the room. Turn the HVAC off at the thermostat. Put down a drop cloth under the work area. Open a window if outdoor air quality allows it. Wear an N95 respirator at minimum; a P100 filter respirator and goggles are appropriate for anything over a few square feet. Disposable gloves and a long-sleeve shirt that gets washed immediately afterward complete the basic PPE.
Step 3: Fix the Moisture Source
This is the step that decides whether the kill sticks or has to be repeated next season. Mold needs liquid water or sustained high humidity to germinate; remove either and the colony cannot regenerate. The moisture source is sometimes obvious — a leak, a roof penetration, a failed gasket — and sometimes hidden, like vapor diffusion through a basement floor or condensation on cool wall surfaces in humid weather.
The diagnosis usually requires elimination. Run a fan and watch whether the moisture pattern changes. Check supply lines, drain lines, and appliance connections in the room above and the room itself. Look at exhaust ventilation in bathrooms and kitchens. Measure the relative humidity with a five-dollar hygrometer and check whether it stays under 60 percent. A moisture meter on suspect drywall reveals whether the substrate is actively wet or has dried out. The fix is whatever the diagnosis points to: a new gasket, a re-pitched drain line, a dehumidifier, an exhaust fan timer, a vapor barrier, a downspout extension, a re-graded landscape bed. Cleanup before the fix is wasted work.
Step 4: Kill and Remove the Mold
With containment in place and the moisture source identified, the actual killing and removal step is the shortest of the five. The choice of agent depends on the substrate. On non-porous surfaces — tile, glass, sealed metal — three percent hydrogen peroxide or five percent white vinegar both kill most household mold species; bleach also works but adds nothing on these surfaces. On semi-porous surfaces like sealed wood, peroxide is the better choice because it penetrates slightly farther than vinegar before neutralizing. On porous surfaces like paper-faced drywall, plaster, or unsealed lumber, the killing options become limited and the question shifts to whether the substrate can be salvaged at all.
The removal step is where homeowners most often shortcut. After the agent has killed the organism, the biomass needs to come off the surface mechanically. A stiff brush, a damp cloth, and a HEPA vacuum on the surrounding area accomplish this. Wipes go into a sealed bag immediately. The work area gets wiped down a second time after the visible colony is gone, to catch settled spores. Painted drywall that has soft spots, lifted paper, or staining visible from the back of the panel cannot be cleaned and needs to be cut out — the EPA guidance for water-damaged drywall is removal to a foot above the visibly affected area. The same principle holds for any porous substrate that has been wet long enough for the colony to penetrate beyond the surface.
Step 5: Verify the Cleanup Worked
Verification is the step most homeowners skip and most professionals build into their contracts. For a homeowner job, verification has two parts. Visual check at intervals — the cleaned area is inspected the next day, the next week, and after the next humid weather event. Any return of staining indicates the moisture source was not fully addressed. Moisture-meter check on the substrate to confirm the area has dried below the regrowth threshold; framing should read under 16 percent moisture content, drywall under similar levels, before the substrate is closed back up with paint or a vapor barrier.
For a professional job, verification adds a third-party post-remediation inspection. The remediator does not verify their own work; an independent inspector takes tape-lift samples or air samples after the containment comes down and the area is cleaned. Clearance criteria typically require spore counts indoors that fall at or below outdoor baseline counts for the species of concern. Without verification, the only test is time, and time has a habit of confirming bad outcomes after the warranty period has expired.
Common Mistakes Homeowners Make at Each Step
The five-step protocol fails most often at predictable points. At Step 1 (identification), homeowners frequently misread the substrate — treating paper-faced drywall as if it were a hard surface, treating sealed wood as if it were unsealed, or treating fabric and stored items as if they were salvageable when they are not. The misread leads to a cleaning agent and a method that does not match the substrate, which produces a cleanup that looks finished but leaves the colony embedded.
At Step 2 (isolation), homeowners often skip containment entirely on the assumption that the colony is small enough that dust release is negligible. The scrubbing process actually releases dust at concentrations many times higher than the static colony, and the released spores deposit on adjacent surfaces, in HVAC returns, and on personal items. A homeowner who finishes the visible cleanup but cross-contaminates the rest of the house through inadequate containment has not improved the overall mold situation. Even simple containment — closing the room door, taping plastic over the return-air grille, turning off the HVAC during the work — eliminates most of the cross-contamination risk for very little effort.
At Step 3 (moisture fix), the most common error is partial diagnosis. The homeowner fixes the most-obvious moisture source — a visible leak, a humidity-management oversight — and misses a secondary or seasonal source. The cleanup holds for a few weeks or months and then the colony returns when the missed source becomes active again. The most useful single tool for catching this is a moisture meter checked across the substrate before and after cleanup, with attention to whether readings stay low across the following weeks. If readings rise after the cleanup despite no obvious water event, the source diagnosis was incomplete.
At Step 4 (kill and remove), the most common error is killing without removing. Bleach in particular tempts homeowners to consider the job done when the visible color is gone, leaving the dead biomass embedded in the substrate where it continues to release allergens. The reliable protocol always includes mechanical biomass removal — scrub, wipe, HEPA-vacuum the area — after the kill step rather than just chemical application.
What “Kill” Means When the Mold Is Already Dead
Mold spores remain allergenic after the organism dies, which is why the protocol does not stop at killing. Mycotoxins produced by Stachybotrys and certain Aspergillus species are stable molecules that persist on contaminated material even after the colony is non-viable. This is the strongest argument for removing the biomass rather than killing in place — the dead spore mass and any mycotoxins contained in it remain a respiratory and dermal exposure source until the material is physically removed and disposed of.
For homeowners considering whether their job fits a DIY scope, a useful reference is the broader mold inspection and testing hub, which sets out the size, substrate, and health thresholds that distinguish DIY-appropriate cleanup from professional remediation. The shorthand is that DIY is appropriate for under ten square feet on a salvageable substrate where occupants are healthy and the moisture source has been fixed; everything else calls for a remediator.
When to Stop and Call a Professional
The clearest triggers are size, substrate damage, location, and health. Anything over ten square feet of visible growth, anything inside HVAC ductwork, anything behind walls that have been wet for more than 48 hours, anything with sewage or flood contamination, and any household with immunocompromised, infant, pregnant, or chronically respiratory occupants warrants a licensed remediator. The remediator brings containment barriers, negative-air machines, full-face PPE, and post-remediation verification protocols that no homeowner kit replicates. The DIY ceiling exists because the dust load released during scrubbing exceeds what a household respirator and a sheet of plastic can safely contain.
The other useful trigger is recurrence. A patch that has been cleaned twice and returned twice is almost always signaling a moisture source that the homeowner has not found. At that point a moisture investigation — sometimes including infrared imaging or invasive probe testing — is more valuable than another round of cleaning. The investigation usually pays for itself by identifying the actual leak before the framing is destroyed.
References
- Mold Cleanup in Your Home — U.S. Environmental Protection Agency
- Mold Cleanup and Remediation Guidance — Centers for Disease Control and Prevention
- Mold Health Effects — National Institute of Environmental Health Sciences
- Mold Safety and Health Topics — Occupational Safety and Health Administration
Homeowners on the Front Range weighing whether their job fits the DIY scope can reach out through our contact page for a referral to a vetted local inspector or remediator.
Mold removal & cleanup picks
For a small, contained patch (under ~10 sq ft) these EPA-friendly removers handle surface mold. Larger or recurring growth warrants a professional assessment first.
| Product | Why | Buy |
|---|---|---|
 RMR-86 Instant Mold Stain Remover RMR-86 Instant Mold Stain Remover | Fast-acting on stains; ventilate and wear PPE. | Amazon — $25.99 |
 Concrobium Mold Control Concrobium Mold Control | No-bleach formula that also helps prevent regrowth. | Amazon — $13.48 |
 Mold Armor Mold & Mildew Remover Mold Armor Mold & Mildew Remover | Widely stocked bathroom/surface remover. | Amazon — $22.98 |