Home Mold Detection: What Homeowners Need to Know
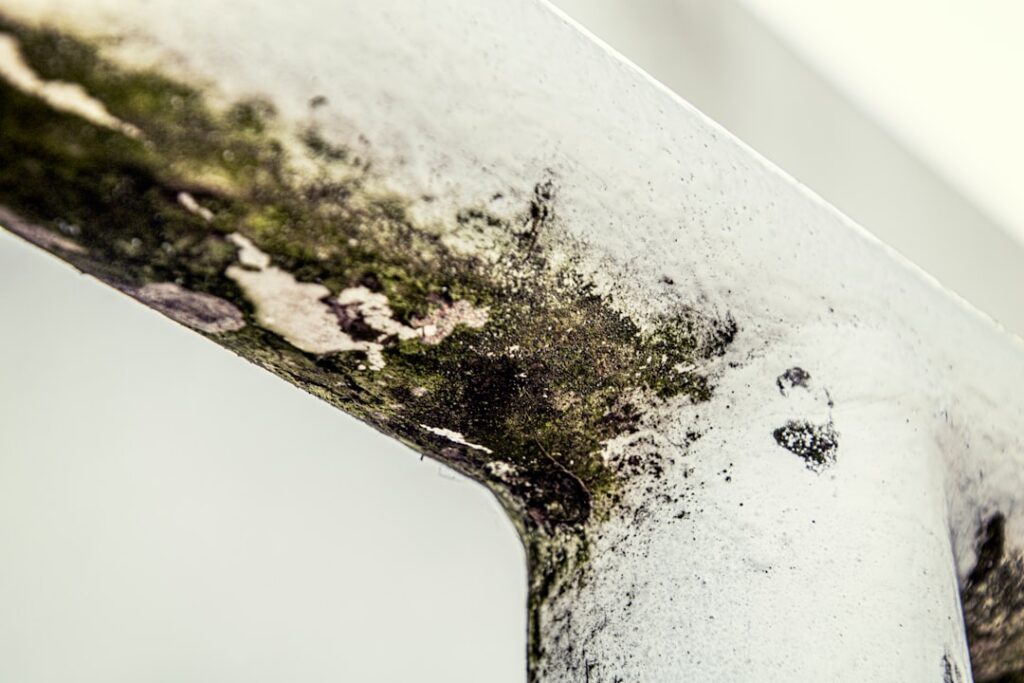
Home mold detection sits at the intersection of three skill sets — moisture science, building construction, and basic microbiology. Most homeowners do not need to master any of them, but understanding the basics helps you sort what is a real problem from what is cosmetic, and helps you avoid paying for tests that will not tell you anything useful. This guide walks through the detection methods that work, the ones that do not, and how to decide when a credentialed inspector is worth the cost. It summarizes EPA and CDC guidance current as of 2026 and is informational only — consult a physician for symptoms and a credentialed inspector for testing decisions specific to your home.
Part of our Mold Testing & Inspection guide — start there for the full picture →
Is this mold, asbestos, or water damage? Get a free instant screen
Upload a clear photo of the suspect area. You'll get an instant AI screening opinion and what to do next. This is screening guidance, not a professional determination.
Screening guidance only. AI can be wrong. Confirm asbestos, mold type, or lead with lab testing or a licensed professional before acting.
What “home mold detection” actually means
Mold detection is the process of finding mold growth or the conditions that support it. It is different from mold identification (figuring out which species is present) and from mold quantification (measuring how much). Most homeowner situations only need detection — find it, find the moisture source, fix the source, clean or remove the affected material. EPA and CDC have said for years that species identification rarely changes the remediation plan.
Detection breaks down into three layers: sensory (smell and visual), instrument-based (moisture and humidity readings, infrared imaging), and laboratory (air samples, surface samples, bulk samples). The cheapest layer often answers the question, and the expensive layers are most useful when the question is more complicated than “is mold growing here.”
Sensory detection: smell and sight
The human nose detects microbial volatile organic compounds at very low concentrations. That musty, earthy, sometimes sweet smell is the byproduct of active mold metabolism. EPA and CDC have both noted that a persistent musty odor is reliable evidence of microbial growth somewhere in the home, even when nothing is visible.
Visual detection adds context. Look for fuzzy or slimy patches that range from black through gray-green to white or pinkish-orange. Pay attention to ceilings near roof valleys, baseboards in basements, behind toilets, under sinks, around windows, and behind any furniture pushed against an exterior wall. Discoloration alone is not always mold — it could be efflorescence (mineral salts), soot, or just dust — but in a damp area, any unfamiliar discoloration deserves a closer look.
One useful rule: do not move stored items immediately when you find growth. Take photos first. If you need to file an insurance claim or get a written report, the original location matters.
Instrument-based detection
A small toolkit dramatically improves a homeowner’s detection ability. None of these tools require professional certification to operate.
Hygrometer
A digital hygrometer measures relative humidity. EPA recommends keeping indoor humidity between 30% and 50%. Anything above 60% in a room — especially a basement or bathroom — is creating conditions for growth. A $15 unit is accurate enough for homeowner use.
Moisture meter
Pinless moisture meters read the moisture content of wood and drywall through the surface. They use capacitance or radio-frequency principles and do not leave pinholes. A $30 to $80 consumer meter is enough for most homeowner detection. Pin-type meters insert two small probes and give a more direct reading; they are useful when you need to verify a specific spot. The companion guide on moisture meters for homeowners goes deeper on the choice.
Infrared thermometer or camera
Infrared imaging detects temperature differences. Cool spots on an interior surface often indicate condensation or evaporative cooling from a wet material — both are mold-friendly conditions. A handheld infrared thermometer (around $50) gives single-point readings. A thermal-imaging camera shows a full image and reveals patterns. Smartphone-attachment cameras start around $300 and have become common homeowner tools.
Borescope
For suspected hidden growth behind drywall, a USB borescope inserted through a small hole (often through an existing outlet opening) gives visual confirmation without major demolition. Consumer borescopes cost $30 to $100.
Laboratory detection
Lab-based methods are most useful when you cannot see the mold but suspect it is there, when you need documentation, or when you are verifying post-remediation cleanup. Three sample types do most of the work.
Air samples (spore traps). A pump draws indoor air through a cassette that captures airborne spores onto a sticky slide. The lab counts and identifies the spores by morphology. Outdoor control samples are critical because indoor spore counts only mean something compared to outdoors. Cost per sample runs $35 to $75 at the lab, plus inspection labor.
Surface samples (tape lifts and swabs). A piece of clear tape pressed onto suspect growth, or a sterile swab rubbed over the area, captures spores and hyphae for direct microscopic analysis. These confirm whether a stain is mold and what kind. Lab cost runs $25 to $60 per sample.
Bulk samples. A piece of the suspect material itself is sent to the lab. Useful for porous materials where surface sampling may miss embedded growth.
The biggest limitation of lab detection is interpretation. Spore counts vary by season, time of day, and weather. There is no enforceable threshold below which the home is “safe” and above which it is “dangerous.” The CDC and Institute of Medicine have been explicit about this for years. A good inspector uses lab data alongside the visual and moisture findings, not in isolation.
What about consumer home mold test kits
Drugstore and home-improvement-store test kits fall into two categories. Petri-dish kits ask you to expose a culture medium to indoor air and watch what grows. Because mold spores exist in nearly every indoor environment, the dish almost always grows something — and the result tells you very little about whether you have a problem. EPA has explicitly said these kits are not a useful diagnostic.
Lab-analyzed kits (where you mail a tape lift or air-pump cassette to a lab and receive a written report) are more useful when paired with a specific suspect surface. The lab is doing real work; the limitation is that the homeowner is choosing the sample location, which is the most error-prone step.
For background on what kinds of testing actually help homeowners, see InspectandTest’s framework on the best way to test for mold.
Where to look first
Walk every room of the house slowly with a flashlight. Pay closest attention to:
- Bathroom ceilings above showers, grout lines, and the wall behind toilets
- Kitchen cabinets under sinks, behind dishwashers, and around refrigerator water lines
- Basement rim joists, the base of finished drywall, and behind stored cardboard
- Window trim, especially on north-facing single-pane windows
- Attic sheathing near roof valleys and around bathroom fan terminations
- The HVAC air handler, evaporator coil, and supply registers
In Colorado specifically, late-spring basement humidity from warm outdoor air contacting cool foundation walls is a common detection trigger. Front Range homes with finished basements should expect to monitor basement humidity year-round.
When detection should escalate to professional inspection
EPA guidance says homeowners can clean small isolated patches under about 10 square feet on hard non-porous surfaces. Above that threshold, or in any of the following situations, bring in a credentialed inspector:
- Growth covers more than about 10 square feet or spans multiple rooms
- You suspect mold inside HVAC ducts, behind finished walls, or under flooring
- The home has had significant water intrusion that took more than 48 hours to dry
- Occupants have asthma, immune suppression, or unexplained ongoing respiratory symptoms
- The inspection is for a real-estate transaction or insurance claim
- You need a written remediation scope a contractor will accept
A credentialed inspector — typically holding ACAC CMI, IAC2, or NORMI certifications — brings calibrated instruments, infrared imaging, and AIHA-accredited lab relationships that homeowners do not have access to.
Tying it together
Effective home mold detection follows a roughly fixed sequence: sensory walk-through first, instrument readings second, professional inspection or lab sampling third (and only if the earlier layers leave a real question unanswered). The detection step is not the end of the project — it is the beginning of a moisture investigation. Every colony has a source, and lasting fixes address the source rather than the patch. Whether the source is a slow leak under a sink, a failed downspout, or an HVAC condensate problem, finding it is what separates a real solution from a paint-over.
Homeowners who would like a deeper walk-through of the inspection-and-testing decision can read InspectandTest’s professional mold inspection guide alongside this one.
References
- A Brief Guide to Mold, Moisture, and Your Home — U.S. Environmental Protection Agency
- About Mold and Health — Centers for Disease Control and Prevention
- Mold Inspection Standards of Practice — InterNACHI
- Mold Resources for Colorado Residents — Colorado Department of Public Health and Environment
Frequently asked questions
What is the most reliable way to detect mold at home?
A combination of smell, careful visual inspection with a flashlight, and a pinless moisture meter catches most home mold problems. Lab testing helps when growth is suspected but hidden, or when documentation is needed.
Do I need to identify the mold species?
Usually not. EPA and CDC guidance both note that species identification rarely changes the remediation approach. Find the moisture source, remove the affected material, and verify cleanup.
What humidity level encourages mold growth?
Surface humidity above about 60% supports mold growth on most building materials. EPA recommends keeping indoor relative humidity between 30% and 50%. A $15 hygrometer is enough to monitor.
How accurate are consumer mold test kits?
Petri-dish kits are mostly unhelpful because mold spores exist in nearly all indoor air. Lab-analyzed tape lifts and air cassettes are more useful when paired with a specific suspect location.
Front Range homeowners who want a referral to a credentialed independent mold inspector before deciding on remediation can reach out through our contact page.