Early Stages of Black Mold: A Progression Timeline Guide
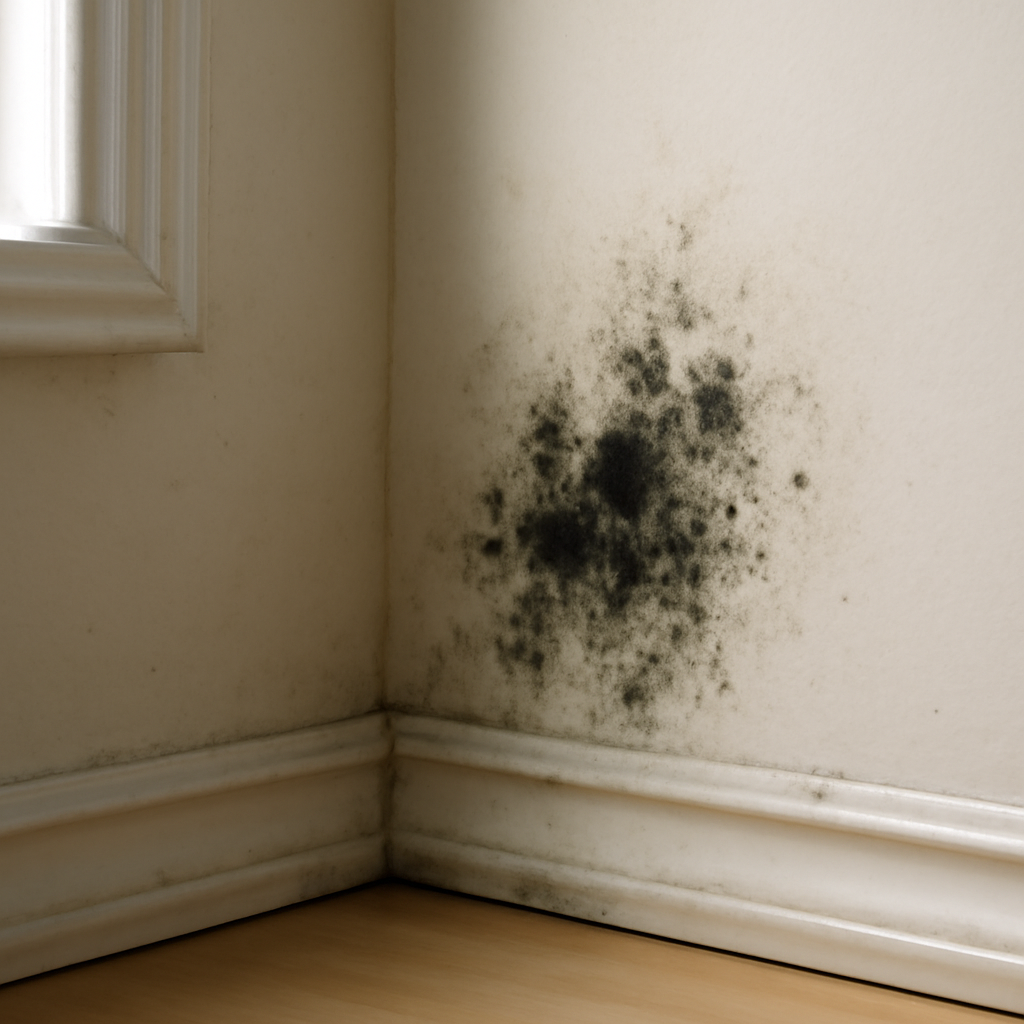
Identifying the early stages of black mold gives homeowners a window to act before growth becomes a remediation-scale problem. Mold develops along a predictable timeline once moisture conditions allow germination, and recognizing each stage helps separate a “wipe-and-watch” situation from one that needs faster intervention. This guide walks the progression from spore activation through dense colony establishment, with the time and visual cues for each stage and the actions appropriate at each point. This article summarizes EPA and CDC guidance current as of 2026 and is informational only; physicians handle health questions and certified inspectors handle testing decisions.
Part of our Black Mold & Your Health guide — start there for the full picture →
Is this mold, asbestos, or water damage? Get a free instant screen
Upload a clear photo of the suspect area. You'll get an instant AI screening opinion and what to do next. This is screening guidance, not a professional determination.
Screening guidance only. AI can be wrong. Confirm asbestos, mold type, or lead with lab testing or a licensed professional before acting.
The Progression Timeline at a Glance
Under typical residential conditions with sustained moisture and an organic substrate, mold development follows a five-stage progression: spore activation (0 to 24 hours), germination (24 to 48 hours), early hyphal growth (48 to 72 hours), visible colony establishment (72 hours to two weeks), and dense colony with active sporulation (two weeks onward). Each stage has visual signatures and corresponding actions that differ in scope.
Stage One: Spore Activation (0 to 24 Hours)
Mold spores are constantly present in indoor air, deposited on every surface. As long as conditions are dry, they remain dormant. When sustained moisture arrives — from a leak, condensation, or high humidity — spores begin internal biochemical changes that prepare them for germination. There is nothing visible to a homeowner during this stage. The only available signal is the moisture event itself.
Action at this stage is fundamentally preventive. Dry wet materials within 24 to 48 hours of any water event. Run fans, set up dehumidifiers, pull wet carpet pad, and lift baseboards if needed to ventilate behind them. Drying within this window typically prevents the entire downstream sequence. EPA materials are consistent: this is the highest-leverage moment in the timeline.
Stage Two: Germination (24 to 48 Hours)
Once water activity at the surface stays above roughly 0.80 and an organic substrate is present, spore walls soften and germ tubes extend outward. The colony is still invisible to the naked eye. The surface may begin to develop very faint discoloration, but homeowners rarely notice anything specific.
The most useful detection tool at this stage is a moisture meter. Elevated readings persisting across multiple checks indicate that conditions for germination are met. Action remains drying-focused: increase airflow, reduce humidity, address the moisture source. If conditions can be reversed within this window, no remediation is needed because no visible growth has occurred.
Stage Three: Early Hyphal Growth (48 to 72 Hours)
Germ tubes become hyphae that grow outward across the substrate. The colony is now microscopically visible but typically below the threshold of homeowner detection. The first sensory cue often appears: a faint musty smell may begin to develop, especially in poorly ventilated areas. Some surfaces show very light discoloration in small patches.
This is the latest stage at which moisture correction alone often resolves the situation without surface treatment. If the substrate dries completely, the early hyphae become dormant and the colony does not progress. Visible cleanup at this point is typically a quick wipe with detergent and water on hard surfaces, combined with replacement of any saturated porous material such as drywall paper or carpet pad.
Stage Four: Visible Colony Establishment (72 Hours to Two Weeks)
The mycelium becomes large enough to see. Small dark spots — often less than a quarter inch across — appear on the substrate. Color is usually muted at first and darkens over days as sporulation begins. Texture is fine, sometimes velvety, sometimes glossy depending on species and surface conditions. The musty smell intensifies and becomes location-specific.
This is where most homeowners first detect the problem. The good news: this stage is still within EPA’s homeowner-cleanup range if the area is under roughly 10 square feet and on hard non-porous surfaces. The bad news: porous materials such as drywall paper, ceiling tile, and carpet pad have likely begun internal colonization that surface cleaning cannot reach. Visual extent often understates actual extent.
What Early Visible Mold Looks Like
Small dark spots scattered across a surface, often in a pattern that mirrors the underlying moisture distribution. On a wet drywall surface, the pattern often follows a rising-damp line. On a window sill, the pattern often radiates from a condensation point at the glass-frame seal. On HVAC components, the pattern often appears as a thin film rather than discrete spots.
Stage Five: Dense Colony With Active Sporulation (Two Weeks and Beyond)
The colony becomes large, the color darkens significantly, and sporulation accelerates. Visible patches merge into continuous growth. The musty odor becomes strong and persistent. Material damage — drywall bowing, paint bubbling, wood warping — becomes apparent. Spores released by the active colony settle throughout the home, where they wait for the next moisture event to germinate.
This is the stage where homeowner cleanup typically becomes inappropriate. The visual extent has crossed the 10-square-foot threshold, porous materials need replacement rather than cleaning, and the spore burden on surrounding surfaces means containment matters during cleanup. EPA guidance recommends professional remediation at this stage for most contexts.
Why Early Detection Matters Financially
The cost difference across stages is dramatic. Drying intervention at stage one or two often costs nothing beyond running existing fans. Surface cleanup at stage three or early four typically runs under $200 in materials and a few hours of time. Professional remediation at stage five for a moderately affected room often runs $2,000 to $6,000. Remediation of multi-room contamination after months of progression can exceed $20,000. The cost curve is roughly exponential, which is why moisture monitoring after any water event matters so much.
Homeowners interested in the broader inspection workflow can read our mold inspection and testing hub.
Stage-Specific Detection Tools
Different stages favor different detection methods.
Stages One and Two
Moisture meter readings are the primary signal. Visual and olfactory cues are not yet present. A $20 hygrometer in each major room and a $40 pin or pinless moisture meter for spot checks are sufficient.
Stage Three
Faint musty smell often emerges before visible growth. Walk the house first thing in the morning before opening windows. Pay attention to closets, bathrooms, and basements where stagnation concentrates MVOCs.
Stage Four
Visual inspection reveals the colony. Photograph everything; the size and pattern at this stage influence cleanup decisions. Moisture meter readings should still be elevated unless the source has self-corrected.
Stage Five
Professional air sampling and tape-lift surface sampling become diagnostic. Visual inspection is straightforward, but mapping the contamination extent for remediation planning often requires inspection openings into adjacent cavities.
Special Cases That Compress the Timeline
Three conditions accelerate the progression.
Warm humid environments — finished basements in summer with no dehumidification, attics during shoulder season — push growth to visible stage four in roughly half the typical time. The 60-to-85-degree zone with elevated humidity is the fastest growth condition.
Highly mold-friendly substrates — paper-faced drywall, kraft-faced fiberglass insulation, OSB, fabric — support faster colonization than less-friendly materials. The same moisture event on cement board or sealed concrete may not produce visible growth even after weeks.
Pre-existing spore loads — homes with prior mold issues that were not fully resolved — start the timeline with elevated surface spore deposits, leading to faster initial colonization when moisture returns.
Decision Points Along the Timeline
Three decision points matter most for homeowners. The first is at 48 hours after any water event: is the area dry? If not, intervention with fans and dehumidifiers is needed. The second is at first visible growth: is the area under 10 square feet on hard surfaces with a known moisture source? If so, homeowner cleanup is reasonable. The third is at any sign of progression beyond a small surface area: contact a certified mold remediator before the contamination spreads.
Our mold exterminator buyer guide covers what to look for when hiring a remediation contractor.
Prevention as the Best “Early Stage”
The most effective intervention happens before stage one. Maintaining indoor relative humidity between 30 and 50 percent prevents the conditions that allow spore activation. Quick response to plumbing leaks, roof leaks, and bulk water events prevents the moisture sustainability that progression requires. Regular inspection of high-risk zones — water heater pans, washing machine hoses, sink cabinet interiors, attic sheathing — catches developing problems while still drying-fixable.
References
- EPA Mold Course Chapter 2: mold growth progression — U.S. Environmental Protection Agency
- CDC basic facts about mold and dampness — Centers for Disease Control and Prevention
- NIEHS mold and indoor environments overview — National Institute of Environmental Health Sciences
- EPA brief guide to mold, moisture, and your home — U.S. Environmental Protection Agency
Frequently asked questions
How quickly does black mold develop after water damage?
Germination typically begins 24 to 48 hours after sustained moisture starts. Visible mycelium appears within 72 hours under typical residential conditions. Drying wet materials within the first 48 hours usually prevents the entire progression.
Can early-stage black mold be reversed by drying alone?
Yes, before significant hyphal growth. Drying the substrate completely within 48 to 72 hours of moisture onset typically arrests progression before visible colony formation. Once visible growth appears, drying alone is no longer sufficient and surface treatment or material replacement is needed.
What does very early black mold look like?
Faint discoloration on a damp surface, often with small scattered dark spots less than a quarter inch across. The musty odor often appears before the visible patches become prominent. Texture is fine and may be invisible under normal lighting; angled light reveals it more clearly.
Does early-stage mold require professional remediation?
Usually not. Visible mold under roughly 10 square feet on hard non-porous surfaces with a known moisture source falls within EPA homeowner-cleanup guidance. Larger areas, porous materials, unknown sources, or HVAC involvement warrant professional remediation regardless of stage.
Front Range homeowners who spot early-stage mold and want a vetted local inspector before deciding on testing or remediation can get in touch through our contact page.