Beginning of Black Mold: Early-Stage Indicators for Homeowners
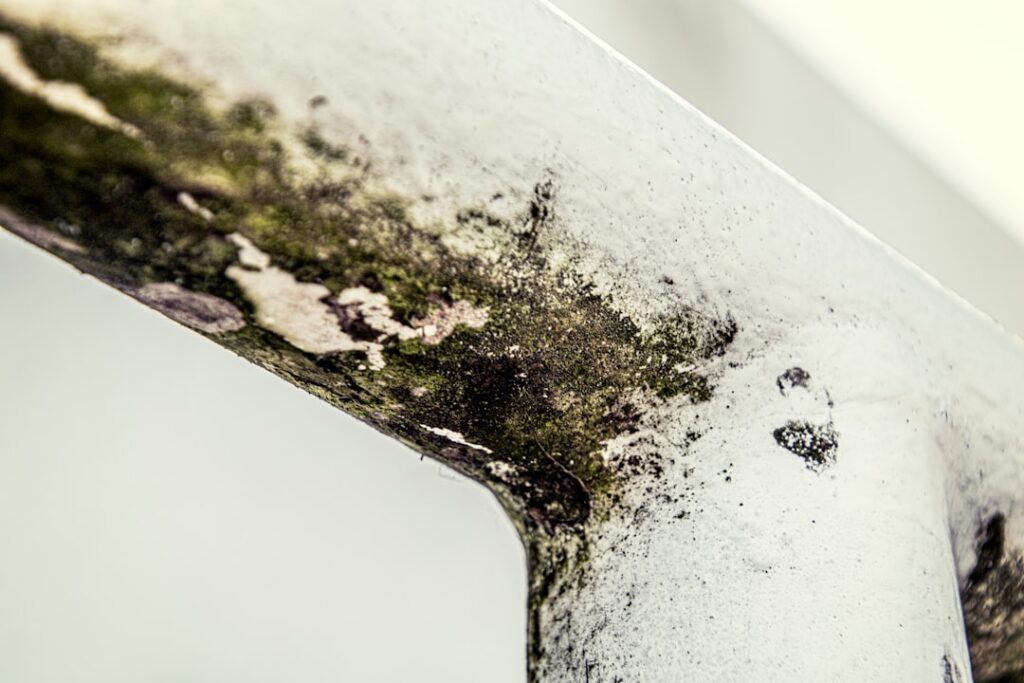
Catching mold growth at the very beginning is dramatically cheaper than catching it late. A colony the size of a quarter usually wipes off a hard surface in five minutes; the same growth six months later may require removing drywall, replacing baseboards, and bringing in a containment crew. Homeowners who recognize early-stage indicators can intervene before the moisture problem matures into a remediation problem. This guide summarizes EPA and CDC guidance current as of 2026 — consult a certified mold inspector for testing decisions and your physician for health-symptom evaluation. The sections below describe what the beginning of black mold actually looks, smells, and behaves like before it becomes obvious.
Part of our Black Mold & Your Health guide — start there for the full picture →
Is this mold, asbestos, or water damage? Get a free instant screen
Upload a clear photo of the suspect area. You'll get an instant AI screening opinion and what to do next. This is screening guidance, not a professional determination.
Screening guidance only. AI can be wrong. Confirm asbestos, mold type, or lead with lab testing or a licensed professional before acting.
The First Visible Stage: Pinprick Specks
Most black mold starts as scattered pinprick-sized dots rather than a continuous patch. The dots are individual colony-forming units that have established on a surface and begun producing visible biomass. They cluster where conditions are most favorable — the lowest point of a damp surface, the coolest spot on a ceiling, the corner of a window frame. To the casual eye they often look like dirt or fly specks. A close look with a flashlight at an angle usually reveals the slight three-dimensional texture that distinguishes colonies from settled debris.
The Stippled-Constellation Pattern
Early colonies often appear in a stippled pattern with small clear gaps between dots. As growth continues, the dots merge into larger patches and eventually a continuous colony. Catching the stippled stage matters because the colony is still surface-only on most substrates. Once the colony reaches the merged-patch stage, the underlying material is more likely to be penetrated, especially on porous surfaces like drywall paper or ceiling tile. The InterNACHI mold standard captures this progression in inspector training.
Light Staining Before Visible Mold
Before any colony is visible, water often leaves a faint stain. Yellow or brown halos on a ceiling, slight discoloration along a baseboard, or a faint dark line at the seam where two pieces of trim meet are all moisture calling cards. The EPA flags any material that has been wet for more than 48 hours as a mold-growth risk. A yellow halo on a ceiling may indicate a slow shower-pan leak in the room above; mold growth in the ceiling cavity is the next stage if moisture is not addressed.
The Faint-Smell Stage
Smell often precedes visible growth by days or weeks. A faintly musty closet, a slightly earthy basement, or a room that smells “different” when you return after a vacation are early indicators. The CDC lists a musty odor as one of the most reliable indicators of hidden moisture problems. Air fresheners and scented diffusers mask the smell while doing nothing for the source. Homeowners who plug in scented products often delay finding the source by months. For background on visual identification, see our guide on what the start of black mold looks like.
Surface Sheen Changes
Early colonies sometimes show as a subtle change in surface sheen rather than as discrete dots. Paint that looked uniformly matte develops a slightly mottled appearance. Tile grout that was uniformly clean develops faint shading. Wood that was uniformly stained shows slight blotchiness. These changes are easy to dismiss as normal wear, but in a damp area they are worth a closer look. Photographs taken at consistent intervals reveal the change more clearly than memory.
Where to Look in the Earliest Stage
Early colonies concentrate at moisture interfaces. The bottom edge of a shower curtain, the rim of caulk around a tub, the ceiling directly above the shower, the underside of a window where condensation pools at night, the corner of a basement where the wall meets the floor, the rear wall of a vanity cabinet, and the joint where a baseboard meets carpet are all early-stage favorites. Knowing where to look saves time during the routine walkthroughs that catch problems early.
The Humidity Pattern Before Visible Growth
Mold needs moisture, and rooms drifting above 60 percent relative humidity are conditions-ready before any growth is visible. A $15 hygrometer in each main room tells you which spaces are crossing the threshold. The EPA recommends maintaining indoor relative humidity between 30 and 50 percent year-round. Front Range basements often drift damp in late spring and early summer; bathrooms drift damp daily during shower hours. Monitoring patterns flags risk before growth appears.
Touch Tests in Early-Stage Areas
A flat hand pressed against drywall feels uniformly firm when dry. Damp drywall feels slightly cool and yields a fraction more under finger pressure. Soft spots indicate water absorption deep enough that mold growth is likely. A pin-style moisture meter confirms what the hand suggests. The cost of a moisture meter ($30 to $50 at most home stores) is justified by the early detection it enables across a house.
Mistakes That Hide Early-Stage Mold
Several common homeowner habits hide early-stage growth. Painting over slightly stained drywall covers the visual evidence without addressing the moisture. Storing cardboard boxes in a basement absorbs moisture and provides cellulose substrate, often making the boxes the first colonies in a damp room. Closing closet doors traps humidity and keeps the closet smell from being noticed. Air fresheners mask developing smells. Each habit delays detection past the easy-cleanup stage.
The Cleanup Window for Early-Stage Mold
Early-stage colonies on hard non-porous surfaces under 10 square feet fall well within the EPA homeowner cleanup guidance. Detergent and water with a stiff brush, allowed to dry, then HEPA-vacuumed, usually removes the colony. Wear an N95 respirator, gloves, and eye protection. Address the moisture source — fix the drip, improve ventilation, lower humidity — or the colony returns. Catching mold at this stage typically takes 30 minutes of cleanup instead of $1,500 of remediation later.
Documenting the Beginning
Photograph any early-stage growth with a coin or tape measure for scale, note the date, and record the location. Document the moisture-source correction (the fixed drip, the new caulk, the improved ventilation). This documentation matters during real-estate transactions and insurance claims; sellers who can show “we noticed it, fixed the source, cleaned it, and it never came back” inspire more buyer confidence than silence. Our hub on mold inspection and prevention covers documentation expectations.
When the Beginning Is Actually Late
What looks like the beginning of mold on a visible surface is sometimes the late stage of a hidden cavity colony. A small black dot on the surface of drywall may be the first emergence from a large colony growing on the cavity side of the same drywall. Soft, stained, or warped drywall in the area suggests the visible spot is actually a tip of an iceberg. When in doubt, a moisture meter and possibly an inspector with infrared imaging clarifies whether you are looking at a small problem or the surface manifestation of a larger one.
Early-Stage Indicators in HVAC Systems
HVAC systems show early-stage mold differently. A faint dark line forming around supply registers indicates spore distribution and dust accumulation that may be growing into a contamination case. A cooling coil with biological-film buildup looks slimy on close inspection. A condensate pan with standing water and a faint smell is a developing problem. Each warrants attention before the system spreads colonies throughout the building.
Habit-Based Prevention From the Start
Most early-stage mold is preventable with a small set of recurring habits. Run bathroom fans 20 minutes after every shower. Squeegee shower walls weekly. Wipe down condensation on windows during cold mornings. Keep relative humidity between 30 and 50 percent. Pull large appliances out from the wall annually to check behind. Address any drip within 48 hours. Each habit takes minutes. Collectively they remove most early-stage growth conditions.
Front Range Seasonal Triggers for Early Growth
Front Range homes show predictable seasonal moments when early-stage mold growth typically begins. April and May snowmelt brings groundwater pressure and basement seepage that supports first colonies in finished basements. June and July monsoon bursts overwhelm gutters and produce small attic and ceiling leaks. August humidity peaks support condensation cycles on cool bathroom surfaces. November and December bring window-condensation cycles on single-pane and older double-pane windows. Each season has its starting points. Scheduling a thorough walk-through at the start of each season catches the new triggers while they are still small and easily addressed.
The Photo-Comparison Method
One useful technique for catching early-stage growth is taking baseline photographs of known damp or vulnerable areas. Photograph the underside of the kitchen sink cabinet, behind the toilet, the bathroom-shower ceiling, and the crawl-space framing once a year, in the same lighting and from the same angles. Compare year-over-year. Subtle changes that memory would miss become obvious in side-by-side comparison. A baseline taken in year one, with annual updates, builds a multi-year visual record that supports both DIY identification and any professional inspector visit. Photos with consistent reference markers (a tape measure laid in the frame) standardize the comparison.
The Faint Stain Triage Question
A faint stain on drywall or ceiling triggers the question: is this active mold-growth-ready moisture, or old dried evidence of a past event already resolved? The triage runs: touch the stain (does it feel slightly cool and damp, suggesting active moisture, or room-temperature and dry, suggesting old). Moisture-meter the substrate (above 15 percent suggests current wet conditions). Compare to a similar area without staining (relative readings matter more than absolute). If the stain is currently dry and the moisture meter reads normal, the past event was resolved and mold growth is unlikely. If conditions are still wet, intervention is warranted.
Catching Mold in HVAC Filters
Disposable HVAC filters captured during quarterly changes can show early-stage mold in the system before any other indicator appears. A filter that looks darker than usual, that has visible dark spots not consistent with dust, or that has a faint musty smell when removed warrants attention. The filter itself is disposable; the question is what its condition reveals about the system upstream. A dark or musty filter combined with elevated humidity in the home suggests HVAC contamination developing before any visible growth at registers.
The Weekly Walk-Through That Compounds Over Time
A five-minute walk-through of the home each week, with deliberate attention to smell, humidity readings, and any visible change, catches developing problems within days of the change rather than months. The compound benefit over years is dramatic — homeowners who walk weekly catch the early stages of nearly every developing problem and rarely face surprise remediation. The discipline is small, the payoff is significant. Adding the walkthrough to a recurring household routine (Sunday morning, say) builds the habit and produces documented evidence over time.
References
- A Brief Guide to Mold, Moisture, and Your Home — U.S. Environmental Protection Agency
- About Mold — Centers for Disease Control and Prevention
- Mold Inspection Standards of Practice — InterNACHI
- Mold Safety Notice — U.S. Department of Housing and Urban Development
Frequently asked questions
What does the very beginning of black mold look like?
Most colonies begin as scattered pinprick-sized dots clustered where moisture conditions are most favorable. Light staining and faint musty smell often precede visible growth. The stippled-constellation stage is the easiest cleanup window before colonies merge into continuous patches.
Can I clean early-stage mold myself?
Yes. Colonies under 10 square feet on hard non-porous surfaces fall within EPA homeowner cleanup guidance. Use detergent and water, scrub thoroughly, allow to dry, HEPA-vacuum, and wear an N95 respirator, gloves, and eye protection.
How can I catch mold before it is visible?
Monitor relative humidity in each room with a hygrometer, sniff-test closed rooms periodically, inspect under sinks and behind appliances twice a year, and address any moisture event within 48 hours. Pre-visible monitoring is much cheaper than late-stage remediation.
If something feels off in your home but you cannot quite confirm growth, talk to a Front Range mold inspector through our contact page. Catching the beginning of a mold problem is dramatically less expensive than treating a mature one, and a short consultation often clarifies what stage you are actually at.