House Mold Clean Up: A Whole-Home Coordination Guide
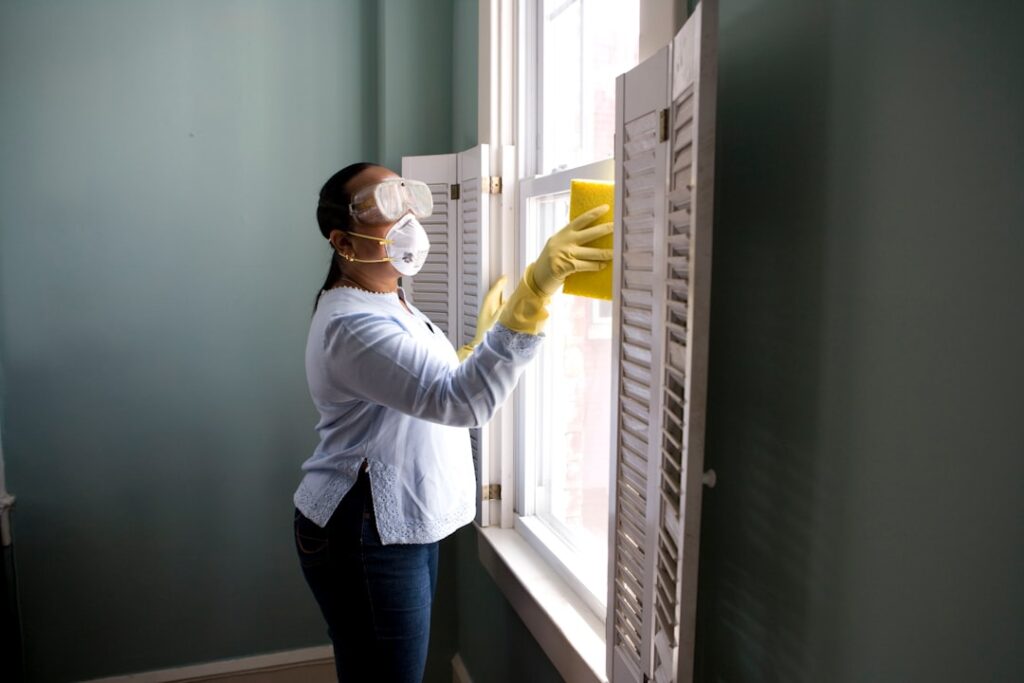
When mold appears in more than one room — bathroom corner plus basement wall plus the back of a closet — the right approach is not three separate cleanups. It is a coordinated house-wide plan that sequences the work, isolates the HVAC system, and prevents cross-contamination from one room into the next. A house mold clean up done piecemeal usually produces the same patches reappearing, because aerosolized spores from the first cleanup settle in the second room and seed regrowth. This guide summarizes EPA and CDC guidance current as of 2026 — consult a certified mold inspector for testing decisions and your physician for symptom evaluation. The framework below describes the whole-house coordination layer most homeowner guides skip.
Part of our Mold Removal & Remediation guide — start there for the full picture →
Is this mold, asbestos, or water damage? Get a free instant screen
Upload a clear photo of the suspect area. You'll get an instant AI screening opinion and what to do next. This is screening guidance, not a professional determination.
Screening guidance only. AI can be wrong. Confirm asbestos, mold type, or lead with lab testing or a licensed professional before acting.
Why Whole-House Coordination Matters
Mold spores are airborne by design. Disturbing a colony — even with a gentle wipe — aerosolizes thousands of spores into the room air. Those spores travel through open doors, through HVAC return ducts, around plumbing penetrations, and under door sweeps. A homeowner who cleans the bathroom on Saturday morning and the basement on Sunday afternoon has just seeded the basement air with bathroom spores, and vice versa.
The coordination problem is solved by three principles: room-by-room containment with the HVAC off, sequencing from least-affected to most-affected (or upstairs to downstairs, depending on layout), and a HEPA-vacuum-and-air-clean pass between rooms. Skipping any one of these is how a weekend of work produces three rooms of regrowth two months later.
The broader inspection framework for identifying everywhere mold has taken hold is covered in our mold inspection and testing hub. Walk the house with a flashlight before scheduling any cleanup.
Step One: Map Every Affected Room
Before any product goes on any surface, walk the entire house with a notebook. List every visible patch by room and substrate, every musty smell even without visible growth, and every moisture source — current or recent. Bathrooms, kitchens, basements, attics, closets backed against exterior walls, around HVAC plenums, behind water heaters, under sinks. Front Range homes commonly hide growth behind finished basement walls and at the attic-ceiling joint where ice dams penetrated the year before.
Photograph every patch with a ruler in frame. Total the square footage across all rooms. If the combined total exceeds ten square feet — even if no single patch does — the house has crossed the EPA’s DIY threshold and a professional should be engaged. Multiple smaller patches in the same home often signal a humidity-control problem, an HVAC contamination source, or a building-envelope failure rather than discrete one-off events.
Step Two: Isolate the HVAC System
Before any cleanup begins, turn off the HVAC system at the thermostat and the breaker. Tape plastic sheeting over every return-air grille in affected rooms and at least one adjacent room. The return-side of the HVAC system is the high-suction path that pulls airborne spores from anywhere in the house into the air handler — where they settle on the coil, in the blower wheel, and on the inside of duct walls.
If visible mold has appeared on any return grille, inside any visible duct section, on the air handler exterior, or on the cooling-coil access panel, the HVAC system itself needs professional cleaning. Continuing to run the system spreads spores through the whole house, and any room-by-room cleanup is essentially wasted work until the system is decontaminated.
Step Three: Sequence the Rooms
The order matters. Three general rules:
Least-affected first, most-affected last. A small bathroom corner is the warm-up; a basement gut-out is the finale. Working in this order keeps the heavily aerosolizing job from contaminating rooms still in the pipeline.
Upstairs before downstairs when possible. Spores settle downward through the house. Cleaning an upstairs bedroom corner after the basement was disturbed means the new spores from the basement work have already drifted up.
HVAC-isolated rooms in a single push. Once the HVAC is off and the return grilles are sealed, the cleanup window before the system has to be restored should be planned in a contiguous block. Living without heat or AC for a week is rough on Front Range homes in shoulder seasons.
Step Four: Containment Setup Per Room
For each room being cleaned, set up minimum containment before opening any antimicrobial bottle. Close doors and tape a 6-mil plastic sheet over the doorway with a Z-flap entrance. Lay a wet towel along the threshold to catch crawling spores. Put a box fan in the window blowing out, with cardboard sealing the rest of the frame. Wear PPE every time the room is entered, including for taking photos.
The HEPA-vacuum-and-air-clean pass between rooms is the move most homeowners skip. After finishing a room, before moving to the next: HEPA-vacuum the floor three feet beyond the work area, wipe horizontal surfaces with disposable cloths, run an air scrubber (or simply the box fan exhaust) for an hour with the door still sealed, and only then break containment. A rented HEPA air scrubber from a Front Range tool rental is $50 to $100 per day and is the single best investment for a multi-room job.
Step Five: Substrate-by-Substrate Cleaning
Different substrates take different approaches. On tile, glass, and sealed concrete (most bathrooms and basements), spray with an EPA-registered antimicrobial or 3% hydrogen peroxide, dwell, scrub, wipe, dry. On wood (window frames, baseboards, framing), the same products work but the dwell needs to be longer and the surface should be lightly sanded after drying if pigmentation remains.
On drywall, the rule is simple: if the colored growth has penetrated the paper face (visible from both sides or with discoloration extending beyond the colored area), remove and replace the affected section plus six inches of margin. Surface cleaning a colonized paper face is cosmetic — the hyphae remain in the paper, and growth returns once humidity rises. Our mold in walls removal guide covers the cut-and-replace workflow.
On carpet, carpet padding, ceiling tile, and insulation, the default is removal. These materials cannot be reliably cleaned at the homeowner scale; bag them in 6-mil plastic and dispose. Salvageable contents (clothing, books, electronics) in affected rooms should be HEPA-vacuumed individually before removal from the room, then assessed in a clean space.
Step Six: Verify Room by Room
After each room is cleaned, verify before moving on. Visual check for any remaining growth or staining. Moisture-meter readings on substrates: below 15% for wood, below the “dry” indicator zone on a pinless meter for drywall and masonry. Sniff test for any persistent musty smell. Photograph the finished state.
Wait 48 hours with the room ventilated before declaring it done. Surface dryness can be deceptive — a wall that reads dry on a pinless meter at the surface may still hold moisture an inch deeper, and condensation overnight will tell. If staining or odor returns inside two weeks, the moisture source was not fully resolved or the cleanup did not penetrate far enough; reopen the work before sealing the room back into normal use.
When the Whole-House Picture Demands a Professional
Three patterns push a multi-room house into professional remediation territory.
HVAC contamination. Any visible mold inside the system, on the coil, in ducts, or on the air handler. Continuing to run the system without decontamination undoes any room-level work.
Combined affected area over ten square feet. Even if no single patch is large, the total scope across the house may warrant professional containment to prevent cross-contamination.
Hidden moisture source. If mold has appeared in multiple rooms without obvious causes — no plumbing leak, no roof leak, no visible condensation — the source is likely structural (envelope failure, humidity control, hidden plumbing pinhole) and needs diagnostic work before cleanup. Cleanup without diagnosis is a guaranteed return engagement.
The whole-house planning step is the value-add a certified mold inspector brings. Engaging an independent inspector for a $300 to $600 walkthrough often saves several thousand in misdirected cleanup work.
Common Front Range Whole-House Patterns
Front Range homes share three recurring whole-house mold patterns worth recognizing during planning.
Ice-dam attic-to-ceiling cascade. A January ice dam pushes water under shingles into attic insulation, which weeps down into ceiling-side drywall in upstairs rooms. By spring, mold has appeared in the attic, in the ceiling cavity, and on bedroom ceilings — three rooms from a single moisture event. The cleanup sequence runs attic first (heavily contained), ceiling cavity second, bedroom interiors last.
Finished-basement chronic seepage. A basement built without proper exterior drainage shows mold on the cold-side of foundation walls, in carpet padding along the perimeter, behind paneled storage walls, and inside HVAC return ducts that share the basement air. The moisture-source fix (exterior grading, sump-pit upgrade, interior drainage) must precede any cleanup, or the work is wasted.
Crawlspace-to-living-area humidity transfer. A vented crawlspace with chronic high humidity feeds mold growth into first-floor subflooring, baseboards along exterior walls, and inside closets backed against exterior walls. Encapsulating the crawlspace with a vapor barrier and a dedicated dehumidifier is the precondition for any first-floor cleanup. Without it, the same patches reappear within months.
Documentation and Post-Cleanup Monitoring
Multi-room cleanups generate more paperwork than single-room jobs, and the documentation pays off later. For each room, save: before photos, the substrates and square footage cleaned, the products used (with EPA registration numbers), the dates, the moisture-meter readings at completion, and after photos.
For the whole-house pass, save: the HVAC isolation log (when off, when restored), the sequencing record, any HEPA filter changes, and the disposal documentation for bagged porous materials. If the house is sold within five years, this packet is what a buyer’s mold inspector wants to see — and it protects the seller from disclosure disputes.
Monitor the cleaned house for thirty days. Walk through every cleaned room weekly, sniff for any returning musty smell, check for new staining, and re-meter substrates at the original problem spots. Front Range humidity swings (dry winter, wet spring) test the durability of moisture-source fixes; the thirty-day window catches early regrowth before it spreads.
One thirty-day milestone worth booking: re-energize the HVAC system on day one, then have the air handler filter inspected on day fourteen. Visible debris on the filter (beyond normal dust) suggests the HVAC was contaminated before isolation and is still releasing spores into the house. At that point, an HVAC-cleaning service should be engaged before the cleanup is considered complete.
Finally, set a calendar reminder for six months out. Pull out the documentation packet, walk every cleaned room again, and look for any new staining or smell. Six months catches seasonal patterns that thirty days misses — a basement that stays dry through summer can re-mold in fall when humid air migrates from upstairs. A house that passes the six-month walkthrough has been genuinely cleaned, not just cosmetically tidied.
References
- A Brief Guide to Mold, Moisture, and Your Home — U.S. EPA
- Mold Cleanup and Remediation Guidance — Centers for Disease Control and Prevention
- Air Duct Cleaning Guidance — U.S. EPA
- Mold and Indoor Air Quality — Colorado Department of Public Health and Environment
Frequently asked questions
Should I clean every room with mold at the same time?
Plan and contain every room, but sequence the cleanup from least-affected to most-affected with a HEPA-vacuum-and-air-clean pass between rooms. Working all rooms simultaneously without containment cross-contaminates clean areas with airborne spores from the disturbed ones.
Do I have to turn off the HVAC during whole-house mold cleanup?
Yes. Turn the system off at the thermostat and the breaker, and tape plastic sheeting over return grilles in affected rooms. Running HVAC during cleanup pulls airborne spores into the air handler and seeds the rest of the house.
What is the cross-contamination risk in a multi-room cleanup?
Aerosolized spores from one room settle in adjacent rooms through open doors, HVAC returns, and plumbing penetrations. The risk is that yesterday's cleaned room becomes tomorrow's regrowth source. Containment per room plus a HEPA pass between rooms prevents this.
When does multi-room house mold become a professional job?
When the combined affected area across rooms exceeds ten square feet, when the HVAC system shows any contamination, or when the moisture source driving multi-room growth is hidden or structural rather than obvious.
Homeowners on the Front Range coordinating a multi-room mold cleanup can connect with a vetted independent inspector through our contact page for a walkthrough before any work begins.