Hardwired Dishwashers: Junction Boxes, Disconnects, Circuits
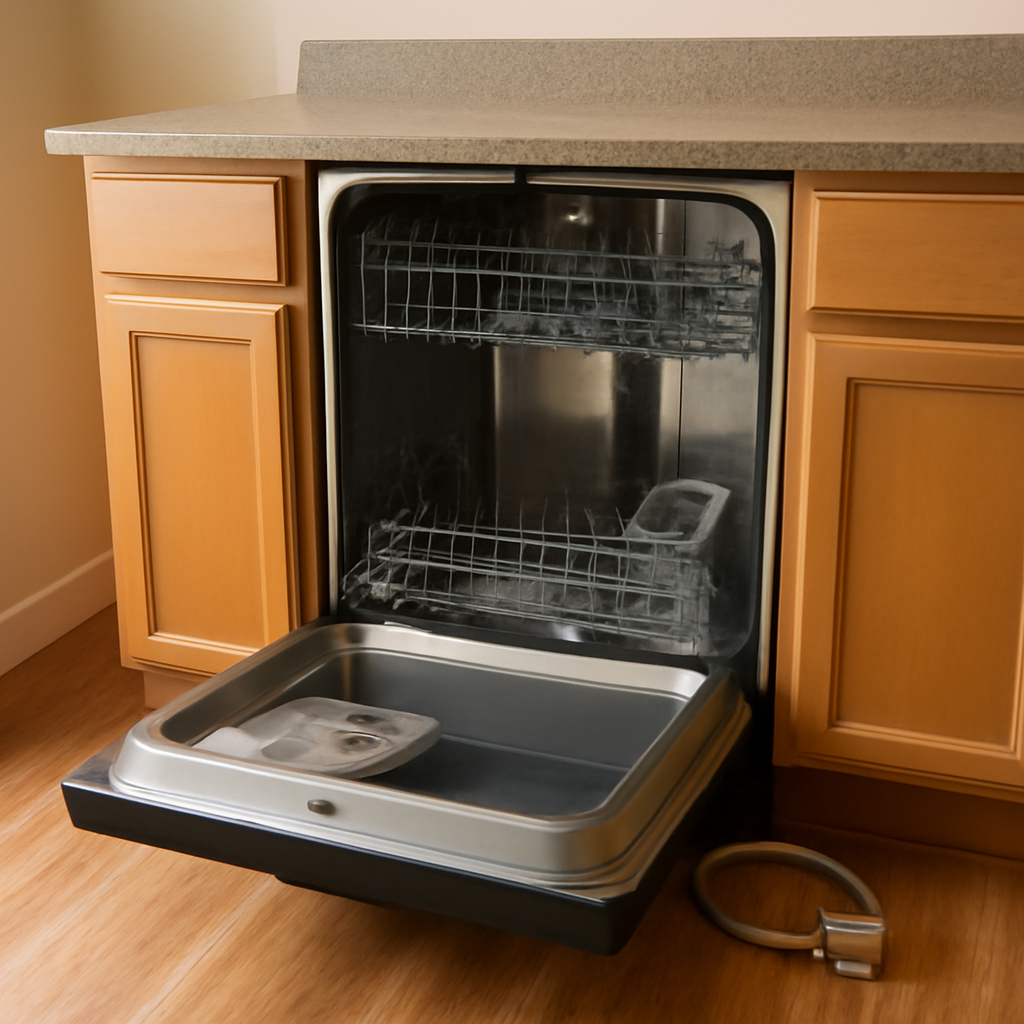
Most people never think about how their dishwasher gets power. The machine slides under the counter, the kick plate goes back on and the wiring disappears. That hidden connection matters, though, because a dishwasher combines a heating element, a motor, a pump and a steady supply of water in a tight space under a countertop. Many dishwashers are hardwired, meaning the house wiring runs straight into a small electrical box on the appliance rather than ending at a plug. Others use a cord and plug that goes into a receptacle in the sink cabinet. Both can be done safely, and both can be done badly. Across the Colorado Front Range, home inspectors see everything from tidy factory-style connections in new builds to taped splices and loose cable in older kitchens that have gone through several appliance swaps. This guide explains how a hardwired dishwasher connects, the disconnect and circuit questions that come up, the plumbing side of the job and what an inspector typically notes.
Part of our Plumbing & Water guide — start there for the full picture →
Hardwired Versus Cord-and-Plug Dishwashers
A hardwired dishwasher has the branch circuit cable, often nonmetallic sheathed cable, run directly to a terminal or junction box on the appliance. The connection is made inside that box with wire connectors, and a cover plate closes it up. There is no plug to pull.
A cord-and-plug dishwasher uses a power cord, either supplied by the manufacturer or sold as an accessory kit, that plugs into a receptacle. That receptacle is usually in the adjacent sink base cabinet, where it is reachable once the cabinet door is open.
Which approach is allowed depends on two things: the manufacturer’s installation instructions and the local electrical code. Some models ship ready for hardwiring and list a specific cord kit for plug-in use. Others are designed for one method only. The installation manual is the first document to read, since it typically lists the required circuit size, the connection method and the clearances. Local code and the building department fill in the rest. The details below describe common practice in broad terms rather than a rule for any specific house.
| Feature | Hardwired | Cord-and-plug |
|---|---|---|
| Connection point | Junction or terminal box on the dishwasher | Receptacle in an adjacent cabinet |
| How power is disconnected | Breaker, often with a lockout, or a local switch | Unplugging the cord |
| Ease of replacement | Requires opening the box and handling conductors | Unplug, swap, plug back in |
| Common failure points | Loose splices, missing clamp, cable pinched under the unit | Cord damage, cord routed through a sharp cabinet hole |
| GFCI protection, where required | Usually at the breaker | At the breaker or the receptacle |
The Junction Box at the Unit
On most hardwired dishwashers, the electrical connection sits behind the lower front kick panel, usually on the right or left front corner. A small metal box houses the connection between the appliance leads and the house wiring. Getting this connection right is the core of a safe installation.
Key points a careful installer handles include:
- A cable clamp or connector. The house cable should enter the box through a listed clamp or connector so it cannot be pulled against a sharp edge. Our guide to the junction box explains why this matters in any splice location.
- Properly made splices. The hot, neutral and ground conductors from the house are joined to the appliance leads, usually with twist-on connectors. A connector that is too large or too small for the wire combination can loosen over time. The wire nut guide covers sizing and the “tug test.”
- The equipment ground. The bare or green conductor must connect to the dishwasher’s grounding point. A metal appliance sitting near a sink and plumbing needs a reliable ground path.
- Cable routing. The cable should run so that it is not crushed when the dishwasher slides into place or pinched by leveling legs. Romex, the common trade name for nonmetallic sheathed cable, is not designed to be stepped on or squeezed under a heavy appliance.
- The cover in place. The box cover belongs back on after the connection is made. An open box with exposed splices is a common inspection finding.
Some homes also have a separate junction box in the wall or cabinet that feeds a short whip to the dishwasher. Every splice in the house should be in an accessible box with a cover, not buried in a wall or floating loose under the cabinet.
Signs of a Poor Connection
A loose or overheated connection may show discoloration around the box, a burnt smell when the dishwasher heats, or intermittent power where the unit stops mid-cycle and then resumes. Melted insulation on the conductors is a serious warning. Any of these signs is a reason to turn off the breaker and call an electrician rather than keep running the machine. The U.S. Fire Administration advises replacing an appliance that has a cracked, damaged or loose cord, and the same caution applies to damaged supply wiring at a hardwired connection.
Disconnecting Means and Circuit Questions
Anyone servicing a dishwasher needs a dependable way to make sure it is not energized. How that is achieved varies with the code edition and local practice, so treat this as a general description and confirm with the local building department.
- Plug as disconnect. On a cord-and-plug unit, unplugging the cord removes power. That is one reason some electricians prefer the cord approach where the manufacturer and local code allow it.
- Breaker with a lockout. On a hardwired unit, the circuit breaker is often the disconnect. If the panel is not in sight of the dishwasher, a lockable breaker or lockout accessory may be used so the breaker cannot be turned back on while someone is working.
- Local switch. Some kitchens have a wall or cabinet switch that serves as the disconnect. A switch that looks like a disposal switch but actually controls the dishwasher is a common source of confusion, so labeling helps.
Whatever the method, the panel directory should clearly identify the dishwasher circuit. An unlabeled panel turns a simple repair into guesswork.
Dedicated Circuit Considerations
Many manufacturers call for a dedicated circuit, meaning the dishwasher is the only appliance on that breaker, and specify a breaker size in the installation manual. Dishwashers with heating elements draw a substantial load during wash and dry cycles. Sharing that circuit with countertop outlets or other appliances can lead to overload trips.
GFCI and AFCI Protection
Newer code cycles in many areas have extended ground-fault protection to dishwasher outlets and circuits, and arc-fault protection to many kitchen circuits. The National Fire Protection Association recommends GFCIs in kitchens and other wet areas and says GFCIs and AFCIs should be installed by a licensed or qualified electrician. On a hardwired dishwasher, GFCI protection is usually provided by a GFCI breaker or a dual-function breaker in the panel, since there is no receptacle at the unit. Whether a particular home needs it depends on when the circuit was installed and local adoption, so confirm with local code. Some older dishwashers can trip sensitive protection devices, and that is a reason for a professional diagnosis rather than removing the protection.
The Plumbing Side: Drain and Supply
A dishwasher is also a plumbing fixture. Its electrical connection usually gets more attention, but water damage under a kitchen floor is a far more common problem than electrical failure.
Drain Hose, High Loop and Air Gap
The dishwasher pumps wastewater through a flexible drain hose to the sink drain or a garbage disposal inlet. To keep dirty sink water from flowing back into the dishwasher, the drain path needs backflow protection. Two methods are common:
- High loop. The hose is fastened as high as possible under the counter before dropping to the connection, so sink water cannot easily siphon back.
- Air gap. A small fitting mounted on the sink deck or countertop that breaks the connection with open air. Some jurisdictions require one. Our dishwasher air gap guide explains how it works and why it sometimes leaks onto the counter.
The dishwasher drain hose guide covers kinks, sagging and the knockout plug in a new disposal, a classic cause of a dishwasher that will not drain after a disposal replacement.
Supply Line and Leak Checks
Hot water usually reaches the dishwasher through a braided stainless or copper supply line from a shutoff valve under the sink. Inspectors and installers look for a working shutoff, a proper fitting at the dishwasher’s inlet valve and no drips at either end. Slow leaks under the unit can go unnoticed for months, soaking subfloor and cabinet bases. Our guide to a dishwasher leaking covers the usual sources, from door gaskets to pump seals.
Installation Overview, Power Off First
Replacing a hardwired dishwasher is a common homeowner project, but it combines electrical, plumbing and carpentry steps. In broad terms, the sequence looks like this:
- Turn off power at the breaker and confirm the circuit is dead with a non-contact or plug-in tester before touching any conductors.
- Shut off the water at the supply valve and disconnect the supply line and drain hose.
- Open the junction box, undo the splices and loosen the cable clamp.
- Remove the mounting screws at the countertop or side cabinets and slide the old unit out.
- Transfer or install the new junction box, inlet fitting and drain hose as the manufacturer directs.
- Route the cable and hoses so nothing is pinched, slide the unit in, level it and secure it.
- Make the electrical connection, close the box, restore water and check for leaks, then restore power and run a cycle while watching underneath.
Our dishwasher installation guide walks through these steps in more detail. Some jurisdictions require a permit for new circuits or certain plumbing changes. If the existing wiring is damaged, too short, aluminum or lacks a ground, a licensed electrician should handle it.
Disposal and Shared-Circuit Notes
In some older kitchens, the dishwasher and disposal share one circuit, sometimes as a split receptacle or multi-wire circuit, sometimes as a simple shared breaker. Running both at once can trip a breaker if the circuit is too small. A shared multi-wire circuit also needs a handle-tied or two-pole breaker so both halves shut off together. These setups are not automatically wrong, but they are worth a closer look by an electrician during a remodel, especially if the manufacturer calls for a dedicated circuit.
Common Problems After an Appliance Swap
Many dishwasher problems trace back to a rushed replacement rather than the original installation. A few patterns show up again and again in older Front Range kitchens that have seen two or three units over the years:
- Short cable stubs. Each replacement trims a little more off the house cable. Eventually there is barely enough conductor to reach the box, and splices end up stretched or made outside the box entirely.
- Reused, mismatched parts. An old inlet elbow, a brittle drain hose or a junction box cover from a different model may be pressed back into service. Mismatched fittings are a common source of slow leaks.
- Unsecured units. Mounting brackets that never got screwed to the countertop or cabinet sides let the dishwasher tip forward when the loaded door is pulled down, which can strain the wiring and hoses.
- Missing kick plates. Without the lower panel, the junction box and supply fitting are exposed to mop water, pets and toes.
- Cord kits added to hardwired models. A cord attached without the manufacturer’s listed kit, or run through a sharp, unbushed hole in the cabinet wall, can wear through over time.
None of these is expensive to correct when caught early. Left alone, they tend to show up as water damage or an intermittent electrical fault that is harder and costlier to trace.
What a Home Inspector Notes
The ASHI Standard of Practice calls for inspectors to inspect installed dishwashing machines and food waste grinders by using normal operating controls to activate the primary function. The standard does not require the inspector to operate or confirm every control and feature of an inspected appliance, and it excludes calibration of thermostats, timers and similar specialized features. Under the plumbing section, inspectors look at interior water supply and drain systems including fixtures.
In practice, a typical inspection of a hardwired dishwasher may include:
- Running a short cycle and watching for leaks under the sink and at the unit’s front.
- Checking for a high loop or air gap on the drain hose.
- Looking for a missing kick plate cover or an open junction box, when visible.
- Noting a loose unit that tips forward because its mounting brackets were never fastened.
- Checking the panel for a labeled circuit and, in newer work, GFCI or dual-function protection.
- Looking for water staining, swollen cabinet bases or soft flooring near the unit.
Inspectors generally do not pull the dishwasher out, open the junction box behind a fastened kick plate or test water temperature. If something looks wrong, the usual recommendation is evaluation by an electrician or plumber. For tips on hiring an inspector who checks under-sink plumbing closely, see the plumbing and water section of our hiring guide, along with the main home inspector hiring guide.
Hardwired Dishwasher Costs
Costs depend on the condition of the existing wiring and plumbing, local labor rates and the dishwasher chosen. These are rough guides only. Get written quotes.
- Like-for-like replacement. Swapping a hardwired unit into an existing opening with sound wiring is usually the least expensive installation, often a few hours of labor.
- New dedicated circuit. Running a new circuit from the panel can cost considerably more, depending on distance, access and whether walls or ceilings must be opened.
- GFCI or dual-function breaker. These breakers cost more than standard ones, and some older panels have limited compatible options.
- Plumbing upgrades. Adding an air gap, replacing a corroded shutoff valve or swapping an old supply line adds parts and labor.
Operating cost matters too. ENERGY STAR says a standard-size certified dishwasher costs about $50 per year to run and can save about 5,800 gallons of water over its lifetime, and that compact models may use more energy than standard models over time. For buyers weighing whether to keep an older unit, that is worth factoring in alongside the installation cost.
References
- Electrical Safety in the Home — National Fire Protection Association
- Appliance and Electrical Fire Safety — U.S. Fire Administration
- Dishwashers — ENERGY STAR
- ASHI Standard of Practice for Home Inspections — American Society of Home Inspectors
Frequently asked questions
Is it better to hardwire a dishwasher or use a plug?
Both can be safe when they follow the manufacturer's instructions and local code. A plug makes disconnecting and replacing the unit easier, while hardwiring avoids a cord in the cabinet. Check the installation manual and the local building department before choosing.
Where is the junction box on a hardwired dishwasher?
It is usually behind the lower front kick panel, at one of the front corners of the unit. Turn off the breaker and confirm the power is off before removing the cover.
Does a hardwired dishwasher need a dedicated circuit?
Many manufacturers call for one and list the breaker size in the installation manual. Sharing a circuit with a disposal or countertop outlets can cause overload trips, so an electrician should confirm the circuit can handle the load.
Does a hard wired dishwasher need GFCI protection?
Newer code cycles in many areas require ground-fault protection for dishwasher circuits, usually provided by a GFCI or dual-function breaker on a hardwired unit. Requirements depend on local adoption, so confirm with the building department.
What does a home inspector check on a dishwasher?
Inspectors typically run the unit with its normal controls, look for leaks, check the drain loop or air gap and note visible wiring or mounting issues. They generally do not remove the unit or test every feature.
Found loose wiring or water stains under the sink during a showing? Ask our team about Front Range inspectors who look closely at kitchen appliances, plumbing and circuits.