FLIR Thermal Camera Rental: What Homeowners Need to Know
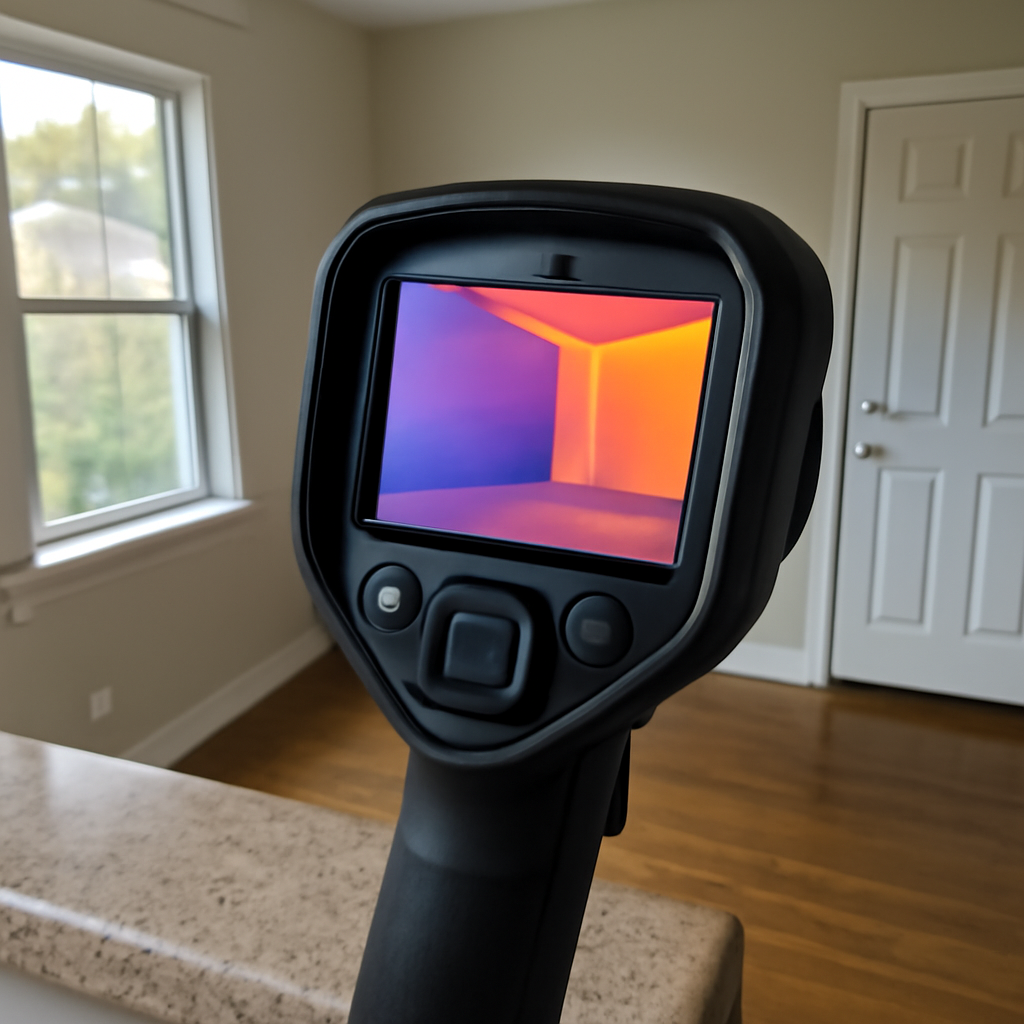
A FLIR thermal camera rental is the most-searched variant of the broader thermal-imaging rental category. FLIR is the dominant brand in pro handheld thermography, but the practical economics and rental process apply equally to comparable units from other manufacturers in the same class. This guide covers the category — renting a FLIR or similar handheld thermal camera for a residential audit — at the pricing tier most homeowners care about. Rates run $80 to $200 per day for a mid-spec handheld with a 320×240 detector, with weekly discounts roughly equal to four daily rates.
Part of our Thermal Imaging for Homes guide — start there for the full picture →
What renting a FLIR or similar handheld thermal camera covers
The bulk of homeowner rentals fall into the pistol-grip handheld category that FLIR popularized with its E-series and Cx-series cameras and that competing manufacturers match feature-for-feature. These cameras display a live thermal image on a small LCD, save radiometric snapshots to internal memory or a removable card, and run a full audit day on a single charged battery. Sensor resolution ranges from 160×120 at the entry tier to 320×240 in the mid-spec range to 640×480 at the high end. Most homeowner audits work fine at 320×240.
Daily handheld rental rates in this category sit at $80 to $200 in 2026, with the lower end reserved for older models and the upper end for current mid-spec units with MSX-style image overlay or comparable proprietary blending tech. A weekly rental typically costs around four daily rates, so a Monday-to-Friday hold lands at $320 to $800 depending on the model.
What is in the rental kit
A handheld rental ships in a hard case. Inside are the camera body, one or two charged lithium-ion batteries, the manufacturer’s AC charger, a USB cable, a memory card if the unit uses removable storage, and a printed quick-start reference. Some rental shops include a wrist lanyard; fewer include the optional carrying strap that ships in retail boxes. The full manual is downloaded from the manufacturer’s website by entering the serial number stamped on the camera body.
A homeowner running an energy audit should know how to switch color palettes (rainbow versus ironbow versus grayscale), adjust emissivity for common materials, and capture radiometric snapshots before the audit window opens.
Daily and weekly rate breakdown
Pricing in this category clusters into three tiers:
Entry-spec handheld
Older 160×120 or 80×60 handhelds rent at $50 to $90 per day. These units work for general envelope scans and obvious thermal anomalies but struggle to resolve small electrical hot spots or narrow moisture columns. Suitable for a first-time energy audit on a home with major air-sealing problems.
Mid-spec handheld
Current 320×240 cameras with image overlay rent at $80 to $200 per day, $320 to $800 per week. This is the sweet spot for most homeowner audits. Resolution is enough to find missing insulation, hidden plumbing leaks, and electrical anomalies.
Pro handheld
640×480 high-resolution handhelds with manual focus and additional analysis modes rent at $200 to $400 per day. These are mostly rented by remediation contractors and home inspectors. A homeowner rarely needs this tier unless documenting a specific high-stakes anomaly for an insurance claim.
What to inspect at pickup and return
The rental house will document existing damage on the contract. Photograph the case, camera body, lens, LCD, and accessory tray with a phone before leaving the counter. This becomes the baseline if a damage claim surfaces at return. Power the unit on, confirm the battery charges to at least 80 percent, and capture a test image of a coffee mug or hand to verify the LCD and trigger work.
At return, bring the case back with every accessory, with the battery charged, and with the lens clean. The lens — usually a germanium element coated with a fragile anti-reflective layer — is the highest-cost component on the camera. A scratched lens is the most common damage claim. InterNACHI training notes that even fingerprint oil left on the lens distorts radiometric readings and produces false anomalies in the image.
Where to source a rental
Four channels make up the bulk of handheld thermal rentals in the U.S.:
- Specialty pro-tool rental shops: Independent contractor-tool shops with one or two thermal models on the catalog. Staff usually know the units. Off-season rates are negotiable.
- Inspection-equipment rental services: Regional houses that stock thermal cameras alongside borescopes, moisture meters, and air-quality samplers. Inventory rotates fast.
- Home improvement specialty centers: National chains with dedicated tool-rental counters list handheld thermal imagers in their catalog, though local stock varies. Always call ahead.
- Manufacturer demo-loan programs: Some thermal imaging brands lend a unit to a serious prospective buyer for an evaluation period. Not a retail rental — the loan is conditioned on a sales conversation.
Why this guide stays category-level
Searches for “FLIR thermal camera rental” almost always express the broader rental intent, not loyalty to a single brand. Renting from a FLIR competitor with a comparable spec produces a near-identical experience for a homeowner audit. For brand-agnostic context, the home inspection tools buyer’s guide covers handheld categories without anchoring to any one manufacturer. A companion piece on FLIR thermal imaging camera category guidance walks through the same tier from a purchase-side angle. Either article pairs cleanly with this rental overview.
How to plan the audit window
Thermal cameras detect surface temperature contrast. Without an indoor-outdoor temperature differential of at least 18 to 20 degrees Fahrenheit, missing insulation will not show clearly. The strongest audit windows in the Front Range are early-morning winter days with single-digit outdoor temperatures and late-afternoon summer days with full-sun loading on west-facing walls. Scan the envelope methodically — one room at a time, floor-to-ceiling, pausing on every window, electrical box, and ceiling penetration. Save radiometric snapshots, not just JPEGs, so a contractor or building-science consultant can pull temperature values from the file later.
When buying beats renting
A handheld rental works for one-off audits. A homeowner planning to monitor a slow moisture intrusion across an entire winter, or running multiple audits over several months, hits a break-even with purchase at roughly four to six rental events. Below that count, renting is cheaper. Above it, a $400 phone-attached thermal accessory or a $1,200 entry-level handheld pays for itself. The rental contract is the right tool for a one-time scan; an owned camera is the right tool for ongoing surveillance.
Common defects a handheld rental reveals
Most homeowner audits surface four defect categories. Missing or compressed insulation in exterior walls shows as a cool vertical band on a winter interior scan. Air-leak points around outlet and switch boxes, attic hatches, and recessed lighting cans appear as small cool spots. Plumbing leaks show as cool stripes on ceilings or walls because evaporating water cools the surrounding surface. Electrical hot spots in panels show as bright spots on a thermal frame — a breaker running 15 degrees Fahrenheit hotter than its neighbors typically indicates a loose connection or overloaded circuit.
Window flashing failures and improperly sealed door thresholds appear as thermal bridges between the exterior frame and the surrounding wall surface. Roof penetrations (plumbing stacks, bathroom fan vents, attic ventilation) show as halos when sealing has failed. None of these require credentialed interpretation, but a complex or persistent finding warrants a follow-up call to a licensed electrician, roofer, or remediation contractor.
Camera palettes and what each one shows
Most pro handhelds offer at least three color palettes. Ironbow uses warm colors (white, yellow, red) for hotter surfaces and cool colors (black, purple, blue) for cooler surfaces, which maps intuitively for most residential work. Rainbow palette adds resolution by spreading the color range over more bands but can be harder to read at a glance because greens and yellows do not have intuitive temperature mapping. Grayscale palette is used for documenting specific anomalies with clean contrast for a written report.
Switch palettes during the audit to see what each one reveals best. A leak that’s hard to see in ironbow sometimes pops clearly in grayscale. An electrical hot spot that’s faint in rainbow palette becomes obvious in ironbow. The palette is a visualization tool — the underlying temperature data does not change, only the color mapping.
Storing and transferring images at the end of the audit
Radiometric image files captured during the audit contain images of occupied living spaces. Save them to a personal drive at the end of the audit and delete the files from the camera’s memory card before returning the unit. Most pro-grade cameras let the user reformat the card from the menu, which deletes everything cleanly. Some rental shops wipe the card between rentals; others do not. Leaving images on the card creates a privacy issue.
Manufacturer analysis software (FLIR Tools, Fluke SmartView, Testo IRSoft, comparable utilities from other brands) reads radiometric files and lets the user adjust emissivity, mark spot temperatures, and produce annotated report images. A contractor without the analysis software can still view the JPEG export of the thermal image, even if they cannot pull per-pixel temperature data.
How emissivity affects the temperature readings
Every material has an emissivity value — a number between 0 and 1 representing how efficiently the surface emits infrared radiation. Drywall, painted wood, and brick have emissivity around 0.90 to 0.95. Polished metals are much lower, often below 0.20. The camera’s default emissivity setting (typically 0.95) reads correctly on common building surfaces and underreports on bare metal. Most residential audits do not need emissivity adjustment, but a finding on a metal surface (an electrical panel cover, a copper plumbing fitting) should be confirmed with a contact thermometer rather than trusted at face value from the thermal frame.
Documenting the audit for follow-up
A short written audit summary captures the practical value of the rental. For each finding, record the location (room, wall, ceiling), the observed temperature differential, the suspected cause, and the recommended follow-up. Pair each finding with at least two saved images — one radiometric thermal frame and one visible-light photograph of the same area. The pairing makes the finding actionable weeks later when a contractor or remediation pro reviews the work.
The summary need not be a formal report. A two-page document with images, location notes, and follow-up recommendations is enough for most homeowner-driven audits. The radiometric files themselves are the data; the summary is the navigation aid that ties them back to specific defects.
References
- ENERGY STAR: Seal and Insulate — U.S. Environmental Protection Agency (ENERGY STAR)
- InterNACHI Infrared Thermography Inspector Program — InterNACHI
- ASHRAE Standards and Guidelines — American Society of Heating, Refrigerating and Air-Conditioning Engineers
Frequently asked questions
How much does a FLIR thermal camera rental cost?
Mid-spec handheld FLIR or comparable units rent at $80 to $200 per day in 2026. Weekly rates run roughly four times the daily rate. Entry-spec units start at $50 per day and pro-spec 640x480 cameras reach $300 to $400 per day.
Is a FLIR rental different from a generic thermal camera rental?
Functionally, no. FLIR is the dominant brand in handheld thermal cameras, but rental pricing, kit contents, and the audit workflow are nearly identical across comparable manufacturer models in the same spec tier.
What sensor resolution does a homeowner audit need?
A 320x240 detector is the sweet spot for most residential audits. It resolves missing insulation, plumbing leaks, and electrical anomalies clearly. 640x480 is overkill for a homeowner and 160x120 misses small anomalies.
Can a homeowner rent a FLIR directly from the manufacturer?
Some thermal imaging manufacturers run demo-loan programs conditioned on a sales conversation. These are not retail rentals. For a true short-term rental, specialty pro-tool shops, inspection-equipment houses, and some home improvement specialty centers are the standard channels.
Thermal imaging cameras
Infrared cameras reveal hidden moisture, missing insulation, and air leaks. Phone-attachment models are the budget entry point; standalone units have higher resolution.
| Product | Why | Buy |
|---|---|---|
 FLIR ONE Pro (phone) FLIR ONE Pro (phone) | Plugs into iPhone/Android; inspector favorite. | Amazon — $349.00 |
 Topdon TC001 Topdon TC001 | High-res phone module at a low price. | Amazon — $199.99 |
 FLIR C5 Compact FLIR C5 Compact | Standalone pocket camera with Wi-Fi. | Amazon — $611.50 |