Mold Remover Spray: What Homeowners Need to Know
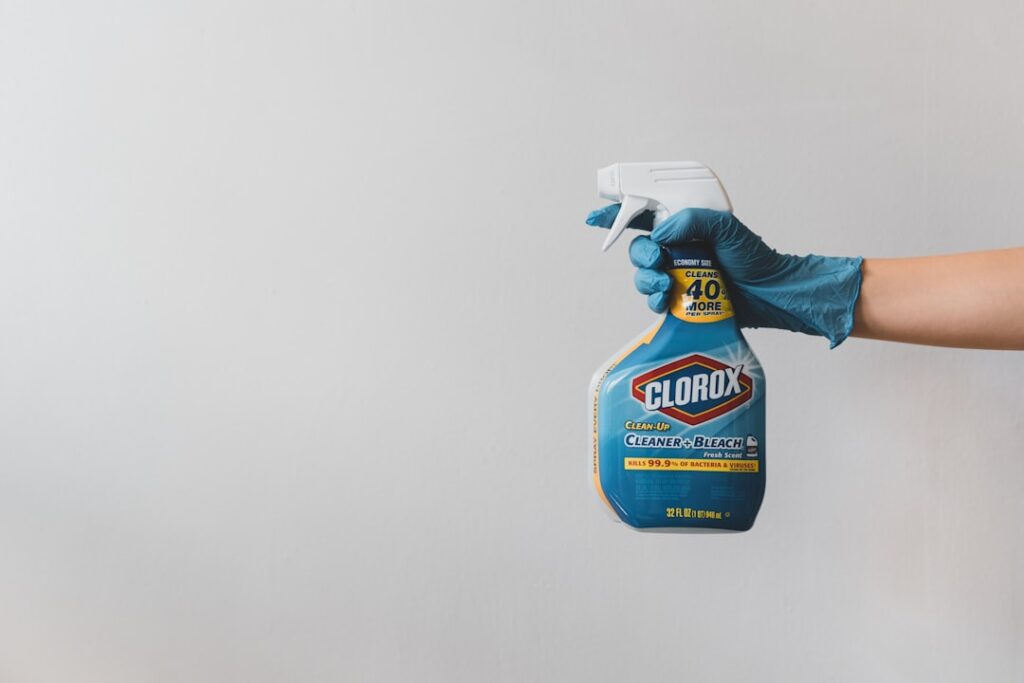
A bottle of mold remover spray is often the first thing homeowners grab when they spot growth. Sprays are convenient and effective on the right surfaces, but they have real limits that the label rarely spells out. Understanding how mold remover spray works helps you use it well and recognize when a spray simply cannot solve the problem. This guide covers the types, the safety rules, and the situations that call for something more. It summarizes EPA and CDC guidance current as of 2026; consult a physician about symptoms and a certified professional for testing decisions.
Part of our Mold Removal & Remediation guide — start there for the full picture →
Is this mold, asbestos, or water damage? Get a free instant screen
Upload a clear photo of the suspect area. You'll get an instant AI screening opinion and what to do next. This is screening guidance, not a professional determination.
Screening guidance only. AI can be wrong. Confirm asbestos, mold type, or lead with lab testing or a licensed professional before acting.
How mold remover spray works
Most sprays deliver a liquid active ingredient, often a bleach, hydrogen peroxide, or surfactant blend, onto the moldy surface. The liquid loosens and lifts growth so it can be wiped or rinsed away. On nonporous surfaces, this works well because the mold sits on top and comes off easily.
The catch is penetration. On porous materials the spray stays on the surface while mold roots remain underneath.
Types of mold remover spray
Bleach-based sprays
These lighten stains fast on nonporous surfaces like tile and glass. They struggle on grout and drywall and add moisture. Never mix them with ammonia or other cleaners, per EPA warnings.
Hydrogen peroxide sprays
A 3 percent peroxide spray kills many mold species, is gentler than bleach, and breaks down into water and oxygen with no harsh residue.
Vinegar sprays
White vinegar penetrates porous surfaces somewhat better than bleach. Our guide on vinegar for mold details where it works and where it falls short.
Detergent solutions
A spray bottle of soapy water is the EPA-endorsed option for most surfaces, since physical removal matters more than chemistry.
Which surfaces suit a spray
Sprays shine on nonporous and sealed surfaces: tile, glass, sealed countertops, metal, and finished wood. On these, a spray, a scrub, and a wipe handle most mold. For a broader comparison by surface, see our guide on the best mold remover options.
Porous surfaces are where sprays disappoint. On grout, a clinging gel often works better, and on saturated drywall, removal beats any spray.
How to use mold remover spray safely
Protect and ventilate
Wear gloves, eye protection, and an N95 respirator, and open a window or run a fan. Spraying can aerosolize spores and chemical mist.
Apply, dwell, and remove
Spray the area, let it sit for the label dwell time, then scrub and wipe to physically remove the growth. Rinse if directed.
Dry the surface completely
Drying is the step people skip. Mold cannot regrow on a dry surface, so finish every job by drying thoroughly.
The limits of mold remover spray
A spray treats what you can see and reach. It cannot remove mold inside wall cavities, under flooring, or in HVAC ducts. It also does nothing about the moisture source feeding the growth. If mold returns after spraying, the water problem is unsolved.
Spraying over large areas is risky too. The EPA suggests DIY cleanup only for hard-surface mold under roughly 10 square feet.
Does spraying kill mold or just bleach the stain?
Many sprays lighten the stain so much that the mold looks gone even when growth remains in porous material. The EPA emphasizes removal over killing, because dead spores still cause allergic reactions. On nonporous tile a clean look means the mold is gone; on porous grout it may not.
Safety rules that matter
Never combine cleaning products, especially bleach with ammonia, which can release toxic gas. Keep sprays away from children and pets, and store them sealed. People with asthma, allergies, or weakened immunity should avoid mold cleanup, per CDC guidance, and have someone else handle it.
Preventing mold so you spray less
The best way to reduce spray use is to control moisture. Run exhaust fans in damp rooms, fix leaks promptly, and keep indoor humidity below about 50 percent as the EPA recommends. Our guide on how to prevent mold growth explains the habits that keep surfaces clean longer.
When a spray is not enough
If mold keeps returning, covers a large area, hides inside walls, or comes with soft drywall or a musty smell from no visible source, the problem is bigger than a bottle can fix. These signs point to a leak or hidden growth that needs professional remediation. For broader guidance on testing and inspection, see our mold inspection hub for homeowners.
Spray technique that actually works
How you use a spray matters as much as which one you buy. Hold the nozzle close enough to coat the surface without creating a fine aerosol that drifts into the air you breathe. Apply enough to wet the area fully, then let it sit for the label dwell time so the active ingredient can work before you wipe. Skipping the dwell time is a common reason a spray underperforms.
After dwelling, scrub the surface with a brush or sponge to physically lift the growth, then wipe clean and dry thoroughly. The EPA emphasizes that removal is the goal, so the scrubbing step is not optional. A spray that is applied and immediately wiped leaves much of the mold behind, especially on textured or porous surfaces.
DIY spray solutions versus store products
Many effective sprays can be mixed at home. A spray bottle of three percent hydrogen peroxide kills many molds and leaves no harsh residue. Undiluted white vinegar handles common molds on a range of surfaces. A little dish detergent in warm water makes the EPA’s recommended cleaning solution for most surfaces, prioritizing removal over chemistry.
Store products offer convenience and sometimes added cling or fragrance, but they rarely outperform these simple mixes on the surfaces sprays suit. The key safety rule applies to both: never combine ingredients, especially bleach with ammonia or vinegar, since mixing can release hazardous gas. When in doubt, one cleaner at a time is always the safer choice.
Surfaces where spray is the wrong tool
Sprays disappoint on porous and hidden surfaces. On grout, the liquid runs off before it can work, so a clinging gel performs better. On saturated drywall, spraying adds moisture and cannot reach mold rooted in the paper backing, so removal beats any spray. Inside wall cavities, under flooring, and in HVAC ducts, a spray simply cannot reach the growth.
Recognizing these limits prevents wasted effort. If a sprayed area keeps regrowing, or if the mold is on a porous material that stays damp, the spray is not the answer. The real fix is either a different method for the surface or addressing the moisture source feeding the growth. Our guide on cleaning mold off walls covers the surface-by-surface approach.
Ventilation while spraying
Spraying creates a fine mist of both chemical and disturbed spores, so ventilation is more important than with wiping methods. Open a window, run an exhaust fan, and keep interior doors closed so the mist and spores do not drift into clean rooms. In a small enclosed bathroom, bleach or other fumes can build up quickly, making a respirator and airflow essential.
People with asthma, allergies, or weakened immunity should avoid spraying mold themselves, per CDC guidance, since aerosolizing spores raises exposure. Even healthy people should wear an N95 respirator, gloves, and eye protection, and should stop and step outside if fumes cause irritation.
Storage, shelf life, and safety at home
Mold sprays degrade over time, which is one reason an old bottle may seem weak. Bleach loses potency over months, and hydrogen peroxide breaks down faster when exposed to light, so storing both sealed and out of sunlight preserves their effect. Keep all sprays upright, labeled, and well out of reach of children and pets.
Never decant a spray into an unlabeled bottle, and never store it next to ammonia-based cleaners where an accidental mix could occur. Buying only what you will use within a season avoids both clutter and the disappointment of a degraded product that no longer lifts mold the way it should.
Choosing a spray by the room
The best spray often depends on where you are using it. In a small enclosed bathroom, a low-fume option like hydrogen peroxide or detergent solution is kinder to breathe than a strong bleach spray. In a basement with concrete surfaces, a more aggressive cleaner can be appropriate since the surfaces are durable and ventilation is easier to arrange.
Kitchens and food-contact areas call for caution with harsh chemicals, favoring vinegar or detergent that rinse clean. Outdoor surfaces tolerate stronger products. Thinking about the room, its ventilation, and who uses it helps you pick a spray that is both effective and safe for that space, rather than defaulting to the strongest bottle available.
How sprays fit a larger cleaning plan
A mold spray is one step in a sequence, not a complete solution. The full plan is to protect yourself, contain the area, apply and dwell the spray, scrub to remove the growth, wipe clean, dry thoroughly, and then control the moisture source. Skipping any of these steps undercuts the others, no matter how good the spray is.
Viewed this way, the spray is a tool that loosens mold so you can remove it, not a magic eliminator. The drying and moisture-control steps determine whether the result lasts. Homeowners who treat spraying as the whole job tend to repeat it endlessly, while those who fold it into a complete plan solve the problem and move on.
When to stop spraying and fix the cause
If you find yourself respraying the same spot repeatedly, the spray is treating a symptom while the cause goes unaddressed. Recurring mold means moisture is still present, whether from a leak, condensation, or high humidity. No amount of spraying overcomes a wall that keeps getting wet.
The lasting fix is to find and resolve the water problem, then keep humidity below about 50 percent as the EPA recommends. At that point a spray becomes an occasional touch-up rather than a constant chore. Our guide on how to prevent mold growth explains the moisture controls that make spraying rarely necessary.
Disposing of spray and cleaning up afterward
When the job is done, dispose of used rags and removed moldy material in sealed bags rather than leaving them to dry out and release spores. Rinse brushes and sponges thoroughly, and wipe down nearby surfaces to remove chemical residue. Wash your hands and any exposed skin after removing your gloves, and keep the room ventilated until fumes clear.
Store leftover spray sealed, upright, and out of reach of children and pets, and check the label for an expiration date since potency fades over time. A careful cleanup prevents accidental exposure and leaves the area ready to dry fully, the step that keeps the cleaned surface clear of regrowth.
References
- Mold Cleanup in Your Home — U.S. Environmental Protection Agency
- A Brief Guide to Mold, Moisture and Your Home — U.S. Environmental Protection Agency
- About Mold and Your Health — Centers for Disease Control and Prevention
- Mold and Indoor Air Quality — American Lung Association
Frequently asked questions
Does mold remover spray actually work?
On nonporous surfaces like tile and glass, yes, especially when you scrub and dry afterward. On porous grout and drywall, sprays sit on the surface and miss rooted growth, so they are less effective there.
Is mold remover spray safe to use indoors?
With precautions. Ventilate the room, wear gloves and an N95 respirator, and never mix bleach sprays with ammonia or other cleaners. People with respiratory issues should avoid mold cleanup entirely.
Does spraying kill mold for good?
No spray prevents regrowth on its own. Mold returns whenever moisture returns. The lasting fix is removing the growth and controlling the leak or humidity feeding it, keeping the area below 50 percent humidity.
When should I stop spraying and call a professional?
Call a pro if the area exceeds about 10 square feet, if mold is inside walls or HVAC, if there is flood or sewage contamination, or if it keeps returning after spraying.
Front Range homeowners who suspect mold runs deeper than a surface stain can get in touch through our contact page to connect with a vetted local inspector before buying more product.
Mold removal & cleanup picks
For a small, contained patch (under ~10 sq ft) these EPA-friendly removers handle surface mold. Larger or recurring growth warrants a professional assessment first.
| Product | Why | Buy |
|---|---|---|
 RMR-86 Instant Mold Stain Remover RMR-86 Instant Mold Stain Remover | Fast-acting on stains; ventilate and wear PPE. | Amazon — $29.99 |
 Concrobium Mold Control Concrobium Mold Control | No-bleach formula that also helps prevent regrowth. | Amazon — $11.26 |
 Mold Armor Mold & Mildew Remover Mold Armor Mold & Mildew Remover | Widely stocked bathroom/surface remover. | Amazon — $22.98 |