Mold Inspection and Remediation: What to Expect
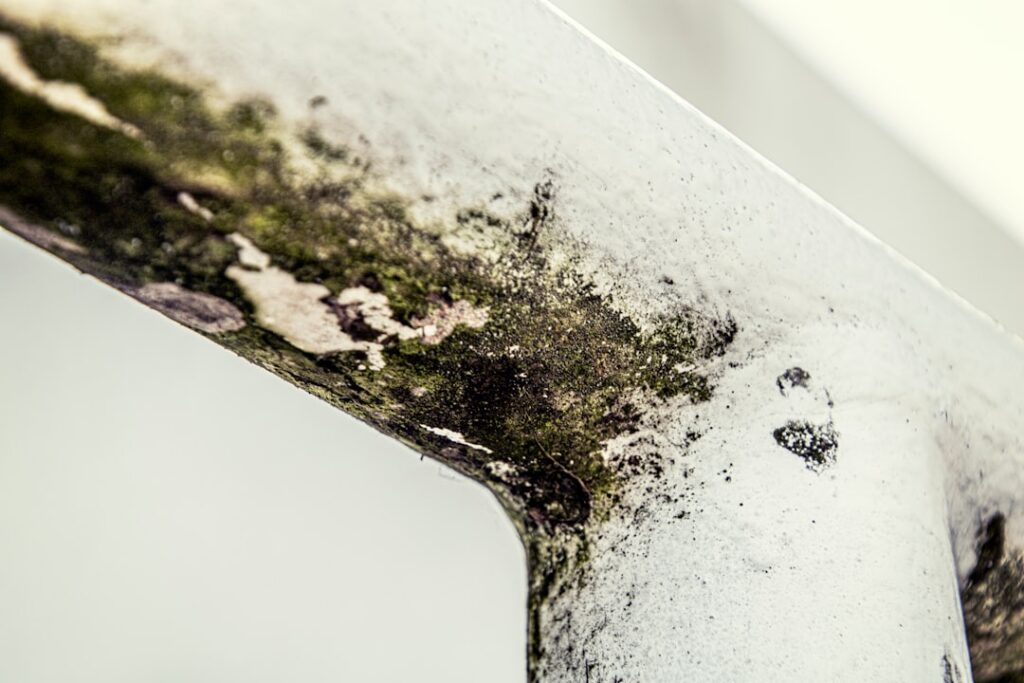
Mold inspection and remediation are two different jobs that homeowners often blur into one phone call. Inspection finds the mold, measures it, and pinpoints the moisture causing it. Remediation removes the mold and restores the affected space. Understanding where one ends and the other begins helps you avoid paying a single company to both diagnose and “fix” a problem it has every incentive to inflate. This guide summarizes EPA and CDC guidance current as of 2026 and general industry practice; consult your physician for health symptoms and a certified professional before making decisions about your specific property.
Part of our Mold Testing & Inspection guide — start there for the full picture →
Is this mold, asbestos, or water damage? Get a free instant screen
Upload a clear photo of the suspect area. You'll get an instant AI screening opinion and what to do next. This is screening guidance, not a professional determination.
Screening guidance only. AI can be wrong. Confirm asbestos, mold type, or lead with lab testing or a licensed professional before acting.
What’s the Difference Between Mold Inspection and Remediation?
A mold inspection is an assessment. An inspector visually examines the home, uses moisture meters and sometimes thermal imaging to find hidden dampness, and may collect air or surface samples sent to a lab. The deliverable is a report: what was found, where, the likely moisture source, and a recommended scope of work. Inspection does not remove anything.
Remediation is the cleanup. A remediation crew contains the work area, removes contaminated porous materials, cleans non-porous surfaces, dries the structure, and corrects the moisture problem. The EPA’s threshold is the practical dividing line: areas larger than roughly 10 contiguous square feet generally warrant professional remediation rather than a DIY wipe-down. Keeping these services separate, ideally with an independent inspector and a different remediation contractor, removes the conflict of interest that arises when the diagnosing party also profits from the removal.
What Happens During a Mold Inspection
A thorough inspection follows a predictable arc. The inspector interviews you about water history, odors, and any health complaints, then walks the property looking for staining, warping, and visible growth. Moisture meters reveal dampness behind drywall and under flooring that the eye misses. In ambiguous cases, the inspector takes air samples indoors and outdoors for comparison, plus surface swabs or tape lifts from suspect areas. A lab identifies the mold types and spore counts.
The value of an inspection is the diagnosis, not the lab numbers alone. The CDC and EPA both note that there are no enforceable federal limits for indoor mold spore counts, so context matters more than a single number. A good report ties the findings to a moisture source and a defined remediation scope. Our guide to choosing a mold detection company covers what separates a rigorous assessment from a sales pitch.
What Happens During Remediation
Professional remediation runs through containment, removal, cleaning, drying, and moisture repair. Crews seal the work zone with plastic and run negative-air HEPA machines so spores don’t spread. Soaked drywall, carpet padding, and insulation come out because porous materials can’t be reliably cleaned. Framing, concrete, and other hard surfaces are HEPA-vacuumed and wiped. Dehumidifiers and air movers dry the structure to a verified moisture content.
The step that determines whether mold returns is fixing the water source. A leaking pipe, poor grading, a failed window seal, or weak bathroom ventilation will regrow mold within days if left alone. After cleanup, reputable firms recommend post-remediation verification, ideally by an independent party, to confirm the area is clean and dry. For a fuller stage-by-stage walkthrough, see our overview of mold removal and remediation.
Why Post-Remediation Verification Matters
Closing the loop with independent verification protects you twice: it confirms the contractor actually achieved a clean, dry result, and it gives you documentation for resale or insurance. Skipping this step means trusting the company that did the work to grade its own homework. A short clearance inspection is inexpensive relative to redoing a failed remediation.
Verification usually combines three things: a visual check that no mold or moisture damage remains, moisture-meter readings confirming structural materials have dried to a normal level, and sometimes air sampling compared against an outdoor baseline. Passing all three before reconstruction begins means the new drywall and paint go over a genuinely clean, dry surface rather than sealing a lingering problem inside the wall. Keep the clearance report; future buyers and their inspectors will ask about any documented mold history.
The Five Phases of a Remediation Project
Breaking remediation into discrete phases makes it easier to follow a contractor’s proposal and spot gaps. Phase one is assessment and moisture mapping, identifying where the water comes from and how far growth extends. Phase two is containment: sealing the work area with plastic sheeting and running HEPA-filtered negative-air machines so spores don’t escape into clean parts of the home. Phase three is removal of unsalvageable porous materials, bagged and sealed inside the containment before disposal.
Phase four is cleaning and drying, HEPA-vacuuming and wiping structural surfaces, then running commercial dehumidifiers and air movers until materials reach a verified low moisture content. Phase five is moisture-source repair and clearance verification. A proposal that names these phases, specifies the equipment, and states which steps the company performs itself is far more trustworthy than a single flat price with no detail. The written scope of work also protects you if a dispute arises later.
What Inspection Tools Actually Reveal
Inspectors lean on moisture meters and thermal cameras because mold lives where water hides. A pin-type moisture meter reads dampness inside drywall and wood; a thermal camera shows temperature differences that often correspond to wet, evaporatively cooled areas behind a surface. Neither tool “sees” mold directly, but together they point to the moisture that feeds it, which is exactly what a remediation crew must fix. When an inspector traces a stain back to a specific leak or condensation pattern using these tools, the resulting scope of work targets the cause rather than just the visible growth.
Cost and Timeline for Each Service
A mold inspection with lab sampling commonly runs a few hundred dollars, with visual-only assessments at the lower end and multi-sample lab work higher. Remediation pricing scales with area and material removal. Industry estimates put small jobs at a few hundred to about $1,500, mid-size projects at $2,000 to $6,000, and extensive contamination above $10,000. A bathroom or closet might be remediated in a day; a contaminated basement or crawl space can take several days plus drying time.
Get itemized written estimates that separate inspection, containment, removal, cleaning, drying, moisture repair, and any rebuild. Flat-rate quotes hide what you’re actually buying and make bids impossible to compare.
Front Range and Colorado Considerations
Colorado’s dry climate doesn’t eliminate mold; it concentrates it around specific moisture sources. Below-grade basements, swamp-cooler condensation, ice-dam leaks after heavy snow, and poorly vented bathrooms are the usual culprits from Fort Collins to Colorado Springs. Spring snowmelt and summer monsoon storms drive seasonal spikes in basement intrusion. Because the problem is moisture-driven here, both inspection and remediation should focus heavily on drainage, grading, and ventilation rather than treating spores as the root issue.
Colorado does not license mold contractors statewide, so verify IICRC certification, liability insurance, and workers’ compensation independently. The CDC notes that infants, older adults, and people with asthma or compromised immune systems face the highest risk from indoor mold, which raises the priority of prompt, thorough work in those households.
The freeze-thaw cycle adds a seasonal layer along the Front Range. Water that enters a foundation crack in autumn can freeze, widen the gap, then thaw and seep when temperatures climb, feeding basement mold on a predictable rhythm. An inspection that maps these exterior water paths, grading, downspouts, window-well drainage, gives the remediation crew a target beyond the visible stain. Skipping that diagnosis is the most common reason a Denver-area basement is remediated twice.
What These Services Cost and How to Budget
Inspection and remediation are billed separately, and budgeting for both avoids surprises. A visual mold inspection often runs in the low hundreds, with lab-analyzed air or surface samples adding a per-sample fee. Remediation scales with the affected area and the volume of porous material removed: small jobs at a few hundred to about $1,500, mid-size projects at $2,000 to $6,000, and extensive contamination above $10,000. Structural drying, HVAC cleaning, and reconstruction are typically separate line items.
When you request estimates, ask each contractor to itemize containment, removal, cleaning, drying, moisture repair, and any rebuild. Flat-rate quotes hide what you’re buying and make competing bids impossible to compare. If the project is large enough to involve an insurance claim, document the damage with photos before any work begins, and read your policy’s mold endorsement, coverage usually applies only to sudden, accidental water events like a burst pipe, not gradual leaks, and many policies cap mold payouts at a few thousand dollars.
What Happens During Each Visit
Knowing what a typical inspection and remediation day looks like sets expectations. An inspection visit usually runs one to two hours for a single-family home: the inspector interviews you about water history and symptoms, walks the property, takes moisture readings, and, if sampling is warranted, collects air and surface samples plus an outdoor control. Lab results, when samples are taken, typically come back within a few business days, followed by the written report.
A remediation visit is more involved. The crew arrives, sets up containment and negative-air equipment, and protects pathways and belongings. Demolition and removal happen first, with debris bagged inside the containment. Cleaning and HEPA-vacuuming follow, then drying equipment runs, sometimes for a day or more, until materials test dry. Expect noise, plastic sheeting, and restricted access to the work zone, and plan for the HVAC system to be shut down or sealed so it doesn’t circulate spores. Reconstruction is a separate phase that should wait until verification confirms the area is clean and dry.
Common Mistakes That Lead to Repeat Work
Several recurring errors send homeowners back to square one. The most common is cleaning or remediating the visible mold while ignoring the moisture source, the leak, condensation, or humidity that caused it, which guarantees regrowth within weeks. A second is painting or sealing over mold or a damp surface, which traps the problem and leads to bubbling and renewed growth beneath the coating. A third is treating porous, water-damaged materials like soaked drywall or carpet padding as cleanable when the EPA advises removing and replacing them.
Skipping containment is another costly shortcut: disturbing mold without sealing the area spreads spores through the home and into the HVAC system, expanding the contaminated zone. Finally, forgoing post-remediation verification leaves you trusting the crew to grade its own work, with no documentation if the problem resurfaces. Avoiding these mistakes is largely a matter of insisting on the full sequence, diagnose, contain, remove, dry, fix the source, verify, rather than the abbreviated version a rushed or low-bid contractor might offer.
When to Inspect, When to Remediate
If you can see and smell mold over a large area, or there’s been major water damage, move toward remediation, with an inspection to define scope and rule out hidden spread. If you suspect mold but can’t find it, smell a musty odor, or want documentation for a real-estate transaction, start with an inspection. Small surface mold under 10 square feet on a non-porous surface is often a reasonable DIY cleanup. When a household member has respiratory issues, lean toward professional help. The broader mold inspection hub lays out how to sequence testing and removal for your situation.
References
- Mold Cleanup in Your Home — U.S. Environmental Protection Agency
- About Mold and Your Health — Centers for Disease Control and Prevention
- A Brief Guide to Mold, Moisture and Your Home — U.S. Environmental Protection Agency
Frequently asked questions
Should I get a mold inspection before remediation?
For large or hidden mold, yes. An independent inspection defines the scope, identifies the moisture source, and avoids the conflict of interest that exists when one company both diagnoses and removes mold. For small visible surface mold, you may not need a formal inspection.
Can the same company do both inspection and remediation?
They can, but using a separate, independent inspector removes the incentive to overstate the problem. At minimum, ask for third-party post-remediation verification so the cleanup is graded by someone other than the crew that did it.
How long does mold remediation take?
A small bathroom or closet can be done in a day. A contaminated basement or crawl space often takes several days plus drying time. Timelines lengthen when structural repairs or HVAC cleaning are involved.
Is there a safe level of mold indoors?
There are no enforceable federal limits for indoor mold spore counts. The CDC and EPA focus on controlling moisture and removing visible growth rather than chasing a specific number, because context and the moisture source matter more than any single reading.
Front Range homeowners weighing whether to inspect or remediate can get in touch with us here to connect with a qualified local inspector for a neutral assessment.