How to Check for Mold: A Plain-Language Guide
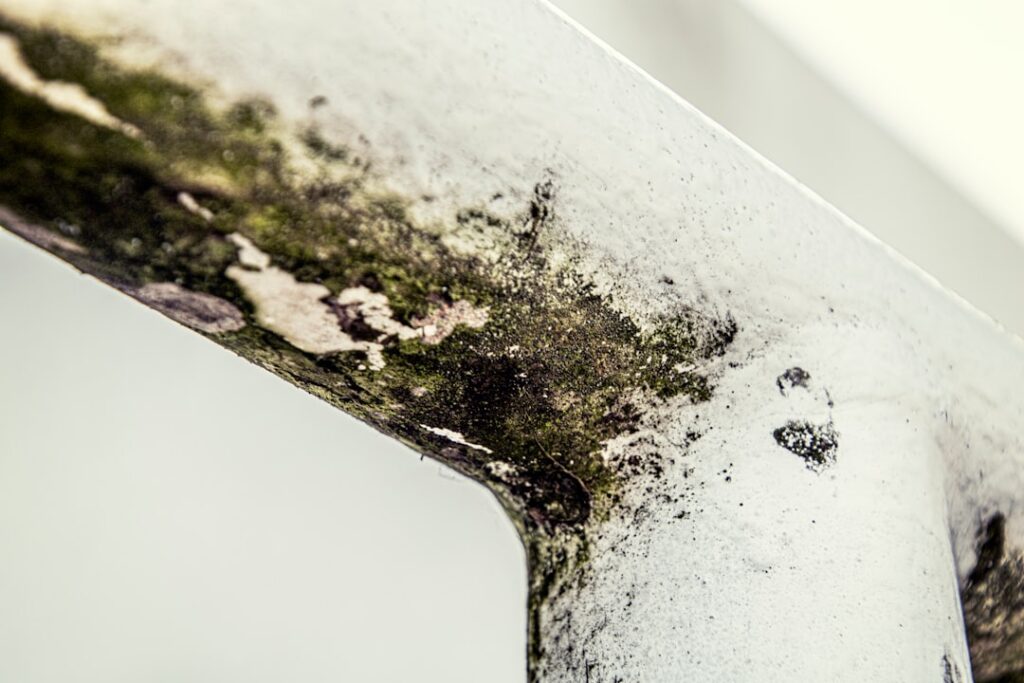
This guide walks a homeowner through a complete check-for-mold workflow: where to look, how to use the senses correctly, what tools cost $40 versus $400, and when to stop DIY and call a professional inspector. Learning how to check for mold properly is the single most useful skill a homeowner can build because it catches problems while they’re still cosmetic instead of structural. The full check takes 60 to 90 minutes the first time and 20 minutes once the routine is established. This guide summarizes EPA and CDC guidance current as of 2026 — consult a certified mold inspector for testing decisions and your physician for symptom evaluation.
Part of our Types of Mold guide — start there for the full picture →
Is this mold, asbestos, or water damage? Get a free instant screen
Upload a clear photo of the suspect area. You'll get an instant AI screening opinion and what to do next. This is screening guidance, not a professional determination.
Screening guidance only. AI can be wrong. Confirm asbestos, mold type, or lead with lab testing or a licensed professional before acting.
The Five-Tool Homeowner Check
The minimum kit for a serious home mold check:
- Bright flashlight — phone flashlights work; an angled-beam headlamp works better for cabinet interiors.
- Hygrometer — $15 to $30; reads relative humidity and temperature.
- Pinless moisture meter — $30 to $80; reads moisture content in drywall and wood without leaving puncture marks.
- Your own nose — the most underrated mold-detection instrument.
- Phone camera — for documenting findings and tracking changes over time.
Optional add-ons include a borescope camera ($40 to $150) for wall-cavity peeks through small holes, and a hand-held infrared thermometer ($30 to $50) for finding cold-condensation surfaces. The parent mold inspection and testing hub covers when each tool earns its cost.
Step 1 — Room-by-Room Visual Scan
Work top to bottom in each room. Look at ceiling corners, windowsills, baseboards, and floors. Open every cabinet and use the flashlight at the back wall and cabinet floor. Document anything suspicious with photos.
Bathrooms
Tub-wall caulk lines, grout, vanity cabinet interior at the drain trap, drywall behind the toilet, exhaust fan grille for black-edge dust. Pull off the fan cover and look up into the duct if accessible.
Kitchen
Under-sink cabinet, dishwasher cabinet, refrigerator drip pan and door gaskets, wall behind the range. Pull the refrigerator out 6 inches to see the back floor.
Laundry Room
Wall behind washing machine, washer door gasket and detergent drawer, dryer vent duct connection. The space behind the appliances is one of the most common hidden-mold sites.
Living Areas and Bedrooms
Window sills and trim, especially on the north and west sides of the house. Baseboard staining in corners. Carpet at exterior walls.
Basement
Foundation walls, especially corners and below grade-level windows. Sump pit and floor drain. Behind boxes and stored items piled against exterior walls. Furnace and water-heater closet. Rim joist at the top of the foundation wall.
Attic
Undersides of roof sheathing visible from the access hatch. Insulation around the bath-fan duct termination. Stained sheathing near ridge or valley flashing.
Garage and Crawl Space
Adjoining-wall corners where garage meets conditioned space. Vapor barriers in crawl spaces — check for tears, condensation underneath. The room-map guide covers the sequence in additional depth.
Step 2 — Smell Test in Every Room
Persistent musty odor is one of the most reliable hidden-mold indicators. Walk into each room with a clear nose — after a few minutes outside or in a different part of the house. The first 10 seconds in a room give the cleanest read; after that, your nose adapts and stops registering subtle odors.
Pay attention to:
- Persistent musty smell with no visible source.
- Odor that gets stronger after rain or humid weather.
- Localized smell at a specific wall, closet, or cabinet.
- Odor that intensifies when HVAC kicks on.
A trained nose beats a $300 air sampler for early detection in many cases. The CDC’s mold guidance specifically mentions smell as a screening cue.
Step 3 — Moisture Meter Spot Check
A pinless moisture meter reads moisture content through drywall and wood without leaving holes. Press the sensor flat against the surface and watch the reading. Reference ranges:
- Drywall: under 1 percent moisture content (or “dry” on relative scales). Readings above 1 percent indicate active wetness.
- Wood: under 15 percent moisture content. Readings above 20 percent will support mold growth within 48 hours.
Check suspect drywall behind toilets, under sinks, at washer connections, around the dishwasher, at basement baseboards. A reading near a known-dry reference area gives a calibration baseline. The DIY check workflow covers meter technique.
Step 4 — Hygrometer Audit
Place hygrometers in zones with different moisture loads: bathroom, basement, primary bedroom. Read across 48 to 72 hours. The EPA recommends indoor relative humidity between 30 and 50 percent. Persistent readings above 55 percent warrant dehumidification or ventilation upgrades.
Connected hygrometers with phone apps log data continuously and flag spikes. Helpful for catching condensation events tied to weather, cooking, or showering patterns.
Step 5 — Tape-Lift Sample for Visible Suspect Patches
If the visual scan finds a dark patch and the homeowner needs to know whether it’s mold or something else — and which species — a tape-lift sample answers within a week. $30 to $60 per sample shipped to an AIHA-accredited lab. Press clear lift tape against the growth, peel carefully, and mount per the kit instructions. Useful for distinguishing Stachybotrys from harmless surface darkening or efflorescence. The black-mold detection guide covers tape-lift technique.
Step 6 — ERMI Dust Test for Historical Exposure
For sensitized occupants, post-remediation verification, or homes with documented water-damage history, an ERMI dust sample provides a DNA-based panel of 36 species and a single index score against a national reference database. Cost runs $250 to $400. Useful when air sampling comes back ambiguous or when the homeowner wants a quantified historical picture.
Step 7 — When to Escalate to Air-Spore Sampling
Move to professional air-spore cassette sampling when:
- A persistent musty odor has no visible source after a thorough DIY scan.
- Occupants experience symptoms that improve away from the home.
- Documentation is needed for insurance, real-estate, or rental disputes.
- Post-remediation clearance is required.
A typical residential investigation runs $300 to $700 with three to five indoor samples plus outdoor control. The inspector also runs moisture mapping and visual inspection. Andersen-style impactor traps or Air-O-Cell cassettes both work with standard lab analysis. The professional hiring guide covers credentials and scope.
Decision Tree at Each Step
The check builds a decision tree:
- Visible growth under 10 sq ft on hard surface → DIY cleanup workflow.
- Visible growth larger than 10 sq ft → call remediator.
- Persistent musty odor, no visible growth, normal hygrometer → professional air sampling.
- Elevated moisture-meter reading, no visible growth → wall-cavity borescope or call remediator.
- Confirmed leak event in past 72 hours → dry the area aggressively and re-check in a week.
- Sensitized occupant in home with water-damage history → ERMI plus air sampling.
Common Mistakes
- Skipping cabinet interiors and pulled-back appliances — the most common hidden sites.
- Sampling air right after vacuuming or HVAC operation.
- Sampling without an outdoor control.
- Painting over suspect staining instead of cutting it open.
- Trusting one moisture meter reading without a calibration baseline.
- Ignoring the nose because the eyes don’t see anything.
Documentation
Photograph every finding with date stamps. A spreadsheet or even a paper notebook tracking room, location, moisture reading, hygrometer reading, and observed condition lets the homeowner compare before-and-after a remediation or seasonal change. Photos help insurance claims and real-estate disclosures.
Maintenance Cadence
After the first full check, schedule a 20-minute quick scan quarterly. Focus on bathrooms, under sinks, behind appliances, and the basement. Hygrometers in three zones plus a quarterly walk-through catches most problems while they’re still cheap to fix. The homeowner check guide covers the routine-cadence side.
When the Check Finds Nothing
A thorough negative result is itself useful data. It rules out the most common indoor sources and shifts the diagnostic toward other indoor-air contaminants — VOCs from new finishes, combustion byproducts from gas appliances, allergens from pets and dust mites — that can produce similar symptoms. A clear-result mold check costs roughly $80 in tools and a Saturday morning. That’s a fair price for ruling out one of the most common indoor-air hazards.
Seasonal Considerations for the Check
The same house can produce different findings depending on when the check runs. Three seasonal patterns worth knowing:
- Late winter / early spring — best time to catch attic mold from winter ice-dam leaks and bathroom-fan duct condensation. Look at roof sheathing from the access hatch and check insulation around bath-fan duct terminations.
- Late spring / early summer — basement humidity transitions from heating-season dry to cooling-season humid. Hygrometer readings spike. Best time to verify dehumidifier capacity.
- Late summer / early fall — peak outdoor mold-spore counts, peak indoor relative humidity, and the most common time for new visible growth to appear. Full room-by-room check is most productive now.
A homeowner doing one annual deep check should aim for late spring; one doing two checks adds late summer.
What Findings Justify Immediate Action
Some findings during the check warrant action that same day rather than scheduling for later:
- Visible growth on bathroom drywall larger than a square foot — start the cleanup workflow.
- Active water dripping from any plumbing or ceiling — stop the source, dry the area, document with photos.
- Moisture meter reading above 1 percent on drywall behind a toilet or under a sink — investigate the source immediately.
- Hygrometer reading sustained above 60 percent in any zone — deploy a dehumidifier or open ventilation.
- Strong persistent musty odor at a specific wall, closet, or cabinet — open the cavity or call an inspector.
Most findings can be scheduled into a normal maintenance calendar. The action-now list deserves same-day attention.
Borescope Inspection for Wall Cavities
When moisture-meter readings or musty odor point to wall-cavity growth that visual inspection cannot reach, a borescope provides a low-cost option short of demolition. A $40 to $150 USB or wireless borescope camera inserts through a small drilled hole (typically 1/4 to 3/8 inch) into the cavity. The camera displays the cavity interior on a phone or computer screen.
Practical borescope tips:
- Drill the access hole at the bottom of the suspect wall section, then move up incrementally if no growth shows.
- Choose a discreet location — behind a piece of furniture, low on a baseboard, inside a closet.
- Patch the access hole with spackling and touch-up paint after inspection.
- Document findings with screen captures from the camera app.
This technique catches hidden growth without committing to full wall opening, which is helpful when the homeowner needs to confirm before scheduling remediation.
What a Professional Brings That DIY Cannot
Even a thorough DIY check has limits. Professional inspectors bring:
- Calibrated air-spore pumps with documented chain of custody for lab-defensible samples.
- Higher-end thermal imaging cameras with better resolution than handheld thermometers.
- Experience interpreting moisture-meter readings across substrate types and conditions.
- Trained eye for non-obvious indicators learned across hundreds of inspections.
- Written interpretive reports tying findings to suspected sources.
- Independence — no incentive to recommend unnecessary work.
For routine maintenance and screening, DIY usually suffices. For real-estate transactions, insurance claims, or sensitized-occupant cases, the professional package earns its fee.
Building a Reusable Checklist
After running the full check once, homeowners benefit from a simple printable checklist with room names, suspect locations, baseline moisture-meter readings, and baseline hygrometer values. Reuse the same checklist quarterly. Patterns emerge over 12 to 24 months — which zones consistently run higher, which seasons hit hardest, which appliances correlate with humidity spikes. The data set supports both predictive maintenance and any future insurance or real-estate documentation. The homeowner testing guide covers documentation practices.
References
- Brief Guide to Mold, Moisture, and Your Home — U.S. Environmental Protection Agency
- Mold and Dampness FAQ — Centers for Disease Control and Prevention
- Mold Resource Guide — InterNACHI
- Healthy Homes Mold Information — U.S. Department of Housing and Urban Development
- Mold Home Maintenance — American Society of Home Inspectors
Frequently asked questions
What's the first thing to check for mold?
Bathrooms and under kitchen sinks. Both combine plumbing fixtures, moisture, and cellulose-rich cabinet materials. A flashlight check at the cabinet floor catches slow leaks before they become wall-cavity problems.
Can I check for mold without testing?
Yes. Visual inspection, smell test, hygrometer readings, and moisture-meter spot checks catch most problems for under $100 in tools. Testing earns its cost only when no visible source explains musty odor or symptoms.
How often should I check my home for mold?
A thorough check once or twice per year, plus a 20-minute quick scan quarterly focused on bathrooms, under sinks, and the basement. Hygrometers in three zones provide continuous background monitoring.
When should I hire a mold inspector instead?
Hire when persistent musty odor has no visible source, when occupants have symptoms that improve away from home, when insurance or real-estate documentation is needed, or when a remediation has just been completed and clearance verification is required.
Front Range homeowners who finish a DIY check and want a professional second opinion can reach a vetted local inspector through our contact page for an air-spore sample, moisture mapping, and interpretive report.