How to Check My House for Mold: A 2026 Homeowner Guide
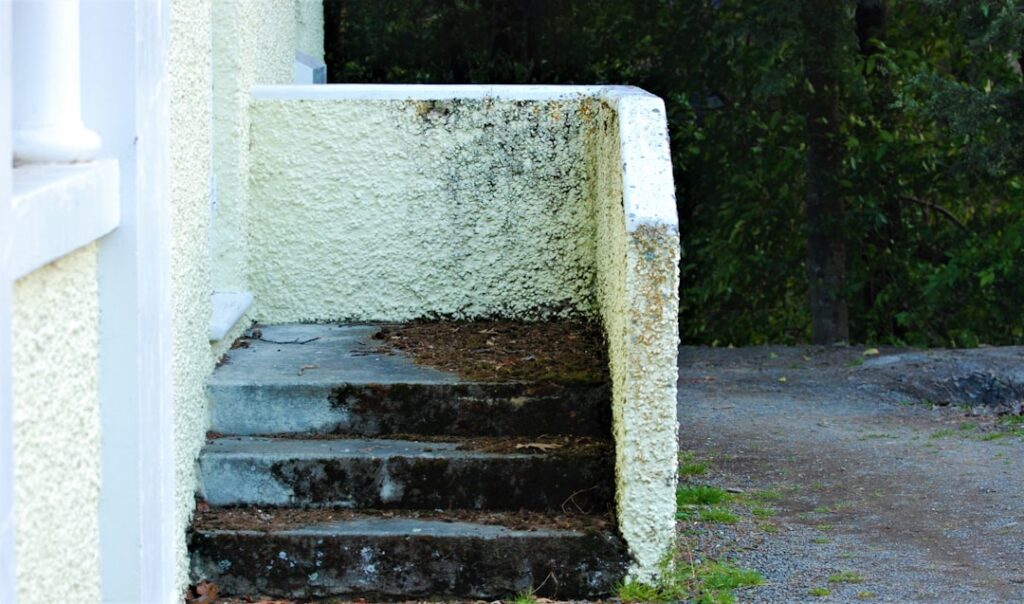
Homeowners searching how to check my house for mold are usually looking for a structured process rather than a single tool. Mold detection works best as a layered workflow: visual inspection first, moisture-meter readings to identify wet cavities, then targeted sampling to confirm or rule out amplification. This guide walks through the full process, the equipment needed at each step, and the action thresholds that determine when DIY is sufficient versus when a certified Indoor Environmental Professional should be called in. This article summarizes EPA and CDC guidance current as of 2026; consult your physician for health symptoms and a certified inspector for remediation decisions.
Part of our Types of Mold guide — start there for the full picture →
Is this mold, asbestos, or water damage? Get a free instant screen
Upload a clear photo of the suspect area. You'll get an instant AI screening opinion and what to do next. This is screening guidance, not a professional determination.
Screening guidance only. AI can be wrong. Confirm asbestos, mold type, or lead with lab testing or a licensed professional before acting.
Step One: Visual Inspection Room by Room
Begin with a systematic walkthrough of every room. Look at three categories of surface: walls and ceilings near plumbing fixtures or exterior corners, baseboards in basements and ground floors, and any surface that has experienced past water intrusion. Visible mold ranges from a faint dusty discoloration to obvious black, green, or pink colonies. Discoloration alone is not proof — staining can come from cooking residue, water minerals, or efflorescence — but it identifies areas worth investigating further.
Use a bright flashlight even during daytime walkthroughs. Most growth establishes in low-light areas where humidity stays elevated: under sinks, behind toilet tanks, inside HVAC return-air boots, behind furniture pushed against exterior walls, and along the top edge of basement window wells.
Step Two: Sniff Test and Odor Mapping
Musty or earthy odors indicate microbial volatile organic compounds (MVOCs) released by active mold colonies. The smell can persist even when no visible growth is present, because the source may be inside a wall cavity, under a subfloor, or in HVAC ductwork. Map the odor by walking through the house and noting where the smell strengthens.
The strongest odor location is the starting point for moisture investigation. Track the odor up to the ceiling, down to the floor, and toward the nearest exterior wall — the source is usually within a few feet of the strongest reading.
Step Three: Moisture-Meter Readings
A $30 to $100 pin-type moisture meter from any hardware store gives quantitative readings on wood, drywall, and other porous materials. Readings above 16% on framing lumber or above 1% on drywall (most meters scale 0 to 100 relative) indicate sustained moisture intrusion. These are the cavities where mold colonies can establish.
Take systematic readings along baseboards in basements, around window frames, beneath sinks, around tub and shower surrounds, and along the bottom plate of exterior walls. The mold inspection hub covers the broader visual and moisture workflow that sampling fits into.
What Moisture Readings Tell You That Visual Inspection Misses
Mold colonies behind drywall are invisible until growth pushes through the paper face. Moisture readings detect the precondition — elevated material moisture content — before visible growth appears. A wet wall cavity with 22% moisture content can develop colonization within 48 to 72 hours under typical indoor temperatures, well before any visual indicator surfaces.
Step Four: Targeted Air or Surface Sampling
After visual inspection and moisture mapping, decide whether sampling is needed. Sampling makes sense in three situations. You smell musty odors but cannot find visible growth. You have visible growth in one room and want to confirm whether spore counts elsewhere are also elevated. Or you need a documented lab result for real-estate, insurance, or legal purposes.
Standard residential sampling uses four locations: lowest occupied level, HVAC return-air register, room with visible growth or odor, and outdoor upwind of the building. Place air samplers at breathing height (3 to 5 feet above floor), run HVAC normally during sampling, and submit all samples to the same lab on the same day.
Step Five: Lab Analysis and Interpretation
Lab reports list spore counts per cubic meter by genus. Three pieces of information matter most: the indoor-to-outdoor ratio for total spores, the presence or absence of indicator species (Stachybotrys, Chaetomium, Memnoniella), and whether counts are consistent across rooms or vary sharply by location.
EPA explicitly warns that there are no federal numerical thresholds for indoor mold spore counts. The only defensible benchmark is the matched outdoor sample taken the same day. An indoor-to-outdoor ratio above 1.5 generally warrants additional investigation; ratios below 1.0 generally indicate normal indoor air with no active amplification.
Where Mold Most Commonly Hides in a House
Six locations account for the majority of residential mold problems. Bathroom ceilings and walls around tub or shower surrounds, where steam and inadequate exhaust ventilation combine. Kitchen cabinets under sinks, where slow plumbing leaks go undetected. Basement walls and floors, particularly in finished basements where moisture is trapped behind drywall and carpet. HVAC condensate-pan and evaporator-coil enclosures. Attic sheathing near roof leaks. And the back of furniture pushed against poorly insulated exterior walls.
For Front Range housing specifically, the basement is the single most common location. Foundation seepage from spring snowmelt, condensation on cold-water lines, and inadequate basement ventilation all contribute. The whole-home Stachybotrys testing guide covers how to allocate samples when basement contamination is the leading hypothesis.
Equipment Worth Owning
Three pieces of equipment cover most DIY mold checks. A bright LED flashlight ($15 to $30). A pin-type moisture meter ($30 to $100). A hygrometer for indoor relative humidity ($15 to $40). Total investment is under $200 and the equipment lasts for years.
If you plan to sample, a 2-pack air cassette kit with outdoor comparison runs $100 to $150 including lab analysis. Premium kits with multi-room sampling and rapid lab turnaround run $200 to $400. Petri dish kits at $10 to $20 work for budget screening but require outdoor comparison plates ordered separately.
When to Stop DIY and Call a Professional
EPA recommends professional involvement in four scenarios. Visible growth exceeds roughly 10 square feet (a 3-by-3-foot patch or larger). HVAC contamination is suspected. Occupants have asthma, COPD, immune compromise, or confirmed mold sensitivity. Or the moisture source is hidden behind finished surfaces.
Professional residential mold assessments in the Denver metro typically cost $300 to $600 and include moisture-meter readings, thermal imaging where available, multiple air samples with outdoor baseline, and a written remediation protocol. The protocol is the value gap — DIY kits give numbers, professionals give a scope of work.
Credential Verification
Certified Indoor Environmental Professionals carry credentials from the American Council for Accredited Certification (ACAC), the Institute of Inspection Cleaning and Restoration Certification (IICRC), or InterNACHI’s IAC2 program. Ask for credential numbers in writing before booking and verify directly with the issuing organization. An assessor independent from any remediation contractor produces the strongest documentation for downstream disputes. The whole-house Q and A workflow covers which questions to ask during scheduling.
Front Range Climate Considerations
Colorado’s outdoor spore counts run lower than coastal averages, which makes indoor amplification easier to detect via comparison sampling. A 1,500-count indoor reading would be unremarkable in Florida but represents meaningful elevation against a Denver outdoor baseline of 300 to 500. Sample on dry, calm days with stable weather for at least 48 hours — sampling during or after a thunderstorm inflates outdoor counts and masks the indoor signal.
Finished basements in older Boulder, Denver, and Jefferson county housing are the most common location for indoor mold problems. Foundation seepage from spring snowmelt and inadequate basement ventilation year-round drive most of the cases. Newer construction with engineered foundations and active basement HVAC has lower incidence.
Common Mistakes During DIY Mold Checks
Five errors recur. Skipping the moisture-meter step and going straight to sampling. Sampling without an outdoor comparison sample. Pre-treating visible growth with bleach before sampling (disturbs spores into the air, kills surface but not material-deep colonization). Sampling with HVAC off, which produces a baseline that does not reflect occupied conditions. And misinterpreting any positive identification as confirmation of a serious problem when the relevant question is always elevation above local baseline.
Each of these mistakes either understates a real problem or overstates a non-problem. Following the layered workflow — visual, odor, moisture, then targeted sampling — minimizes all five.
What to Do When the Check Finds Something
A confirmed elevation triggers a moisture investigation, not an immediate remediation contract. Document the lab report and the suspected moisture source in writing before contacting a remediator. Mold cannot establish without sustained moisture, so the next step is finding and stopping the water source.
Reputable remediation contractors work from a written protocol defining containment area, removal scope, and post-remediation clearance testing. Independent clearance testing — by a tester not affiliated with the remediator — is the strongest documentation if insurance disputes develop. Skipping clearance to save $200 to $400 is the most common money-loser, because recurrence rates without verification make the savings illusory.
Indoor Humidity Control as Prevention
Indoor relative humidity sustained above 60% is itself a flag for mold-conducive conditions, regardless of any lab result. EPA recommends keeping indoor RH below 50% as a baseline preventive measure. A $15 hygrometer makes monitoring trivial. Place one in each major living area and the basement, and check readings weekly during humid seasons.
Front Range homes occasionally fight the opposite problem — winter indoor humidity dropping below 25%, which is too dry for occupant comfort but is excellent for mold prevention. Summer monsoon weeks in Denver can swing basement RH above 70% within hours; a basement dehumidifier sized to the cubic footage handles this reliably and prevents the moisture conditions that drive colonization in the first place.
How Often to Repeat the Check
Routine annual sampling is not necessary in a dry, well-ventilated home with no visible growth and no water-intrusion history. Sampling should be event-driven. Trigger events include roof or plumbing leaks, basement floods from snowmelt or runoff, the appearance of visible growth or musty odor, real-estate transactions where mold becomes a negotiation point, and onset of unexplained respiratory symptoms that correlate with time spent at home.
For higher-risk buildings — finished basements in older housing, homes with chronic ice-dam history, or properties with prior remediation work — a baseline air sample every two to three years gives a longitudinal data set that flags slow-developing problems before they become visible. Save each lab report alongside the home inspection report and title documents.
Documentation Practices That Pay Off Later
Build a paper trail from the first check. Photograph every visible discoloration with timestamps, save moisture-meter readings in a spreadsheet keyed to room and surface, and record environmental conditions at the time of any sampling. If a mold issue eventually becomes an insurance claim or a disclosure dispute, this documentation is what separates a paid claim from a denied one.
Note outdoor temperature, indoor temperature, relative humidity, and HVAC status at the time of any sample. These data points let any later reviewer reconstruct sampling conditions and judge whether results are reproducible. Reproducibility matters more than any single number when the goal is documenting a chronic problem versus a one-off event.
Health Symptoms and the Physician Referral
CDC frames mold-related symptoms in three categories: allergic reactions (sneezing, runny nose, red eyes, skin rash), irritant effects (throat irritation, coughing, headache), and infection risk in immunocompromised patients. The agency notes that there is no clinical consensus on a “toxic mold syndrome” diagnosis, and clinical evaluation belongs with a physician — not a remediation contractor or a lab technician.
If symptoms appear consistently in one building and resolve in another, mention this pattern to your physician. The pattern is more diagnostically useful than any single air-sample result, and it helps the physician decide whether allergy testing, pulmonary function testing, or environmental medicine referral is warranted.
References
- EPA Mold Remediation in Schools and Commercial Buildings — U.S. Environmental Protection Agency
- CDC Mold Basics — Centers for Disease Control and Prevention
- InterNACHI IAC2 Mold Standards of Practice — InterNACHI
- CDPHE Mold Information — Colorado Department of Public Health and Environment
Frequently asked questions
How do I check my house for mold step by step?
Start with a visual inspection room by room, then a sniff test to identify odor sources, then moisture-meter readings on suspect surfaces, then targeted air or surface sampling with an outdoor comparison. Follow the layered workflow rather than jumping straight to sampling.
What does mold smell like in a house?
Mold odors are typically described as musty, earthy, or damp-basement-like. The smell comes from microbial volatile organic compounds released by active colonies and can persist even when no visible growth is present.
Where is mold most commonly found in a home?
Bathroom ceilings around tubs and showers, kitchen cabinets under sinks, basement walls and floors, HVAC condensate enclosures, attic sheathing near roof leaks, and behind furniture pushed against exterior walls. Front Range basements top the list.
When should I call a professional instead of checking myself?
When visible growth exceeds 10 square feet, when HVAC contamination is suspected, when occupants have asthma or immune compromise, or when the moisture source is hidden behind finished surfaces. EPA recommends professional involvement in these scenarios.
Front Range homeowners looking for a structured mold check from a vetted local inspector can reach out through our contact page for a same-week walkthrough.