Home Thermal Imaging: What Homeowners Need to Know
Home thermal imaging turns invisible temperature differences into a visible diagnostic image, and it has moved from a specialty tool used only by working inspectors to a workflow many homeowners now use directly. The transition has been driven by smartphone-attached cameras dropping in price and by widespread interest in energy efficiency, moisture detection, and electrical safety. This guide explains what home thermal imaging actually does, how to use it effectively, and how Front Range homeowners and inspectors can integrate it into a broader diagnostic workflow in 2026.
Part of our Thermal Imaging for Homes guide — start there for the full picture →
What Is Home Thermal Imaging?
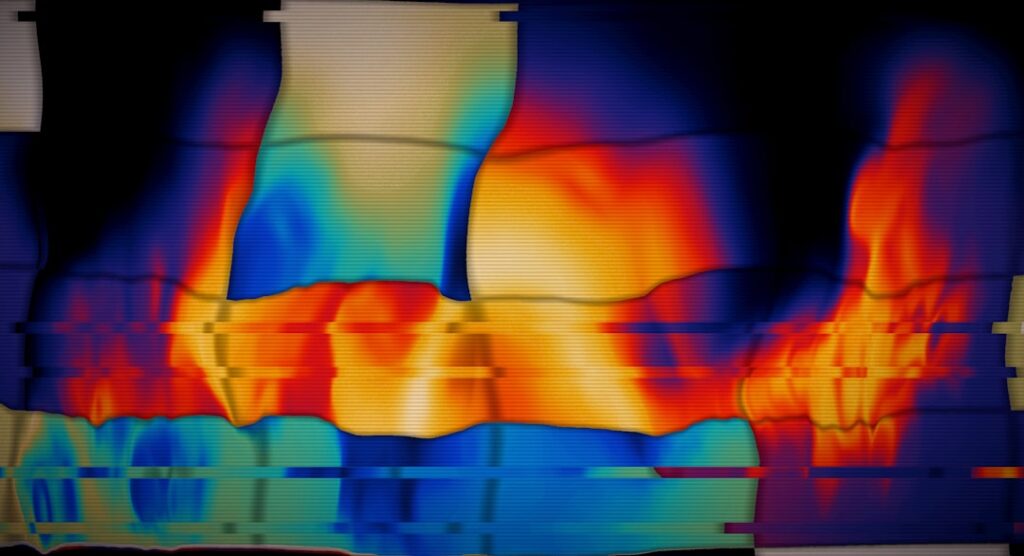
Home thermal imaging uses an infrared camera to capture the surface temperatures of walls, ceilings, floors, electrical components, plumbing, and appliances, then displays those temperatures as a color-coded image called a thermogram. The camera contains a microbolometer sensor that detects long-wave infrared radiation in the seven to fourteen micron range, and a processor converts the readings into the colored image. Cooler areas typically appear in blue or purple; warmer areas in yellow, orange, or red.
The camera does not see through walls. It sees the surface of whatever it points at. Hidden problems — wet drywall, missing insulation, hot electrical connections, leaking ducts — alter the surface temperature of the wall, ceiling, or component cover, and the camera reveals those patterns. The interpretation requires understanding what causes which patterns, which takes practice. Without that interpretive skill, the camera produces interesting images that are hard to translate into actionable findings.
For homeowners, home thermal imaging is most useful for four purposes: detecting hidden moisture, identifying missing or settled insulation, finding air leaks around windows and doors, and spotting hot electrical connections that signal failing components. Each use case has its own best-practice workflow and its own seasonal considerations, particularly in the Front Range where temperature differentials swing dramatically across seasons.
What Home Thermal Imaging Reveals
Moisture detection is the most common residential use case. Wet drywall reads cooler than surrounding dry drywall because water evaporates from the wet area and pulls heat off the surface. The pattern matters more than absolute temperature: a thin vertical streak following a pipe chase usually means a leak inside the wall; a localized blob in a corner usually means a roof leak or window flashing failure. Combining thermal imaging with a moisture meter — see our guide to the best moisture meters for specific models — produces the most reliable diagnosis.
Insulation assessment is the second use case. Walls and ceilings with missing, settled, or wet insulation read at outdoor-influenced temperatures during heating or cooling seasons. A whole-house scan reveals patterns: voids in attic insulation showing up as cool ceiling spots in winter, gaps in wall cavity insulation showing as cold streaks behind drywall, settled blown-in insulation creating a “two-tone” wall appearance where the insulated upper portion reads warmer than the uninsulated lower portion.
Air leak detection is the third use case. Drafts around windows, doors, electrical outlets, and recessed lights show up as temperature anomalies under blower-door pressurization or natural pressure differentials. Cold air infiltrating around a window jamb reads as a blue streak; hot attic air leaking into the conditioned space through a recessed light reads as a warm halo.
Electrical inspection is the fourth use case. Loose connections, overloaded breakers, and failing components run hotter than properly functioning equipment. A thermal scan of an electrical panel, with the cover removed and the panel under load, reveals hot spots that signal trouble. For broader context on inspection tooling, see our home inspection tools hub.
Equipment: From Smartphone Cameras to Professional Units
Home thermal imaging equipment falls into three tiers. The entry tier is smartphone-attached cameras that plug into the phone’s USB-C or Lightning port, using the phone’s screen and battery for display and storage. Brands include FLIR ONE, Seek Thermal CompactPro, and Hikmicro Pocket. Pricing ranges from two hundred fifty to six hundred dollars in 2026. Resolutions span 80×60 to 256×192 thermal pixels, which is enough for basic moisture and insulation work but limits diagnostic-grade detail.
The mid tier is standalone consumer or prosumer cameras that look like a small camera or pistol-grip unit with a built-in display. Brands include FLIR C-series and E-series, Hikmicro Mini and Pocket2, and Topdon TC. Pricing ranges from six hundred to fifteen hundred dollars. Resolutions span 160×120 to 256×192 thermal pixels. Battery life is typically three to four hours, and most units include Wi-Fi or USB image transfer plus reasonable smartphone integration.
The professional tier is dedicated diagnostic cameras with high resolution, long battery life, calibration documentation, and reporting-software integration. Brands include FLIR Exx series and the high-end E-series, Fluke Ti and TiX series, and Testo 875/890. Pricing ranges from twelve hundred to seven thousand dollars and up. Resolutions range from 240×180 to 640×480 thermal pixels, with thermal sensitivity (NETD) often below 50 mK. These cameras are overkill for most homeowner use but justified for working inspectors delivering thermal reports.
Resolution and Sensitivity Explained
Thermal resolution determines what the camera can resolve at a given distance. At 80×60 pixels — the bottom of the smartphone-attached tier — the camera shows broad patterns: a wet wall area, a missing-insulation void, a hot panel breaker. At 160×120, finer details emerge: individual stud bays in an insulated wall, the boundary between wet and dry drywall, smaller air-leak paths. At 256×192 to 320×240, the camera resolves nuanced patterns useful for diagnostic work, including subtle moisture migration patterns.
Thermal sensitivity, expressed as NETD (noise-equivalent temperature difference) in millikelvin, determines how small a temperature difference the camera can distinguish. Lower numbers are better. Consumer cameras often spec 100 mK or higher; prosumer cameras spec 50 to 70 mK; professional cameras spec under 50 mK. In practical terms, a 100 mK camera can distinguish about a tenth of a degree Celsius between adjacent pixels; a 30 mK camera can distinguish about three hundredths of a degree.
For most homeowner uses focused on moisture and insulation checks, 160×120 resolution and 100 mK sensitivity are adequate. The marginal value of higher resolution and lower NETD becomes apparent when subtle patterns matter — small moisture streaks behind paint, fine insulation gaps, electrical connections at early-stage failure. For most residential use, the resolution sweet spot is in the 160×120 to 256×192 range at the six-to-nine-hundred-dollar pricepoint.
How to Use a Thermal Camera Effectively
Effective use comes down to controlling for the temperature differential. The camera reveals patterns when there is a meaningful temperature difference between the surface being scanned and the source of the temperature anomaly. For moisture detection, the indoor air should differ from the wet area by at least five to ten degrees; in winter, indoor heat warms dry walls while wet walls cool from evaporation, producing a clear contrast. For insulation, indoor temperature should differ from outdoor by at least fifteen to twenty degrees; the contrast reveals missing insulation as it lets outdoor temperatures influence interior wall surfaces.
Workflow matters as much as differential. A typical homeowner whole-house scan starts in the basement, moves through main-floor rooms, includes attic access, and ends with electrical panels. Take wide establishing shots of each wall before zooming in on suspect areas. Photograph each thermogram alongside a corresponding visible-light photo of the same area; without the visible-light reference, blue blobs on a thermogram are hard to associate with physical locations later.
Documentation matters too. For each scan, record date, time, indoor and outdoor temperatures, indoor humidity, HVAC operation status, and recent weather. Save thermograms with clear filenames including room and wall identifier. For ongoing investigations, build a simple spreadsheet that tracks scans over time so patterns can be compared.
Limitations Homeowners Should Understand
Thermal imaging has real limits. Cameras cannot see through walls; they see surface temperatures only. They cannot detect moisture directly; they detect surface cooling that evaporation produces. They require a temperature differential to reveal patterns; in conditions where indoor and outdoor temperatures are similar, the camera produces featureless images.
The most common misuse is interpreting a thermal image without controlling for the differential. A homeowner who scans a wall on a 70-degree spring day with indoor air also at 70 degrees will see nothing useful regardless of what is hidden. The camera’s most useful work happens when indoor temperatures are at least ten to twenty degrees different from outdoor or from the suspect cavity. In Front Range homes this usually means winter scans for the building envelope and shoulder-season scans for HVAC issues.
The second misuse is treating thermal images as definitive. A blue blob does not prove a wall is wet; it proves a temperature anomaly exists. Confirmation requires moisture-meter readings or visual inspection. The thermal camera is a screening tool that targets follow-up; it is not a diagnostic tool that eliminates other steps.
The third misuse is buying a camera before learning to interpret images. Online training courses from FLIR, the Building Performance Institute, and similar organizations teach interpretation patterns that take experience to recognize. A homeowner who invests four hours in training before the first scan gets dramatically more value from any camera than one who relies on intuition alone.
When to Hire a Professional vs. DIY
For homeowners who need a one-time thermal scan — diagnosing a specific moisture concern, evaluating insulation before an energy upgrade, checking electrical health before selling a home — hiring a credentialed inspector is often more efficient than buying a camera and learning to interpret images. Professional thermal scans on the Front Range typically run two hundred fifty to four hundred fifty dollars for a residential property and include written interpretation, annotated images, and recommendations.
For homeowners who anticipate ongoing diagnostic work — landlords with multiple properties, owners of older homes with chronic issues, energy-conscious renovators planning multiple upgrades — buying a camera and learning to interpret images often produces better long-term value. The breakeven point is usually three to five professional scans worth of fees, depending on the camera tier chosen.
Working inspectors, energy auditors, and remediation contractors should plan to own a camera as part of their basic toolkit. The diagnostic capability the camera provides, when paired with reporting software and proper training, often justifies the cost within the first few months of professional use. For inspectors specifically, a camera in the 240×180 range with reporting integration and calibration documentation is the practical minimum.
Common Pitfalls in Home Thermal Imaging
The most common pitfall is scanning under inadequate temperature differentials. A scan that produces a featureless image is rarely a sign that nothing is wrong; it is usually a sign that conditions did not support detection. Scan again when conditions improve, often by waiting for a colder or hotter day or by pre-conditioning the indoor environment with aggressive heating or cooling.
The second pitfall is over-interpreting noise. Every thermal image contains some level of pixel-to-pixel variation that is sensor noise rather than real temperature difference. Subtle patterns at or near the camera’s NETD limit may not be real. Reproduce findings in a second scan before drawing conclusions.
The third pitfall is failing to consider solar gain. Direct sunlight on exterior walls or roof surfaces produces thermal patterns dominated by solar heating rather than building-assembly issues. Scan exterior surfaces in early morning or evening, or after sunset for clearest results. Solar-influenced patterns can mask the moisture or insulation findings the inspector is looking for.
The fourth pitfall is forgetting that the camera measures surface temperature, not interior temperature. A wall that reads “cool” is not necessarily wet inside; it may simply have a thermal mass that holds outdoor temperature longer than adjacent walls. Pair thermal findings with moisture readings before drawing conclusions about hidden water.
Building a Diagnostic Workflow
A complete homeowner diagnostic workflow combines several tools. The thermal camera identifies suspect zones across a whole-house scan in ninety minutes to two hours. A pin moisture meter confirms whether temperature anomalies are moisture-related. A hygrometer documents ambient conditions and tracks indoor humidity over time. A flashlight handles visual inspection. A small inspection borescope extends the kit to wall-cavity inspection through small drilled holes that patch with paintable caulk.
Adding a blower door — typically by hiring an energy auditor for a single appointment rather than purchasing — amplifies air-leak signals dramatically. Under fifty pascals of depressurization, infiltration accelerates and thermal scans reveal leak paths invisible at natural pressure. Many Front Range energy auditors offer thermal-plus-blower-door packages for three hundred fifty to five hundred fifty dollars; the combination is the highest-value single appointment a homeowner can buy for energy and air-leak diagnostics.
For ongoing investigations, build a simple notebook or spreadsheet tracking scans, conditions, findings, and follow-up actions. Date everything. Photograph everything. The investment in documentation pays back many times over when problems recur, when contractors need context, or when home transactions require historical records.
Specific Pattern Recognition for Common Problems
Recognizing patterns is what separates useful thermal imaging from confusing thermal imaging. Three pattern types account for most residential findings. Linear patterns — long thin streaks — usually indicate framing members behind drywall, ducts in walls or ceilings, or fluid lines in finished spaces. The pattern follows the geometry of the hidden component. Vertical streaks behind drywall often mean a cold air leak through the wall cavity or a wet vertical surface like a pipe chase.
Cluster patterns — irregular blobs — usually indicate localized phenomena. A cool blob on a ceiling can mean wet drywall, a missing-insulation void, or a duct boot air leak. A warm blob on an electrical panel face usually means a hot connection inside. Cluster patterns require interpretation in context: the same blob on a basement wall in winter probably means cold concrete contact rather than a moisture problem, and on a kitchen ceiling probably means a recessed-light air leak.
Boundary patterns — sharp temperature transitions between adjacent areas — usually indicate transitions in building assembly. A wall section reading at one temperature next to an adjacent section at a noticeably different temperature often means insulation differences, vapor barrier presence or absence, or assembly transitions like a kneewall meeting a ceiling. Boundary patterns are diagnostic gold for energy auditors.
Specific Front Range Construction Patterns
Several Front Range construction patterns produce predictable thermal signatures worth knowing. Older Denver bungalows from the 1920s through 1950s often have minimal wall insulation and significant air leakage at the rim joist; thermal scans reveal cold streaks along the floor-wall junction in winter and warm streaks in summer. Mid-century ranches from the 1950s through 1970s often have settled blown-in insulation in walls, producing a “two-tone” wall pattern where the lower portion reads outdoor-influenced.
Suburban homes from the 1990s through 2000s often have thermal bridging through 2×4 framing in exterior walls, visible as evenly spaced vertical streaks every sixteen inches on center. Modern homes from 2010 onward often have more rigorous insulation and sealing, but air-leak paths through can-light fixtures, recessed cans, and duct chases are still common findings on thermal scans.
Walkout basement designs common in Douglas, Jefferson, and El Paso counties produce predictable cold patterns along the partial below-grade walls in winter and condensation-related cooling along finished basement walls in summer. Inspectors who understand the construction style focus their scans efficiently rather than scanning the whole house equally.
Cost-Benefit Analysis for Homeowners
The economic case for owning versus renting versus hiring depends on use frequency. A homeowner who plans one scan per year for a decade will spend two thousand five hundred to four thousand five hundred dollars on professional scans over that period. Owning a six-hundred-dollar smartphone-attached camera plus four hours of training amortizes to under one hundred dollars per scan, with the additional benefit of being able to scan reactively when problems arise.
For homeowners who plan only one or two scans in a lifetime, hiring is almost certainly more efficient. The professional brings interpretation skill, calibrated equipment, and a written report — all of which take significant time to develop independently. For homeowners somewhere in between — three to five anticipated scans over a decade — renting equipment for specific scan events often produces the best value.
For property managers, landlords, and home-renovation enthusiasts, ownership almost always wins. Quarterly scans of multiple properties, repeated scans during renovation projects to verify insulation work, and ongoing energy investigations all benefit from immediate access to the equipment. The marginal cost of an additional scan once the camera is owned is essentially zero.
Integrating Thermal Imaging with Other Inspection Tasks
Thermal imaging works best as part of a sequenced workflow rather than as a standalone task. A typical residential diagnostic sequence starts with a hygrometer logging room humidity for several days to identify rooms with elevated indoor moisture. The thermal scan then targets those rooms first, focusing on walls, ceilings, and corners where condensation or leakage might have occurred. Moisture-meter readings confirm temperature anomalies that point to wet drywall. A borescope inspects wall cavities through small drilled holes when readings warrant.
For energy work, the sequence reverses. A blower door pressurizes or depressurizes the home first, then the thermal camera maps the air-leak paths the blower door has amplified. Adding manometer readings on individual rooms quantifies the leakage by location, and the combination produces an air-sealing scope that contractors can work to. Most Front Range energy auditors offer this sequence as a packaged service for three hundred fifty to five hundred fifty dollars.
For electrical work, the sequence involves removing the panel cover with the panel under load, scanning each breaker and lug while the home is operating normally, and following up on hot spots with electrician evaluation. Inspectors should follow OSHA electrical safety guidance during this work, including PPE for arc-flash potential. Homeowners scanning their own panels should hire a licensed electrician for any follow-up rather than attempting repairs themselves.
The sequenced approach takes more time than spot-scanning, but it produces dramatically more reliable findings. Spot-scanning often produces interesting images that turn out to be artifacts or normal variation; sequenced scanning produces findings that have already been triangulated against other data sources by the time the homeowner or inspector reaches conclusions.
What to Document and Save
Every scan deserves its own documentation record. For each scan record date, time, indoor temperature, outdoor temperature, indoor relative humidity, HVAC operation status, and weather conditions. Save thermograms with descriptive filenames that include the room and wall identifier. Pair each thermogram with a corresponding visible-light photo of the same area; without the visible-light reference, blue blobs on a thermogram are hard to associate with physical locations weeks or months later.
For ongoing investigations, build a simple spreadsheet that tracks scans over time. Columns might include date, location, suspected cause, follow-up action, and resolution status. Patterns become visible across multiple scans that single events miss. A homeowner who scans the same suspect wall four times across a year — once per season — catches seasonal moisture patterns that any single scan would miss entirely. The discipline of consistent documentation pays back many times over when problems recur or when home transactions require historical context. Save records to two locations, a cloud service plus a local backup, since cloud accounts and storage services sometimes lose access or change subscription terms over years. Treat the documentation package as a long-lived asset rather than throwaway notes. Front Range homeowners who document well during one ownership cycle leave a meaningful asset behind for the next owner of the home, and they protect themselves if disputes arise during their own ownership of the property.
References
- ENERGY STAR: Seal and Insulate — U.S. Environmental Protection Agency (ENERGY STAR)
- Infrared Thermography for Inspections — InterNACHI
- American Society of Home Inspectors — ASHI
- International Code Council — ICC
Frequently asked questions
Can home thermal imaging see inside walls?
No. Thermal cameras detect surface temperatures only. Hidden problems alter surface temperatures, which the camera reveals as patterns, but the camera cannot image objects behind solid materials directly.
What is the best season for thermal imaging on the Front Range?
Winter produces the largest indoor-outdoor temperature differentials and the clearest envelope-related patterns. Summer scans work best in early morning or evening to avoid solar gain interference. Shoulder seasons produce limited useful data without artificial pre-conditioning.
How much does a professional thermal scan cost?
Front Range residential thermal scans typically run two hundred fifty to four hundred fifty dollars and include written interpretation and annotated images. Combined thermal-plus-blower-door energy audits run three hundred fifty to five hundred fifty dollars.
Do I need to learn how to read thermograms?
Yes. Without interpretive skill, even a high-resolution camera produces images that are hard to translate into actionable findings. Online training courses from FLIR, BPI, and InterNACHI teach the patterns. Plan four to ten hours of training before relying on a thermal camera for diagnostic decisions.
Thermal imaging cameras
Infrared cameras reveal hidden moisture, missing insulation, and air leaks. Phone-attachment models are the budget entry point; standalone units have higher resolution.
| Product | Why | Buy |
|---|---|---|
 FLIR ONE Pro (phone) FLIR ONE Pro (phone) | Plugs into iPhone/Android; inspector favorite. | Amazon — $349.00 |
 Topdon TC001 Topdon TC001 | High-res phone module at a low price. | Amazon — $199.99 |
 FLIR C5 Compact FLIR C5 Compact | Standalone pocket camera with Wi-Fi. | Amazon — $611.50 |