HIKMICRO Thermal Scope: What Homeowners Should Know
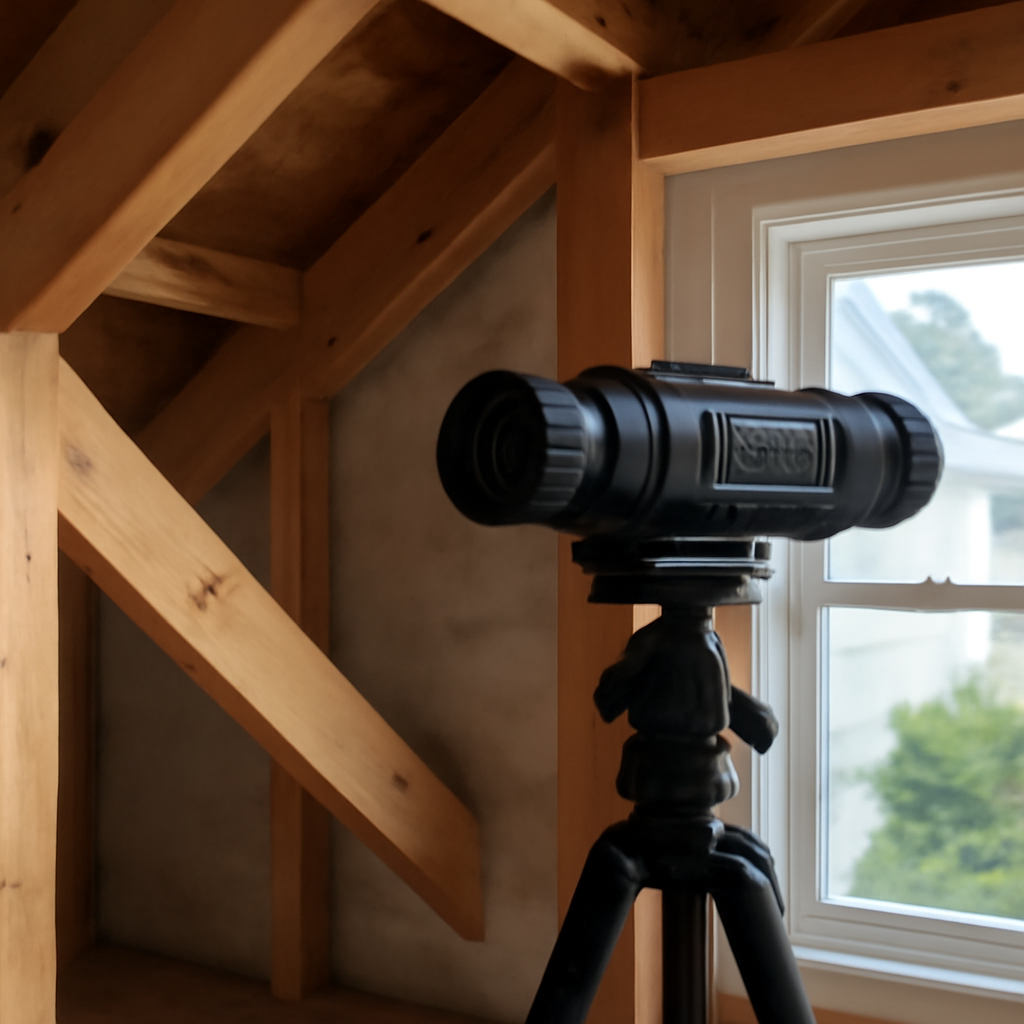
The name HIKMICRO thermal scope comes up often because the brand offers a wide range of affordable handheld infrared devices, from monoculars to compact imagers. For a homeowner, the brand matters less than understanding what the specs behind any thermal scope mean and how that class of device applies to finding moisture, insulation gaps, and other building faults. This guide describes the specifications generically, using a HIKMICRO-style handheld scope as the example, so you can judge any thermal device on its merits rather than its marketing, and avoid overpaying for numbers that do not help a home inspection.
Part of our Thermal Imaging for Homes guide — start there for the full picture →
What is a handheld thermal scope used for?
A handheld thermal scope is a portable infrared camera, sometimes in a monocular form factor that you look through like a small telescope and sometimes with a screen on the back. It detects the heat objects emit and renders it as a visible image, so you can spot temperature differences in the dark or across a surface. The same device that an outdoorsperson uses to spot a warm animal at night reads the warm or cool patterns that reveal a building defect.
Around a home, that means scanning a wall for a cold draft, a ceiling for the cool footprint of a leak, or an exterior for streaks where insulation is missing. The portability and the eyepiece make these scopes handy for quick surveys, though they are generally simpler than the documentation-focused cameras a professional inspector carries. The core capability, seeing heat instead of light, is what makes them relevant to diagnostics at all. That single shared capability is why a device marketed for nighttime outdoor spotting and one marketed for building inspection can be closely related under the hood, and why understanding the specs matters more than the category on the box.
Scope, monocular, or imager: what is the difference?
The word “scope” gets applied loosely, and the form factor shapes how a device suits home use. A thermal monocular is a single-eyepiece device you look through like a small spyglass, designed for observation, spotting warm objects outdoors at a distance. A thermal imager, by contrast, has a screen on the back and is built to capture, measure, and often save images, which is the format inspectors prefer.
The distinction matters for diagnostics. An observation-focused monocular may show only relative heat with no temperature readout, which is fine for seeing that something is warm but limited for building work, where a spot-temperature value helps. An imager with a screen, spot measurement, and the ability to save and share images is far more useful for documenting a draft or a damp patch. When a brand offers many models, the question is not the brand but whether the specific device measures and records, or merely observes.
The specs that actually matter
Thermal device marketing throws a lot of numbers around. A few of them genuinely affect what you can see; others are pure noise designed to look impressive. Here is how to read them.
Thermal resolution
This is the number of temperature-sensing pixels in the detector, often given as a grid like a few thousand to tens of thousands of points. More pixels mean a sharper thermal image and the ability to resolve smaller details from farther away. Budget scopes have low native resolution, which is fine for spotting a large insulation gap but limiting for fine work. Do not confuse the displayed image size with the true detector resolution; software upscaling does not add real detail.
Thermal sensitivity
Often expressed as a small temperature value, this measures the smallest temperature difference the device can distinguish. Better sensitivity reveals subtle anomalies, like a faint moisture signature, that a less sensitive unit would miss. For building diagnostics, sensitivity often matters more than raw resolution because the temperature differences involved can be small. A scope tuned for outdoor spotting may have plenty of range but mediocre sensitivity, which is exactly the wrong tradeoff for reading the gentle thermal patterns inside a home.
Detection range and field of view
Range describes how far away the device can detect heat, which matters more for outdoor spotting than for indoor wall scanning. For building work, you are usually within a few meters of the surface, so headline range figures aimed at outdoor observation are largely irrelevant. Field of view affects how much you see at once; a wider field surveys a room faster, a narrower one zooms on a detail. Some devices offer a digital zoom, but like image upscaling, zoom does not add real resolution; it just enlarges the pixels you already have.
Refresh rate and measurement features
A higher refresh rate gives smoother motion when you pan, which makes scanning less disorienting. Some scopes also display spot temperature readings, which is useful for diagnostics; pure observation scopes may only show relative heat, which limits their building use.
Color palettes and image features
Most thermal devices let you switch color palettes, white-hot, black-hot, iron, rainbow, and the choice affects how easily an anomaly stands out. A high-contrast palette like iron makes subtle temperature differences pop, while white-hot gives a more photographic look. This is a usability feature, not a performance one, but it matters for actually spotting a faint moisture signature. Some devices also blend the thermal image with a visible-light image, which helps you tell exactly where a hot spot sits.
Battery, storage, and connectivity
Practical features round out a device’s usefulness. Battery life determines how long a survey can run, onboard storage and image capture let you save findings, and Wi-Fi or app connectivity lets you transfer images to a phone for a closer look or to share with a contractor. None of these affect what the sensor can see, but they affect whether you can document and act on what you find.
Where a thermal scope helps a homeowner
For quick, informal checks, a handheld scope is genuinely useful. Run it along an exterior wall on a cold day and the cold streaks of missing insulation jump out. Scan around windows and doors and the drafts show as temperature changes. Point it at a ceiling after suspecting a leak and a damp area may appear as a cooler patch. The Department of Energy describes exactly this kind of thermographic survey in its guidance on home energy audits.
It is a screening tool, though, not a diagnostic instrument. A scope tells you something is different about a spot’s temperature; it does not tell you why. Confirming a suspected leak still requires a moisture meter, and reading the result correctly requires understanding building science. Our moisture meter guide covers that confirmation step. The most effective home setup is exactly this pairing: a budget thermal scope to scan a whole wall quickly and flag suspicious spots, and a cheap moisture meter to confirm, point by point, whether those spots are actually wet.
Common homeowner uses, room by room
It helps to picture where a handheld scope earns its keep around an actual house.
Walls and windows
On a cold day, scanning interior walls reveals the cool streaks of missing or settled insulation and the drafts leaking around window and door frames. These are the comfort-and-energy findings most homeowners notice first, and they point directly at where weatherstripping or insulation would help.
Ceilings and bathrooms
After a storm or with a suspected plumbing leak, a ceiling scan can show the cool footprint of evaporating moisture before a stain appears. Bathrooms and the rooms below them are common targets, since slow leaks around tubs and shower pans are frequent and hidden.
The electrical panel
With the panel cover off and circuits under load, a scope can flag a breaker or connection running hotter than its neighbors, an early warning of an overloaded or loose connection. This is genuinely a safety check, though opening a panel carries shock risk and is best left to those who know what they are doing.
The limits every thermal scope shares
No thermal device sees through walls; it reads surface temperature and infers the rest. None detects moisture directly; it detects the temperature change moisture causes. And all of them are vulnerable to the same artifacts, reflections off shiny surfaces, solar loading that warms one wall, and emissivity differences between materials that can mimic a defect.
A simple handheld scope in untrained hands produces striking images and unreliable conclusions, because interpreting thermal imagery is a learned skill. The device narrows where to look; a person with training draws the conclusion. That is true of an expensive professional camera and a budget scope alike, which is why brand and price matter less than knowing how to read what you see. Our explainer on how thermal cameras work covers those artifacts in plain terms.
There is one more shared limit worth naming: a thermal scope shows only the surface, never the depth. It cannot tell you whether a cool patch is a thin film of surface moisture or a soaked wall cavity, nor how far damage extends behind the finish. That depth information comes from a moisture meter, a borescope, or opening the wall, which is exactly why the scope is the start of an investigation rather than the end of one.
Buying smart: match the device to the job
If the goal is occasional homeowner checks, finding a draft, eyeballing insulation, satisfying curiosity, a budget handheld scope with modest resolution and decent sensitivity is plenty. Prioritize sensitivity and a spot-temperature readout over headline resolution numbers, and ignore software-upscaled image specs. Also weigh the practical features, image capture, a usable color palette, and a way to transfer pictures, because being able to save and study a finding often matters more in real use than a marginally higher pixel count that the marketing pushes.
If the goal is documenting a problem for a claim, a sale, or a serious diagnosis, the device matters far less than the operator. A professional thermal imaging inspection pairs a calibrated camera with confirmation tools and trained interpretation, which is what produces a defensible result. The handheld thermal imager guide and the broader home inspection tools guide lay out where a scope fits among the rest of the kit.
Getting reliable results from a handheld scope
A few habits make a budget scope far more trustworthy. Scan when there is a temperature difference between inside and outside, because the contrast is what makes anomalies visible; a mild day produces a flat, uninformative image. Move slowly and let the device settle, since a fast pan smears the picture and hides detail.
Take a reference reading on a known-normal surface before judging a suspect spot, the same baseline logic that governs a moisture meter. Watch for the artifacts, a shiny surface reflecting a warm object, a sun-baked wall, a material change, before concluding you have found a defect. And confirm anything important with a second tool rather than trusting the colorful image alone. Used this way, even an inexpensive scope becomes a genuine early-warning device.
What a scope cannot replace
It is worth ending on the honest boundary. A handheld scope, however good, does not replace a professional thermal imaging inspection any more than a home blood-pressure cuff replaces a doctor. The scope shows you that a spot is a different temperature; it does not tell you the cause, the extent, or the seriousness, and it does not carry the training to interpret a complex thermal scene.
For peace of mind, a scope is a fine tool to spot obvious issues and decide whether to call someone. For a purchase decision, an insurance claim, or a serious moisture problem, the device takes a back seat to a qualified inspector who pairs a calibrated camera with confirmation tools and experience. Knowing which situation you are in is the most useful judgment of all, and it keeps a budget scope in its proper role as a screening aid rather than a substitute for expertise.
References
- ENERGY STAR: Seal and Insulate — U.S. Environmental Protection Agency (ENERGY STAR)
- Standards of Practice for Home Inspections — InterNACHI
- A Brief Guide to Mold, Moisture and Your Home — U.S. Environmental Protection Agency
Frequently asked questions
What thermal scope specs matter most for home use?
Thermal sensitivity and a spot-temperature readout matter more than headline resolution for building diagnostics, because the temperature differences involved are often small. Ignore software-upscaled image specs, since upscaling does not add real detail to the true detector resolution.
Can a thermal scope detect a water leak?
It can flag the temperature anomaly a leak causes, but it detects temperature, not water. A cool patch is a clue to investigate, not proof. Confirming a leak still requires a moisture meter and a physical check.
Is a budget thermal scope good enough for a homeowner?
For occasional checks like finding drafts or eyeballing insulation, a budget scope with modest resolution and decent sensitivity is plenty. For documenting a problem for a claim or sale, the operator's training matters far more than the device.
Does any thermal scope see through walls?
No thermal device sees through walls. It reads surface temperature and infers what is behind from the pattern. It is also vulnerable to reflections, solar loading, and emissivity differences that can mimic a defect, which is why interpretation skill is essential.