Floor Moisture Meter: What Homeowners Need to Know
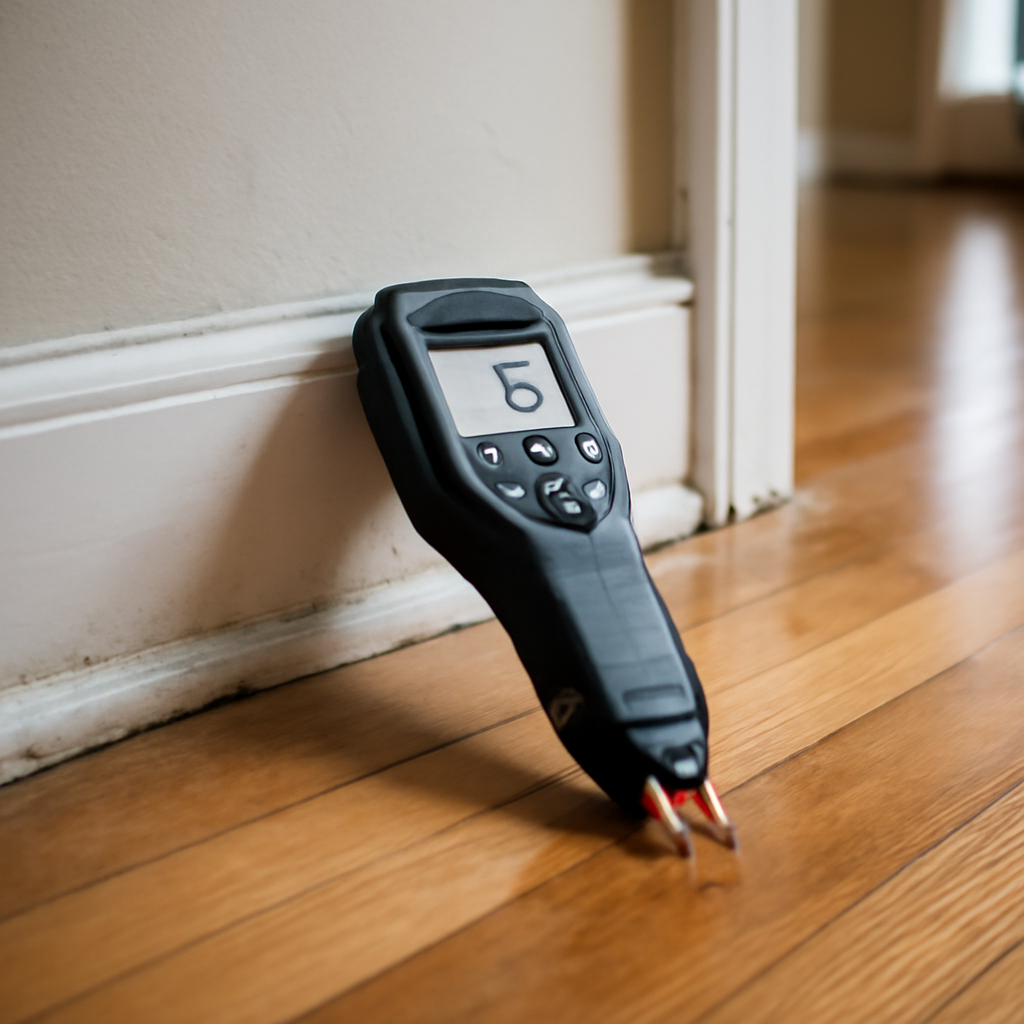
A floor moisture meter measures how much water is in a subfloor, slab, or finished floor — a check that prevents the warping, cupping, adhesive failure, and mold that ruin flooring installations. Concrete slabs and wood subfloors behave very differently from drywall, and measuring them correctly involves both surface meters and, for slabs, relative-humidity probes embedded in the concrete. This guide explains what a floor moisture meter does, the specifications that matter, how slab RH testing works, and how to read the results so flooring goes down over a genuinely dry base.
Part of our Moisture Meters & Water Damage Detection guide — start there for the full picture →
What a Floor Moisture Meter Measures
Floor moisture meters serve two main jobs: checking wood subfloors and engineered or solid wood flooring for moisture content (%MC), and assessing concrete slabs for moisture before a floor covering is installed. For wood, a pin meter calibrated to the wood species gives a meaningful percentage. For concrete, the picture is more complex — surface meters give a relative reading, while the industry-recognized standard for slab readiness is an in-slab relative humidity (RH) test.
The reason this matters is that flooring failures are expensive and often blamed on the product when the real cause was a damp subfloor. Manufacturers publish maximum acceptable moisture levels for their flooring, and meeting those numbers is a condition of warranty coverage. Our broader home inspection tools guide explains how moisture metering fits the larger diagnostic toolkit.
Wood Subfloors and Flooring: %MC
For wood, the target is acclimation. Solid hardwood is typically installed when its moisture content sits within a few percentage points of the subfloor’s, often in the 6–9% range depending on region and climate. A pin meter set to the correct species reads %MC directly; a pinless meter scans larger areas quickly but should be set to the appropriate density or scale for the wood.
Along the Front Range, the dry climate means wood often arrives wetter than the in-service equilibrium, so acclimating flooring on-site and verifying both the flooring and subfloor with a meter prevents post-install gaps and cupping. Comparing the flooring’s %MC to the subfloor’s is the key check — a large mismatch predicts movement. For the differences between meter types, see our pin vs pinless comparison.
Concrete Slabs: Surface Readings vs RH-in-Slab
Surface and non-destructive meters
A pinless concrete moisture meter gives a quick relative reading of the slab surface and near-surface zone. It’s excellent for mapping — finding which areas of a slab are wetter than others — and for go/no-go screening. What it can’t do is reliably predict the moisture that will migrate up after a floor covering traps it.
In-slab relative humidity testing
The recognized method for determining whether a concrete slab is dry enough for flooring is the in-slab RH probe test, defined by ASTM F2170. Probes are placed in holes drilled to a specified depth (40% of slab thickness for a slab drying from one side), sealed, allowed to equilibrate, and then read for relative humidity deep in the slab. Most flooring manufacturers specify a maximum RH — commonly around 75–85% — for warranty-valid installation. An older surface method, the calcium chloride test (ASTM F1869), measures moisture vapor emission rate but is considered less predictive than RH testing.
The practical point: a surface meter screens, but the RH-in-slab test decides. Installing flooring over a slab that passed only a surface scan but failed an RH test is a leading cause of adhesive and finish failure.
Specifications Worth Checking
Modes: A dual-mode meter (pin and pinless) covers both wood and concrete screening. Concrete scale: Look for a dedicated concrete or reference scale, not just wood %MC. RH capability: For slab work, you need a meter or kit that accepts ASTM F2170 RH probes (Wagner, Tramex, and Protimeter all offer systems). Measurement depth (pinless): Typically up to 1 inch — surface zone only. Accuracy: Wood-scale resistance accuracy near ±0.1% is typical; RH probe accuracy is usually quoted around ±2–3% RH. Temperature compensation: Quality RH systems compensate for slab temperature, which affects readings. Display and logging: Data logging matters for documenting an RH test over its equilibration period.
How to Read Floor Moisture Results
Always compare against the flooring manufacturer’s published limits, because those numbers govern both performance and warranty. For wood, confirm the flooring and subfloor are within a few points of each other and within the manufacturer’s range. For concrete, the in-slab RH reading is the gatekeeper — if the manufacturer caps installation at 80% RH and the slab reads 88%, the slab needs more drying time or a moisture-mitigation system before flooring goes down.
Take multiple readings across the floor and watch for patterns. A slab that’s wet near an exterior wall or a plumbing run points to intrusion rather than normal cure moisture. Document readings with location and date; restoration and warranty disputes often hinge on that record. Our guide on how to read a moisture meter covers scale interpretation in more detail.
Common Mistakes
The biggest mistake is trusting a surface concrete reading as proof a slab is ready — it isn’t, because surface moisture can read fine while deeper moisture migrates up later. The second is skipping species or material calibration on wood, producing a number that doesn’t mean what the user thinks. The third is installing on a freshly poured slab without allowing adequate cure and drying time; new concrete can take a month or more per inch of thickness to reach acceptable RH. The fourth is ignoring manufacturer limits and voiding a warranty. Avoiding these protects both the floor and the budget.
Acclimation and the Front Range Climate
Wood flooring is hygroscopic — it gains and loses moisture to match the surrounding air — so it must be acclimated to the conditions it will live in before installation. The goal is equilibrium moisture content, the point at which the wood neither gains nor loses moisture in the home’s typical temperature and humidity. Install wood that’s wetter than its in-service equilibrium and it will shrink and gap as it dries; install it drier and it will swell and cup as it absorbs moisture.
Colorado’s Front Range makes this especially relevant. The region’s dry climate produces a low equilibrium moisture content, often lower than where flooring is manufactured or stored, so wood frequently arrives wetter than it will ultimately settle to indoors. Acclimating the flooring on-site for the manufacturer’s recommended period, with the home’s HVAC running at normal conditions, and verifying both the flooring and subfloor with a moisture meter before installation, prevents the gapping that otherwise shows up over the first dry winter. A floor moisture meter is the tool that confirms acclimation is complete rather than guessed. Our best moisture meter for wood guide covers the meters suited to this check.
Why Floor Moisture Causes So Many Failures
Flooring failures are among the most common and costly callbacks in residential construction, and excess moisture is the usual culprit. When a floor covering is installed over a subfloor or slab that’s too wet, the trapped moisture has to go somewhere. In wood flooring, it causes cupping (edges rising above the center), crowning, gapping, and buckling as boards absorb and release water. In resilient flooring like vinyl or laminate, trapped moisture breaks down adhesives, lifts seams, and can foster mold growth beneath the surface where it’s hard to detect until the damage is widespread.
What makes these failures frustrating is that they often appear weeks or months after a seemingly successful installation, by which point the homeowner blames the product or the installer. In reality the subfloor was never dry enough. This delayed feedback is exactly why pre-installation moisture verification exists, and why flooring manufacturers tie their warranties to documented moisture conditions. A floor moisture meter, used correctly before installation, is cheap insurance against a problem that’s expensive and disruptive to fix afterward. The EPA’s moisture-control guidance reinforces that trapped moisture under finishes is a setup for both material failure and mold.
Meter Types Matched to Floor Materials
Different floors call for different tools. For solid and engineered wood flooring and wood subfloors, a pin meter set to the correct species reads %MC directly and accurately, while a pinless meter scans larger areas faster for screening. For concrete slabs, a pinless concrete meter screens the surface, but only an in-slab RH probe kit answers the readiness question. For laminate and luxury vinyl over concrete, the subfloor’s RH governs the install, so RH testing applies even though the flooring itself isn’t wood.
Manufacturers like Wagner, Tramex, and Protimeter sell systems spanning all of these. A homeowner doing a single wood-floor project needs only a modest pin or dual-mode meter; a contractor installing over slabs needs an ASTM F2170-capable RH probe kit. Buying a wood-only meter and then trying to clear a concrete slab with it is a frequent and expensive mismatch. Our best moisture meter for wood guide covers the wood side, while concrete demands the RH approach described above.
How Long Concrete Takes to Dry
Impatience is the enemy of a good floor over concrete. A common industry guideline is roughly one month of drying per inch of slab thickness under good conditions, but that is only a starting estimate — humidity, temperature, ventilation, and whether the slab dries from one or both sides all change the timeline, sometimes dramatically. A four-inch slab poured in a humid, poorly ventilated space can take far longer than four months to reach an acceptable in-slab RH.
This is why the RH test, not the calendar, decides readiness. Installing flooring on a slab that “should” be dry by the schedule but actually reads 88% RH against an 80% limit invites adhesive failure, cupping, and trapped-moisture mold. If a slab will not dry in time, moisture-mitigation systems — surface membranes or coatings rated to a specified RH — let installation proceed, but they add cost and must match the manufacturer’s requirements. The EPA’s broader moisture-control guidance reinforces that trapped moisture under flooring is a setup for mold.
Documenting Readings for Warranties and Disputes
Flooring warranties frequently hinge on proof that moisture conditions met the manufacturer’s specification at installation. That makes documentation part of the job, not an afterthought. Record the meter type and settings, the date, the ambient temperature and humidity, the specific locations tested, and the readings — ideally with the slab’s RH test results logged over the full equilibration period. Photos of the meter display at each location strengthen the record.
If a floor later fails, this documentation determines whether the manufacturer honors the warranty or blames the installation. Restoration and warranty disputes routinely turn on whether anyone verified moisture properly and wrote it down. Data-logging RH systems make this straightforward by capturing readings automatically, which is one reason professionals favor them for consequential installations. Our guide on how to read a moisture meter covers interpreting the numbers you record.
When to Call a Professional
For a homeowner checking a small wood subfloor before a project, a dual-mode meter and patience are enough. Call a professional for any consequential concrete installation, a recurring damp-floor problem, or a flooring failure you need to diagnose. Certified flooring inspectors and moisture-testing technicians run proper ASTM F2170 RH tests, interpret them against manufacturer specs, and can identify whether the moisture is residual cure water or active intrusion. When a flooring warranty or a costly install is on the line, that professional testing is well worth it.
Buying Criteria for a Floor Moisture Meter
Pulling the specifications together into a buying decision: for a homeowner doing a single wood-floor project, a dual-mode pin-and-pinless meter with correct species settings in the $60 to $150 range is sufficient, used to compare flooring and subfloor before installation. For a contractor or installer regularly working over concrete, the essential addition is an ASTM F2170-capable RH probe kit from a maker like Wagner, Tramex, or Protimeter, since surface readings alone can’t clear a slab. Prioritize temperature-compensated RH systems with data logging for documentation, a clear concrete or reference scale for surface screening, and a calibration check you can run before each job.
Avoid the common mismatch of buying a wood-only meter and expecting it to certify a concrete slab — that’s the error behind many flooring failures. Match the tool to the floor type and to how often you’ll use it, and budget for the RH kit if slabs are in your future, because it’s the only method that actually answers the readiness question.
References
- Moisture intrusion and measurement — InterNACHI
- Moisture control to prevent mold — EPA
- Standards of practice for home inspectors — ASHI
Frequently asked questions
What does a floor moisture meter measure?
It measures moisture content in wood subfloors and flooring as a percentage, and moisture in concrete slabs. For slabs, surface meters screen the area while an in-slab relative humidity probe test determines whether the slab is dry enough for flooring.
How do you test a concrete slab for flooring?
The recognized method is the in-slab relative humidity test under ASTM F2170, using probes set in drilled holes to read RH deep in the slab. Most flooring makers cap installation around 75 to 85% RH for warranty coverage.
Can a surface meter tell me if my slab is ready for flooring?
Not reliably. Surface readings screen and map wet areas, but moisture deeper in the slab can migrate up after a floor covering traps it. The in-slab RH test is what determines readiness.
What moisture content should wood flooring be at?
Wood flooring is generally installed within a few percentage points of the subfloor, often in the 6 to 9% range depending on climate. Always check the manufacturer's specified range before installation.
Moisture meters for home inspection
Pin meters read deep but leave marks; pinless meters scan surfaces non-destructively. Many inspectors carry both.
| Product | Why | Buy |
|---|---|---|
 Klein Tools ET140 Pinless Klein Tools ET140 Pinless | Non-destructive scanning; affordable. | Amazon — $49.14 |
 General Tools MMD4E General Tools MMD4E | Best-selling pin meter for drywall/wood. | Amazon — $39.98 |
 Lignomat Mini-Ligno Lignomat Mini-Ligno | Trusted by woodworkers; species-calibrated. | Amazon — $99.00 |