DIY Mold Testing: What Homeowners Need to Know
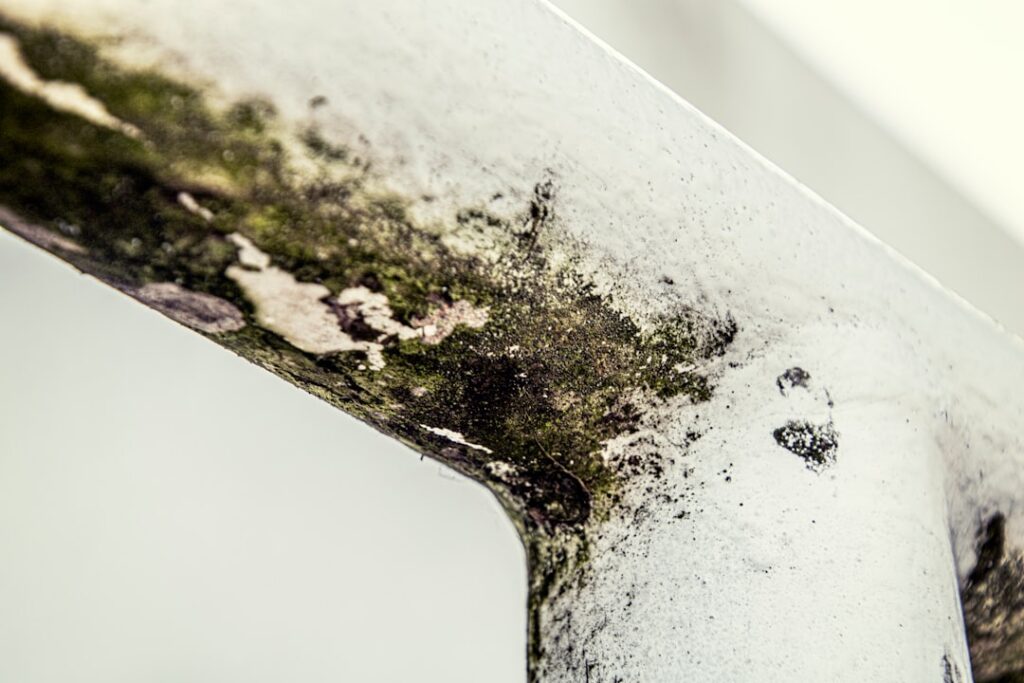
DIY mold testing covers a wider methodology range than most consumer marketing suggests — surface swabs, settle-plate air screening, tape-lift sampling, and ERMI dust sampling are all available to homeowners at price points from twenty to three hundred dollars. Understanding when DIY testing is sufficient and when professional assessment is required is the difference between an informed decision and an expensive misfire. This guide summarizes EPA and CDC guidance current as of 2026 — consult a certified mold inspector for testing decisions and your physician for symptom evaluation.
Part of our Mold Testing & Inspection guide — start there for the full picture →
Is this mold, asbestos, or water damage? Get a free instant screen
Upload a clear photo of the suspect area. You'll get an instant AI screening opinion and what to do next. This is screening guidance, not a professional determination.
Screening guidance only. AI can be wrong. Confirm asbestos, mold type, or lead with lab testing or a licensed professional before acting.
The DIY Testing Toolkit
A complete DIY mold-testing toolkit assembles from four products under three hundred dollars total. A pinless moisture meter at thirty to seventy dollars measures water content in drywall, wood, and other building materials. A tape-lift sampling kit at thirty to fifty dollars confirms whether a visible spot is mold and identifies genus through lab analysis. A settle-plate Petri kit at fifteen to twenty-five dollars screens room air for viable spore presence. An ERMI dust sampling kit at one hundred fifty to three hundred dollars profiles cumulative species deposition across the home.
Each tool answers a different question. Moisture meter identifies the upstream cause (water source). Tape-lift confirms biological presence at a specific spot. Petri kit screens whole-room air for viable spores. ERMI profiles cumulative species over weeks or months. Together, the toolkit covers the four primary diagnostic questions for residential mold investigation.
When DIY Testing Is Sufficient
DIY testing is the right choice in four common scenarios. First, when there is a visible spot and the homeowner wants to confirm whether it is mold before deciding on cleanup. A tape-lift kit at forty dollars answers definitively. Second, when one room smells musty or seems worse than the rest of the house, and the homeowner wants rough comparative screening. Paired Petri plates at twenty dollars each provide the comparison. Third, when household members have persistent allergy or respiratory symptoms with no obvious source, and a cumulative species profile would inform the medical workup. An ERMI dust kit at two hundred dollars produces the data.
Fourth, when a homeowner has experienced a known water event (washing machine overflow, ice dam, sewer backup) and wants to verify the affected area is clean before refinishing or replacing materials. Tape-lift sampling of the cleaned area gives a before-and-after pair that demonstrates the cleanup was effective. In all four scenarios, the question is one DIY methods can answer, and the decision the result will drive is one a homeowner can act on without certified documentation.
When Professional Testing Is Required
Five situations make professional testing the right call regardless of DIY availability. First, post-remediation clearance — verifying that a remediation contractor has actually cleaned the affected space. This requires paired indoor-outdoor calibrated air sampling with documented chain of custody, which consumer kits do not provide. Second, real-estate transactions involving disclosed mold or water damage. Buyers’ agents, lenders, and insurers usually require certified inspector reports, not consumer kit results. Third, tenant-landlord legal disputes. Court-admissible evidence requires professional documentation. Fourth, occupant medical workups where a physician has requested exposure assessment. Medical evidentiary standards require professional data. Fifth, large affected areas exceeding ten square feet, which by EPA standard warrant professional remediation and accompanying testing.
Front Range homeowners weighing the professional upgrade can consult the mold inspection hub for an overview of certified assessment options. Professional sampling typically runs three to seven hundred dollars for a single-family home, including paired indoor-outdoor air samples and a written report.
The DIY Workflow Step by Step
A thorough DIY mold investigation follows a five-step workflow. First, visual scan of all suspect areas, with photographs documenting any staining, discoloration, or visible growth. Second, moisture-meter readings on suspect substrates, comparing to baseline readings in known-dry areas of the same materials. Third, tape-lift sampling of any visible suspect spot with lab analysis included. Fourth, if cumulative or whole-house concerns exist, ERMI dust sampling for species profiling. Fifth, decision-making based on collected evidence: DIY cleanup, professional remediation, or referral to a physician for symptom workup.
The workflow is sequential rather than parallel. Visual evidence drives moisture-meter sampling location. Moisture findings drive surface sampling decisions. Surface sampling results drive cleanup-versus-professional decisions. ERMI is the optional whole-house overlay for situations where the spot-by-spot approach does not capture the full picture. Following the sequence produces interpretable results; skipping steps produces ambiguous data. Homeowners walking through their first DIY investigation can also reference the check for mold in house walkthrough.
Common DIY Mistakes
Several mistakes recur often enough to undermine DIY mold-testing results. First, sampling without a moisture investigation. A positive lab result without a moisture-source explanation is interpretively incomplete — mold needs water, and the source matters more than the species. Second, single-plate Petri sampling without a paired reference. Indoor air always contains some spores; only comparison against a reference plate makes a result interpretive. Third, sampling immediately after vacuuming or wiping the area, which removes the evidence the sample was supposed to capture.
Fourth, over-interpreting kit results. A Petri plate that grows a few colonies is not evidence of a mold problem; it is evidence that air contains spores, which is universally true indoors. Fifth, skipping the symptom-cause correlation. A high ERMI score in a home where no occupants report symptoms is informative but not actionable. A modest ERMI score in a home where multiple occupants have respiratory issues warrants follow-up despite the modest reading.
Reading and Comparing Results
Moisture-meter readings interpret by comparison. Baseline readings in known-dry areas of the same material establish what “normal dry” looks like for the specific home. Readings significantly elevated above baseline in suspect areas indicate moisture issues warranting attention. Absolute thresholds vary by material — drywall above twenty percent and framing lumber above fifteen percent typically indicate active or recent moisture.
Petri plate results interpret by comparison against a paired reference plate exposed simultaneously. Significantly more colonies in the suspect plate than the reference suggests an indoor source. Similar counts indicate indoor and outdoor air are mirroring each other, which is the expected pattern in a healthy home. Tape-lift results interpret directly from the lab report: genus identified, active hyphae versus settled spores noted, and contextual comments included.
ERMI scores interpret against the national reference database the lab uses. Low scores (below the median) indicate below-average mold; high scores (above five on the relative scale) warrant consultation with a certified indoor environmental professional.
Pairing DIY Testing With Lab Quality
The single biggest variable in DIY mold-testing accuracy is the laboratory that processes the sample. Tape-lift and ERMI results from AIHA-accredited or ELLAP-accredited labs produce reliable genus-level and species-level identification. Unaccredited labs may use less rigorous methods. Before buying a kit, check the manufacturer website or kit packaging for the lab’s accreditation status. Reputable brands always disclose lab accreditation; unreputable brands obscure it.
Kit brands at hardware retail (Pro-Lab, DIY Mold Test, Home Health Sciences) all use accredited partner labs. Specialty mail-order ERMI providers (Mycometrics, EnviroBiomics, EMSL Analytical) are typically accredited. The brand-to-brand differences are smaller than the format-to-format differences; choose by sampling method first, then verify the lab accreditation.
Cost-to-Information Summary for DIY Testing
For under three hundred dollars total, a homeowner can assemble a complete DIY mold-testing toolkit: moisture meter ($30-$70), tape-lift kit ($30-$50), Petri kit ($15-$25), ERMI dust kit ($150-$300, optional for cumulative profiling). For under one hundred dollars, the screening-tier toolkit (moisture meter plus tape-lift plus Petri) covers most homeowner-tier questions. Professional assessment at three to seven hundred dollars upgrades the data quality and produces documentation, but is not required for most homeowner investigations.
The right spend depends on the question. For confirming a visible spot, the under-fifty-dollar tape-lift kit is enough. For symptom workup with no visible source, the two-hundred-dollar ERMI kit is the right tool. For documentation purposes, the four-hundred-dollar professional assessment is required regardless of consumer alternatives.
DIY Testing Across Different Home Types
The DIY testing approach varies by home type. In a single-family home with a basement, the most informative starting points are the basement (high moisture risk), bathrooms (humidity), kitchens (potential leaks), and any visible suspect spots. In a single-family home without a basement, the focus shifts to crawlspaces, ground-level humidity-prone rooms, and any visible suspect spots. In a multi-story home with no basement, attention typically focuses on upper-floor bathrooms above living areas (leak potential), ground-floor humidity, and any visible spots.
In condominiums or apartments, DIY testing focuses on visible suspect spots and humidity-prone rooms. Cavity testing is often impractical because shared walls may belong to neighboring units or to building common-area. For renters, documentation matters — photograph any DIY testing setup and result for potential tenant-landlord conversations, but understand that DIY documentation rarely satisfies legal evidentiary standards without supporting professional assessment.
DIY Testing as Preparation for Professional Assessment
One under-appreciated use of DIY testing is preparation for a subsequent professional assessment. A homeowner who arrives at a certified inspector’s first visit with documented moisture-meter readings, photographs of suspect spots, and lab reports from preliminary tape-lift sampling enables the inspector to focus the professional assessment on the genuinely informative questions. The inspector spends less time on initial investigation and more time on diagnostic work that requires professional equipment and expertise.
Many inspectors appreciate clients who have done preliminary DIY work because the upfront data clarifies the scope. The professional assessment becomes more efficient and often less expensive — a focused assessment on specific suspect areas at four hundred dollars produces more value than a broad initial scan at six hundred dollars. The DIY-first approach is not a substitute for professional work when documentation matters, but it improves the outcome of the professional engagement when one is needed.
Pairing DIY Testing With Improvement Strategies
DIY testing is most useful when paired with concrete improvement strategies for any conditions identified. A high moisture-meter reading on a basement wall prompts dehumidifier purchase or improved drainage. A positive tape-lift on a bathroom ceiling prompts exhaust-fan upgrade or longer run times. An elevated ERMI score with Stachybotrys prompts source investigation and possibly professional assessment. The testing identifies; the improvements address.
Homeowners who run DIY tests without follow-through tend to accumulate ambiguous data without progressing toward resolution. The more productive pattern is sequential: test, identify a likely cause, implement an improvement, re-test after a defined interval. This pattern mirrors what a certified inspector does at higher cost — diagnose, recommend, verify — and produces measurable progress on the underlying problem.
References
- A Brief Guide to Mold, Moisture, and Your Home — U.S. Environmental Protection Agency
- About Mold and Health — Centers for Disease Control and Prevention
- Mold Cleanup in Your Home — U.S. Environmental Protection Agency
- Mold Inspection Guidance — International Association of Certified Home Inspectors
Frequently asked questions
Is DIY mold testing reliable?
DIY testing is reliable for the questions it is designed to answer — confirming visible spots, comparing rooms, profiling cumulative species. Reliability depends on lab accreditation and proper sampling technique. DIY does not replace professional testing for clearance, transactions, or legal documentation.
How much does a complete DIY mold-testing toolkit cost?
Under three hundred dollars total for moisture meter, tape-lift kit, Petri kit, and ERMI dust kit. Under one hundred dollars for the screening tier (moisture meter, tape-lift, Petri) which covers most homeowner-tier investigation questions.
When should I skip DIY and call a professional?
For post-remediation clearance, real-estate transactions, tenant-landlord disputes, occupant medical workups, or any visible affected area exceeding ten square feet. These situations require certified documentation that consumer kits do not provide.
What is the most common DIY testing mistake?
Sampling without first investigating the moisture source. Mold needs water, and a positive lab result without a moisture-source explanation is interpretively incomplete. Always pair tape-lift sampling with moisture-meter readings on the same substrate.
Front Range homeowners working through DIY mold testing who need a professional second opinion can reach out through our contact page for a vetted inspector recommendation.