DIY Mold Remediation: What Homeowners Should Know
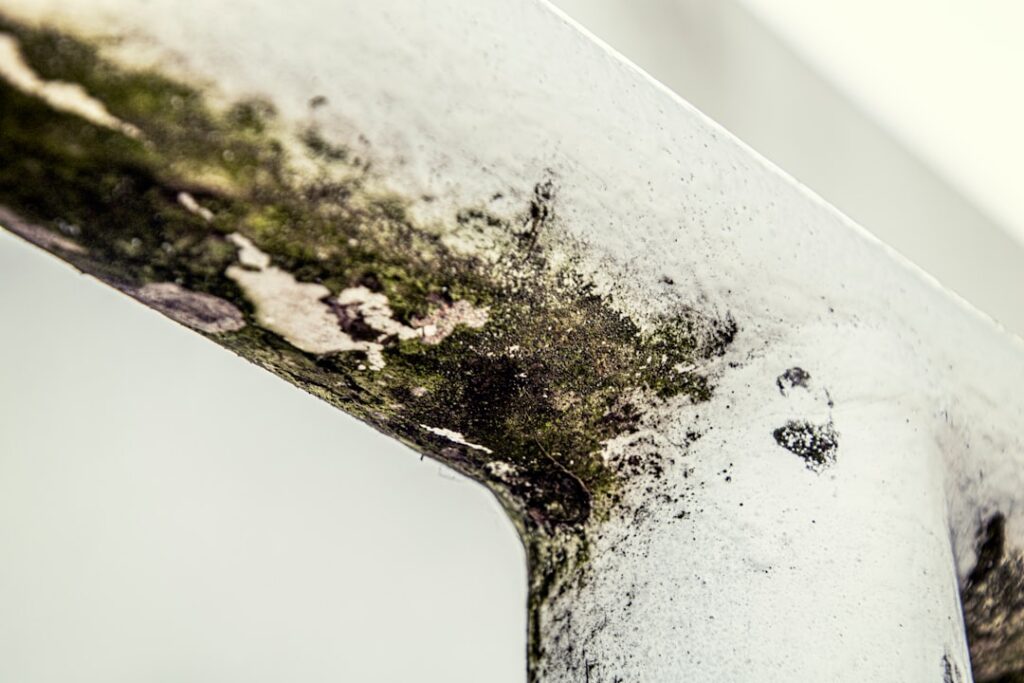
A small patch of mold on a bathroom wall does not always require a professional crew, and DIY mold remediation can be reasonable when the area is limited and the moisture source is fixable. The challenge is knowing where the safe line sits, because the wrong DIY job can spread spores and cost more than hiring help would have. This guide outlines when DIY makes sense and how to do it correctly, drawing on EPA and CDC guidance current as of 2026. It is general information, not professional remediation advice or medical guidance for symptoms.
Is this mold, asbestos, or water damage? Get a free instant screen
Upload a clear photo of the suspect area. You'll get an instant AI screening opinion and what to do next. This is screening guidance, not a professional determination.
Screening guidance only. AI can be wrong. Confirm asbestos, mold type, or lead with lab testing or a licensed professional before acting.
When DIY mold remediation is appropriate
The EPA offers a practical rule of thumb: homeowners can often clean mold themselves when the affected area is smaller than roughly 10 square feet, the moisture source can be corrected, and no one in the household has a relevant health condition. Within those limits, a surface patch on tile, a small section of painted drywall, or mildew on a window frame is a reasonable DIY project. The work is well within a careful homeowner’s ability as long as the methods below are followed in order and the right protective gear is used.
DIY is not appropriate above that size, when mold is inside the HVAC system, when the water involved was sewage or flood water, or when the colony is hidden behind walls or under floors. Those situations need containment most homeowners cannot build. Readers can frame the decision within the broader process at our mold inspection and testing hub.
The 10-square-foot guideline is a rough threshold, not a hard rule, and judgment matters at the edges. A patch slightly under that size on a hard, accessible surface with an obvious, fixable moisture source is a reasonable DIY candidate. The same size on porous drywall, in a poorly ventilated space, or with no clear water source is riskier and may be better handled professionally. The honest questions to ask before starting are whether you can identify and fix the moisture, whether you can contain the area, and whether anyone in the household has a health condition that mold could aggravate. If any answer is no, the job has likely outgrown DIY.
Tools and materials you actually need
A successful DIY job depends on having the right gear before starting, not improvising mid-task.
- N95 respirator at minimum; a half-face respirator with P100 cartridges for anything larger.
- Non-porous gloves reaching mid-forearm and vent-free goggles.
- Plastic sheeting and painter’s tape to seal the room and cover vents.
- Pump sprayer to keep mold damp and reduce airborne spores.
- Detergent and water for hard surfaces; bleach is not required for routine cleanup.
- HEPA vacuum for final cleanup, never a standard shop vacuum.
- Contractor bags for double-bagging porous debris.
A moisture meter is a useful extra. Confirming a cavity is dry before closing it up prevents regrowth. The instruments are inexpensive and explained in our home inspection tools guide.
The DIY remediation steps
Work in a deliberate order. Rushing is what spreads spores.
First, fix or stop the water source. A leak or condensation problem left in place guarantees regrowth, so this step comes before any cleaning. Second, contain the room: close doors, cover HVAC vents and returns with plastic, turn off the air handler, and set a box fan to exhaust air out a window. Third, suit up in your respirator, gloves, and goggles.
Fourth, lightly mist the moldy surface so it sheds fewer spores. Fifth, clean non-porous surfaces with detergent and water and scrub until the visible growth is gone. Cut out and bag porous materials such as moldy drywall, carpet padding, or ceiling tile that cannot be cleaned. Sixth, double-bag debris inside the contained area and carry it straight outdoors. Finally, HEPA-vacuum the area, dry it completely, and monitor over the following weeks for any return. Our step-by-step walkthrough on how to clean mold without spreading spores goes deeper on the containment details.
Setting up containment for a DIY job
Containment is the step that turns a risky DIY cleanup into a controlled one, and it is simpler than it sounds for a small area. Seal the room by closing the door and hanging plastic sheeting over any open doorway. Cover HVAC supply and return vents in the room with plastic and tape, and turn off the air handler so the system cannot pull spores into the ductwork and distribute them through the house.
Create gentle negative pressure by setting a box fan in a window blowing outward, which draws air, and any disturbed spores, out of the room rather than into the rest of the home. For repeated or slightly larger jobs, a portable HEPA air scrubber running inside the sealed room captures airborne spores during the work. The principle mirrors what a professional crew does with negative-air machines, scaled down. Skipping containment is the single most common reason a DIY cleanup spreads mold to new rooms, so it is worth the few minutes of setup even for a modest patch. The deeper containment techniques are covered in our guide on cleaning mold without spreading spores.
Common DIY mistakes that make mold worse
Most failed DIY jobs share a handful of errors. Dry-scrubbing or sanding mold launches spores into the air, undoing the whole effort. Skipping containment lets those spores ride the HVAC system into other rooms. Painting over mold hides it briefly but does nothing, and the growth resumes under the new coat.
Two more are subtle. Using a standard vacuum spreads fine spores instead of capturing them. And cleaning the visible mold while ignoring the leak that caused it produces a clean-looking wall that grows mold again within weeks. The EPA is explicit that moisture control is the heart of mold prevention, so the water fix is not optional.
Finding and fixing the moisture source
Because moisture is the root of every mold problem, the most important DIY skill is tracking down where the water comes from. Common culprits include plumbing leaks under sinks or behind walls, roof leaks that travel along framing before showing up, condensation on cold surfaces in humid rooms, poor bathroom or kitchen ventilation, and groundwater intrusion in basements and crawl spaces. A moisture meter helps confirm whether a surface is actively wet or merely stained from an old, resolved leak.
Once located, the source has to be corrected before the cleanup is meaningful. That might mean repairing a pipe, sealing a roof penetration, adding or fixing an exhaust fan, running a dehumidifier, or improving drainage and grading outside. Some of these are straightforward DIY repairs; others, like a hidden plumbing leak or a chronic basement water problem, may need a plumber or other trade. Cleaning before the water is fixed is wasted effort, because the mold will return to the same damp spot regardless of how thoroughly it was scrubbed. Homeowners can see how the full professional sequence handles this in our guide on how to remediate mold.
After the cleanup: verifying and preventing return
A DIY job is not finished when the visible mold is gone; it is finished when the area stays clean. Dry the cleaned surfaces and cavity completely, ideally confirming dryness with a moisture meter before closing anything up. Over the following weeks, check the spot for any sign of return, since early regrowth is the clearest signal that the moisture source was not fully resolved.
Prevention then becomes an ongoing habit. The EPA recommends keeping indoor relative humidity below roughly 60 percent, which a dehumidifier helps achieve in damp basements and crawl spaces. Run bathroom and kitchen exhaust fans, fix small leaks promptly, and keep gutters and grading directing water away from the foundation. For Front Range homeowners, seasonal basement humidity makes these habits the difference between a one-time DIY success and a recurring chore, so treating prevention as routine maintenance rather than a one-time fix is what keeps the mold from coming back.
Health precautions during DIY work
The CDC notes that mold exposure can trigger stuffy nose, wheezing, and eye or skin irritation, and that people with asthma, allergies, or weakened immune systems can react more severely. Anyone in those groups should not perform the work. For healthy adults, the respirator, gloves, and goggles are not optional accessories; they are what keep a manageable cleanup from becoming an exposure event.
Ventilate during and after the job, keep children and pets out of the area, and remove protective clothing inside the contained zone so you do not carry spores through the house. If symptoms appear during or after the work, stop and consult a physician.
Plan the cleanup phase before starting, because that is when settled spores get either removed or stirred back up. Have the HEPA vacuum, contractor bags, and cleaning supplies staged inside the contained area so you are not walking in and out mid-job. When finished, HEPA-vacuum the work surfaces and the surrounding floor, bag the disposable gear and debris inside containment, and carry it straight outdoors rather than through the house. Leaving the area to settle before taking down the containment plastic captures the last of the airborne spores instead of releasing them as the final step.
When to call a professional
Hand the job to a certified remediator when the area exceeds about 10 square feet, when mold is in the HVAC system, when the water source was contaminated, or when a household member has a respiratory condition. Hidden or structural mold also belongs to professionals, who use negative-air containment and document the work to a recognized standard. If a real estate transaction or insurance claim is involved, professional remediation with an independent clearance test creates the paper trail that protects you later.
The honest way to approach DIY mold work is to start by assessing the scope and the moisture source rather than by reaching for a spray. If the area is small, accessible, and tied to a moisture problem you can fix, DIY is a reasonable and economical choice when done with containment and protective gear. If any of those conditions is uncertain, treating the job as larger than it appears and bringing in a certified professional is the conservative call. Recognizing that line before disturbing anything is the single most valuable skill a homeowner brings to a mold problem.
For Front Range homeowners, basement humidity and the freeze-thaw cycle make recurrence common, so even after a successful DIY job, controlling moisture year-round is what keeps mold from returning.
When DIY costs more than hiring out
A DIY job that goes wrong can end up more expensive than hiring a professional from the start, which is worth weighing honestly before beginning. The classic failure is disturbing a hidden colony without containment, spreading spores through the house and turning a one-room problem into a whole-home one. The second is cleaning the visible mold while missing the moisture source, so the growth returns and the work has to be redone. The third is underestimating scope, discovering mid-job that the affected area is far larger than it looked, and being unequipped to finish safely.
The math favors professional help when any of those risks is real: when the moisture source is unclear, when the affected area might extend behind finished surfaces, or when the home has occupants vulnerable to mold. The cost of a professional remediation is known and bounded, while the cost of a botched DIY job is open-ended. For genuinely small, accessible, well-understood patches, DIY remains sensible and economical. The judgment lies in recognizing which situation you actually have before the first piece of drywall comes off.
References
- Mold Cleanup in Your Home — U.S. Environmental Protection Agency
- About Mold and Health — Centers for Disease Control and Prevention
- A Brief Guide to Mold, Moisture and Your Home — U.S. Environmental Protection Agency
- Mold and Indoor Air Quality — American Lung Association
If a DIY attempt has not solved the problem in your Front Range home, you can get in touch through our contact page for a connection to a vetted local inspector.