How to Test for Mold: A Practical 2026 Walkthrough
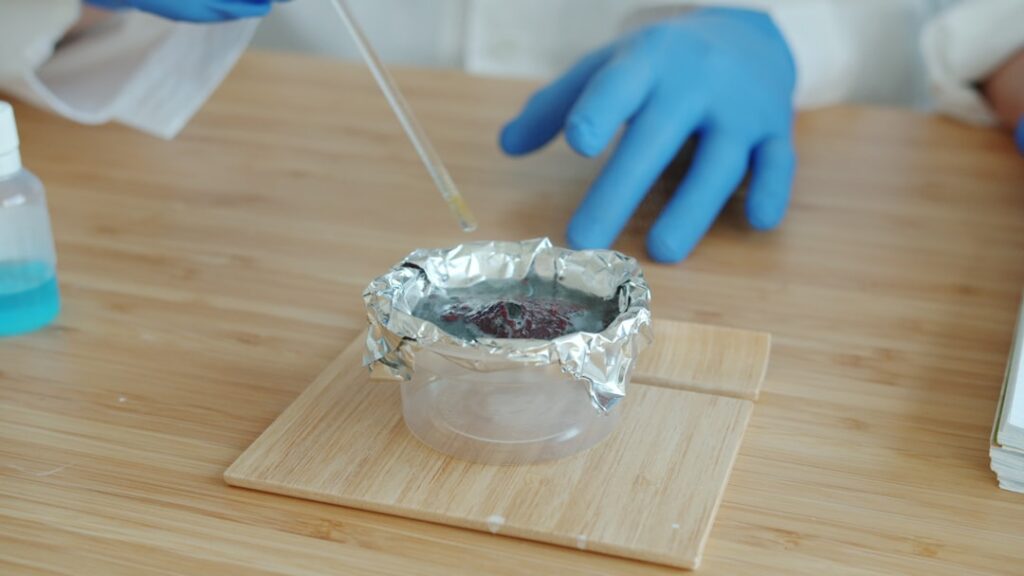
Learning how to test for mold properly is partly about technique and partly about knowing when not to test at all. The EPA’s longstanding position is that visible mold should simply be cleaned and the underlying moisture corrected, with sampling reserved for hidden contamination, post-remediation verification, or unresolved occupant symptoms. The flood of consumer test kits sold at hardware stores has muddied that guidance considerably. This walkthrough summarizes EPA, CDC, and ASHI direction current as of 2026 to help Colorado Front Range homeowners decide whether to test, which method fits which question, and how to interpret a lab report without panicking. Always consult a physician for any health symptoms and a credentialed professional for testing decisions on sensitive cases. Our broader mold inspection and testing hub covers the surrounding decision framework.
Part of our Mold Testing & Inspection guide — start there for the full picture →
Is this mold, asbestos, or water damage? Get a free instant screen
Upload a clear photo of the suspect area. You'll get an instant AI screening opinion and what to do next. This is screening guidance, not a professional determination.
Screening guidance only. AI can be wrong. Confirm asbestos, mold type, or lead with lab testing or a licensed professional before acting.
Decide whether to test at all
The first decision is binary: does this situation actually need a sample, or does it need a cleanup? If a homeowner can see mold on a surface smaller than ten square feet of porous material, the EPA position is to clean it. A lab confirmation that the visible stain is Cladosporium or Aspergillus does not change the cleanup steps. Spending $300 on testing only to receive instructions you could have followed without it is a common waste.
Sampling earns its keep in four scenarios. The first is hidden contamination: musty odor in a finished basement with no visible source, or chronic respiratory complaints in a building with no obvious staining. The second is post-remediation verification, where a third party confirms that spore counts indoors are no higher than outdoors and that water-damage indicators such as Stachybotrys or Chaetomium are absent from clearance samples. The third is real-estate or insurance documentation, where numeric data backs a negotiation or a claim. The fourth is litigation, where chain-of-custody sampling supports legal proceedings.
Outside those four cases, money spent on testing usually outperforms when redirected toward fixing moisture sources, replacing colonized porous materials, and monitoring relative humidity over time. A $25 hygrometer that records 60-day humidity trends often exposes the underlying problem more clearly than any single air sample.
Homeowners with asthma, immune compromise, or severe allergies sit in a separate tier. For those occupants, conservative response to even small mold findings is reasonable, and pre-cleanup sampling can establish a baseline that helps verify the cleanup actually worked. The CDC explicitly recommends physician involvement for sensitive occupants rather than relying on building data alone.
Pick the right sampling method
Four methods dominate residential work, and each answers a different question. Air sampling pulls a measured volume of air through a spore-trap cassette, which a lab analyzes by direct microscopy. Air samples answer “what airborne spore burden exists in this room compared to outdoors?” and are the workhorse of professional indoor-air-quality work. Surface sampling lifts material from a visible patch with tape, swab, or a small bulk cut. Surface samples answer “what is this stain made of?” and are useful when the visible material might be soot or efflorescence rather than fungal growth.
Wall-cavity sampling addresses hidden contamination behind finished surfaces. The inspector drills a small port, draws air from the cavity through a cassette, and compares it to a same-room control. This method shines in finished basements, behind tiled bathroom walls where slow plumbing leaks are suspected, and in chase walls around HVAC equipment. ERMI dust sampling, the fourth method, vacuums settled dust and reports a qPCR-based index of 36 mold-DNA targets. EPA developed ERMI as a research tool and has not endorsed it for routine homeowner decisions; reserve it for hard-to-resolve cases.
The selection logic is straightforward. Visible suspect material gets a tape lift. Suspected hidden growth in a finished area gets paired air samples (interior plus outdoor reference) and possibly a wall-cavity sample. Post-remediation verification gets multiple air samples across the work zone plus a control. Persistent unexplained symptoms after a normal investigation can justify ERMI as a follow-up. Stacking every method on every job inflates cost without improving the answer. For wall-specific guidance, the dedicated wall-cavity sampling walkthrough covers the access-port workflow in depth.
How a DIY kit actually works
Two kit categories dominate the consumer market. Settle-plate kits include a small petri dish with growth medium that the homeowner exposes to room air for an hour or so, seals, and incubates for two to five days. The plate is then either inspected at home or mailed to a lab for genus identification. The fundamental problem is that almost any indoor space will grow something on a settle plate, and the result has no defensible baseline against which to compare. The CDC and EPA both note that settle-plate sampling does not produce data interpretable against any meaningful standard.
Mail-in air-cassette kits are a step up in defensibility. They use the same cassettes and labs as professional work. The homeowner rents or purchases a small air pump, draws a measured volume of air through the cassette over five to ten minutes, and ships the sealed cassette to the lab. Calibration is the weak link: a homeowner without a calibrated flow standard cannot guarantee the listed flow rate, and lab calculations of spores per cubic meter depend on accurate volume.
If a homeowner does use a mail-in kit, three protocols improve defensibility. First, take a paired outdoor sample on the same day at the same flow rate, and ship both cassettes together. Without an outdoor reference the indoor number stands alone. Second, use the lab’s calibrated rental pump rather than a generic vacuum or fan. Third, keep all activity in the room consistent during the sampling window: no vacuuming, no open windows, no HVAC cycling on or off mid-sample.
Even with those steps, DIY sampling has a ceiling. It cannot include the moisture survey, the infrared imagery, the wall-cavity work, or the building-history interview that a credentialed inspector brings. For real-estate negotiations, insurance disputes, or post-remediation verification, the DIY option is rarely defensible, and a professional engagement is the better path.
What a credentialed inspector adds
A credentialed mold inspector brings five things a kit cannot. First, a calibrated air pump verified against a primary flow standard, with a recent calibration certificate available on request. Second, a moisture survey using a pin or pinless meter to identify wet substrates that are not yet visibly stained. Third, infrared imagery to locate temperature anomalies that often track water intrusion behind finished surfaces. Fourth, a building-history interview that contextualizes the sampling result against recent plumbing work, roof events, and occupancy patterns. Fifth, the experience to write a report that distinguishes findings warranting remediation from findings warranting only continued monitoring.
Credentials worth looking for include the IAC2 mold inspector designation, ACAC’s CMI or CIEC certification, and membership in InterNACHI or ASHI for the underlying inspection skill set. Industrial hygienists with a CIH credential bring the deepest technical background and are typically engaged on complex commercial or post-litigation work. For routine residential investigations, an InterNACHI-affiliated inspector with IAC2 mold certification covers most needs.
Conflict-of-interest separation is worth asking about. An inspector who also offers remediation has a financial incentive to find work, and even when that incentive is not consciously acted on, the structural conflict undermines the report’s defensibility in any subsequent dispute. Independent industrial-hygiene firms and dedicated inspectors who do not perform remediation are the cleanest source of pre- and post-remediation sampling.
Front Range pricing for professional engagements typically lands as follows. A focused single-room investigation with one indoor cassette, one outdoor control, and a brief written report runs $300 to $450. A whole-house investigation with moisture mapping, IR imagery, multiple cassettes, and a narrative report runs $600 to $1,200. Post-remediation verification billed separately by the cassette runs $400 to $800 for a typical small-to-medium remediation project.
Run the test correctly
Whether sampling is DIY or professional, the protocol matters more than the brand of cassette. Indoor air samples should be taken with the HVAC system in its normal operating state, with windows and exterior doors closed for at least an hour before sampling, and with no unusual activity (vacuuming, cleaning, cooking) for the same window. The standard is to mimic actual occupied conditions so the result reflects what occupants typically breathe.
The outdoor control sample is taken at the same time, on the same flow rate, in the upwind side of the building, away from compost piles, dumpsters, leaf litter, or HVAC exhaust that might bias the count. The outdoor result establishes the natural background spore burden against which indoor counts are compared. Without it, an indoor count of 1,200 spores per cubic meter has no meaning; with it, that number can be evaluated as either elevated, similar, or lower than the outside reference.
Sample placement inside the home matters. Cassettes are placed at breathing height (roughly four to five feet above the floor), away from direct airflow from HVAC registers, and in the center of the room rather than against a wall. Multiple cassettes in a single zone provide better data than a single cassette but raise cost. A common scope is one cassette per floor in the suspect area, plus the outdoor control, plus one cassette in a clean reference zone for comparison.
Surface sampling has its own protocol. Tape lifts are pressed gently onto visible growth and lifted straight up, then sealed in the supplied container without folding. Bulk samples are cut from the substrate with a clean blade, double-bagged, and labeled with the location. Photographs of each sample location, with a ruler for scale, become part of the chain of custody.
Read the lab report
Lab reports list spore counts in spores per cubic meter (s/m3) for air samples and structures-per-square-centimeter for tape lifts. The first comparison is indoor versus outdoor totals. Indoor totals lower than outdoor totals, with a similar genus profile, are reassuring. Indoor totals substantially higher than outdoor totals, or showing genera absent outdoors, suggest an indoor source.
The genus profile carries as much weight as the count. Cladosporium and Aspergillus/Penicillium types appear nearly everywhere and modest indoor elevations are common. Stachybotrys chartarum, Chaetomium, and Memnoniella indicate sustained chronic moisture (often above 28 days) on cellulose substrates, and almost always warrant professional investigation. Fusarium and Trichoderma similarly point to wet cellulose. The presence of any of those “water-damage indicator” genera in indoor samples but not in the outdoor control is a strong signal of an indoor amplifier even at modest counts.
Reports should include the analytical method (direct microscopy, culture, or qPCR), the lab’s accreditation (AIHA EMLAP is the relevant residential program), the sampling time, the pump flow rate, and the calculated air volume. A report missing those metadata fields is hard to defend in any subsequent dispute. Reports that simply list “mold detected” without quantification or genus identification are not useful for decision-making.
One frequent misreading is treating a single elevated number as proof of a health hazard. No federal exposure standards exist for residential mold, and counts vary with season, weather, occupancy, and recent activity. A single elevated reading is a prompt for further investigation, not a verdict. Two or three samples taken across different days that consistently show indoor elevation with water-damage indicator genera is a much stronger signal than one isolated high count.
Act on the results
The first 48 hours after a lab report arrives are often the most error-prone window. Homeowners react to elevated counts by calling remediation contractors who quote work before the moisture source is identified. The defensible sequence is the reverse. Identify and correct the moisture source first; without that step any cleaning is temporary. Small leaks under sinks, missing window-well covers, downspouts terminating at the foundation, ungasketed bath fans, and uninsulated ductwork in unconditioned spaces are common Front Range culprits.
Second, scope the cleanup to the EPA homeowner-doable threshold of roughly ten square feet of porous material. Hard non-porous surfaces (glass, glazed tile, sealed metal) clean with detergent and water. Porous materials (carpet pad, drywall, upholstered furniture) usually replace rather than clean, because hyphae penetrate the substrate and surface cleaning will not eliminate viable growth.
Third, when the affected area exceeds that threshold, when occupants have asthma or immune compromise, or when contamination involves HVAC components, the work belongs with a credentialed remediator under containment. Containment uses six-mil polyethylene sheeting, negative-air machines with HEPA filtration, and personal protective equipment to keep spores from migrating during work. The IICRC S520 standard is the most widely cited reference. Selecting a remediation contractor deserves its own due diligence.
Fourth, document everything. Photographs before, during, and after work; itemized invoices; lab reports; and any third-party verification all become part of the disclosure record if the property is later sold. Front Range disclosure law requires sellers to identify known material defects, and a properly documented and remediated mold event is far less of a transaction risk than an undocumented one.
Front Range conditions to factor in
Colorado’s semi-arid climate sometimes leads homeowners to assume mold cannot establish indoors. That assumption fails in three predictable scenarios. Below-grade finished basements in older Denver, Aurora, Lakewood, and Englewood neighborhoods often carry chronic capillary moisture in foundation walls. Spring snowmelt and the typical May rain pattern produce concentrated water-intrusion events that surface as ceiling stains weeks later. Summer swamp-cooler use pushes interior relative humidity well above the 60% threshold that supports mold growth on cool surfaces.
Newer tightly built homes in Douglas, Elbert, Adams, and Arapahoe counties present a different failure mode. Mechanical ventilation systems can develop condensation in attic sheathing during winter when bath fans are improperly vented or roof ventilation is undersized. Improperly sealed can-light penetrations, missing attic-hatch gaskets, and HVAC return leaks pulling humid garage air all contribute. CDPHE has documented residential mold complaints across all Front Range counties; the climate trims prevalence but does not eliminate it.
Foothills properties from Boulder through Jefferson County add drainage challenges. Steep grades behind homes combine with under-engineered window-well systems to produce predictable spring intrusion at the rim joist and at egress windows. Inspectors who work that geography routinely flag the same failure modes: missing window-well covers, downspouts terminating within four feet of the foundation, and negative grading from settled fill. Each of those drives the wetting-and-drying cycle that supports mold colonization on the inside face of below-grade walls.
Practical sequence for any Front Range homeowner: monitor relative humidity for two weeks with a basic hygrometer; address any visible moisture or staining; clean small visible mold patches per EPA guidance; and reserve sampling for hidden contamination, persistent occupant symptoms, or post-remediation verification.
Cost ranges and what to budget
Pricing for “how to test for mold” services on the Front Range varies more than radon or asbestos pricing because the scope is more elastic. A focused single-room visual inspection without sampling typically runs $250 to $400. Adding two air cassettes plus an outdoor control raises the total to roughly $500 to $750. A whole-house investigation with moisture mapping, infrared imagery, and four to six cassettes typically lands at $800 to $1,400. ERMI dust sampling adds $250 to $350 per sample. Post-remediation verification with multiple cassettes can exceed $900 depending on zone count.
Mail-in DIY kit pricing is lower up front but the per-sample cost is similar once the lab fee is included. A typical mail-in cassette kit runs $40 to $80 with $50 to $100 lab analysis per cassette. A two-cassette indoor-plus-outdoor protocol therefore lands at $180 to $360, with no inspector time included. The savings disappear quickly if a homeowner orders multiple rounds because the result was ambiguous.
Three line items frequently inflate the bill above expectations. The first is rush turnaround at the lab, which can add $50 to $150 per cassette for 24-hour service. The second is travel charges for inspectors serving outlying counties (Elbert, El Paso, Weld) where minimum trip fees of $75 to $150 are common. The third is the report deliverable: a brief summary letter is usually included, but a full narrative report with photographs, IR imagery, and remediation specifications is sometimes billed separately at $150 to $400.
Insurance coverage is the final variable. Most standard homeowner policies exclude mold remediation triggered by long-term water intrusion (treated as a maintenance issue) but cover sudden and accidental events such as a burst supply line. Carriers typically cap mold-related coverage at $5,000 to $10,000 unless an additional rider is purchased. Sampling costs are usually paid out of pocket, although some carriers reimburse third-party post-remediation verification when the underlying claim is covered.
Common mistakes that waste money
Five mistakes show up repeatedly in Front Range mold-testing engagements. The first is sampling without an outdoor control. The result is an indoor number with nothing to compare it against, and the report cannot answer the question the homeowner actually paid to answer. Always pair indoor cassettes with a same-day outdoor reference.
The second mistake is sampling visible growth instead of cleaning it. The EPA position is consistent: visible mold under the homeowner-doable threshold gets cleaned, not sampled. Spending $300 on a tape lift to confirm what is already obvious rarely changes the response.
The third mistake is hiring the same firm to test and to remediate. The structural conflict undermines the report’s defensibility, and even when the firm is honest, the result is harder to use in any subsequent insurance or real-estate dispute. Independent industrial-hygiene firms or dedicated inspectors are the cleaner source.
The fourth mistake is treating a single elevated reading as a verdict. Air sampling captures a brief snapshot, and counts vary with season, weather, occupancy, and recent activity. A single high number is a prompt for further investigation, not a final answer. Two or three samples across different days that consistently show indoor elevation with water-damage indicator genera is a much stronger signal.
The fifth mistake is treating sampling as a substitute for fixing moisture. No amount of testing or remediation will hold if the underlying water intrusion is not corrected. The defensible sequence puts moisture correction first, cleanup second, and verification sampling last.
One additional pitfall worth noting: ozone or fogging treatments offered as an alternative to physical removal. The EPA position is that ozone at concentrations safe for occupied spaces does not effectively kill mold, and at concentrations high enough to be effective ozone is harmful to occupants and damaging to materials. Antimicrobial fogging has a narrow legitimate role as a finishing step after physical removal under containment, but it is not a substitute for finding the source and removing colonized material. Any contract that proposes fogging as a primary treatment, with no physical removal step, deserves a second opinion before signing.
Avoiding these five mistakes is the single most reliable way to keep a mold-testing budget proportionate to the actual problem. The homeowner who treats sampling as one tool inside a broader investigation, rather than as the investigation itself, almost always ends up with a clearer answer at lower total cost.
- A Brief Guide to Mold, Moisture, and Your Home — U.S. Environmental Protection Agency
- About Mold — Centers for Disease Control and Prevention
- Mold and Moisture in the Home — Colorado Department of Public Health and Environment
- Mold Inspection Standards — InterNACHI
Frequently asked questions
Should I test for mold if I can already see it on the wall?
Usually no. The EPA recommends cleaning visible mold under roughly ten square feet of porous material and correcting the moisture source. A lab report identifying the genus rarely changes the response, so testing money is better spent on cleanup and moisture correction.
Are home mold test kits accurate?
Settle-plate kits are difficult to interpret because no exposure standard exists for residential air. Mail-in air-cassette kits with a calibrated pump and a same-day outdoor control are more defensible, though calibration without professional equipment is the weak link.
How long does mold testing take from sample to results?
Standard turnaround for direct-microscopy spore-trap analysis is two to five business days, and 24-hour rush service is available for an extra fee. ERMI qPCR analysis typically takes seven to ten business days because it requires DNA extraction and amplification.
What spore count is considered safe?
No federal safe threshold exists. The working interpretation is that indoor counts should be lower than outdoor counts and contain a similar genus profile. Indoor counts ten times the outdoor reading or showing genera absent outdoors point toward an indoor amplifier.
Can mold testing tell me if my health symptoms are caused by my home?
No. Sampling quantifies what is in the building; it does not diagnose health conditions. Occupants with persistent symptoms should see a physician for allergy or immunology workup separately from any building investigation.
Front Range homeowners who want to talk through testing options with a vetted local inspector can reach out through our contact page for a referral.
DIY mold test kits
A test kit can confirm whether a suspect patch is mold and (with lab analysis) what type — though visible mold over ~10 sq ft generally warrants a professional.
| Product | Why | Buy |
|---|---|---|
 DIY Mold Test (lab included) DIY Mold Test (lab included) | Surface + air-sampling options. | Amazon — $49.99 |
 Healthful Home 5-Minute Mold Test Healthful Home 5-Minute Mold Test | Rapid screening strips. | Amazon — $35.47 |
 Mold Test Plates (DIY petri dishes) Mold Test Plates (DIY petri dishes) | Settle-plate style sampling you culture at home. | Amazon — $22.99 |