Log Homes: Checking, Rot, Settling and Inspection Points
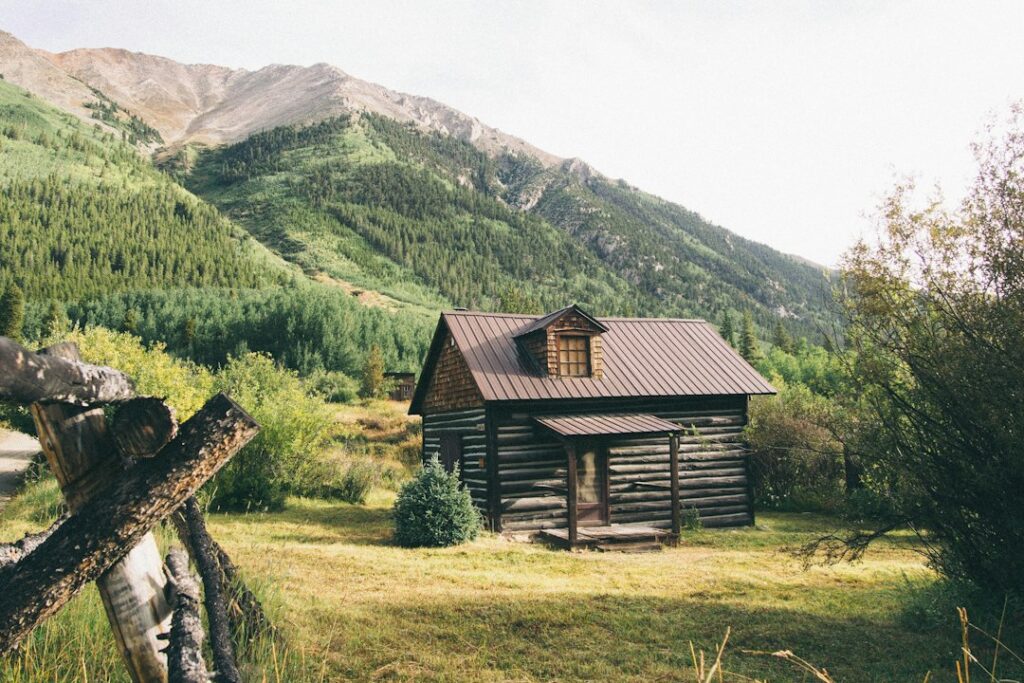
A log cabin in the foothills is one of the most recognizable property types along the Colorado Front Range, from small weekend cabins near Evergreen and Estes Park to large full-scribe log homes in Douglas and Larimer counties. Solid log walls behave very differently from framed walls. They shrink, crack, settle and absorb water in ways a stick-built house never does, and the problems that matter most are often hidden at log ends, lower courses and the joints between logs. This guide covers what buyers and owners should understand: checking and cracks, rot, settling and the adjustable posts and slip joints that accommodate it, chinking and caulk, insects, wildfire exposure, staining and maintenance cycles, and what inspections and repairs tend to cost. A general home inspection can identify many visible issues, but serious log damage usually calls for a log home specialist.
Part of our Specialty Home Inspections guide — start there for the full picture →
What Makes a Log Cabin Different to Inspect
In a framed house, the wall is a skeleton of studs covered with sheathing, insulation, drywall and siding. In a log home, the log itself is the structure, the insulation, the exterior finish and often the interior finish all at once. That has several consequences for an inspection:
- Wood movement. Logs lose moisture for years after construction and shrink across their diameter. A wall of stacked logs can drop several inches in height over the first years, depending on species, log size and how dry the logs were when stacked.
- Exposed structure. The exterior face of the log is directly exposed to sun, rain, snow and insects. There is no house wrap or siding to stop water from reaching structural wood.
- Joints everywhere. Each course meets the course below along its full length, and corners, window bucks and door openings add many more joints. Every joint is a possible path for air, water and insects.
- Limited visibility. Rot often starts inside a log while the surface still looks sound. An inspector may need to probe or sound logs to find soft areas.
Construction styles vary. Handcrafted homes use round, often scribe-fit logs stacked with saddle-notched corners. Milled homes use machine-profiled logs with tongue-and-groove or similar joinery, often with gaskets and caulk between courses. Some homes use log siding over a framed wall, which looks like a log house but performs like a framed one. Confirming which type a house is shapes the rest of the inspection.
Checking and Cracks
As logs dry, the outer wood shrinks faster than the core, and the log splits along its length. These cracks are called checks. Nearly every log home has them, and most are cosmetic.
When checks matter
The concern is water. A check on the upper surface of a log, or one that faces upward on a curved surface, can collect rain and snowmelt and funnel it into the center of the log, where it stays damp long enough for decay fungi to grow. Inspectors pay particular attention to:
- Upward-facing checks on exterior logs, especially on the south and west elevations that see the most sun and weather.
- Checks wider than a pencil that run deep into the log.
- Checks in log ends that extend past the roof overhang.
- Checks in structural members such as purlins, ridge beams, posts and corbels, which may need evaluation by a log specialist or engineer if they are large or near a connection.
Upward-facing checks wider than a small amount are often sealed with a flexible log sealant or a backer rod and sealant made for log homes. Downward-facing checks are generally left alone because they shed water.
Rot at Log Ends and Lower Courses
Decay is the most expensive problem in log homes, and it tends to show up in predictable places. Our guide to wood rot repair explains how decay develops and is repaired in general; in log construction the hot spots are specific.
Where rot starts
- Log ends and corner extensions. End grain soaks up water like a bundle of straws. Logs that extend past the eaves at the corners take rain and snow directly and are frequently the first place rot appears.
- The bottom courses. The first two or three courses above the foundation take splashback from rain, snow piled against the walls and moisture from soil that is too high. Short foundations, missing gutters and landscaping against the logs all make this worse.
- Below windows and doors. Water running off glass and sills can soak the log below, especially where sills lack drip edges.
- Under decks and porches. Ledger connections and deck boards close to the walls can trap water against the logs.
- Where roof runoff concentrates. Valleys and roof sections without gutters can dump water onto the same section of wall every storm.
How inspectors find it
Soft or spongy wood, darkened or stained areas, peeling finish, fungus or mushrooms, and a hollow sound when tapped with a mallet can all point to decay. Probing with an awl or screwdriver in suspect areas helps confirm it. Moisture meters show where logs are wetter than surrounding wood. Interior staining at the bottom course or around windows can also be a clue. Confirming the extent of decay often requires a specialist, because surface damage can hide deeper rot.
Repair options
Depending on extent, repairs range from cutting out small areas and filling with epoxy or wood patches, to splicing in partial log replacements, to replacing whole logs in the bottom courses, which may require jacking the wall. Correcting the water source matters just as much: extending eaves, adding gutters, lowering grade, raising the bottom course with a taller foundation curb, and moving landscaping away from the wall.
Settling, Adjustable Posts and Slip Joints
Because log walls lose height as they dry, anything vertical that does not shrink, such as window and door frames, interior framed partitions, posts, chimneys, plumbing stacks and stairways, must be built to accommodate that movement. A well-built log home uses details designed for settling; a poorly built one shows the strain.
Settling details to look for
- Adjustable posts. Posts that support beams often sit on screw jacks or adjustable bases so they can be lowered as the walls settle. If the posts are never adjusted, the walls settle away from the beam or the beam is held up while the walls drop, creating gaps and stresses.
- Slip joints in framed walls. Interior partitions attach to the log ceiling or upper floor with slotted connections or a gap at the top, so the logs can move without crushing the wall.
- Settling spaces above windows and doors. Openings are framed with a gap above the header, often covered by trim attached to the log only, not to the frame. If the gap is missing or the trim is attached to both, windows and doors may bind, crack or be pushed out of square.
- Flexible connections for plumbing, ducts and chimneys. Rigid connections can be pulled apart or crushed as walls settle.
Typical signs of settling trouble include doors and windows that stick, cracked glass, gaps between logs and trim, drywall cracking at partition tops and visible gaps between logs and framed elements. Many of these are correctable once the adjustment points are identified.
Foundations under log homes
Log walls are heavy, and foundation problems show up quickly as uneven settling. In crawl spaces, look for adequate clearance between the soil and the lowest wood, vapor retarders, ventilation or conditioning, and the condition of sill logs or sill plates. Front Range foundations also face expansive soils and mountain drainage issues, so grading around the house matters as much as on any property.
Chinking, Caulk and Air Leaks
Gaps between logs are sealed with chinking (a wide, flexible material between courses, common in handcrafted and some milled homes) or with caulk, gaskets and backer rod in tighter joints. These materials keep out air, water and insects. When they fail, the result can be drafts, high heating bills, water entry and insects nesting inside walls.
Inspectors look for chinking that has pulled away from the logs, cracked, or separated along one edge; missing or degraded caulk at corners, window bucks and butt joints; and daylight visible between logs. A helpful field check on a cold, windy day is to feel for air at interior joints, and an infrared camera or blower-door test can map leakage more thoroughly. Modern synthetic chinking products are elastic and designed to stretch with log movement, while older mortar-based chinking can crack and fall out as logs shrink.
Insects in Log Homes
Termites, carpenter ants, carpenter bees and wood-boring beetles all target wood. In much of Colorado, subterranean termites are less common than in warmer, more humid states, but they do occur along the Front Range, and wood-boring beetles and carpenter ants are frequent findings in log homes. Our termite inspection guide explains the separate wood-destroying insect inspection that many lenders and buyers request.
EPA’s consumer guidance on termites recommends keeping soil around the foundation dry through grading and drainage, fixing leaks, keeping vents clear, not planting trees and shrubs too close to the structure or letting them grow against exposed wood, and not storing firewood or wood debris next to the house. Those prevention points are especially relevant for log homes, where exposed wood is the entire wall. EPA also suggests probing exposed wood for hollow spots and learning to tell termite swarms from ant swarms.
Signs in a log house include frass or sawdust piles below small holes, the round holes of carpenter bees on the underside of logs and eaves, and the pin holes of beetles. Small populations may be localized, but active infestations in structural logs should be evaluated and treated by a licensed pest professional.
Wildfire Considerations for Log Homes
Many Front Range log homes sit in the wildland-urban interface, where homes meet forest and grassland. The U.S. Fire Administration notes that more than 60,000 communities in the United States are at risk for wildland-urban interface fires, and that these fires are not limited to western states.
Massive logs are slow to ignite compared with thin siding, but the house is still vulnerable through embers landing on roofs, in gutters, on decks and in vents. NFPA’s guidance on preparing homes for wildfire divides the home ignition zone into three zones. The immediate zone, from the house out to 5 feet, should be non-combustible: clean roofs and gutters, replace missing shingles, cover eave and attic vents with 1/8-inch metal mesh, screen or box in areas below decks, and move mulch, plants, leaves and firewood away from exterior walls. The intermediate zone (5 to 30 feet) and extended zone (30 to 100 feet and beyond) focus on spacing trees, removing ladder fuels and keeping vegetation managed.
For log homes, that means firewood stacked against the walls, woodpiles under decks and heavy mulch along the bottom course are both a rot problem and a wildfire problem. Insurance availability and pricing in high-risk areas can also depend on mitigation work, so buyers should get an insurance quote early.
Staining, Sealing and Maintenance
Exterior finishes protect logs from UV damage and moisture. UV breaks down the surface of unprotected wood, which turns gray and erodes, and finish failure lets water reach the wood more easily. Colorado’s high-altitude sun is hard on log finishes, and south- and west-facing walls often need attention first.
Signs that a log cabin needs refinishing include fading, graying, peeling or flaking finish, and water that soaks into the log instead of beading up. Refinishing usually involves cleaning or media blasting to remove failed finish and gray wood, treating as needed, then applying a breathable, log-specific stain or finish. Some products are paired with borate wood preservatives, which require following the label. Recoat cycles vary from a few years to longer depending on product, exposure and climate.
Annual maintenance typically includes washing walls, checking finish condition, looking for new upward-facing checks, inspecting chinking and caulk, adjusting posts if needed, clearing gutters and keeping vegetation and firewood away from the walls.
What Log Home Inspections and Repairs Cost
A general home inspection on a log house is often priced similarly to a comparable-sized house, but some inspectors charge more for log homes, larger properties or remote mountain locations. A dedicated log home inspection by a specialist who probes logs and evaluates settling details may be priced separately. Wood-destroying insect inspections, radon tests, well tests and septic inspections are usually extra.
Repair costs vary widely. Resealing checks and touching up caulk may be a modest maintenance item. Full stripping and refinishing of a large log home can be a substantial project, often in the thousands to tens of thousands of dollars depending on size, access and how much prep is needed. Replacing rotted bottom courses or log ends can cost significantly more because of jacking, specialized labor and materials. These are general 2026 ranges, not quotes; get written estimates from log home contractors.
How to Hire the Right Inspector
A standard home inspection has defined limits. The ASHI Standard of Practice, for example, calls for inspecting structural components including the foundation and framing, the exterior wall coverings, and the vegetation, grading, surface drainage and retaining walls likely to adversely affect the building. It does not require an inspector to determine the methods, materials or costs of corrections. In a log home, that means a general inspector can flag soft logs, failing chinking and stuck doors, but the scope of a rot repair or a settling adjustment usually comes from a log home contractor. Buyers should budget time in the inspection contingency for that follow-up visit.
Ask whether the inspector has evaluated log homes before, whether probing or sounding logs is part of the inspection, and whether a specialist referral is likely for decay or settling issues. The specialty inspections section covers other non-standard property types, and the main guide to hiring a home inspector walks through credentials, sample reports and questions to ask.
References
- Termites: How to Identify and Control Them — U.S. Environmental Protection Agency
- Preparing Homes for Wildfire — National Fire Protection Association
- Wildfire and the Wildland Urban Interface (WUI) — U.S. Fire Administration
- ASHI Standard of Practice for Home Inspections — American Society of Home Inspectors
Frequently asked questions
Are cracks in log cabin walls a problem?
Most cracks, called checks, are normal drying cracks and are cosmetic. Upward-facing checks that collect water, very wide or deep checks, and checks in structural beams or posts deserve closer attention and may need sealing or specialist evaluation.
Where does rot usually start in a log home?
Log ends and corner extensions, the bottom courses above the foundation, below windows and doors, and areas under decks or roof runoff. Probing these spots is a key part of a log home inspection.
How often does a log home need to be restained?
It depends on the product, exposure and climate. Sun-exposed walls in Colorado often need attention first, and many owners recoat every few years. Water soaking into the logs instead of beading is a common sign it is time.
Why do log homes have adjustable posts?
Log walls shrink and settle as they dry. Adjustable posts let owners lower supports over time so beams and walls settle together instead of creating gaps or stress.
Do log homes burn more easily in a wildfire?
Large logs are slower to ignite than thin siding, but embers can still ignite roofs, gutters, decks, vents and combustible material near the walls. Keeping the first five feet around the house non-combustible is a key step.
Looking at a log home in the foothills? Get in touch and we can connect you with a Front Range inspector who knows how to evaluate logs, chinking and settling details.