How Much to Remove Mold? Cost Ranges
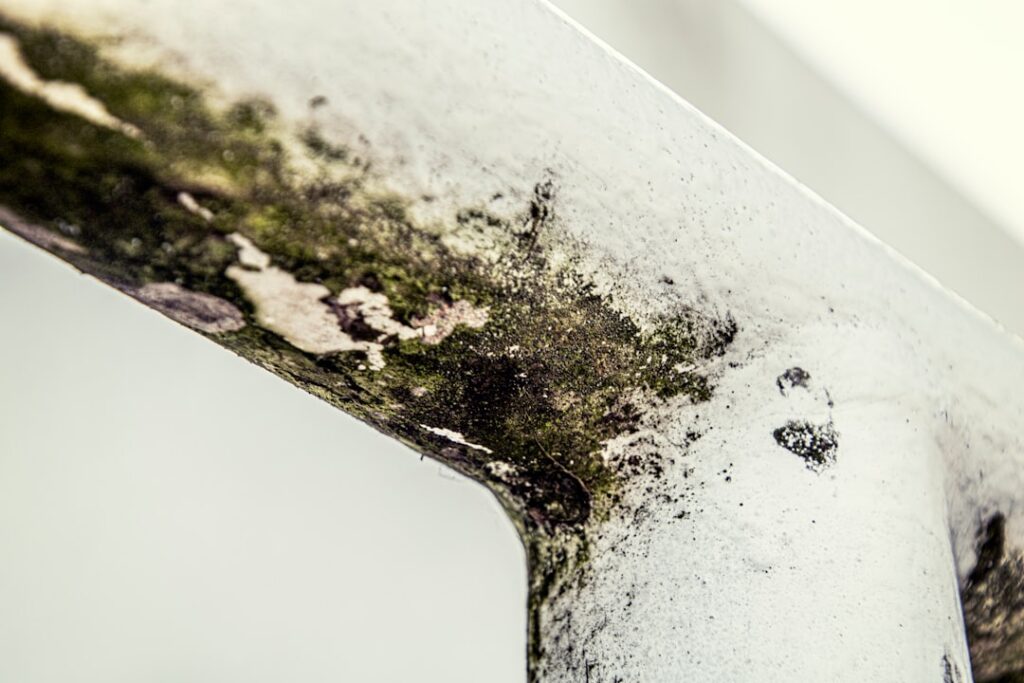
How Much to Remove Mold: DIY vs. Professional
How much it costs to remove mold depends almost entirely on who does the work and how large the problem is: a small DIY cleanup of a contained surface area typically runs about $50 to $200 in supplies, while hiring professionals generally costs $500 to $6,000 or more for larger or hidden growth. These are widely cited industry estimate ranges meant for planning, not quotes for your home. The deciding factor is usually the size and location of the affected area, with the EPA suggesting that areas under about 10 square feet are often manageable yourself while larger jobs warrant a professional. The guidance below is educational and is not medical or remediation advice for your specific property.
Is this mold, asbestos, or water damage? Get a free instant screen
Upload a clear photo of the suspect area. You'll get an instant AI screening opinion and what to do next. This is screening guidance, not a professional determination.
Screening guidance only. AI can be wrong. Confirm asbestos, mold type, or lead with lab testing or a licensed professional before acting.
The Core Question: DIY or Hire Out
The single biggest driver of cost is whether you can safely handle the job yourself. The EPA offers a practical rule of thumb: a moldy area smaller than roughly 10 square feet, about a three-by-three-foot patch, can often be cleaned by a homeowner with proper precautions, while larger or hidden growth is better left to professionals. This threshold, not the species, is what most affects what you pay.
Because the same problem can cost $100 done yourself or several thousand done professionally, choosing the right path matters more than shopping for the cheapest crew. The sections below break down each route so you can decide where your situation falls.
What a DIY Mold Cleanup Costs
For a small, accessible patch on a non-porous surface, your costs are mostly consumables. Protective gear such as N95 respirators, gloves, and eye protection runs a modest amount, and cleaning supplies like detergent, scrub brushes, and disposable rags add a little more. Plastic sheeting and tape to limit spread, plus heavy-duty bags for disposal, round out the list.
Altogether, a basic DIY kit lands in the $50 to $200 range. If you need to rent or buy a wet/dry vacuum, a dehumidifier, or an air mover to dry the area afterward, the total rises but usually stays well below a professional bill for the same small space.
What DIY Cannot Cover
DIY economics break down when porous materials are involved. Soaked drywall, carpet, insulation, and ceiling tiles generally cannot be reliably cleaned and must be removed and replaced, which turns a cleaning job into a small demolition and rebuild. Once you are cutting out drywall, the savings shrink and the risk of spreading spores rises.
DIY is also the wrong choice when growth is hidden inside walls or ducts, when it covers a large area, when there is significant water damage, or when household members have health sensitivities. In those cases the cost of doing it wrong, including spreading contamination, can far exceed the price of professional help.
What Professional Removal Costs
Professional pricing reflects a full process rather than surface cleaning. A contained single-room job commonly falls in the hundreds to low thousands, while multi-room, hidden, or structural problems reach the upper part of the $500 to $6,000 range and beyond. The bill covers assessment, containment, removal of contaminated materials, treatment of salvageable surfaces, air filtration, disposal, and verification.
The value of paying for professionals lies in containment and proper disposal, which prevent a localized problem from spreading, and in addressing the moisture source so the growth does not return. For a deeper component view, see what mold remediation costs.
Factors That Move Either Number
Regardless of who does the work, the same factors push costs up. A larger affected area means more labor and materials. Hard-to-reach locations such as crawl spaces, behind walls, or in ductwork add time. Heavier water damage that has rotted structural material adds removal and rebuild. And the need to fix the moisture source, whether a plumbing repair or better ventilation, is an unavoidable line item in any lasting solution.
Location within the country also matters because labor and disposal rates vary regionally, which is why a national average is only a starting estimate.
The Hidden Cost of Skipping the Moisture Fix
The most expensive mistake is paying to remove mold without correcting the water that caused it. Growth returns to the same spot, and you pay twice or more. Both the EPA and CDC stress that moisture control is essential, so factor the repair, whether a fitting, a roof patch, or a dehumidifier, into your budget from the start.
A DIY cleanup that ignores a slow leak is not cheaper in the long run; it simply defers and compounds the cost. Build the moisture fix into whichever path you choose.
When to Spend More for Testing
Testing adds cost and is optional in many cases. The EPA notes that if mold is visible, sampling is usually unnecessary because the response is identical regardless of species. Pay for testing mainly when growth is hidden, when you need documentation for insurance or a dispute, or when you want to verify that a cleanup succeeded. To gauge that expense, review our guide to restoration and repair costs after remediation.
Comparing the Cost Guides
Each mold-cost guide answers a different question. For what removal companies charge specifically, see mold removal company cost. For whole-property scope read house mold removal cost, and for the highest-stakes scenario consult the black mold removal cost guide. Understanding the assessment first helps; start with our mold inspection overview.
How Affected Material Changes the Math
The type of material involved shifts the cost calculation as much as the size of the area. Non-porous surfaces like sealed paint, tile, glass, and metal can usually be cleaned, keeping the job firmly in DIY territory for small areas. Porous materials that have absorbed growth, including soaked drywall, the paper backing of drywall, carpet, insulation, and ceiling tiles, generally cannot be cleaned reliably and must be removed and replaced, which adds material and labor regardless of who does the work.
This is why a seemingly small problem can cost more than expected: a one-square-foot patch on tile is trivial, but the same patch on soaked drywall means cutting out and replacing a section, possibly uncovering wet insulation or framing behind it. Before estimating cost, identify whether the affected material is salvageable or must be removed, because that single distinction often determines whether you are looking at a modest cleanup or a small reconstruction.
The Cost of Testing and When It Is Worth It
Testing adds to the total and is genuinely optional in many situations. The EPA notes that when mold is visible, sampling is usually unnecessary because the response is the same regardless of species. Spending on testing makes sense mainly when growth is hidden and you need to confirm its presence and extent, when documentation is required for an insurance claim or a real estate dispute, or when you want post-cleanup verification that the work succeeded.
Air and surface sampling interpreted against an outdoor baseline, plus laboratory analysis, contribute to the cost. Decide based on whether the result will change a decision: for a clear visible problem you intend to address regardless, testing adds expense without changing the outcome, while for a contested claim the documentation can be worth the price.
Making the Cost-Effective Choice
For a small surface patch you caught early, DIY is genuinely economical and the EPA’s 10-square-foot guideline supports doing it yourself. For anything larger, hidden, structural, or health-sensitive, professional removal is the cost-effective choice once you account for the risk of spreading spores and the certainty of recurrence if the moisture is not addressed.
Decide by honestly assessing the area’s size, the materials involved, and the moisture source. That assessment, more than any price list, determines what you should reasonably spend.
A Closer Look at DIY Supply Costs
Breaking down a DIY cleanup helps set realistic expectations. Personal protection is the first expense: an N95 or better respirator, nitrile or rubber gloves, and goggles guard against inhaling or contacting spores during the work. Cleaning supplies come next, including a household detergent, scrub brushes, and disposable rags that you bag and discard as they become soiled. Plastic sheeting and painter’s tape let you isolate the work area, and heavy-duty bags handle disposal.
Drying equipment can add to the total. A box fan, a borrowed or owned dehumidifier, and in some cases a wet/dry vacuum help dry the area completely after cleaning, which is essential to prevent regrowth. Even with these additions, a small contained job typically stays within the $50 to $200 range, though renting larger drying equipment for a slightly bigger area can push it modestly higher while still costing far less than professional service.
The Real Cost of a DIY Mistake
DIY looks cheapest on paper, but a botched attempt can become the most expensive path. Disturbing mold without containment scatters spores to clean rooms, turning a one-room problem into a multi-room one. Cleaning the surface of porous material that has absorbed growth leaves the colony embedded, so it returns and you eventually pay for professional removal anyway, now with a larger affected area.
The costliest error is ignoring the moisture source. A homeowner who scrubs a patch, repaints, and moves on without fixing the leak or humidity will watch the growth reappear, having spent time and money for nothing. Honest assessment of whether a job is truly within DIY range, small, surface-level, on non-porous material, with a fixable moisture source, is what keeps the cheap option from becoming the expensive one.
How Professional Pricing Reflects Value
The gap between a $100 DIY job and a multi-thousand-dollar professional one can seem stark, but the professional price buys things DIY cannot. Engineered containment with negative air pressure keeps spores from spreading. Trained crews remove and replace porous materials correctly and safely dispose of contaminated debris. The moisture source is identified and addressed, and the work is verified, often with documentation useful for insurance or resale.
For a problem that exceeds DIY range, this is not overpaying; it is paying for an outcome that actually lasts. The value lies in not having to redo the work, not spreading contamination, and having confidence the problem is resolved. Matching the spend to the scope, modest for small surface jobs, professional for larger or hidden ones, is the essence of cost-effective mold removal.
Ongoing Costs After Removal
The price of removal is not always the end of the spending. Preventing recurrence may involve ongoing costs like running a dehumidifier in a damp basement, improving ventilation, or maintaining repairs to the roof, plumbing, or foundation. These are usually modest compared to remediation, and they protect the investment you made in removing the growth.
Factoring prevention into the total cost picture leads to better decisions. A small recurring expense for humidity control is far cheaper than repeated removal, which makes ongoing moisture management the most economical long-term strategy regardless of whether the initial removal was DIY or professional.
References
- EPA: Mold Cleanup in Your Home
- EPA: A Brief Guide to Mold, Moisture and Your Home
- CDC: Basic Facts About Mold and Dampness
Unsure whether your problem is a DIY job or a professional one? Ask our team for a quick assessment.
Mold removal & cleanup picks
For a small, contained patch (under ~10 sq ft) these EPA-friendly removers handle surface mold. Larger or recurring growth warrants a professional assessment first.
| Product | Why | Buy |
|---|---|---|
 RMR-86 Instant Mold Stain Remover RMR-86 Instant Mold Stain Remover | Fast-acting on stains; ventilate and wear PPE. | Amazon — $29.99 |
 Concrobium Mold Control Concrobium Mold Control | No-bleach formula that also helps prevent regrowth. | Amazon — $13.48 |
 Mold Armor Mold & Mildew Remover Mold Armor Mold & Mildew Remover | Widely stocked bathroom/surface remover. | Amazon — $22.98 |