Removing Black Mold: A Homeowner’s Step-by-Step Guide
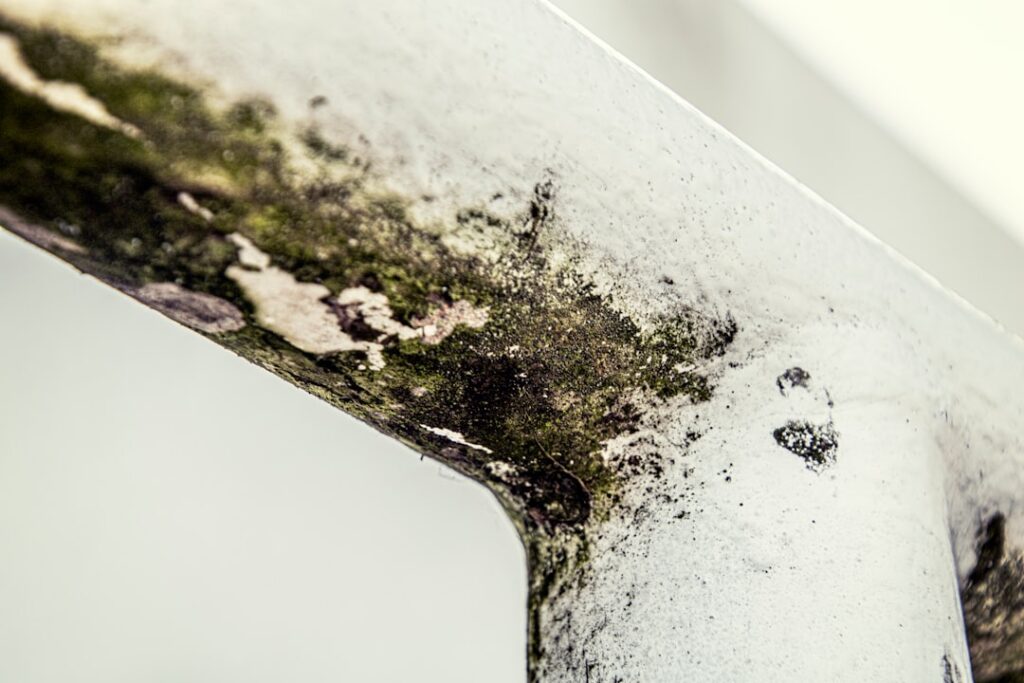
Finding a dark, blotchy patch spreading across a bathroom wall or basement corner is unsettling, and the first instinct is usually to wipe it away as fast as possible. Removing black mold can be straightforward for a small surface stain, but larger or recurring growth points to a moisture problem that scrubbing alone will not solve. This guide summarizes EPA and CDC guidance current as of 2026 and is informational only — consult your physician about symptoms and a certified professional for testing or large-scale removal decisions.
Is this mold, asbestos, or water damage? Get a free instant screen
Upload a clear photo of the suspect area. You'll get an instant AI screening opinion and what to do next. This is screening guidance, not a professional determination.
Screening guidance only. AI can be wrong. Confirm asbestos, mold type, or lead with lab testing or a licensed professional before acting.
How to Remove Black Mold Safely
For a contained patch smaller than roughly ten square feet on a hard, non-porous surface, the EPA says most homeowners can handle the cleanup themselves. Start by putting on an N95 respirator, gloves, and eye protection, then open a window or run a fan vented to the outside so spores are not pushed into other rooms. Mist the area lightly with water first; this keeps dry spores from going airborne while you work.
Scrub the surface with detergent and warm water, then wipe it down and dry it completely. The goal is physical removal of the growth, not just a color change. Bleach is not required on hard surfaces, and the CDC notes that detergent and water are usually enough. If the material is porous — drywall, carpet padding, ceiling tile, insulation — cleaning rarely reaches the roots, and those items typically need to be cut out and replaced rather than wiped.
What Counts as “Black Mold”?
The phrase usually refers to Stachybotrys chartarum, a greenish-black mold that grows on cellulose-rich materials kept wet for days, such as soaked drywall or water-damaged wood. Plenty of other molds also appear dark, and the only way to confirm a species is lab analysis. From a cleanup standpoint, the color and exact species matter less than people assume. The EPA’s position is consistent: all indoor mold should be removed and the underlying moisture corrected, regardless of type, because no indoor mold is desirable in occupied spaces.
Homeowners who want certainty about what they are dealing with can read more in our overview of what black mold looks like on walls, which walks through the visual cues that separate surface staining from active growth.
The Step-by-Step Removal Process
1. Stop the moisture source first
Removal that skips this step is wasted effort. A leaking supply line, a condensing cold-water pipe, poor bathroom ventilation, or groundwater wicking into a basement slab will all feed regrowth within weeks. Fix the leak, add an exhaust fan, run a dehumidifier, or regrade soil away from the foundation before any scrubbing begins.
2. Contain the work area
Close doors, cover vents, and tape plastic sheeting over doorways when the affected area is more than a few square feet. Containment keeps spores from migrating into clean rooms while material is disturbed. Lay down plastic to catch debris from any material being removed.
3. Remove or clean the material
Hard surfaces get scrubbed and dried. Porous materials get bagged and discarded. Double-bag soft debris in heavy plastic, seal it, and carry it directly outside rather than walking it through the house. Our walkthrough on removing mold from drywall explains when a panel can be saved and when it has to come out.
4. Dry, then verify
After cleaning, run fans and a dehumidifier until moisture readings on a meter return to normal for the material. A persistent musty odor or visible regrowth within a couple of weeks signals that either the moisture source was missed or hidden growth remains behind a wall.
When to Call a Professional Instead
The EPA recommends professional remediation for any mold patch larger than about ten square feet, for contamination tied to sewage or contaminated water, and for situations where mold has spread inside HVAC systems. A pro is also the right call when the growth keeps returning despite cleanup, when occupants have asthma or weakened immune systems, or when the source is hidden inside walls or under flooring.
Professionals bring containment barriers, negative-air machines with HEPA filtration, and the experience to find moisture intrusion that a homeowner would miss. They also document the work, which matters for resale disclosures and insurance claims. If the job has outgrown a spray bottle and a sponge, the cost of doing it wrong — repeated cleanups, ruined finishes, ongoing exposure — usually exceeds the cost of doing it right once. For an idea of pricing, our breakdown of mold removal costs covers typical ranges by job size.
What Removing Black Mold Typically Costs
A small DIY cleanup might run $30 to $100 in supplies: a respirator, gloves, detergent, plastic sheeting, and disposal bags. Professional remediation varies widely with the size and location of the problem. Industry estimates commonly cite $500 to $1,500 for a contained area such as a single bathroom or closet, $2,000 to $6,000 for larger jobs involving drywall removal across a room, and considerably more when mold has infiltrated framing, HVAC, or a finished basement.
Colorado Front Range homes add their own wrinkles. Finished basements are common in the Denver metro, and below-grade humidity combined with snowmelt against foundations creates ideal conditions for hidden growth. Swamp coolers, still used in parts of the region, raise indoor humidity in summer and can seed bathroom and window-frame mold if not managed.
Tools and Materials You’ll Need
A small DIY removal does not require specialized equipment, but the right basics make the job safer and more effective. Plan to have an N95 respirator rated for particulates, not a loose dust mask; nitrile or rubber gloves long enough to protect the wrists; and sealed eye protection that wraps around the sides. A stiff scrub brush, a spray bottle for misting and applying cleaner, microfiber cloths, and heavy contractor-grade plastic bags for debris round out the list. Plastic sheeting and painter’s tape are useful for sealing off a doorway or covering vents when the patch is larger than a hand’s span.
A moisture meter, while optional, is genuinely useful. It confirms whether a wall or floor has dried back to normal after cleaning, which removes the guesswork that leads to premature repainting over still-damp material. Inexpensive pinless meters are sufficient for spot-checking, and the readings tell you when it is safe to close up or refinish a surface. A small dehumidifier and a box fan handle the drying stage, which is as important as the scrubbing itself.
Common Mistakes That Let Mold Return
The most frequent error is painting over mold without removing it. Mold-resistant and “mold-killing” primers are marketed for this, but the EPA is clear that painting over active growth does not solve the problem; the growth continues beneath the paint and the coating eventually fails. Remove the growth first, dry the surface, then refinish.
A second mistake is treating the symptom and ignoring the source. Scrubbing a bathroom ceiling spotless accomplishes little if the exhaust fan is undersized or vents into the attic. A third is using bleach as a cure-all on porous materials, where it cannot reach the roots and mostly removes color. A fourth is skipping the drying step — a cleaned surface that stays damp simply regrows within days. Each of these errors stems from the same misunderstanding: that mold is a stain to be erased rather than a symptom of moisture to be corrected.
How to Keep Black Mold From Coming Back
Mold needs moisture, and controlling moisture is the entire prevention strategy. The EPA recommends keeping indoor relative humidity below 60 percent, and ideally between 30 and 50 percent. A simple hygrometer makes this measurable rather than a guess.
Run bathroom exhaust fans during and for at least 20 minutes after showers. Vent clothes dryers outside, never into a crawl space or attic. Insulate cold-water pipes to stop condensation. Repair roof and plumbing leaks promptly, since material kept wet beyond 24 to 48 hours is where mold gains a foothold. In basements and crawl spaces, a dehumidifier kept at a steady setting does more lasting good than any cleaner. For deeper background on the moisture-first approach, the mold inspection and testing hub connects the prevention, testing, and cleanup pieces together.
Choosing the Right Cleaner for the Surface
The product matters less than people assume, but matching it to the surface still helps. On hard, washable surfaces such as tile, glass, sealed concrete, and finished metal, plain detergent and warm water with a stiff brush is the EPA-endorsed baseline. It is cheap, safe, and effective because the scrubbing physically removes the growth rather than just bleaching its color.
For stubborn surface staining, white vinegar sprayed on and left for about an hour, then scrubbed, handles light growth with little odor. Three-percent hydrogen peroxide left for roughly ten minutes is slightly more aggressive and still gentler than bleach. Diluted bleach removes staining on non-porous surfaces but does not penetrate porous materials and is not required for routine cleaning. A critical safety rule applies to all of these: never mix products. Combining bleach with ammonia or with vinegar releases toxic gases. Rinse thoroughly between any two cleaners, and keep the room ventilated throughout.
Commercial mold sprays are largely the same active ingredients in convenient packaging. None of them substitutes for the two things that actually matter — physically removing the growth and then drying the surface so it cannot return.
How to Tell Surface Staining From Active Growth
Not every dark patch is active mold. Soap scum, mineral deposits, soot, and old water staining can all mimic the look. Active mold often has texture — a fuzzy, slightly raised, or slimy quality — while a flat discoloration that does not change after cleaning may be a stain rather than living growth. A simple field check is to dab the spot with a little detergent solution on a cloth; if the color lifts easily and the surface underneath is clean, it was likely a stain. If it returns or feels rooted, it is more likely active growth feeding on a damp surface.
The distinction matters because active growth signals a moisture problem that needs correcting, while a one-time stain may just need cleaning. When the patch keeps coming back after cleaning, treat it as active growth with an unresolved water source, regardless of how it looks.
Black Mold and Front Range Homes
Colorado’s generally dry climate suppresses mold for much of the year, which leads some homeowners to assume it is not a local concern. The reality is more specific. Finished basements, common across the Denver metro and Douglas, Arapahoe, and Jefferson counties, sit below grade where snowmelt and spring runoff push moisture against foundations. Bathrooms without adequate exhaust trap shower humidity. Swamp coolers, still used in parts of the region, raise indoor humidity through the summer and can seed growth around windows and in poorly ventilated rooms.
The wet-dry cycling that follows afternoon thunderstorms also stresses building envelopes, opening small entry points for water. None of this makes the Front Range a high-mold region overall, but it does mean local growth tends to cluster in predictable spots — and that finding the moisture source is just as important here as anywhere wetter.
Does Cleaning Black Mold Make You Sick?
Disturbing mold releases spores and fragments into the air, which is why protective equipment matters during removal. The CDC notes that exposure can trigger nasal congestion, throat irritation, coughing, and wheezing, and that people with asthma or mold allergies may react more strongly. Disturbing a large colony without containment temporarily raises spore counts throughout a home. That is the central argument for wetting surfaces first, sealing off the work zone, and leaving big jobs to crews with proper equipment.
People with asthma, mold allergies, or weakened immune systems should consider having someone else perform the removal, even for a modest patch. The temporary spike in airborne spores during scrubbing affects sensitive individuals most, and the cost of a professional doing a small job correctly is usually modest compared with a triggered asthma episode. Anyone who develops persistent respiratory symptoms after exposure should consult a physician rather than self-managing.
References
- Mold Cleanup in Your Home — U.S. Environmental Protection Agency
- About Mold and Your Health — Centers for Disease Control and Prevention
- A Brief Guide to Mold, Moisture and Your Home — U.S. Environmental Protection Agency
- Mold and Your Health — Colorado Department of Public Health & Environment
If you are on the Front Range and want a vetted local inspector to confirm the source before you tear into a wall, get in touch through our contact page.
Mold removal & cleanup picks
For a small, contained patch (under ~10 sq ft) these EPA-friendly removers handle surface mold. Larger or recurring growth warrants a professional assessment first.
| Product | Why | Buy |
|---|---|---|
 RMR-86 Instant Mold Stain Remover RMR-86 Instant Mold Stain Remover | Fast-acting on stains; ventilate and wear PPE. | Amazon — $25.99 |
 Concrobium Mold Control Concrobium Mold Control | No-bleach formula that also helps prevent regrowth. | Amazon — $13.48 |
 Mold Armor Mold & Mildew Remover Mold Armor Mold & Mildew Remover | Widely stocked bathroom/surface remover. | Amazon — $22.98 |