How to Wash Mold: When Washing Works and When It Fails
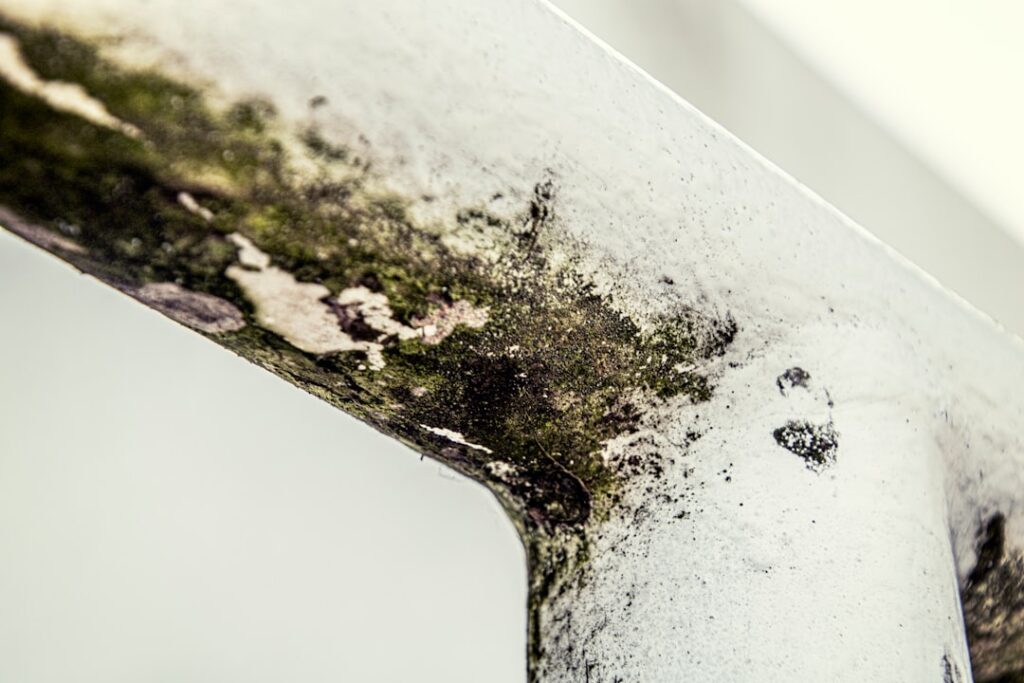
How to wash mold is a question with a more specific answer than “how to clean mold” or “how to remove mold.” Washing implies a wet step — water plus detergent or antimicrobial — applied to a surface where the visible growth can be physically lifted off. That works on hard non-porous materials and fails on porous ones, which is the distinction this article exists to draw out. This guide summarizes EPA and CDC guidance current as of 2026, and consulting a certified mold professional remains the right call when washing is not the appropriate technique for the substrate in front of you.
Is this mold, asbestos, or water damage? Get a free instant screen
Upload a clear photo of the suspect area. You'll get an instant AI screening opinion and what to do next. This is screening guidance, not a professional determination.
Screening guidance only. AI can be wrong. Confirm asbestos, mold type, or lead with lab testing or a licensed professional before acting.
What washing actually means in mold cleanup
Washing is the wet-cleaning step that follows physical removal and HEPA vacuuming. It is not a standalone treatment. The IICRC S520 standard and the EPA’s residential mold guidance both treat wet-cleaning as one stage in a sequence — never as the first or last step. A homeowner who skips the HEPA vacuum and goes straight to washing has likely smeared the colony rather than removed it.
The wash step uses one of three cleaners depending on the surface and the situation: detergent and water (the EPA’s first-line recommendation), an EPA-registered antimicrobial labeled for mold (for sensitive occupants or confirmed colonization), or a diluted bleach solution (for glazed tile and sealed grout only). The cloth or sponge matters too — disposable microfiber wipes are preferred over reusable sponges, which trap spores and become contamination vectors.
When washing is the right technique
The washing approach belongs on hard, non-porous surfaces where the colony has not penetrated the substrate. The list is shorter than people expect:
- Glazed ceramic tile
- Glass shower enclosures, mirrors, windows
- Painted metal — sealed HVAC vents, appliance exteriors
- Sealed concrete with a paint or epoxy topcoat
- Stainless steel and fiberglass surfaces
- Hard plastic — bins, shelving, refrigerator interior surfaces
- Sealed grout in good condition
On each of those, the colony sits at the surface. Wet-cleaning lifts it, the antimicrobial step kills any residual organisms, and the substrate dries to a state that resists re-colonization.
The HEPA-vacuum-plus-antimicrobial-wash sequence
The full sequence on a hard non-porous surface follows six steps in strict order.
Step one: physical debris removal
Pick up any loose material — fallen drywall fragments, debris from the colony’s substrate — with a tool, not your gloved hand. Put it directly into a sealed bag.
Step two: HEPA vacuum
True HEPA filtration captures the loose spore mass before it gets wet. A 2-foot perimeter on all sides of the visible patch is the minimum vacuum coverage. Standard shop vacuums fail at this step because their exhaust re-aerosolizes the spores.
Step three: damp wipe with detergent
Detergent and water on a damp microfiber cloth lifts the visible film and the residual oils that feed surface organisms. Wipe from the outside of the patch inward. Switch to a fresh cloth surface after each pass.
Step four: antimicrobial wash
Apply the chosen antimicrobial — EPA-registered, vinegar, hydrogen peroxide, or diluted bleach as the situation warrants. Let it dwell for the label-recommended contact time, typically 5 to 10 minutes for EPA-registered products. Wipe with clean cloths.
Step five: rinse if required
Some EPA-registered antimicrobials require a clean-water rinse after dwell time; others are leave-on formulations. Read the label. Bleach and vinegar both benefit from a rinse to prevent residue.
Step six: dry completely
Airflow plus a dehumidifier targeting 40 to 50 percent indoor relative humidity. The surface should feel dry to the touch within minutes and remain dry for the verification window — 24 hours, 72 hours, and one week.
Why washing fails on porous substrates
Porous materials are where washing breaks down as a technique. The colony grows into the substrate rather than just on top, and the surface treatment cannot reach the hyphae that have penetrated:
- Drywall paper — the colony embeds in the paper face, which cannot be cleaned
- Carpet pad — the padding traps spores and moisture in a way wet-cleaning cannot reverse
- Ceiling tile — most acoustic tile is porous and the colony grows through the thickness
- Fiberglass insulation — spores attach to the fiber matrix and resist removal
- Raw or unsealed wood with deep staining — the colony grows into the grain
- Upholstered furniture with embedded growth
On these substrates, washing produces a temporary cosmetic improvement followed by recurrence within days or weeks. The EPA’s mold remediation guidance is consistent that porous materials with significant growth should be removed and replaced rather than cleaned in place. Our porous-surface removal walkthrough covers the cut-out workflow.
The “deep colony” flag
Even on a surface that looks hard and non-porous, washing can fail when the colony has migrated through the substrate. The signs:
- Staining returns within days of a thorough wash
- The substrate feels soft beneath the cleaned area
- Musty smell persists after visible cleanup
- Adjacent substrates show secondary growth
Each of these is telling you the colony is not a surface film. The next step is an assessment with moisture metering and, if warranted, infrared imaging to map the extent before any further cleanup attempts. The cluster overview at our mold inspection and testing hub covers the assessment workflow.
Substrate decision table
The short version of which technique to use:
- Glazed tile, glass, sealed metal, plastic — wash works
- Painted drywall with light staining — wash may work, watch for return at 72 hours
- Painted drywall with soft substrate or deep staining — remove and replace
- Carpet face only, pad intact — surface wash sometimes works, often not
- Carpet pad with growth — remove pad, dry subfloor, replace
- Ceiling tile — replace, do not wash
- Fiberglass insulation — remove and replace
- Finished wood — light wash with hydrogen peroxide
- Raw wood with deep staining — sand or remove section
PPE and ventilation during washing
The wet-cleaning step generates aerosol even when the work looks gentle. Cleaning sprays atomize the cleaning solution, the colony, and the substrate dust into the air around the worker. The full PPE list applies during washing as much as during physical removal: N95 respirator, nitrile gloves, eye protection, long sleeves.
Ventilation should go to outdoors only, with HVAC off, throughout the work and for at least 30 minutes after. Closing the work area off from the rest of the home with a sheet of plastic at the doorway helps contain any aerosolized spores. The surface mold cleaning walkthrough covers ventilation setup in more detail.
Verification: when the wash worked
A successful wash on a non-porous surface looks like this at one week: the patch is gone, no shadow staining remains, the substrate feels firm and dry, the area has stayed below 50 percent humidity, and no musty smell has returned. If all five hold, the wash was the right technique and the job is complete.
If any one fails, the diagnosis was wrong somewhere — usually either the substrate was more porous than it appeared, the moisture source was not fully addressed, or the colony had penetrated deeper than the wash could reach.
Why “wash” gets misused as a complete treatment
Several factors contribute to the over-application of washing as a mold-removal technique.
Marketing language on cleaning products
Consumer mold and mildew sprays advertise “kill,” “remove,” and “eliminate” claims that imply the spray alone solves the problem. The product does the wash step well; the homeowner is left with the impression that the spray is the whole answer rather than one component of a larger workflow.
Visual feedback during cleaning
Wet-cleaning produces immediate visual improvement. The patch looks gone within seconds of application, which feels like resolution. The deeper colony or moisture source that drove the visible growth is not addressed in those seconds.
Lack of training in the EPA workflow
The EPA’s mold cleanup guidance is not common reading among homeowners. The HEPA-vacuum-first protocol that real remediators follow is not intuitive without exposure to professional training material.
The cost asymmetry incentive
Spraying and wiping costs a few dollars in supplies. Hiring an assessment plus professional remediation costs hundreds to thousands. The incentive to call the wash a complete treatment is strong, even when the underlying conditions do not support that conclusion.
What washing accomplishes in the broader workflow
Inside a complete remediation workflow, washing serves three distinct functions that work together.
Removing the visible colony
The primary function. Wet-cleaning combined with the antimicrobial step physically removes the visible biological mass and kills residual organisms at the surface.
Removing the food source
Surface dust, soap scum, organic residue, and skin oils provide nutrition for mold growth. Washing removes these and reduces the food available to support any spores that remain after the cleanup.
Verifying surface integrity
The wet-cleaning step is also a diagnostic step. The substrate’s reaction during washing — does it remain firm, does staining lift, does the surface dry properly — informs whether the surface was a true non-porous candidate for washing or whether the colony had penetrated deeper than the visual assessment suggested.
Wash techniques by surface type
The wash step requires adjustments based on what is being cleaned.
Glazed ceramic tile
Most tolerant surface. Tolerates bleach, vinegar, hydrogen peroxide, and EPA-registered antimicrobials. Aggressive scrubbing with a stiff brush is acceptable. Sealed grout cleans alongside the tile.
Glass shower enclosures and mirrors
Tolerates all common cleaners. Soft cloths are sufficient — abrasive scrubbing is not needed and risks scratching. Squeegee drying after wash prevents water spots that look like residue.
Painted metal surfaces
Sealed exterior of HVAC vents, appliances, painted metal furniture. Tolerates most cleaners but prolonged bleach exposure can damage paint finishes. Wipe dry promptly after antimicrobial dwell.
Sealed concrete
Tolerates EPA-registered antimicrobials labeled for masonry. Plain detergent is less effective on alkaline concrete than on neutral surfaces. Distinguish efflorescence (mineral salt that dissolves in water) from white mold before treating.
Hard plastic surfaces
Storage bins, shelving, appliance interiors. Tolerates most cleaners. Watch for chemical compatibility — some plastics are degraded by certain antimicrobials. Test on an inconspicuous area first.
Common errors during the wash step
Six errors recur during home wet-cleaning of mold-affected surfaces.
Skipping the dwell time
EPA-registered antimicrobials require contact time (typically 5 to 10 minutes) to achieve their kill claim. Wiping immediately after applying defeats the chemistry. Read the label and respect the dwell time.
Using too much water
Saturating a porous-but-cleanable surface drives moisture into the substrate and creates conditions for re-colonization. Damp wipes work better than wet ones.
Reusing contaminated wipes
One wipe contaminated by the first pass then used on the second pass spreads the colony. Discard between passes.
Wiping inward without HEPA pre-vacuum
The HEPA vacuum step captures loose spores before they get spread by the wet wipe. Skipping the vacuum is the most common error in homeowner wet-cleaning.
Not drying after the wash
Residual moisture is what allows surviving spores to re-establish. Fan and dehumidifier should run during and after the wash until the surface and ambient humidity confirm dry conditions.
Returning items to the same conditions
Washing a moldy basement shelf and returning it to the same damp basement guarantees recurrence. The environment is part of the problem, not just the item.
The honest verdict on washing
Washing as a standalone treatment works on small surface colonies on hard non-porous substrates with a known and addressed moisture source. That conditional sentence covers the legitimate application. Outside those conditions, washing is one step inside a larger workflow rather than a complete answer. Knowing the difference is what separates homeowners whose cleanups stick from those who repeat the same cleanup every few weeks.
References
- Mold Remediation in Schools and Commercial Buildings Guide — U.S. Environmental Protection Agency
- Mold Cleanup Guidance — Centers for Disease Control and Prevention
- Residential Mold Inspection Reference — InterNACHI
If a wash-and-watch attempt failed and the patch keeps coming back, Front Range homeowners can reach out through our contact page to be connected with a vetted local assessor.