Cleaning Black Mold: A Step-by-Step Safety Guide
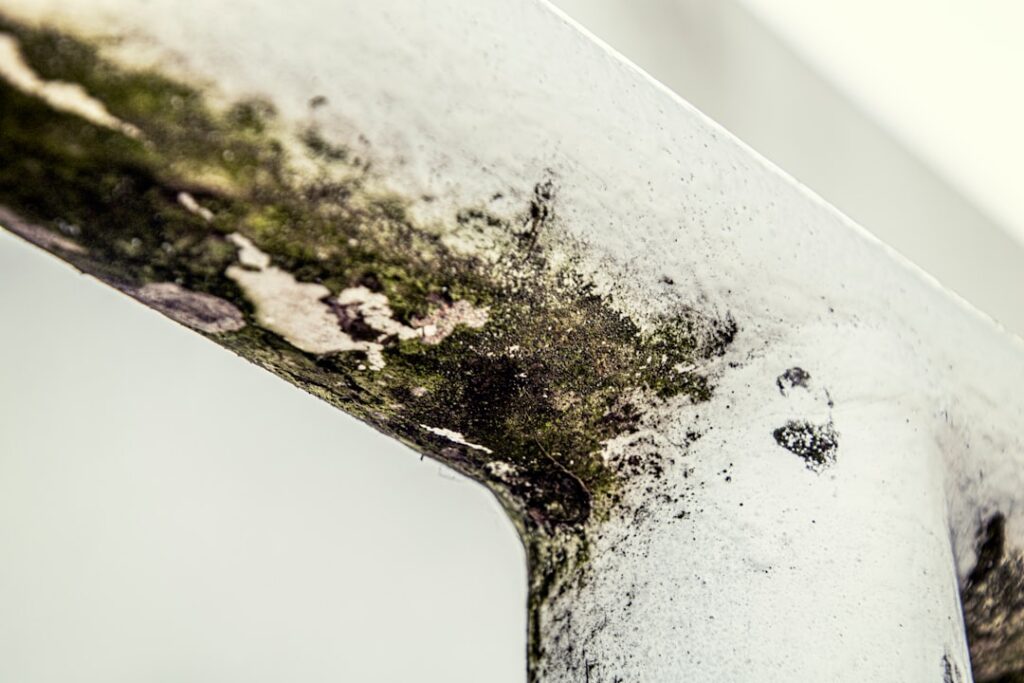
Discovering a black, slick patch creeping across a basement wall or behind a toilet tank raises an immediate question: clean it now, or call someone? Cleaning black mold is well within reach for small, surface-level growth, but only if the process respects how spores spread and how moisture keeps feeding the colony. Done carelessly, scrubbing launches more spores into the air than it removes. This guide summarizes EPA and CDC guidance current as of 2026; consult a physician about symptoms and a certified professional for testing and large remediation decisions.
Is this mold, asbestos, or water damage? Get a free instant screen
Upload a clear photo of the suspect area. You'll get an instant AI screening opinion and what to do next. This is screening guidance, not a professional determination.
Screening guidance only. AI can be wrong. Confirm asbestos, mold type, or lead with lab testing or a licensed professional before acting.
How do you clean black mold the right way?
The right way starts before any cleaner touches the wall. The CDC and EPA both frame mold cleanup as a containment problem first and a chemistry problem second. The core sequence is consistent across authorities: protect yourself, contain the spores, clean hard surfaces while removing porous ones, dry the area completely, and correct the moisture source. Skip any step and the work either fails or exposes you unnecessarily.
For most homeowners, the practical threshold is size. The EPA advises that areas under roughly 10 square feet — about a 3-by-3-foot patch — are reasonable for a careful DIY approach. Beyond that, or when the mold sits inside ductwork or follows a sewage backup, the job belongs to professionals with negative-air containment and HEPA equipment.
The reasoning behind that 10-square-foot guideline is exposure, not chemistry. A larger colony releases far more spores when disturbed, and the volume quickly overwhelms a homeowner’s basic protection and the simple containment a household can build. The figure is a sensible default rather than a hard law — a 12-square-foot patch on intact tile is less concerning than a 6-square-foot colony on saturated drywall hiding more growth behind it. Use the number as a prompt to assess honestly: how deep is the growth, how porous is the material, and who is in the home.
Before you start: confirm it is mold
Not every dark stain is mold. Soot, mineral deposits, dirt, and old water staining can all mimic it. A quick check: dab the spot with a cotton swab dipped in diluted detergent — mold often smears and may lighten, while a stain stays put. Mold also tends to have a slightly raised, fuzzy, or slimy texture and an accompanying musty smell, whereas mineral efflorescence on basement walls is dry, crystalline, and odorless. Misidentifying efflorescence as mold leads homeowners to scrub harmless salt deposits while ignoring the actual moisture intrusion underneath. If you cannot tell, that uncertainty itself is a reason to get a professional opinion before committing to a cleanup.
Gear up before you start
Cleaning disturbs the colony, and disturbance is exactly when airborne spore counts spike. Personal protection is not optional, even for a small patch.
- Respirator: An N95 at minimum; a half-face respirator with P100 cartridges for larger or repeated jobs.
- Gloves: Long nitrile or rubber gloves that extend past the wrist.
- Eye protection: Sealed goggles, not glasses, to keep spores out.
- Clothing: Disposable coveralls or clothes you can wash in hot water immediately after.
People with asthma, mold allergies, or weakened immune systems should not do this work at all, according to CDC guidance. The exposure risk outweighs the savings.
Contain the area so spores stay put
Containment turns a one-room problem into a one-room solution. Before cleaning, close the door to the affected room and seal HVAC vents with plastic and tape so spores cannot ride the duct system into clean spaces. Place a fan in a window blowing outward to create negative pressure, pulling air out rather than pushing it through the house. Lay plastic sheeting to catch debris, and bag any removed material before carrying it through the home.
This matters most in finished basements, where black mold commonly hides. Our guide to black mold in basements covers the containment specifics for below-grade spaces, where humidity and poor airflow make recontamination especially likely.
Clean hard surfaces, remove porous ones
The surface decides the method. This single distinction prevents most wasted effort.
Hard, non-porous surfaces
Tile, glass, sealed concrete, fiberglass, and finished metal can be cleaned and kept. Wet the area with a registered antimicrobial cleaner, detergent solution, or a peroxide mix; let it dwell several minutes; scrub with a stiff brush; then wipe and dry. The EPA notes that for hard surfaces, plain detergent and water is often sufficient — the goal is physical removal, not sterilization.
Porous and semi-porous surfaces
Drywall, ceiling tile, carpet, padding, and insulation that show real growth cannot be reliably cleaned. The roots thread through the material where no cleaner reaches. The EPA recommends cutting out and discarding these materials, double-bagged. Solid wood framing can sometimes be salvaged by HEPA vacuuming, scrubbing, and drying if the wood remains structurally sound. For wall-specific tactics, see our breakdown of handling black mold on drywall, which explains when a cut-out beats a scrub.
Choosing the cleaner for the job
On hard surfaces, the choice of cleaner matters less than the scrubbing. The EPA’s baseline is detergent and water, because physical removal is the goal, not sterilization. Beyond that, hydrogen peroxide at 3–10% lifts staining and kills surface growth without fumes, white vinegar handles light growth cheaply, and EPA-registered antimicrobials offer a purpose-built option with a verifiable registration number. Chlorine bleach belongs on non-porous tile and grout only — on drywall it is mostly water that soaks in while the chlorine evaporates, and the EPA does not recommend it for porous materials. Whatever you choose, never combine bleach with ammonia or vinegar; both mixtures release toxic gases.
Technique that keeps spores down
How you apply the cleaner is as important as the cleaner itself. Mist the surface rather than blasting it, since a pressurized stream aerosolizes spores. Let the product dwell for the label’s specified contact time — typically five to ten minutes — so it actually kills rather than merely loosens the growth. Scrub with a stiff brush using deliberate strokes, wiping debris into a damp cloth you then bag, rather than dry-brushing which throws spores into the air. Work from the edges inward to avoid spreading the colony outward. Replace cloths frequently; a saturated rag just redistributes spores.
Dry everything, then dry it again
Mold cannot regrow without moisture, so drying is the step that makes cleanup permanent. After cleaning, run a dehumidifier and fans until surfaces and surrounding materials read dry — ideally below 50% relative humidity and with material moisture content normalized. A moisture meter removes the guesswork; surfaces can feel dry to the touch while the substrate behind them stays wet.
The EPA targets a 24–48 hour drying window after any water event to prevent mold from establishing in the first place. The same urgency applies after cleanup. In Colorado’s dry outdoor air, opening windows on a low-humidity day speeds drying considerably, but basements and bathrooms still benefit from mechanical dehumidification.
Fix the moisture source or repeat forever
Cleaning treats the symptom; the leak, condensation, or humidity is the disease. Black mold thrives only where water lingers. Common Front Range culprits include foundation seepage, swamp-cooler condensation, poorly vented bathrooms, plumbing drips under sinks, and ice-dam leaks during snowmelt. Identify and repair the source, or the colony returns on schedule.
If you cannot find the water, that is itself a reason to bring in help. A professional inspection traces hidden moisture with meters and thermal imaging. The mold inspection and testing hub explains how source-finding and clearance testing work together so cleanup actually holds.
Disposing of moldy material safely
What you remove has to leave the home without seeding new growth along the way. Double-bag moldy drywall, carpet, and insulation in heavy plastic, seal each bag, and wipe the outer bag down before carrying it through clean spaces. Better still, pass bagged debris out through a window or nearest exterior door rather than walking it across the house. Standard household trash collection accepts bagged residential mold debris in most Front Range municipalities, though large remediation volumes may require a dedicated dumpster. Keep the debris route separate from the path occupants use, and clean any surface the bags touched.
Cleaning the tools and yourself afterward
Spores cling to everything used in the job. Disposable items — gloves, N95, cloths — go into the sealed debris bags. Reusable brushes and buckets get washed in hot, soapy water and dried fully before storage. Wash work clothes separately in hot water immediately, and shower before re-entering living areas, since spores settle in hair and on skin. Skipping this step is a common way homeowners carry contamination from a contained basement into bedrooms upstairs.
Regional moisture patterns to address
Cleaning only holds if the Colorado-specific moisture sources are corrected. Evaporative coolers raise summer humidity and feed ceiling and duct mold when neglected. Spring snowmelt and ice dams push water into attics and top-floor ceilings. Below-grade basements on expansive clay soils seep seasonally across much of the metro. Daily temperature swings drive condensation on cold surfaces. Match the cleanup to the source: a bathroom patch may need only a better exhaust fan, while basement growth may point to a grading or drainage fix. Without that step, the patch returns no matter how carefully it was scrubbed.
A realistic supply list and budget
Cleaning a small black mold patch correctly does not require expensive equipment, but it does require the right basics. A practical kit includes an N95 respirator and a few spares, long nitrile gloves, sealed goggles, disposable coveralls or dedicated work clothes, a stiff scrub brush, heavy contractor trash bags, plastic sheeting and painter’s tape for containment, and the cleaner of your choice — detergent, hydrogen peroxide, vinegar, or a registered antimicrobial. A box fan for the window and a basic dehumidifier handle the drying step. Most homeowners can assemble this for well under $75, and a pin-type moisture meter to confirm drying adds roughly $25 to $60. Compared with the cost of a repeat cleanup or spreading spores through the home, the modest outlay is worthwhile.
When cleaning is the wrong move
Some situations call for stopping and dialing a professional rather than reaching for a sponge:
- Growth larger than about 10 square feet.
- Mold inside HVAC systems or ductwork.
- Contamination from sewage or flood water.
- A musty smell with no visible source, suggesting hidden growth.
- Returning mold after a previous cleaning, indicating deep roots or an unresolved leak.
- Occupants with respiratory conditions or weakened immunity.
Certified remediators bring containment, HEPA filtration, and clearance testing that confirm the space is genuinely clean. For a small bathroom patch, a careful homeowner is fine. For a wall cavity full of Stachybotrys, the spray bottle is the wrong tool.
What to expect during a professional cleanup
When a job exceeds what a homeowner should tackle, knowing the professional process helps you judge the work. A reputable crew begins by assessing the extent and locating the moisture source, then builds containment with plastic barriers and negative air pressure so spores cannot escape the work zone. They remove contaminated porous materials, HEPA-vacuum and clean the surfaces that remain, and run air scrubbers throughout. The space is dried with commercial dehumidifiers until moisture meters confirm it is dry, and the moisture source is repaired before any rebuilding. Many projects end with independent clearance sampling that verifies the air is clean. The containment and HEPA filtration are the elements that distinguish professional work from a homeowner with a spray bottle, and they are why larger jobs belong to specialists.
References
- Mold Cleanup in Your Home — U.S. Environmental Protection Agency
- About Mold and Your Health — Centers for Disease Control and Prevention
- A Brief Guide to Mold, Moisture and Your Home — U.S. Environmental Protection Agency
- Mold and Dampness — American Lung Association
Front Range homeowners who want a professional to pinpoint the moisture behind recurring black mold can reach a vetted local inspector through our contact page before the next cleanup.