Normal Mold vs Black Mold: A Homeowner Decision Tree
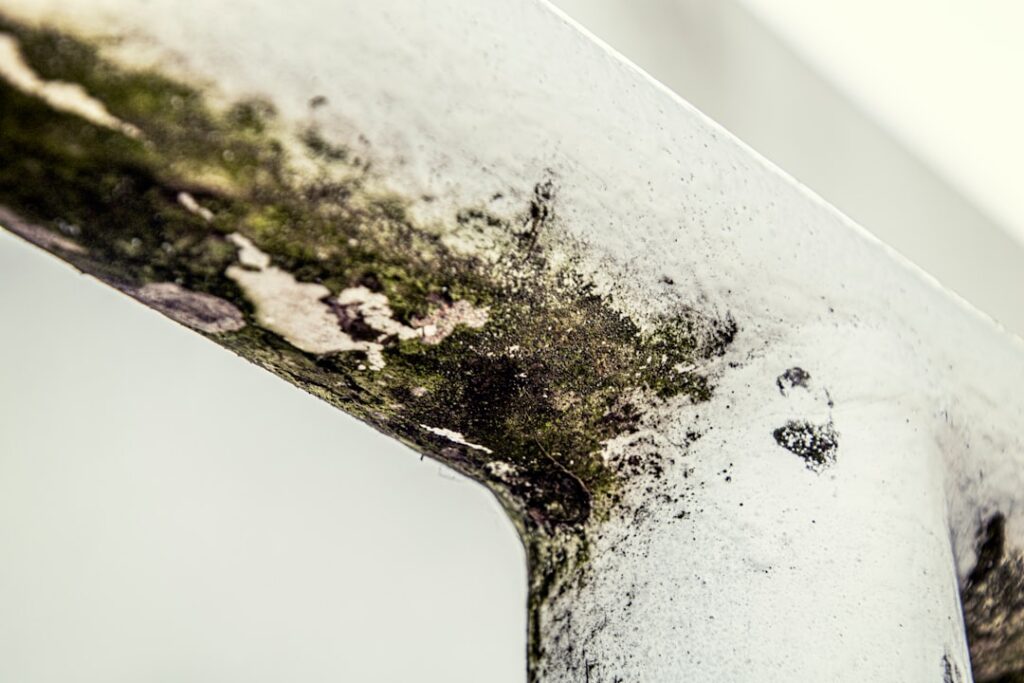
Normal mold versus black mold framed as a side-by-side comparison usually misses the decision the homeowner actually faces. The real situation is this: someone has spotted a dark patch in a closet, behind a piece of furniture, on a basement wall, or in the corner of a shower. Is it the species they have read about, or one of the dozens of common household molds? What should they do next? This guide walks through the decision tree from the moment the dark spot is noticed, with attention to which clues actually narrow the species probability and which actions follow from each branch of the tree. This guide summarizes EPA and CDC guidance current as of 2026 — consult a certified mold inspector for testing decisions and your physician for symptom evaluation.
Is this mold, asbestos, or water damage? Get a free instant screen
Upload a clear photo of the suspect area. You'll get an instant AI screening opinion and what to do next. This is screening guidance, not a professional determination.
Screening guidance only. AI can be wrong. Confirm asbestos, mold type, or lead with lab testing or a licensed professional before acting.
Normal Mold vs Black Mold: The First Five Minutes
The first five minutes of investigation determine most of what the homeowner needs to know. Without touching the colony, three observations carry most of the diagnostic weight. The substrate the colony is growing on. The moisture history of that substrate. The visible characteristics of the colony — color, texture, growth pattern. From these three observations, a substrate-and-context probability emerges that points toward either the “normal mold” branch (Cladosporium-likely, surface cleanup) or the “Stachybotrys-likely” branch (substrate-removal, possibly professional remediation).
The five-minute investigation does not require any equipment beyond a flashlight, though a moisture meter improves it considerably if one is available. The questions are answerable from the homeowner’s own knowledge of the house. When was that wall last wet? What is behind that wall (kitchen sink, bathroom plumbing, roof structure)? Does the area smell musty? Is the colony confined to a defined patch or has it spread across the surface? Each answer shifts the probability one way or the other.
Branch One: Hard Surface, Short Moisture History
The first decision node is the substrate. If the colony is growing on tile, glass, sealed metal, painted glossy surfaces, or finished hardwood — any non-porous surface — the species is almost certainly Cladosporium, Aspergillus, or a similar common indoor mold. Stachybotrys does not grow on non-porous surfaces because the species requires cellulose and sustained wetness, both absent from these substrates. The dark color of a colony on tile is not evidence of Stachybotrys; it is evidence of Cladosporium that has been allowed to mature on a humid surface.
The cleanup branch for this node is straightforward. Three percent hydrogen peroxide on the surface, scrubbed in with a stiff brush, wiped dry, area observed for return over the following weeks. The full PPE set is unnecessary at this scope — an N95 respirator, gloves, and basic eye protection cover the work safely. Most colonies in this branch are under one square foot and clean up in under fifteen minutes. The moisture-source fix is usually a bathroom fan timer, a closet airflow improvement, or a humidity-management change rather than substantial trade work.
Branch Two: Porous Surface, Short Moisture History
If the colony is on a painted drywall surface or sealed wood and the moisture history is brief (a recent leak, dried within 48 hours; a single condensation event; a transient spill), the species is still most likely Cladosporium or Penicillium with a small possibility of early Stachybotrys colonization. The cleanup branch depends on whether the substrate has been compromised. Surface staining on intact paper without lifted edges, soft spots, or back-of-panel staining responds to peroxide cleanup with the addition of a stain-blocking primer before any repaint.
The cleanup expansion at this branch includes more careful containment than the hard-surface branch — the dust from scrubbing painted drywall carries more material than the dust from tile cleanup — and a moisture-meter verification that the substrate is dry before sealing. The homeowner should also do an inspection cut or peel back a sample of the paper face to verify there is no growth on the back of the panel or in the cavity. When the cavity inspection is clean, this branch resolves with a homeowner-scale cleanup; when the cavity inspection reveals more growth, the protocol escalates to the next branch.
Branch Three: Porous Surface, Sustained Moisture History
This is the branch where Stachybotrys becomes a real possibility. If the substrate is paper-faced drywall, cardboard, ceiling tile, or other cellulose material that has been wet for more than a week — a chronic leak, a basement wall in a flood zone, a roof leak that took weeks to find — the species probability shifts substantially toward Stachybotrys, though Cladosporium and Penicillium can also colonize under these conditions. The visible colony is often only the tip of the affected area; cavity inspection usually reveals more growth than is visible on the face.
The cleanup branch at this node typically calls for professional remediation. The colony size after cavity inspection often exceeds the ten-square-foot DIY ceiling, the substrate is usually not salvageable, and the moisture history indicates a water-loss event that may have insurance implications. Homeowners who attempt this cleanup at DIY scale risk releasing substantially more spores into the home and creating a more difficult cleanup downstream. The escalation logic and the IICRC-aligned cleanup standards are described in the restoration mold removal guide.
Branch Four: HVAC System Involvement
Mold inside the HVAC system — return-air grilles, blower compartments, ductwork — is its own branch regardless of substrate or moisture history. The HVAC system circulates whatever is growing inside it through the entire house, multiplying the affected area by orders of magnitude relative to the visible growth. Visible mold on a return-air grille or inside an air handler is a signal that the HVAC system itself needs professional cleaning, often combined with source-moisture work (condensation in the system, a leak at the coil, a humidifier problem, or duct condensation in unconditioned space).
The cleanup branch for HVAC contamination is essentially always professional. DIY duct cleaning is rarely effective for true mold growth, and the dust released during DIY attempts often makes the contamination worse. A licensed HVAC contractor or remediator with appropriate certifications handles the work, typically with HEPA-vacuum cleaning, antimicrobial treatment of accessible interior surfaces, and source-moisture correction. The cost is moderate to substantial depending on the system extent and the substrate condition. Most importantly, occupants typically should not run the HVAC during active cleanup work elsewhere in the home, since cross-contamination through the duct system can undo cleanup efforts in other rooms.
Visible Characteristics: A Secondary Clue
After the substrate and moisture branches, visual characteristics provide a secondary check. Slimy texture on wet drywall, with dark olive-to-black coloration and defined patch edges, is the visual signature most consistent with Stachybotrys. Powdery or velvet texture in olive-green to dark-green coloration, often on hard surfaces or painted drywall, is most consistent with Cladosporium. Dust-like black colonies on stored items or HVAC components are most consistent with Aspergillus niger. Fuzzy or hairy growth in dark colors on damp painted surfaces is most consistent with Alternaria.
None of these visual signatures is definitive on its own. Cladosporium colonies can appear black on long-established growth; Stachybotrys colonies can appear less slimy when the colony has dried after the moisture source was interrupted; Aspergillus species span a wide visual range. The visual check confirms or complicates the substrate-and-context hypothesis rather than independently establishing the species. Lab testing remains the only reliable identification method. The broader visual identification checklist for toxic black mold covers the diagnostic features in more detail.
When to Test the Mold
Lab testing is rarely necessary for routine homeowner cleanup decisions because the protocol is driven by substrate-and-size considerations rather than species. The exceptions are real-estate transactions where defensible documentation supports either party, post-remediation clearance after professional work, health-driven cleanup where occupant symptoms persist, and high-stakes cleanup decisions where the substrate condition leaves the species genuinely uncertain.
Cost is moderate: roughly forty to a hundred dollars for a single tape-lift sample sent to a mycology lab, results in three to seven business days. Air sampling adds a sampling pump and trained technician for a few-hundred-dollar visit. The investment pays for itself when documentation matters or when the answer would actually change the homeowner’s action. For routine cleanup of small visible colonies, the testing rarely changes the protocol and the money is usually better spent on supplies or professional remediation as appropriate.
Action Criteria for Each Branch
The branches above translate into specific action criteria. Branch One — non-porous surface, short moisture history — calls for peroxide cleanup, basic PPE, observation. Branch Two — porous surface, short moisture history with cavity inspection clean — calls for peroxide cleanup, enhanced PPE, stain-blocking primer, moisture-meter verification. Branch Three — porous surface with sustained moisture history — calls for professional remediation with containment, controlled demolition, and post-remediation verification. Branch Four — HVAC involvement — calls for professional HVAC cleaning regardless of visible-growth size.
Cross-cutting all branches, the occupant health profile shifts the threshold. Sensitized occupants (immunocompromised, infants, pregnant, asthmatic) move the cleanup toward professional involvement earlier than for healthy adults. The size threshold also matters across branches — anything over ten square feet, regardless of branch, typically calls for professional remediation. The cost of professional involvement varies from a few hundred dollars for a small consulting visit to several thousand dollars for a multi-room remediation with substrate replacement.
The Moisture Source Investigation
Every branch shares one requirement: identify and fix the moisture source. The cleanup of any colony fails if the moisture source remains, regardless of which branch the cleanup follows. The diagnosis often takes longer than the cleanup itself, particularly for intermittent or seasonal moisture sources that are not present during the initial investigation.
Common sources include bathroom humidity from inadequate exhaust ventilation, kitchen humidity from cooking without a vent hood, plumbing leaks at supply or drain connections, roof leaks at flashing or penetrations, foundation leaks at grade, condensation on cool surfaces in humid weather, vapor diffusion through uninsulated walls or floors, and appliance failures at the dishwasher, washing machine, refrigerator, or water heater. A moisture meter is the homeowner’s most useful diagnostic tool; an infrared camera, where available, accelerates the investigation by revealing temperature differences correlated with moisture. Homeowners working through a stubborn moisture source benefit from a professional consultation, often through the broader mold inspection and testing hub for homeowners.
The Cost Calculation Behind the Decision Tree
Branch One cleanup costs roughly five to twenty dollars in supplies and a quarter of a Saturday. Branch Two cleanup costs twenty to fifty dollars plus the cost of a stain-blocking primer and a moisture meter rental if needed, with a half-day commitment. Branch Three cleanup as a professional remediation costs several thousand dollars depending on area, substrate, and regional market. Branch Four HVAC cleanup costs a few hundred to a few thousand dollars depending on system extent.
Insurance coverage depends heavily on the moisture cause. Sudden covered water losses — burst pipes, failed appliances, storm events — are often covered up to defined sublimits, with mold cleanup an included or capped expense. Gradual or maintenance-related causes typically are not covered. The decision tree above is built around the assumption that homeowners are paying out of pocket for cleanup; when insurance is in play, the remediator typically works with the carrier and the homeowner’s role shifts to coordination and documentation.
When to Call a Professional
The clearest triggers across the branches are size over ten square feet, HVAC involvement, suspected Stachybotrys on sustained-wet cellulose substrate, sewage or flood contamination, and sensitized household members. Any of those calls for a licensed remediator with containment barriers, negative-air machines, full-face PPE, controlled demolition, and post-remediation verification by an independent third party. The professional protocol exists because the engineering controls available to a remediator are not replicable in a homeowner setting, and the verification step matters because cleaning that looks clean is not the same as cleaning that passes a tape-lift or air sample.
For homeowners on the borderline, a professional scoping visit before any cleanup begins can resolve the question for a moderate consulting fee. The visit produces a written assessment with photographs, moisture readings, recommendations, and where appropriate sampling results that support either a DIY decision (with confirmed scope) or a professional cleanup decision (with defensible documentation for insurance and resale purposes).
References
- Mold Cleanup in Your Home — U.S. Environmental Protection Agency
- Mold and Health Information — Centers for Disease Control and Prevention
- Mold Health Effects — National Institute of Environmental Health Sciences
- American Society of Home Inspectors — ASHI
If you are on the Front Range and want a vetted inspector to walk through the decision tree for a specific colony before you commit to DIY or professional remediation, reach out through our contact page for a referral.