Local Crawl Space Mold Removal: A Clear Guide
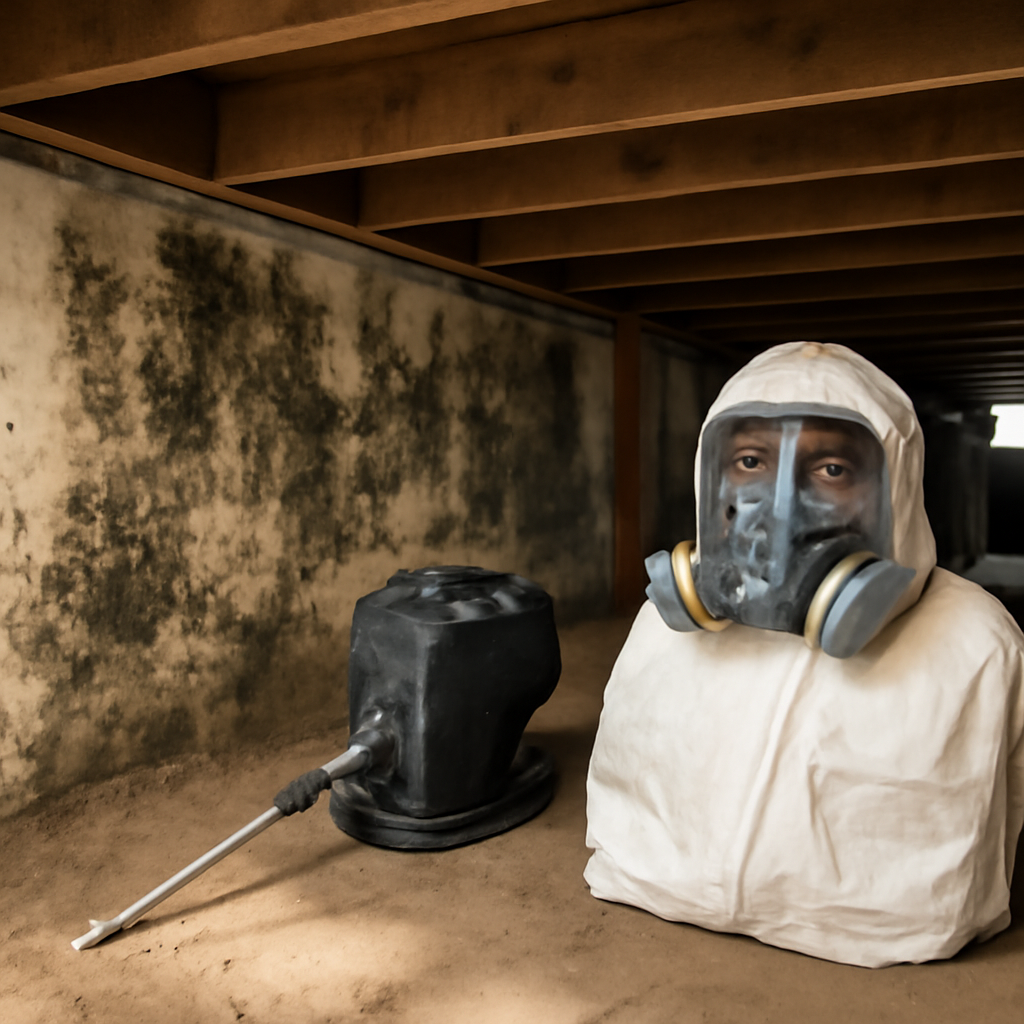
Crawl spaces are where mold problems hide longest. They are dark, often damp, rarely visited, and built directly over bare soil that breathes moisture into the wood above it. By the time a homeowner smells something musty in the rooms upstairs, growth on the floor joists below may have been spreading for months. Because the space is out of sight, the problem is usually well advanced before anyone notices, which makes crawl-space mold both common and frequently underestimated. This guide summarizes EPA and CDC guidance current as of 2026 and is informational only; consult a physician about health symptoms and a certified professional for an assessment of your specific crawl space.
Is this mold, asbestos, or water damage? Get a free instant screen
Upload a clear photo of the suspect area. You'll get an instant AI screening opinion and what to do next. This is screening guidance, not a professional determination.
Screening guidance only. AI can be wrong. Confirm asbestos, mold type, or lead with lab testing or a licensed professional before acting.
Why local crawl space mold removal is different
Removing mold from a crawl space is not the same job as wiping down a bathroom wall. Access is tight, the surfaces are structural framing rather than finished tile, and the moisture source is usually the ground itself rather than a single leak. A local contractor familiar with regional soil and humidity patterns has an advantage, because crawl-space moisture behaves differently in dry Front Range conditions than in a humid coastal climate. The work has three phases: remove the existing growth, dry the space, and stop the moisture from returning. Skip the last phase and the mold simply grows back.
The structural stakes are higher too. Persistent moisture and the fungi that thrive in it can degrade joists, subfloor, and insulation over time. Wood-decay fungi are a particular concern, because unlike surface mold they actively weaken the framing, and advanced rot can compromise the floor system above. Catching and correcting a crawl-space problem protects not just air quality but the framing that holds the floor up.
How crawl-space air reaches your living space
One reason crawl-space mold deserves urgency is the stack effect, the natural tendency of air to rise through a house. Warm air escaping upper levels pulls replacement air upward from below, and a significant share of that replacement air comes from the crawl space. Studies of residential airflow have long noted that a meaningful portion of the air people breathe upstairs originated in the crawl space beneath them. If that space is moldy and humid, its spores and musty odors travel into the living areas through gaps, penetrations, and the floor itself.
This connection explains why a crawl space far from any bedroom can still affect indoor air quality throughout the home, and why occupants sometimes report symptoms or smells with no visible source upstairs. It also raises the stakes for doing the removal correctly. Treating the crawl space is not only about protecting the framing; it is about cutting off a pathway that feeds the rest of the house. An inspector who understands the stack effect will treat a moldy crawl space as a whole-home issue rather than an isolated basement nuisance.
The access and inspection challenge
Before any removal happens, someone has to get under the house and see the extent of the problem. Crawl-space access is often a small hatch leading to a clearance of two or three feet, sometimes less. A thorough assessment maps where growth appears, checks the moisture content of the wood, evaluates the existing vapor barrier if there is one, and looks for the water sources feeding the space: bulk groundwater, plumbing leaks, poor drainage at the foundation, or humid outside air drawn in through vents.
This is why a proper inspection comes first. A contractor who quotes removal without crawling the full space is guessing at the scope. Homeowners can compare the broader process in our guide to mold in crawl space removal, which covers the same diagnostic steps in detail.
How the removal work is done
Once the scope is clear, the physical cleanup follows a predictable sequence.
Containment and removal
Crews set up containment so spores do not migrate into living areas through floor penetrations. Heavily colonized porous materials, such as old fiberglass insulation, are bagged and removed. Mold on framing is treated, scrubbed, or in some cases addressed with abrasive methods like dry-ice or soda blasting that strip growth from wood without sanding away the structure. The goal is to remove the growth, not merely paint over it.
Drying the space
After removal, the wood must come down to a safe moisture content. Contractors use commercial dehumidifiers and air movers, monitoring with moisture meters until readings drop into a normal range. Rushing this step is a common failure point; framing that still reads damp will simply recolonize. A thorough crew documents the moisture readings before and after, giving the homeowner evidence that the wood actually dried rather than just looking clean.
Protective treatments
Some contractors apply an antimicrobial or a borate-based wood treatment to the cleaned framing as an added layer of protection. These treatments can discourage future growth, but they are not a substitute for moisture control. A coating on damp wood still sits on damp wood. Used correctly, a treatment is the final touch after the growth is removed and the space is dried and moisture-controlled, not a shortcut that lets a contractor skip the harder work of fixing why the space was wet.
Vapor barriers and encapsulation
Removing mold without controlling moisture is temporary work. The two most common moisture-control measures are a vapor barrier and full encapsulation.
A vapor barrier is a sheet of polyethylene laid over the exposed soil to block ground moisture from evaporating into the crawl space. It is the minimum moisture control most experts recommend and dramatically reduces the humidity that mold needs. Seams are overlapped and the barrier is run partway up the foundation walls.
Full encapsulation goes further. A thicker reinforced liner covers the floor and walls, seams are sealed, and the crawl space is closed off from outside air. Many encapsulation projects add a dedicated dehumidifier to hold humidity at a target level year-round, and some seal the foundation vents entirely. Encapsulation costs more than a basic barrier but turns a chronically damp space into a controlled, dry zone. The right choice depends on how wet the space runs, the local water table, and budget. A local contractor who has worked the area’s soils will know which approach the conditions call for.
The debate over venting deserves a note. Older building practice favored ventilating crawl spaces to the outside, on the theory that airflow carries moisture away. In many climates that approach backfires, because humid outside air entering a cool crawl space condenses on the framing and adds moisture rather than removing it. Modern practice in many regions favors a sealed, conditioned crawl space, which is essentially what encapsulation creates. Which approach suits a given home depends on local climate and code, and it is precisely the kind of judgment a contractor with regional experience brings that a generic checklist cannot.
Drainage and the source of the water
Encapsulation and vapor barriers manage moisture that has already arrived, but lasting control often means stopping water before it reaches the crawl space at all. The most durable fixes address the exterior. Gutters and downspouts that discharge well away from the foundation keep roof runoff out. Grading that slopes ground away from the house prevents surface water from pooling against the foundation and seeping in. Where groundwater is persistent, a contractor may recommend an interior drainage system with a sump pump to collect and pump out water that still finds its way in.
A thorough crawl-space project considers all of these in sequence: stop the water at the source where possible, manage what remains with a barrier or encapsulation, and dehumidify to hold the space dry. A contractor who installs a liner without ever looking at the gutters and grading has treated the inside while ignoring the cause. The most reliable outcomes come from addressing the whole water path, not just the last few feet of it.
What to expect from a qualified contractor
A trustworthy crawl-space contractor inspects before quoting, identifies the moisture source rather than just the visible growth, and writes a scope that includes both removal and moisture control. Be cautious of any quote that addresses the mold but ignores why the space was wet. As with any mold work, watch for the conflict of interest that arises when the same company both diagnoses and profits from a large remediation; an independent assessment is worth the modest extra cost. The wider mold inspection and testing hub covers how to vet firms and read their reports.
Ask whether the contractor will install a vapor barrier or recommend encapsulation, how they will dry the framing, and whether they offer a post-work verification that moisture levels actually dropped. Get the moisture-control plan in writing alongside the removal scope.
What crawl-space mold removal costs and why it varies
Pricing for crawl-space mold work spans a wide range, and the spread reflects how different two jobs can be. A small space with light surface growth and a simple vapor barrier sits at the low end. A larger crawl space with extensive growth on the framing, wet or contaminated insulation to remove, structural drying, full encapsulation, and a dedicated dehumidifier reaches the high end. Add drainage corrections or a sump system and the figure climbs further. Because the variables are so many, any single number is meaningless without a site-specific assessment.
This variability is exactly why an independent inspection before hiring pays off. A homeowner who understands the true scope, the extent of growth, the moisture source, and the control measures genuinely needed, can compare contractor bids on equal footing rather than accepting the first alarming quote. It also guards against the conflict of interest of a firm that both diagnoses and profits from the work. Knowing the scope in advance turns a vague, high-pressure sales situation into a clear comparison of competing bids for a defined job.
When to call a professional
Crawl-space mold is one of the clearest cases for professional help rather than DIY. The confined access, structural framing, and persistent ground moisture put it well beyond a spray-bottle fix. Call a professional when growth is visible on joists or subfloor, when insulation is wet or discolored, after standing water or a plumbing leak under the house, or when musty odors reach the living space. Homeowners with respiratory conditions should avoid entering an actively moldy crawl space at all and leave the work to crews with proper protection and containment. The confined, low-oxygen environment of a crawl space adds its own hazards beyond the mold, which is another reason the work belongs to trained crews rather than a homeowner crawling in with a flashlight and a spray bottle. A qualified contractor brings the protective equipment, the drying gear, and the experience to handle the space safely.
References
- A Brief Guide to Mold, Moisture and Your Home — U.S. Environmental Protection Agency
- Mold Cleanup in Your Home — U.S. Environmental Protection Agency
- About Mold and Your Health — Centers for Disease Control and Prevention
- Standards of Practice for Mold Inspection — InterNACHI
If your home is in the Denver area or along the Front Range and you suspect mold under the floor, contact us here for a connection to a vetted local inspector who can assess the crawl space before you hire a removal crew.
Mold removal & cleanup picks
For a small, contained patch (under ~10 sq ft) these EPA-friendly removers handle surface mold. Larger or recurring growth warrants a professional assessment first.
| Product | Why | Buy |
|---|---|---|
 RMR-86 Instant Mold Stain Remover RMR-86 Instant Mold Stain Remover | Fast-acting on stains; ventilate and wear PPE. | Amazon — $25.99 |
 Concrobium Mold Control Concrobium Mold Control | No-bleach formula that also helps prevent regrowth. | Amazon — $13.48 |
 Mold Armor Mold & Mildew Remover Mold Armor Mold & Mildew Remover | Widely stocked bathroom/surface remover. | Amazon — $22.98 |