How to Get Rud of Mold: A Plain-Language Guide
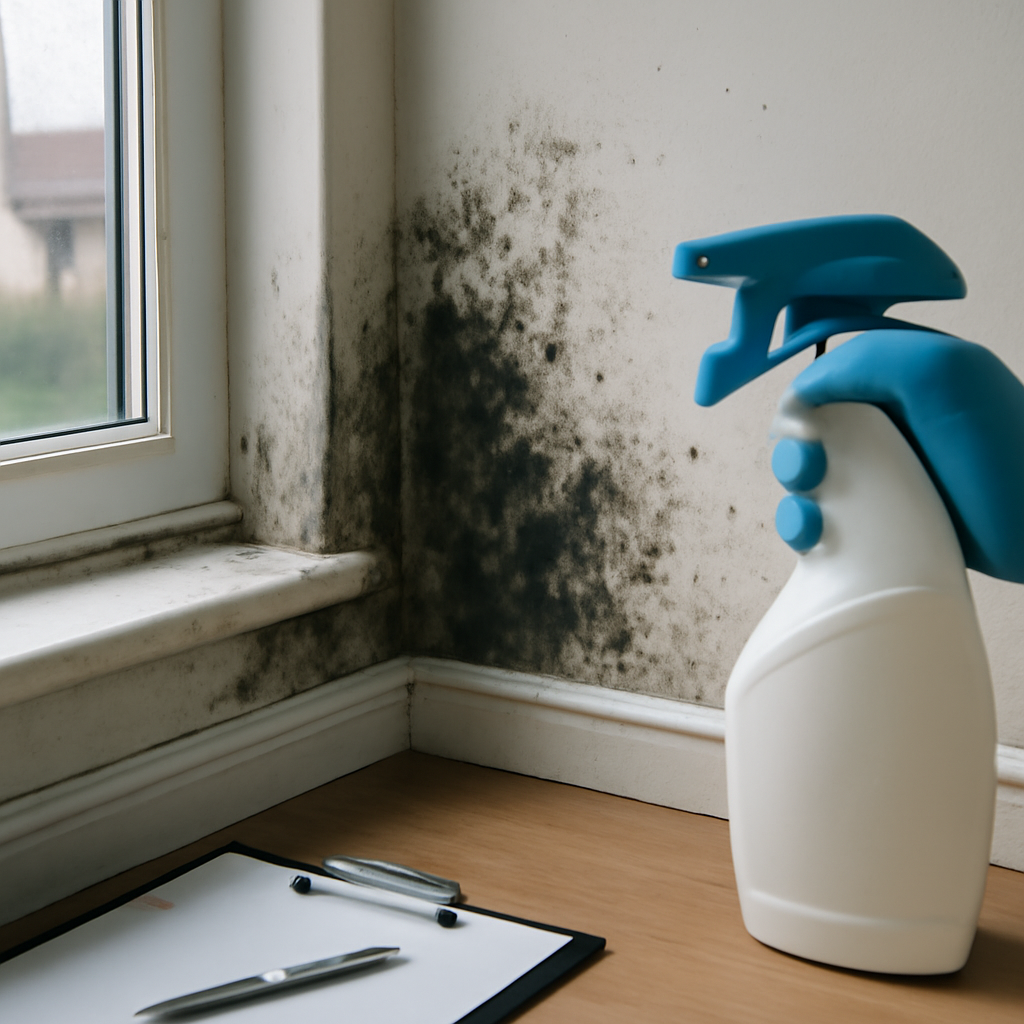
Search-spelling variations on getting rid of mold all point to the same homeowner question — what is the right way to remove a visible mold colony without making things worse? Whether the query was typed as “rud” or “rid,” the protocol is identical: identify the source, contain the work zone, suit up with proper PPE, remove the colony with the right product for the surface, and verify the cleanup held. This guide summarizes EPA and CDC guidance current as of 2026 — consult a certified mold inspector for testing decisions and your physician for symptom evaluation. The next sections walk through the standard removal workflow homeowners can run safely.
Is this mold, asbestos, or water damage? Get a free instant screen
Upload a clear photo of the suspect area. You'll get an instant AI screening opinion and what to do next. This is screening guidance, not a professional determination.
Screening guidance only. AI can be wrong. Confirm asbestos, mold type, or lead with lab testing or a licensed professional before acting.
Confirm the Job Fits DIY Range
EPA guidance draws a clear line at roughly 10 square feet of contiguous mold growth on a non-porous surface, with a known and corrected moisture source, and no occupants with respiratory or immune sensitivities. Below that threshold, careful DIY work with proper PPE produces results essentially equivalent to professional remediation. Above it, professional involvement is the better path.
Several conditions push the work out of DIY range regardless of square footage. Visible mold on or near HVAC components. Any sewage or category-three water source. Visible growth on framing, soft drywall, or warped subfloor. A household member with asthma, immunocompromise, or pregnancy. A prior cleanup that already failed and the colony has returned to the same spot.
Fix the Moisture Source First
Cleaning mold without fixing the moisture is a wasted afternoon. Both EPA and CDC emphasize that mold cannot grow without sustained moisture, and any cleanup that does not address the leak, condensation, grading, or humidity will fail within a season.
Common Front Range moisture drivers: bathroom exhaust fans that vent into the attic rather than outside, slow drips at hose-bibb supply lines that surface in basement walls, ice dams pushing meltwater into soffit details, sprinkler heads aimed at the foundation, washing machine supply hoses weeping at connections, and condensation behind vinyl wallpaper in poorly ventilated rooms.
A pinless moisture meter pressed against the affected substrate gives the objective answer on whether moisture is still active. Aim for wood readings under 15 percent and drywall readings under 1 percent on the relative pinless scale. Higher readings mean the source is still feeding the colony and cleanup is premature.
Suit Up Outside the Affected Room
PPE goes on before entering the work zone. N95 respirator minimum — surgical masks do not filter at the size where mold spores live. Nitrile gloves, sealed eye protection, disposable coveralls for jobs larger than a small wipe-down. Shoe covers if the worker will walk through clean parts of the house after.
The respirator goes on outside the room. Walking across the affected area to set up containment without protection means inhaling spores during the setup phase, which defeats the entire purpose of the PPE.
Contain the Work Zone
Close the door and stuff a towel under the gap. Tape plastic sheeting over HVAC supply and return registers in the affected room. This single step prevents the most common cross-contamination pattern in DIY mold work — the air handler pulling spores from one room and distributing them through every register in the house.
Open a window inside the work zone for fresh air if available. Keep doors to other parts of the house closed throughout the project. Limited containment with sealed doorway and HVAC isolation works for small DIY jobs.
The Removal Workflow
Step One: HEPA Vacuum Before Wet Work
A HEPA-filtered vacuum captures loose surface material and settled spores before any scrubbing aerosolizes more. A shop vacuum without true HEPA filtration ejects spores from the exhaust port back into the room and converts the cleanup into a spore distribution event. Rent a HEPA vacuum from a tool yard if you do not own one.
Step Two: Mist, Then Wipe
Lightly spray the affected surface with water before any cloth contact. Wait two to three minutes for the mist to settle. Wipe with a microfiber cloth folded into quarters and rotated through fresh sections. Misting first prevents dry-scrubbing spore dispersion.
Step Three: Apply Antimicrobial
EPA-registered antimicrobial spray per the label dwell time. Three percent hydrogen peroxide from the pharmacy is the homeowner-friendly alternative. Bleach diluted at one cup per gallon of water works on tile and glazed surfaces but not on drywall, wood, or porous substrates. Reviewing the mold inspection and testing hub covers product-substrate pairings.
Step Four: Wipe Residue and HEPA Vacuum Again
After the antimicrobial dwell, wipe the residue with a fresh microfiber cloth. Then HEPA vacuum the surrounding area to capture spores that settled during the wet work.
Step Five: Bag Debris
Used cloths, brushes, and disposable items go into a heavy contractor bag inside the work zone. Seal the bag, double-bag at the doorway, take directly to outdoor disposal.
What to Do With Porous Materials
Drywall with hyphae visible on the back paper, insulation through the matrix, ceiling tile with staining throughout the thickness — all are removal jobs rather than cleaning jobs. EPA guidance points to porous-material removal when affected areas exceed about 10 square feet, and even smaller patches on heavily affected materials usually come out cleaner with replacement.
The mechanics of porous-material removal: cut a clean rectangular section with a utility knife, removing the affected area plus a 12-inch buffer around visible growth. Bag the removed pieces inside the containment. HEPA vacuum the cavity, verify moisture readings on framing inside are at dry baseline, and only then close the new material into place.
What to Have on Hand Before Starting
A practical Front Range homeowner kit for small mold work costs under fifty dollars. An EPA-registered antimicrobial spray covers most non-porous work. A bottle of three percent hydrogen peroxide handles tile grout and bathroom surfaces. A box of NIOSH-rated N95 respirators. A dozen microfiber cloths, a stiff nylon brush, a spray bottle for water misting, and a pinless moisture meter under $40 at most hardware stores round out the kit.
The fogger devices marketed on social media for mold killing fall outside the CDC’s endorsed methods. They produce visual reassurance — visible mist that looks like the room has been treated — without meaningful biological effect on substrate-embedded colonies. Skip them and use the antimicrobial spray-and-wipe approach instead.
Front Range Conditions That Drive Mold
Colorado’s semi-arid climate creates a false sense that mold cannot establish here. Outdoor humidity stays low for most of the year, but indoor microclimates tell a different story. Basement humidity behind a vapor barrier, bathrooms without working exhaust fans, kitchens venting into attics rather than outside, ice-dam meltwater intruding through soffit details, and washing machines tucked into unventilated closets all generate localized moisture mold needs.
Seasonal patterns matter. Spring snowmelt drives basement seepage along the foothills. Late-summer afternoon thunderstorms push wind-driven rain past aging window flashing. Winter humidifier use combined with poorly insulated exterior walls produces condensation that homeowners often mistake for paint failure. Each triggers the same cleaning question but the underlying fix differs in every case.
Verifying the Cleanup Held
A finished cleanup shows three signs at 48 hours. The surface looks visually clean under bright direct light. The moisture meter reads dry baseline on the substrate. The musty odor is gone and stays gone for at least two weeks. Failing any of those three means the cleaning was incomplete or the moisture source was not fully corrected.
Recheck at 30 days and again at 90 days. Some hidden moisture issues only resurface seasonally — basement walls that wet up only during spring snowmelt, bathroom ceilings that grow only in winter when windows stay closed. A spot that passes 48 hours but fails 90 days usually points to a seasonal driver that needs further investigation. The homeowner decision tree walks through what to investigate.
For larger projects, a third-party clearance assessment is the formal verification. Visual inspection, tape-lift surface samples, and airborne spore counts compared to outdoor baseline. The independent assessor is not the contractor who did the work. Cost is $300 to $600 in Front Range pricing.
Common Mistakes Homeowners Make
Reaching for bleach on drywall as the first instinct — the chlorine cannot penetrate the porous substrate and the water content can actually feed continued growth. Dry scrubbing without misting first, which aerosolizes spores. Closing the work-zone door but leaving HVAC registers open, so the air handler distributes spores. Using a household sponge that absorbs the colony and redistributes it across the next surface it touches. Skipping the respirator because the patch looks small.
The subtler mistake is treating the first cleanup as final. Even with perfect technique, a small patch on a previously damp substrate sometimes needs a second pass once the substrate fully dries and any residual subsurface growth reactivates. Plan a recheck at two-week and two-month intervals, and treat the second-look moment as a planned step rather than evidence of failure.
When to Call a Professional
Professional involvement is the right answer at the 10-square-foot threshold, when HVAC is involved, when the source is sewage or contaminated water, when structural framing is affected, when an occupant has compromised respiratory or immune health, and when a prior cleanup has failed. Any one alone is enough to escalate.
A professional brings containment with negative-pressure HEPA exhaust, the right antimicrobials for each substrate, and a clearance protocol that confirms the work succeeded. Front Range pricing for a small contained job typically runs $500 to $1,500. A mid-scope project with framing involvement runs $2,000 to $8,000. Larger projects with structural drying and finish replacement run higher depending on the rooms involved.
For homeowners less certain about scope, a separate inspection by an independent assessor — not the contractor — produces the moisture map and substrate inventory that drives the decision. A few hundred dollars on an assessment up front consistently saves multiples on a misdirected cleanup. The report doubles as bid baseline and insurance documentation.
Disposal of Cleanup Materials
Used cloths, brushes, and disposable items go into a sealed plastic bag for outdoor disposal, not the indoor wastebasket. A standard household kitchen trash bag that sits in the can overnight becomes a slow release point for spores back into the room. Double-bag in heavy contractor bags and take the bag directly outside at the end of the job.
The HEPA vacuum filter gets changed outdoors when the job ends. Disposable filters go directly into outdoor trash. The vacuum itself gets a wipe-down with antimicrobial on the outside before storage. Tools that left the work zone without decontamination carry residual spores for months.
References
- EPA Mold Cleanup in Your Home — U.S. Environmental Protection Agency
- CDC Cleanup and Remediation — Centers for Disease Control and Prevention
- OSHA Mold Standards — Occupational Safety and Health Administration
- Mold and Dampness Indoor Air — American Lung Association
Front Range homeowners who want a second opinion before tackling a mold cleanup themselves can connect with a vetted local inspector through our contact page.