How Do I Test for Black Mold: A Plain-Language Guide
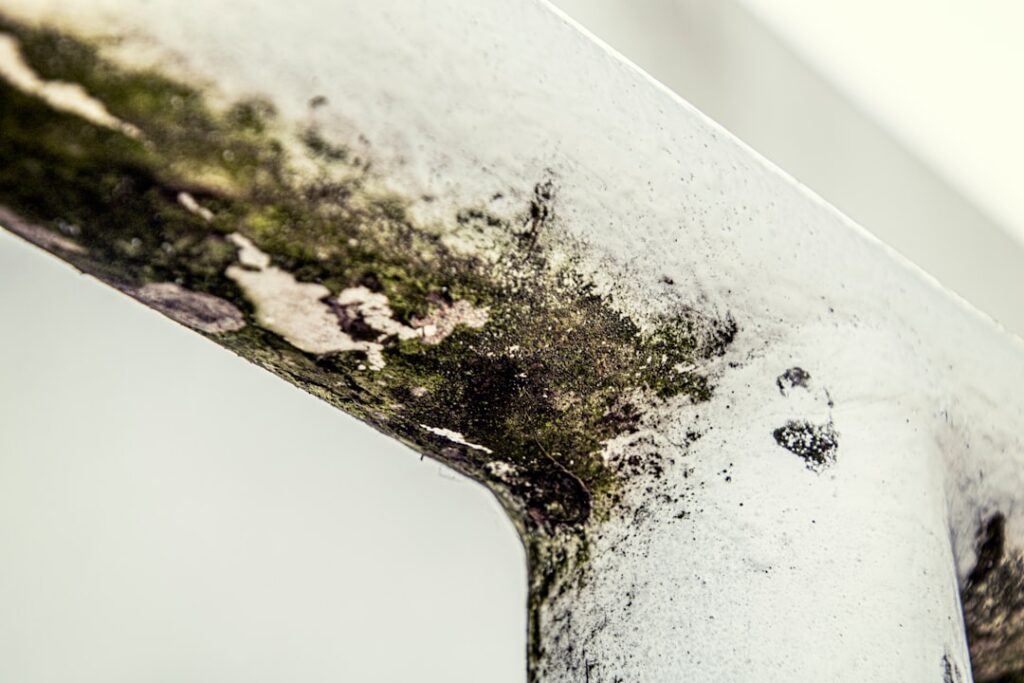
How do I test for black mold is one of the most common search questions in residential mold testing, and the answer requires unpacking a small but important confusion. “Black mold” in popular usage usually refers to Stachybotrys chartarum — a specific water-damage species that appears dark green to nearly black and grows almost exclusively on chronically wet cellulose materials. But several other genera also appear dark, including some Cladosporium species, Aspergillus niger, and various Alternaria species. Reliable testing therefore means lab-confirmed species identification, not just visual judgment. This guide covers first-person testing methodology for Stachybotrys specifically. This guide summarizes EPA and CDC guidance current as of 2026 — consult a certified mold inspector for testing decisions and your physician for symptom evaluation.
Is this mold, asbestos, or water damage? Get a free instant screen
Upload a clear photo of the suspect area. You'll get an instant AI screening opinion and what to do next. This is screening guidance, not a professional determination.
Screening guidance only. AI can be wrong. Confirm asbestos, mold type, or lead with lab testing or a licensed professional before acting.
How do I test for black mold: the species-specific framework
Three testing methods reliably identify Stachybotrys. Surface swabs and tape lifts capture material from visible dark growth for microscopic identification. Air-cassette spore traps detect airborne Stachybotrys spores. Bulk samples of wet drywall, insulation, or framing material — sent to the lab as physical samples — provide the most definitive identification.
All three methods require lab analysis. Consumer “field” kits that claim to identify black mold visually or with simple chemistry tests are not reliable for species identification. The microscopic features that distinguish Stachybotrys from other dark molds require trained mycology lab work. For the broader landscape of mold testing, see our mold inspection hub guide.
Why visual identification of black mold fails
Dark color alone does not identify a mold genus. Stachybotrys typically appears as slimy, dark green to black patches on wet drywall paper. But Cladosporium can also appear dark on damp surfaces. Aspergillus niger forms dark colonies that can look very similar to Stachybotrys at first glance. Alternaria produces dark, velvety growth that some homeowners assume is black mold.
The species distinction matters because Stachybotrys is one of the water-damage indicator genera that require sustained moisture for several weeks to colonize. A confirmed Stachybotrys finding signals a serious moisture intrusion that has been active long enough to support this slow-growing species. Confusion with Cladosporium or Alternaria — both of which can appear within days of any damp condition — could lead a homeowner to overestimate or underestimate the severity of the underlying moisture problem.
Step one: identify suspect growth visually
Before sampling, walk through the home with a flashlight and document any dark growth. Stachybotrys most commonly appears on the back of drywall paper, on cellulose ceiling tiles, on cardboard boxes stored in damp basements, and on wood subfloor exposed to chronic leaks. The growth is usually patchy rather than uniform, slimy rather than fuzzy, and almost always associated with visible water staining or warping nearby.
Take photos of each suspect patch with a measurement reference (a coin or ruler in frame) so the lab and any follow-up inspector can assess size and substrate. Note the substrate type — drywall, wood, insulation, fabric — since some testing methods work better on specific substrates.
Step two: take a surface or bulk sample
For lab-confirmed Stachybotrys identification, the homeowner has three sampling options. Tape lifts work best on hard, smooth surfaces like painted drywall or finished wood. The clear tape is pressed against the growth, peeled up smoothly, and adhered to a slide holder. Surface swabs work on textured or porous surfaces where tape cannot make full contact. Bulk samples — physically removing a piece of the affected material — work when cleanup is planned anyway and the material will be discarded.
Most consumer kits cost $25 to $50 with lab analysis included. Some kits ship as “black mold test kits” specifically, but the underlying lab method is the same surface or air sampling used for any mold identification. The lab is the same; only the marketing differs. For substrate-specific guidance, see our piece on mold sample testing methods.
Step three: pair with an airborne sample if appropriate
Surface samples confirm what is present on a visible patch but say nothing about airborne load. If the question is whether Stachybotrys spores are dispersing into the indoor air the homeowner breathes, a paired indoor-outdoor air cassette sample provides that data. Stachybotrys detection in indoor air, when none appears outdoors, is a strong signal of indoor contamination because Stachybotrys spores rarely become airborne under normal outdoor conditions.
Air sampling for Stachybotrys has one specific limit. The spores are heavier and stickier than many other airborne mold spores, so they tend to remain on the substrate rather than dispersing freely. A confirmed surface presence does not always produce a high airborne count, especially if the growth is sealed under paint or covered by debris. Negative air results do not rule out an indoor Stachybotrys source.
Step four: interpret the lab report
The lab report identifies genera detected in the sample. Three outcomes are common. First, Stachybotrys is identified as the dominant or sole genus — strong positive for what the homeowner suspected. Second, Stachybotrys is absent but another dark mold (Cladosporium, Aspergillus niger, Alternaria) is identified — the dark patch is mold but not Stachybotrys. Third, mixed identification with multiple genera — the patch contains both Stachybotrys and other species, common when multiple contamination sources have overlapped.
Any Stachybotrys detection on a surface or in indoor air warrants follow-up, regardless of relative abundance. Stachybotrys grows only on chronically wet cellulose, so its presence inherently signals an ongoing moisture problem.
What confirmed black mold means for next steps
A confirmed Stachybotrys finding signals three things. First, there is or has been chronic moisture intrusion at the affected location — the species requires sustained wet conditions to colonize. Second, the affected material (drywall, insulation, wood) likely needs removal rather than cleaning, because Stachybotrys penetrates porous substrates deeply. Third, the underlying moisture source must be identified and corrected before any cleanup, or the growth will return within months.
EPA guidance recommends professional remediation for any mold contamination over 10 square feet, and the recommendation is especially relevant for confirmed Stachybotrys. The slimy spores are easily disturbed during DIY cleanup, releasing high concentrations into indoor air precisely when the homeowner is most exposed.
When to skip DIY testing entirely
If the visible dark growth covers more than 10 square feet, if it appears on multiple surfaces or in multiple rooms, if the home has known persistent water damage, or if occupants report serious respiratory symptoms, skip DIY testing and go straight to a certified professional. Professional assessment includes calibrated air sampling, thermal imaging to locate moisture sources, and chain-of-custody documentation for any insurance or legal needs.
When the test is wrong: false positives and false negatives
Consumer settle-plate kits return false positives at meaningful rates because ambient outdoor air seeded with normal background Cladosporium and Penicillium grows colonies on any agar plate left open in a normally ventilated home. A returned plate showing “elevated growth” frequently reflects outdoor air infiltration rather than an indoor source. False negatives also occur — surface-only sampling misses hidden cavity mold, dead colonies behind sealed paint return clean swab results, and air cassettes taken during dry weather can underestimate average exposure in homes with seasonal moisture cycles.
The strongest defense against either failure mode is methodological. Pair an indoor sample with an outdoor control taken simultaneously. Combine air sampling with moisture-meter scanning so the airborne data is interpreted against a moisture map. Sample more than once for symptoms-driven concerns rather than relying on a single snapshot. And distrust any kit format that returns a binary “mold present” or “no mold” verdict without quantification, since that level of summarization throws away the comparative data that makes results interpretable in the first place.
Cost versus confidence: choosing a testing tier
Testing budgets break into three rough tiers, each answering a different question. Tier one runs $10 to $40 for settle plates or basic surface swabs and answers “is there visible activity in this specific spot.” This tier is appropriate for low-stakes confirmation of a patch the homeowner has already decided to clean. Tier two runs $80 to $250 for paired air cassettes processed by a participating lab and answers “is the airborne load elevated relative to outdoors.” This tier supports symptom investigation, pre-purchase due diligence, and post-cleanup verification for minor work.
Tier three runs $300 to $700 for ERMI dust analysis or Andersen impactor sampling through an independent industrial hygienist and answers species-level questions about long-term exposure, including identification of dormant or sealed-off colonies. The upgrade decision usually correlates with stakes: an owner-occupant cleaning a bathroom corner sits comfortably in tier one, while a homeowner pursuing an insurance claim or evaluating a property with persistent symptoms benefits from tier three. Spending more than the next tier requires rarely improves the decision-quality.
Sampling missteps that quietly skew mold results
The most common reason a home test returns confusing numbers is the moment of collection rather than the lab work that follows. Disturbing a surface — wiping it, vacuuming nearby, even fanning air across it — lofts settled spores and produces an artificially high air count. Sampling during active renovation is similarly compromised because demolition dust carries embedded mycelium fragments that lab counts cannot separate from active growth. Skipping the outdoor control cassette is another silent failure mode; without that paired reading, the indoor number is just a value with no comparator. Homeowners who collect on a windy day with windows cracked end up with indoor readings that essentially mirror outdoor air, washing out any signal from a true indoor source.
The fix is procedural rather than expensive. Close the home for at least two hours before air sampling, leave HVAC running on circulation but not heat or cool, refrain from cleaning or walking around the sample point, and run the outdoor cassette simultaneously about ten feet from the house exterior on the leeward side. Documented technique matters as much as the kit brand printed on the box.
Re-testing after remediation: timing and method
A common mistake after professional remediation is testing the same day containment comes down. Even successfully cleaned spaces hold elevated settled-dust loads that re-aerosolize as occupants resume normal traffic. The defensible clearance protocol waits at least four weeks after the final HEPA pass, with the space occupied normally during that interval so settled material has time to redistribute and either persist or dissipate. Clearance testing typically combines an airborne spore-trap cassette with a dust-wipe sample taken from a horizontal surface at chair height. Pairing the two methods catches both currently airborne contamination and recent settling that air sampling alone might miss.
Independent verification matters here — the remediation contractor should not perform their own clearance test, since the structural conflict of interest is obvious. Many homeowner insurance policies and litigation-track inspections require an independent industrial hygienist signature on the clearance report. Budget about $300 to $500 for an independent clearance package; the document becomes part of the home’s permanent maintenance record and matters if the house is sold within five years.
References
- CDC — Stachybotrys chartarum Information — Centers for Disease Control and Prevention
- EPA — Mold Cleanup in Your Home — U.S. Environmental Protection Agency
- InterNACHI — Mold Inspection Standards — International Association of Certified Home Inspectors
- NIEHS — Mold Research — National Institute of Environmental Health Sciences
Front Range homeowners who have confirmed Stachybotrys and want professional remediation support can connect with a vetted local inspector through our contact page before starting cleanup.