Detect Mold: 2026 Plain-Language Owner Methods Guide
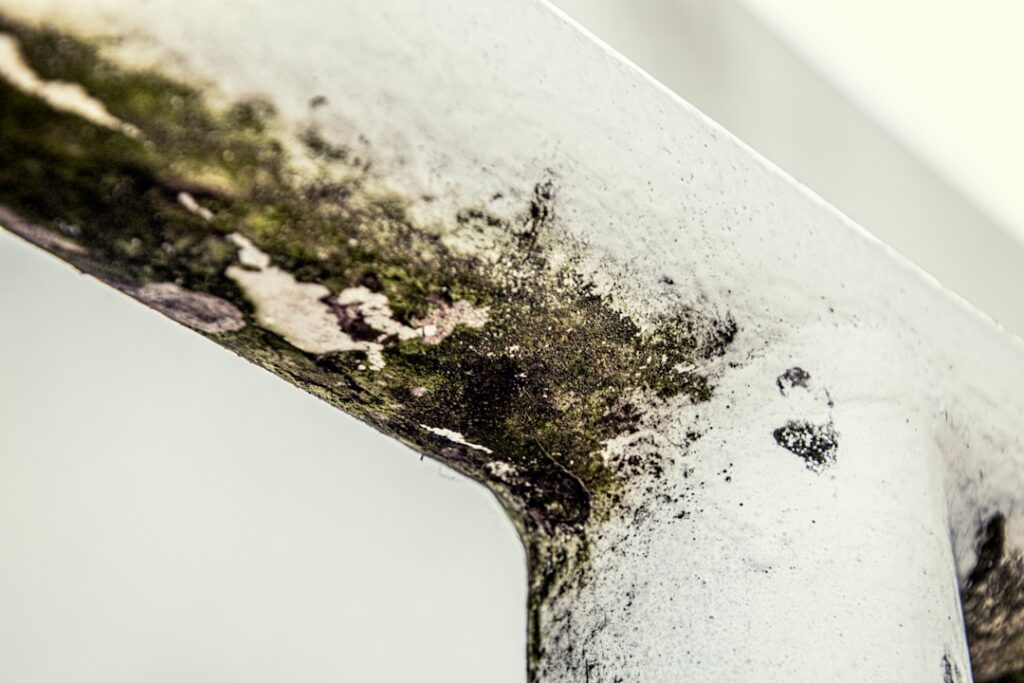
To detect mold reliably, no single method is sufficient. The job calls for a layered approach combining what your senses observe, what your meter measures, what kit samples confirm, and what professional sampling documents. Each method answers a different question and has a different cost-accuracy tradeoff. This guide summarizes EPA and CDC guidance current as of 2026 — consult a certified mold inspector for testing decisions and your physician for symptom evaluation. The walkthrough below presents a complete catalog of detection methods, with cost, accuracy, and best-use-case notes for each.
Is this mold, asbestos, or water damage? Get a free instant screen
Upload a clear photo of the suspect area. You'll get an instant AI screening opinion and what to do next. This is screening guidance, not a professional determination.
Screening guidance only. AI can be wrong. Confirm asbestos, mold type, or lead with lab testing or a licensed professional before acting.
The Five Method Families for Detect Mold Work
Mold detection methods fall into five distinct families, each with a different scope and cost.
- Visual inspection — eyes plus flashlight, low cost, surface-level accuracy.
- Sensory detection — smell and hand-feel for damp surfaces, low cost, suggestive accuracy.
- Moisture measurement — pin or pinless meter, low cost, high accuracy for moisture proxy.
- DIY sampling — settle plates, tape-lift, volumetric air kits, moderate cost, moderate accuracy.
- Professional sampling — calibrated pumps, surface samples, lab analysis, higher cost, defensible accuracy.
Effective detection combines methods. Visual plus moisture catches most surface mold. Visual plus moisture plus DIY tape-lift handles species ID. Professional sampling layers on for defensible documentation or hidden contamination.
Visual Inspection: The First Method
Walk every room with a strong flashlight. Look for staining, bubbled paint, warped trim, dark speckling that does not wipe away, and texture changes on ceilings and walls. Use raking light — beam parallel to the wall — to reveal surface deformations the eye misses under flat overhead light. Visual inspection alone catches the majority of household mold cases when paired with attention to high-yield zones: under sinks, behind toilets, around dishwashers, at window sills, basement walls below grade, attic sheathing, and ceilings under bathrooms. Cost: free, beyond the flashlight you already own. Accuracy: high for surface growth, blind to hidden cavity growth. The EPA mold cleanup guide recommends visual inspection as the starting point for any homeowner-level assessment.
Smell and Hand-Feel
Close-up rooms with the door shut for two minutes amplify musty smell from any active growth in that space. Stand in the center, breathe through your nose, and note any persistent musty or earthy odor. The microbial volatile organic compounds responsible for that smell vent from active colonies through drywall, paint, and even tile grout, so smell often reveals hidden growth that visual inspection misses. Hand-feel adds a second sensory channel: press the back of your hand against drywall around plumbing penetrations. Cool, slightly damp surfaces in warm rooms indicate moisture migrating through paint — typically from a leak behind the panel.
Moisture Meter Mapping
A $25–$120 moisture meter is the single highest-leverage tool for detect mold work. Pin meters drive two metal probes into the surface and read electrical resistance; pinless meters use capacitance sensors and leave no marks. Either works. Walk the basement, the bottom 24 inches of every exterior wall, every wet room, and the underside of any second-floor bathroom. Mark readings above 17 percent in drywall or 19 percent in framing with painter’s tape. Return after a weather change to distinguish persistent leaks from transient humidity. Moisture meter mapping catches roughly 80 percent of hidden mold conditions before visible staining develops, because mold needs sustained moisture to grow.
DIY Sampling Methods
Three DIY sampling families address different questions.
Settle Plates
Petri dishes exposed to indoor air for one hour, incubated five to seven days. Confirm that spores are circulating; do not quantify concentration. Cost: $10–$30 plus optional $25 lab analysis.
Tape-Lift Surface Samples
Clear adhesive strips pressed against suspected surface growth, mailed to a lab for species identification under microscopy. Confirm what is on a specific surface. Cost: $15–$40 plus $25–$75 per lab analysis.
Volumetric Air Sampling Kits
Small pumps and spore-trap cassettes that approximate professional air-sample data. Quantify concentration per cubic meter of indoor air. Use with outdoor control. Cost: $40–$100 plus $50–$75 per cassette lab analysis. The CDC mold basics page notes that no federal numerical standard exists for residential air spore counts, so comparative analysis carries interpretive weight.
Professional Detection Methods
Credentialed inspectors bring calibrated equipment that defines the accuracy ceiling for residential mold detection. The standard kit includes a calibrated BioPump or equivalent air-sampling pump (15 L/min through Air-O-Cell or Allergenco-D cassettes), Air-O-Cell or Allergenco-D cassettes, surface tape-lift slides and bulk-sample bags, pin and pinless moisture meters, a thermal-imaging camera for hidden moisture detection, a borescope for cavity inspection, hygrometers for ambient humidity, and PPE for crawlspace and attic access. Combined with AIHA-accredited lab analysis, professional sampling produces reports defensible for insurance claims, real-estate disclosure, and post-remediation verification. Cost: $400–$700 for a standard two-air-sample inspection with outdoor control in Front Range markets.
Thermal Imaging and Borescope Methods
Two non-destructive techniques find hidden mold without major demolition. Thermal-imaging cameras detect temperature anomalies that correlate with moisture infiltration — wet drywall reads cooler than dry drywall under normal indoor conditions because evaporative cooling lowers surface temperature. Borescope inspection through a small drilled hole reveals what is happening inside a wall cavity. Both methods extend professional detection capability significantly. Some homeowners now own consumer-grade thermal imagers ($300–$600) that function for basic moisture mapping. Our moisture meter physics overview explains how moisture mapping complements thermal scanning.
Combining Methods: A Practical Order
A reasonable detection workflow runs five steps. First, visual inspection of every room — about 60 minutes for a 2,000 square foot home. Second, smell-walk closed-up rooms — about 15 minutes. Third, moisture meter mapping of high-risk zones — about 30 minutes. Fourth, DIY tape-lift sampling of any suspect surface growth for species ID — five minutes per sample. Fifth, escalate to professional sampling if findings exceed about 10 square feet of growth, HVAC contamination is suspected, occupant symptoms track with home occupancy, or insurance/real-estate documentation is needed. The mold testing hub covers how these steps fit into a full assessment.
Detection Method Accuracy at a Glance
| Method | Cost | Surface mold | Hidden mold | Species ID | Defensibility |
|---|---|---|---|---|---|
| Visual inspection | Free | High | Low | None | Low |
| Smell + hand-feel | Free | Moderate | Moderate | None | Low |
| Moisture meter | $25–$120 | Moderate | High | None | Low |
| DIY settle plate | $10–$55 | Low | Low | Genus | Low |
| DIY tape-lift | $40–$115 | High | Low | Genus | Moderate |
| DIY volumetric air | $140–$220 | Moderate | Moderate | Genus | Moderate |
| Professional sampling | $400–$700 | High | High | Genus + species | High |
When Detection Becomes Action
Detection findings shape next steps in predictable patterns. Surface growth under 10 square feet on hard non-porous materials usually qualifies for owner cleanup with detergent and water following EPA guidance. Growth on porous materials (drywall, ceiling tile, carpet, insulation) generally requires material replacement plus source-moisture correction. Growth above 10 square feet, HVAC contamination, or any visible suspected Stachybotrys typically requires IICRC S520 professional remediation with containment and HEPA filtration. The InterNACHI mold inspection standard documents these thresholds in detail.
Detection Methodology by Home Age
Different home eras have different high-yield detection priorities. Pre-1970 homes typically lack vapor barriers and exterior foundation waterproofing; prioritize basement and crawlspace inspection with thermal imaging if available. 1970–1990 homes often have hidden moisture issues at exterior wall framing where vapor barriers were partially installed; prioritize moisture-meter mapping of the bottom 24 inches of exterior walls. 1990–2010 homes generally have better envelopes but may have HVAC issues with returns routed through unconditioned space; prioritize HVAC plenum and supply-boot inspection. Post-2010 homes built tighter with mechanical ventilation can have humidity-trap problems if the ventilation system is misconfigured; prioritize humidity readings and mechanical-ventilation balance verification.
Common Substances Mistaken for Mold
Several non-mold substances mimic mold visually and cause false detection alarms. Knowing what is not mold saves effort.
- Efflorescence — white powdery mineral deposits on concrete or masonry. Wipes away with dry cloth; mold does not.
- Soot — dark sharp-edged deposits from candles or fireplaces, often patterning near baseboards or outlets.
- Mineral water-stain deposits — brown rings on ceilings from old leaks, lacking colony texture.
- Soap scum — pink or gray buildup in showers, responds to bathroom cleaner.
- Dust accumulation — gray or black settled dust, wipes away easily.
- Cobweb residue — light gray strands often clustered in corners and ceiling-wall intersections.
- Tannin staining — brown bleed-through from wood structural members through paint.
When visual identification is ambiguous, a $30 tape-lift sample sent to an AIHA-accredited lab resolves the question quickly. Spending $30 on testing beats spending $300 on unnecessary remediation.
Detection Workflow Time Budget
A realistic Saturday detection workflow runs three hours start to finish for a 2,000 square foot home. Hour one covers visual inspection of every room. Hour two covers smell-walk plus moisture-meter mapping. Hour three investigates any findings. Add 30 minutes per area where you go deep — pulling out the refrigerator, checking bathroom exhaust ducts, opening under-sink cabinets. If findings warrant DIY tape-lift sampling, plan a 30-minute second pass to collect samples and prepare for mailing. Lab results return in three to five business days.
Hidden Mold and Targeted Investigation
When indirect cues suggest hidden mold (musty smell without visible source, sustained elevated moisture readings, symptoms tracking with home occupancy), targeted investigation methods extend detection into wall cavities. Thermal imaging — using consumer-grade thermal cameras ($300–$600) or rental-grade FLIR units — detects temperature anomalies correlating with moisture infiltration. Borescope inspection through a small drilled hole reveals what is happening inside a wall cavity without major demolition. Both techniques extend owner-level detection capability significantly when used carefully. Our moisture meter physics overview explains how thermal-imaging findings complement moisture mapping.
Front Range Seasonal Detection Priorities
The Front Range climate creates distinct seasonal patterns that affect detection priorities. Spring snowmelt (April through May) drives basement seepage along foundation walls and around window wells — prioritize basement and crawlspace inspection during this window. Summer monsoon season (July through August) produces roof leaks through failed flashing and ice-dam-damaged shingles plus HVAC condensation problems — prioritize attic, ceiling, and HVAC plenum inspection. Fall (September through November) is the low-incidence season with stable indoor humidity, ideal for routine checks without the urgency of active moisture events. Winter freeze-thaw cycles drive condensation on poorly insulated exterior walls plus ice damming that drives water back under shingles — prioritize attic, window, and exterior wall inspection during cold snaps.
Detection Documentation and Follow-Through
Document detection findings during the inspection rather than relying on memory. Photograph any visible growth, staining, bubbled paint, or warped trim with dated phone metadata. Log moisture-meter readings by location and date. Save digital copies in a folder named with the inspection date. Detection findings should produce specific follow-through actions: moisture-source fixes for elevated readings, ventilation improvements for humidity issues, surface cleanup or material replacement for visible growth, escalation to professional sampling for findings beyond owner-level scope. Without follow-through, detection becomes an annual ritual of finding the same problems repeatedly rather than a meaningful preventive activity. Our mold inspection hub covers follow-through actions for each detection scenario.
References
- EPA — Mold Cleanup in Your Home — U.S. Environmental Protection Agency
- CDC — Basic Facts About Mold and Dampness — Centers for Disease Control and Prevention
- InterNACHI — Mold Inspection Standard of Practice — International Association of Certified Home Inspectors
- NIEHS — Mold and Health — National Institute of Environmental Health Sciences
Front Range homeowners running detection work themselves who hit a finding that needs professional follow-up can reach a vetted local inspector through our contact page. A short phone consult often clarifies whether the next step is testing, remediation, or simply a moisture fix.