How to Kill Mold: A Complete Homeowner Guide
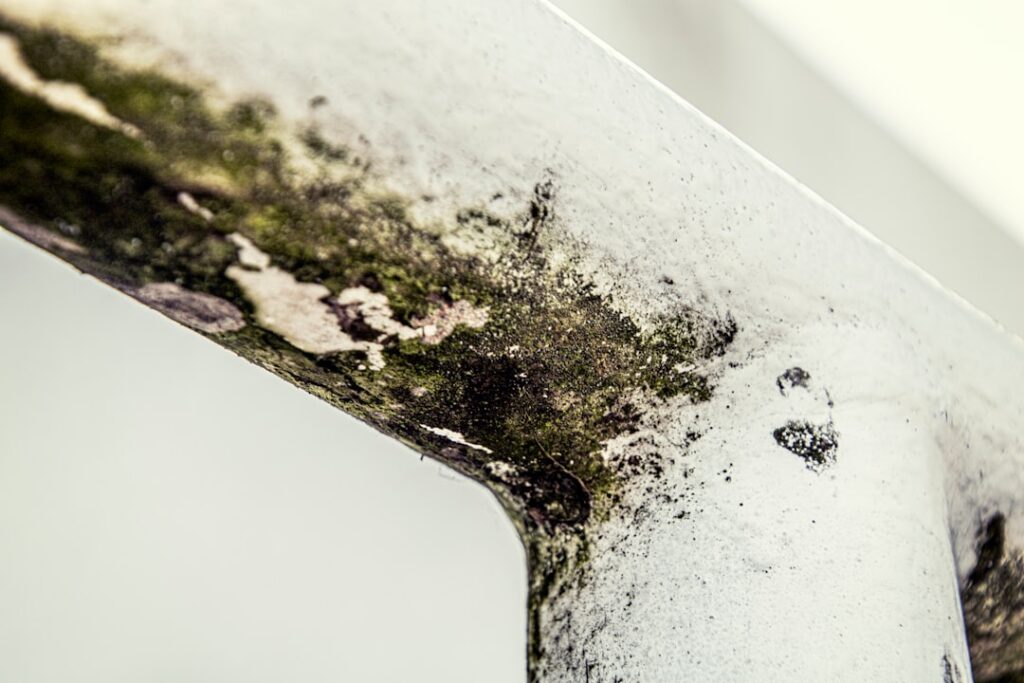
How to kill mold is the most-searched mold question on the internet, and the answer is more layered than the verb suggests. Killing — chemically deactivating a fungal colony — addresses only one part of the problem. The allergenic spore fragments embedded in porous substrates remain after the colony is dead, the moisture source that supported the growth is still active unless corrected, and the dead biomass continues to produce respiratory irritation until physically removed. This guide explains what killing mold actually means in practice, ranks the products that work on each substrate, walks through the EPA-aligned process, and frames the DIY-versus-professional decision for Front Range homeowners. This guide summarizes EPA and CDC guidance current as of 2026 — consult a certified mold inspector for testing decisions and your physician for symptom evaluation.
Is this mold, asbestos, or water damage? Get a free instant screen
Upload a clear photo of the suspect area. You'll get an instant AI screening opinion and what to do next. This is screening guidance, not a professional determination.
Screening guidance only. AI can be wrong. Confirm asbestos, mold type, or lead with lab testing or a licensed professional before acting.
How to Kill Mold: Why the Verb Misleads
The colloquial verb kill describes only the chemistry step in what mycologists and remediation contractors call remediation. The Environmental Protection Agency recommends remediate as the operational term because it combines three actions — source-moisture correction, physical removal of affected materials, and antimicrobial treatment — into one coordinated response. Killing the colony without removing the spore-laden material leaves the allergenic content in place to be inhaled later.
The distinction matters for two practical reasons. First, allergic and inflammatory reactions can occur from dead mold biomass just as from living colonies. Cleaning that kills but does not remove still produces ongoing respiratory irritation. Second, mold without an active moisture source eventually dies on its own, but mold with an active source returns regardless of how thoroughly the visible colony was killed. The chemistry step alone is incomplete; the EPA’s preferred framing acknowledges that.
For homeowners with small visible patches on non-porous substrates, the killing-versus-remediation distinction is mostly semantic — mechanical scrubbing during the cleaning physically removes the dead colony along with the chemistry. For larger patches or porous substrates, the distinction becomes operational, and the verb remediate captures the full scope of the work.
Product Effectiveness Ranked
The practical ranking of mold-killing products depends on the substrate. For non-porous surfaces, the order from most to least effective is EPA-registered antimicrobials, three percent hydrogen peroxide, diluted chlorine bleach, and white vinegar. For porous substrates, none of these products is reliably effective because the colony penetrates below the reachable surface.
EPA-Registered Antimicrobials
Products like Concrobium, Sporicidin, Moldstat, and Mold Armor are formulated specifically for fungal growth and registered with the EPA for that use. They have manufacturer-tested dwell times that give the chemistry time to work, produce predictable results on non-porous substrates, and are the products professional remediation contractors use after physical removal. Cost runs ten to twenty-five dollars per quart. These are the right default for any homeowner mold project on a non-porous surface.
Three Percent Hydrogen Peroxide
Three percent hydrogen peroxide from any pharmacy oxidizes mold organisms effectively on non-porous substrates. It produces less respiratory irritation than bleach, lightens staining as effectively as most EPA-registered products on tile and glass, and costs under three dollars per bottle. Peroxide is the homeowner-friendly second choice and a reasonable default for households where bleach fumes cause issues for sensitized occupants.
Chlorine Bleach: Mostly Cosmetic on Porous
Household chlorine bleach diluted at one cup per gallon of water kills surface organisms on non-porous substrates but does not penetrate porous materials. On drywall, unsealed grout, wood, and similar porous substrates, bleach removes visible staining temporarily without addressing the colony below the surface. EPA guidance describes this result as cosmetic rather than remedial. Bleach also produces chlorine fumes that irritate occupants with asthma — OSHA treats it as a respiratory hazard. Bleach is acceptable for non-porous surface work but is not the EPA’s preferred recommendation, and it should not be the first choice for any project involving porous substrates.
White Vinegar: Surface Mildew Only
Distilled white vinegar handles light surface mildew on tile grout, shower walls, and similar non-porous applications. It works more slowly than peroxide or registered antimicrobials and does not lift staining as quickly. Vinegar is appropriate for households committed to non-chemical cleaning and as a maintenance product alongside humidity control, but it is not the right primary product for visible mold colonies on any substrate larger than light shower mildew.
Products That Should Stay Off the List
Tea-tree oil produces variable results depending on commercial product concentration. Baking soda is a mild abrasive that kills organisms slowly. Borax is sometimes recommended in DIY guides but lacks predictable efficacy. Fogger devices marketed on social media disperse antimicrobial mist without the physical scrubbing that removes spore-laden material — the CDC does not endorse fogging as a primary remediation method. None of these belongs as the first-line product for a visible mold finding.
The Complete Process Beyond Killing
Effective mold work follows six steps, with chemistry being only one of them. Assessment identifies the visible growth, the moisture source, and the affected materials. Source correction stops the water feeding the colony. Containment isolates the work zone. Removal extracts affected materials physically. Antimicrobial treatment addresses residual spores. Verification confirms the result. Skipping any step produces predictable failures, and source correction is the most commonly skipped and the most commonly fatal omission.
The relative emphasis on each step changes with project scale. A small bathroom-tile patch involves a brief visual assessment, a fan-runtime adjustment for source correction, closing the door for containment, scrubbing for removal, a final wipe for treatment, and a forty-eight-hour visual check for verification. A whole-basement project after a sump-pump failure involves a documented assessment by an independent inspector, plumbing repair plus waterproofing for source correction, six-mil polyethylene sheeting plus negative-pressure air movement for containment, multi-day removal of saturated drywall and carpet, antimicrobial application to all exposed substrates, and third-party clearance testing for verification. The six-step framework applies at both scales.
The DIY-Versus-Professional Threshold
The EPA threshold for professional remediation is roughly ten square feet of contiguous growth, or any growth on porous substrates that have been saturated, or any situation involving sensitized occupants, or any growth on or near HVAC components, or any moisture source involving sewage or category-three water. Below these thresholds, on non-porous substrates, with a corrected source and healthy occupants, homeowner work is reasonable.
The honest self-assessment matters because partial DIY work followed by contractor remediation usually costs more than going straight to the contractor. Cross-contamination from a failed effort can expand the affected area. The professional threshold is conservative for good reason — it accounts for hidden growth that the homeowner cannot see, dispersion risk during disturbance, and occupant-health vulnerabilities that may not be obvious. Erring toward professional involvement at the margin protects the home and the household.
Source Correction by Cause
Every mold colony depends on a moisture source. The fix depends on the cause. Plumbing leaks require a plumber. Roof flashing failures require a roofer. Basement seepage requires a waterproofing contractor, often with grading and downspout extension work outside. Bathroom and kitchen ventilation issues require a general contractor or HVAC technician to install or upgrade exhaust fans and verify vent terminations. Slab moisture wicking through concrete requires a vapor barrier installation.
Identifying which trade is needed is the function of the pre-work assessment. An independent mold inspector — unaffiliated with any remediation contractor — provides an objective baseline and identifies the source explicitly. The mold inspection and testing hub covers what an assessment includes and how it differs from a real-estate home inspection. The investment in an assessment typically saves substantially more in correctly scoped cleanup and avoids repeat work caused by missed sources.
Front Range Context for Mold Killing
Colorado’s semi-arid climate creates a misleading sense that mold cannot establish here. Interior microclimates tell a different story — bathrooms without exhaust fans, kitchens venting into attics, basements behind vapor barriers, closets backing exterior walls in older homes. Each generates the localized moisture that mold needs despite the dry outside air. Seasonal patterns matter too. Spring snowmelt drives basement seepage along the foothills. Late-summer monsoon storms push wind-driven rain past failing window flashing. Winter humidifier use combined with cold exterior walls produces condensation behind paint.
The Front Range building stock adds variability. Denver pre-1970 brick bungalows often lack continuous insulation behind plaster walls. Boulder mid-century ranch homes frequently have ducts running through unconditioned attic space. Colorado Springs homes built during the 1980s expansion may have vapor barriers installed on the wrong side. Higher-elevation homes in Evergreen and Estes Park face larger temperature differentials that produce more aggressive condensation patterns. A contractor familiar with the local building stock identifies these patterns faster than one transferring generic experience from a different climate.
Cost Ranges for Front Range Projects
Project costs vary widely with scope. A successful DIY effort on a small non-porous patch costs forty to seventy dollars in supplies and one to three hours of labor. A single-room professional project addressing a small finding runs six hundred to fifteen hundred dollars. A whole-basement project after a sump-pump failure runs three to seven thousand. A multi-room project involving HVAC contamination and significant drywall removal can exceed fifteen thousand.
Homeowners insurance coverage varies by policy and cause. Sudden discharge from a burst pipe is usually covered; gradual seepage is usually excluded. Read the policy before assuming coverage. Document everything from the day the moisture event was discovered — date-stamped photographs, contractor invoices, moisture readings — because claims denied for insufficient documentation are common. Third-party verification testing adds three to six hundred dollars and is worth specifying as a non-negotiable line item rather than skipping to save money.
Verification That Closes the Loop
For homeowner-managed projects, verification means visual inspection under bright light at completion, moisture meter readings at forty-eight hours, and rechecks at two weeks and three months. The three-month recheck catches seasonal moisture issues that may not appear in the initial six weeks. Treat verification as a planned project step rather than a paperwork formality.
For professional projects, verification means independent third-party air and surface sampling. The inspector takes samples in remediated rooms, unaffected control rooms, and outdoor air. Remediated rooms should show airborne spore counts at or below the outdoor baseline. Failed clearance triggers contractor re-work under standard contracts. The verification report becomes a permanent document for the home’s history and supports future real-estate disclosure under Colorado law. Homeowners can review broader removal context in the how to remove mold guide.
Containment Practices Homeowners Often Skip
Containment is the step homeowner projects most commonly underestimate. Even a small twelve-square-foot bathroom patch generates aerosolized spores during scrubbing that, without containment, travel through the home via open doors, gaps under interior doors, and especially through the central HVAC system. Forced-air systems can redistribute spores from one work zone to every other room in the house within minutes if the air handler runs during the work.
Practical homeowner-level containment costs almost nothing. Close the door to the work zone. Place a damp towel along the bottom door gap. Tape painter’s plastic over the supply registers and return grilles in the room. Turn the central HVAC system to OFF — not AUTO, not FAN — before starting work. Open a window and place a small box fan exhausting outward to create slight negative pressure. These five actions take five minutes and prevent the cross-contamination scenario that produces secondary mold findings in previously unaffected rooms months later.
Personal Protective Equipment That Matters
The PPE checklist for mold work is short but non-negotiable. An N95 respirator rated by NIOSH for particulate filtration — surgical masks do not filter mold spores and provide essentially no respiratory protection during this work. Nitrile gloves that extend past the wrist. Sealed safety glasses or goggles that prevent splashes from reaching the eyes. Long sleeves and long pants that can be removed and washed immediately after the work. Closed-toe shoes that can be wiped down before leaving the work zone.
For larger projects or sensitized homeowners, upgrade to a half-face respirator with P100 filters. Cost runs forty to seventy dollars and provides substantially better protection than a disposable N95. The investment pays off for any homeowner planning multiple mold projects or who has any respiratory sensitivity. Discard disposable N95s after each session and replace P100 filters per manufacturer guidance.
Long-Term Prevention After the Project
The work to kill or remediate mold succeeds long-term only when the moisture conditions that supported the colony are corrected and stay corrected. That means humidity monitoring with a digital meter in basements and main living areas, ventilation maintenance with annual exhaust fan checks, and routine inspection of plumbing connections, roof flashing, and basement penetrations.
Winter humidifier settings deserve specific attention on the Front Range. Whole-house humidifiers set above forty percent during cold weather push exterior-wall surface temperatures below the dew point and produce condensation behind paint that often surfaces as growth within a season. Lower the humidifier setting to thirty to thirty-five percent when outdoor temperatures drop below twenty degrees Fahrenheit. The comfort difference is minimal; the long-term mold prevention is substantial.
References
- Mold Cleanup in Your Home — U.S. Environmental Protection Agency
- Cleanup and Remediation — Centers for Disease Control and Prevention
- Mold Standards and Worker Protection — Occupational Safety and Health Administration
- Mold Health Topic — National Institute of Environmental Health Sciences
- Healthy Homes Guidance on Mold — U.S. Department of Housing and Urban Development
Front Range homeowners working through a mold finding can request an independent assessment through our contact page before committing to a DIY cleaning effort or hiring a remediation contractor.
Mold removal & cleanup picks
For a small, contained patch (under ~10 sq ft) these EPA-friendly removers handle surface mold. Larger or recurring growth warrants a professional assessment first.
| Product | Why | Buy |
|---|---|---|
 RMR-86 Instant Mold Stain Remover RMR-86 Instant Mold Stain Remover | Fast-acting on stains; ventilate and wear PPE. | Amazon — $18.38 |
 Concrobium Mold Control Concrobium Mold Control | No-bleach formula that also helps prevent regrowth. | Amazon — $13.48 |
 Mold Armor Mold & Mildew Remover Mold Armor Mold & Mildew Remover | Widely stocked bathroom/surface remover. | Amazon — $22.98 |