Detecting Mold in Walls: What Homeowners Should Know
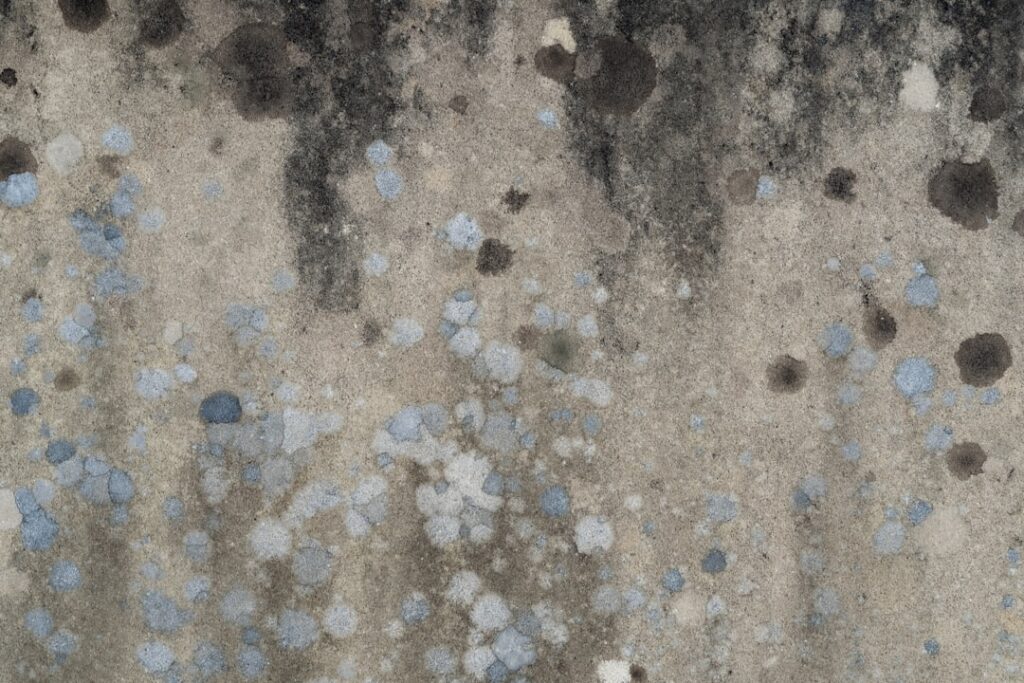
Detecting mold in walls is harder than spotting it on a tiled shower, because the growth often hides inside the cavity where drywall, insulation, and framing meet trapped moisture. By the time a stain bleeds through the paint, a colony may have been spreading behind it for weeks. This guide summarizes EPA and CDC guidance current as of 2026 — consult your physician about symptoms and a certified professional for any testing decision that affects a sale or a remediation plan.
Is this mold, asbestos, or water damage? Get a free instant screen
Upload a clear photo of the suspect area. You'll get an instant AI screening opinion and what to do next. This is screening guidance, not a professional determination.
Screening guidance only. AI can be wrong. Confirm asbestos, mold type, or lead with lab testing or a licensed professional before acting.
Why wall-cavity mold is so easy to miss
A wall is a sealed box. Air-sampling kits read the room, not the space between the studs, so a colony feeding on damp insulation can stay invisible to a standard test. The earliest clues are usually sensory rather than visual: a persistent musty odor, paint that bubbles or discolors, or a cold damp patch that never quite dries.
The musty-odor signal
Microbial growth releases volatile organic compounds that produce that distinctive earthy, basement-like smell. A musty odor with no visible source is one of the strongest reasons to investigate a wall cavity. The nose often detects hidden mold before any instrument does.
Moisture meters: the first instrument
Mold needs water, so finding the damp finds the likely growth. A moisture meter pressed against drywall reads relative moisture content. Pin meters use two probes that pierce the surface; pinless meters scan without marking the wall. A reading well above surrounding dry areas flags a cavity worth opening or scanning further.
How to read the pattern
Single high readings can mislead. Sweep the meter across a wall in a grid and look for a gradient — moisture usually rises from a leak source or wicks up from a wet bottom plate. The shape of the wet zone often points to the water’s origin.
Infrared and thermal imaging
An infrared camera does not see mold. It sees temperature differences, and wet materials hold and release heat differently than dry ones. A thermal scan can reveal a cool, damp plume inside a wall that the eye and the moisture meter together might map only slowly. Professionals often pair the camera with a moisture meter to confirm that a cool patch is actually wet rather than just a draft or a stud.
The borescope: looking inside without a demolition
When evidence points to a specific cavity, a borescope, sometimes spelled bore-scope, settles the question. A technician drills a small hole, often near an outlet or in an inconspicuous spot, and feeds a slim camera through it. The screen shows the back of the drywall, the insulation, and the framing directly. This is the least destructive way to confirm hidden growth before committing to opening a wall.
Removing a baseboard or outlet cover
Less invasive than drilling, pulling a baseboard or unscrewing an outlet plate gives a partial view into the cavity. The bottom plate of a wall is where water collects, so baseboard removal frequently exposes the first signs of growth. An outlet box can offer a small window and a way to smell into the cavity.
Surface sampling once growth is exposed
After opening a section, a swab or tape-lift can sample the growth for lab identification. This confirms the genus, which matters when an occupant has health concerns. For the full menu of confirmation tools, our companion guide on how to check for mold in the walls details each step.
Common moisture sources behind wall mold
Investigation goes faster when you know where to look. Plumbing inside a wall, window flashing failures, roof leaks tracking down framing, and condensation on cold exterior walls all feed cavity mold. In Colorado, spring snowmelt against a foundation and swamp-cooler lines running through walls are recurring culprits in Denver and Boulder County homes.
When to stop investigating and call a pro
A homeowner with a moisture meter can identify a suspect wall. Confirming and remediating widespread cavity growth is professional work. The EPA suggests bringing in help when affected drywall exceeds about 10 square feet, when growth returns after cleaning, or when an occupant has a compromised immune system. A certified inspector adds calibrated thermal imaging and a documented report.
Pin versus pinless moisture meters
The two meter styles answer slightly different questions. A pin meter drives two probes into the material and measures electrical resistance between them, giving a localized reading at a known depth. A pinless meter uses a sensor pad that scans without marking the surface, reading an average across a shallow area. Pinless models work well for a fast sweep of a large wall, while pin meters confirm a suspect spot and can probe deeper into framing.
What thermal images actually show
An infrared scan produces a heat map, not a mold map. Evaporative cooling makes wet areas read cooler than surrounding dry material, which is why a damp plume often appears as a darker patch on the camera. But a cold supply duct, a missing batt of insulation, or an exterior shadow can mimic that signature. The discipline is to treat a thermal anomaly as a lead, then confirm it with a moisture meter before opening anything.
Reading the shape of a wet zone
The geometry of moisture tells a story. A wet band along the bottom plate suggests water wicking up from a slab or a flooded floor. A vertical streak points to a pipe or a roof leak tracking down framing. A halo around a window frame implicates failed flashing or condensation. Mapping the pattern before cutting drywall narrows where the source — and the worst growth — is likely to be.
Confirming with a lab sample
Once a cavity is opened, a swab or tape-lift of the exposed growth can be sent to a lab for identification. This matters most when an occupant has health concerns or when a dispute requires documentation. For routine cleanup, the EPA notes that the species rarely changes the response, so confirmation is optional unless the situation calls for a paper trail.
Why wall mold keeps coming back
Recurrence almost always traces to an uncorrected water source. Painting over a stain, wiping the surface, or even replacing drywall without fixing the leak only resets the clock. The colony returns because the conditions that created it never changed. Detection that stops at “yes, there is mold” without finding the water leaves the homeowner repeating the cycle.
What to document during detection
A useful record includes moisture-meter readings with locations, thermal images with notes, photographs of any opened cavity, and the suspected source. This documentation supports a remediation quote, an insurance claim, or a seller negotiation. It also helps a professional pick up where the homeowner left off rather than starting the investigation over.
Where wall mold hides most often
Certain wall locations turn up growth repeatedly. The bottom plate of an exterior basement wall collects water that wicks up from a damp slab. The cavity beneath a window catches condensation and leaks from failed flashing. Walls behind showers and tubs absorb moisture from plumbing and steam. The interior face of an exterior wall in an unheated room can sweat in cold weather. Starting an investigation at these high-probability spots saves time and reduces unnecessary drilling.
The order to use your tools
Detection works best as a sequence rather than a single test. Begin with the senses: follow a musty odor to its strongest point. Next, sweep the area with a moisture meter to localize the damp. Then, if available, run an infrared scan to map the wet zone and confirm the meter’s findings. Only after narrowing the location should you drill a small hole for a borescope or pull a baseboard. Working from least to most invasive keeps damage minimal while steadily closing in on the source.
When the wall is dry but the smell remains
Occasionally every reading comes back dry while the odor persists. Several explanations are worth checking. The moisture source may be intermittent, wet only after rain or heavy use, so timing the test matters. The growth may sit in an adjacent cavity, a floor system, or a ceiling rather than the wall you suspected. Or the odor may come from a different source entirely. Persistent odor with dry walls is a reason to widen the search rather than assume the home is clear.
Detecting versus confirming a problem
Two stages deserve separation. Detecting wall mold means gathering enough evidence — odor, moisture readings, a thermal anomaly — to be reasonably confident growth exists in a cavity. Confirming it means opening or scoping the space and seeing the colony, or sampling it for the lab. Homeowners can usually handle detection with a moisture meter and a keen nose. Confirmation that involves cutting into walls, especially over a large area, is where a professional’s tools and judgment earn their cost.
The health frame for hidden wall mold
Mold sealed in a wall can still affect the people living with it, which is why detection matters even when growth is out of sight. The CDC links damp, moldy environments to respiratory irritation, congestion, and worsened asthma, with higher risk for people who have weakened immune systems. Detection identifies the building problem; it does not diagnose health effects. Occupants with persistent symptoms should consult a physician while the wall investigation proceeds, treating the two as parallel rather than interchangeable.
From detection to repair
Detecting mold in walls is only the first half. The cavity must be opened, the growth removed, the wet material discarded, and — most importantly — the water source corrected, or the colony returns. The broader mold inspection resource center connects detection findings to a remediation plan you can act on.
Tools a homeowner can use versus pro gear
The detection toolkit splits into accessible and specialized tiers. A homeowner can reasonably own and use a moisture meter, a flashlight, and a screwdriver for pulling outlet covers or baseboards. Infrared cameras and articulating borescopes exist in consumer versions, though professional-grade units offer better resolution and calibration. The judgment to interpret a thermal image, distinguishing a wet plume from a cold draft or a stud, is where professional experience adds the most. Homeowners can detect a suspect wall; pros confirm and quantify it with greater certainty.
Preventing wall mold after the fix
Once a wall is repaired, prevention keeps the problem from returning. The decisive step is correcting whatever let water in, since the EPA treats moisture control as the foundation of mold control. Beyond that, keep indoor humidity below roughly sixty percent, improve drainage and grading so groundwater stays away from the foundation, insulate cold exterior walls to limit condensation, and address plumbing promptly. A wall that stays dry cannot grow mold, no matter how many spores drift past it in ordinary indoor air.
References
- EPA Brief Guide to Mold, Moisture and Your Home — U.S. Environmental Protection Agency
- CDC facts on mold and dampness in buildings — Centers for Disease Control and Prevention
- InterNACHI homeowner resources on mold inspection — International Association of Certified Home Inspectors
Front Range homeowners who suspect mold behind a wall and want a qualified inspector to scan it can get in touch through our contact page.