Easy Mold Removal: What Homeowners Need to Know
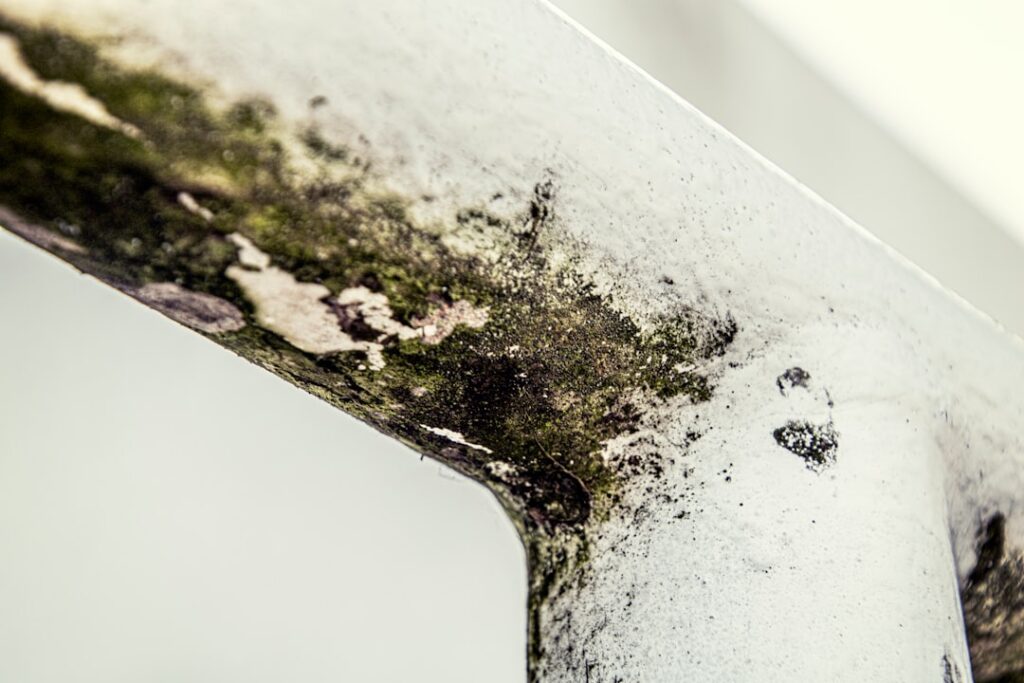
The phrase “easy mold removal” rarely matches reality on patches that have been wet for weeks, but small surface patches caught early genuinely can be straightforward. This guide summarizes EPA and CDC mold cleanup guidance current as of 2026 and walks through the DIY workflow for sub-10-square-foot mildew and mold patches, plus the warning signs that push a job out of homeowner scope. Two principles cover every easy case: fix the water source first, and respect the EPA’s 10-square-foot DIY threshold. Beyond that line, scrubbing harder isn’t the right move; controlled remediation with containment is the appropriate response.
Is this mold, asbestos, or water damage? Get a free instant screen
Upload a clear photo of the suspect area. You'll get an instant AI screening opinion and what to do next. This is screening guidance, not a professional determination.
Screening guidance only. AI can be wrong. Confirm asbestos, mold type, or lead with lab testing or a licensed professional before acting.
Easy Mold Removal: The Core Workflow
The DIY workflow has six steps. Find the moisture source. Gather PPE. Pick a cleaner. Vent the work area. Scrub with detergent and water. Verify the cleanup held. Each step takes 15 to 30 minutes for a typical bathroom or basement patch under 10 square feet. Total time investment for one patch usually runs 90 minutes to 3 hours of active work, plus a 48-hour wait to confirm the cleanup holds. Supply cost runs under $50 if you don’t already have rubber gloves, an N95 mask, and a box fan.
Cleaning without fixing moisture is wasted work. Mold needs water, a spore, and a substrate. Spores and substrate are always present indoors; water is the variable you control. The EPA mold cleanup guidance emphasizes this point because it’s the most commonly skipped step.
Step One: Find the Moisture Source
Before any cleaner touches the patch, identify why the area got wet. Common sources include leaky plumbing under sinks, condensation on cold supply pipes, ice-dam leaks at roof eaves, sump pump failures in finished basements, bathroom exhaust fans vented into attics, humidifier overuse, and bathroom showers without adequate fan ventilation. A $30 pin-type moisture meter on adjacent drywall and trim confirms whether the substrate is still wet enough to support regrowth. Drywall above 17% on a pinless meter, or wood above 20% on a pin meter, means substrate is still wet.
Step Two: Gather PPE
For sub-10-square-foot patches you need rubber gloves, an N95 or KN95 respirator, sealed safety goggles (not glasses), long sleeves and pants. The CDC mold basics page recommends N95 minimum for any visible mold cleanup. Cheap surgical or dust masks don’t filter spores. Skip both and use proper N95 or better. Heavy-duty trash bags hold contaminated rags after cleanup. A box fan venting outdoors keeps disturbed spores from spreading to occupied rooms.
Step Three: Pick the Right Cleaner
Plain detergent and water work as well as anything fancier for most patches. The EPA does not recommend bleach for routine mold cleanup because the water in bleach soaks into porous materials and can feed regrowth while the chlorine evaporates within hours. For hard non-porous surfaces (glazed tile, glass, stainless steel) a diluted bleach solution (1 cup bleach in 1 gallon water) is acceptable. Never mix bleach with ammonia. Hydrogen peroxide at 3% household strength kills surface mold without the porous-substrate problems of bleach. Commercial cleaners (Concrobium, RMR-86, Mold Armor) rarely outperform plain detergent on routine patches.
Step Four: Vent the Work Area
Set a box fan in a window pointing outward to create negative pressure in the room and pull spore-laden air out during cleanup. Close the work area off from the rest of the house with painter’s plastic and tape if possible. The point is to prevent disturbed spores from spreading to occupied rooms. After cleanup, leave the fan running for an additional hour and HEPA-vacuum the floor before removing plastic barriers.
Step Five: Scrub With Detergent and Water
Work from clean areas toward the affected patch. Wet the surface lightly first to suppress spore release. Scrub gently with cleaning solution. Rinse with clean water. Dry completely (a $20 box fan helps). Discard cleaning rags in a sealed plastic bag rather than reusing them. For porous materials that won’t come fully clean (drywall, ceiling tile, carpet padding), cut out and replace the affected section rather than trying to scrub it back to white. When cutting out drywall, extend the cut at least 12 inches past the visible patch because mold typically extends further than visible staining.
Step Six: Verify the Cleanup Held
Re-check the cleaned area at 48 hours, one week, and one month. Re-growth at any checkpoint means moisture wasn’t actually fixed. A moisture meter confirms substrate dryness. For documentation needs (real-estate, insurance, post-remediation clearance), an air-sample test with outdoor control taken by a certified inspector is the standard verification step. Our pro testing workflow guide covers what a certified inspector delivers for clearance work. Visit the mold inspection pillar hub for the broader testing menu.
The 10-Square-Foot DIY Threshold
The EPA’s 10-square-foot rule (a 3-foot by 3-foot patch) is the practical line between DIY and pro scope. Under 10 square feet is homeowner-scope with detergent, basic PPE, and a fan venting outdoors. Over 10 square feet, or growth tied to sewage water (category three), or any hidden mold suspected behind walls, calls for a licensed remediation contractor with containment, negative air pressure, and HEPA-filtered exhaust. Expect $1,500 to $30,000 for full remediation depending on scope. The IICRC S520 standard governs professional remediation; contractors should be IICRC-certified.
What Doesn’t Count as Easy Removal
Five red flags push the job out of DIY scope regardless of patch size. Growth larger than 10 square feet. Growth tied to sewage backup or category-three water. Hidden mold suspected behind walls (warped baseboards, brown staining bleeding through paint, musty odor with no visible source). Occupants with asthma, allergies, or immune compromise. HVAC contamination (mold inside ductwork or on cooling coils). In any of these cases, the cleanup is no longer easy and warrants a licensed remediation contractor.
Surface-Specific Tactics
Tile and grout: scrub with detergent and a stiff nylon brush; apply hydrogen peroxide for stubborn staining; re-grout if mold has penetrated more than 1mm; re-caulk shower corners every two to three years. Painted drywall: wipe with detergent if paint is intact; cut out and replace if the paper backing is soft or stained brown. Bare wood: surface scrub with detergent; sand lightly with 120-grit if staining remains; HEPA-vacuum; apply borate-based wood treatment per manufacturer instructions. Concrete: scrub with detergent and hot water; seal with a masonry sealer after the surface dries to reduce dust accumulation.
Fabric and soft goods: washable fabrics (clothing, curtains, towels) can usually be saved with hot wash, detergent, and a cup of distilled white vinegar in the rinse. Mattresses, upholstered furniture, and carpet padding with visible mold growth are usually disposed of rather than restored; porous fabric layers retain spores even after cleaning. The cost of professional fabric remediation often exceeds replacement cost on anything but high-value items.
Preventing Recurrence
Keep indoor humidity below 50%. Run bathroom exhaust fans during showers and 20 minutes after. Vent fans outside, never into attics. Fix plumbing leaks within 24 hours. Insulate cold supply pipes against summer condensation. In Front Range basements, run a dehumidifier in summer and ventilate during dry months. Avoid carpet over concrete slabs without a vapor barrier. Replace bath caulk every two to three years. A $30 hygrometer in each main living zone shows where moisture concentrates and reveals problems early.
A simple test for bathroom exhaust fan adequacy: run the fan and hold a single tissue near the grille. It should pull toward the fan with noticeable force. If the tissue barely moves, the fan is undersized, clogged, or has degraded over years of dust accumulation. Replace fans that don’t move at least 50 CFM measured at the grille. The cheapest upgrade in the prevention list.
Disposal of Contaminated Materials
Sealed plastic bags are the standard disposal route for moldy rags, cut-out drywall, contaminated carpet padding, and used PPE. Double-bag heavily contaminated material, label the outer bag, and dispose with regular trash unless local rules require otherwise. Do not put moldy material in compost bins. Do not run moldy fabric through a household washing machine; spores spread to clean laundry on the next cycle. Smaller jobs fit in regular curbside collection; larger projects sometimes warrant a contractor dumpster.
Common Mistakes That Make Things Worse
Five mistakes turn a small cleanup into a bigger problem. Aggressive scrubbing on dry mold (sends spores airborne). Bleach on porous substrates (water feeds regrowth while chlorine evaporates). Painting over visible mold (the patch returns and the new paint peels). Reusing contaminated rags (spreads spores to clean areas). Skipping the moisture diagnosis (cleanup fails within weeks). Avoiding these five mistakes matters more than which specific cleaner brand you choose.
Front Range Climate Considerations
Colorado’s semi-arid climate keeps large-scale mold less common than coastal regions, but specific failure modes recur in Denver-area homes: post-flood drying that exceeded 48 hours, humidifier overuse in master bedrooms during dry winters, basement bathrooms without exhaust fans, ice-dam leaks at north-facing eaves after heavy snows. Slab-on-grade homes in Aurora, Centennial, and Highlands Ranch concentrate risk in finished basements where summer dewpoint condensation can support growth even without obvious water damage.
Choosing a Remediation Contractor If Needed
If the patch crosses the 10-square-foot threshold or any other red flag appears, vetting a remediation contractor requires three checks. IICRC certification on file (verify on the IICRC website). General liability and workers’ compensation insurance (request certificates). Reference checks from completed jobs of similar scope. Avoid the lowest bid; mold remediation pricing varies widely because the scope of work depends on judgment about how far the colony extends. The middle-bid contractor with strong references is usually the safer pick.
Tools and Supplies List
Two pairs of rubber gloves. Two N95 or KN95 respirators (one for application, one for rinse). Sealed safety goggles. A bucket with hot water and detergent. Microfiber rags or sponges. A spray bottle. Hydrogen peroxide at 3% household strength. A box fan. Heavy-duty trash bags. A pin-type or pinless moisture meter for substrate verification. Painter’s plastic and masking tape if isolating the work area. Total supply cost runs under $50 for a one-time job, less if you already have rubber gloves and a box fan on hand.
Time Investment Reality
A 4-square-foot bathroom corner patch typically takes 90 minutes of active work plus a 48-hour re-check window. A 9-square-foot basement closet patch may take 3 hours of active work plus the same re-check. Add 30 to 60 minutes if you also need to identify and fix the moisture source (loose toilet wax ring, dripping supply valve, dehumidifier deployment). Build in the re-check time and a one-week follow-up before declaring the job done. Skipping the re-check is the most common reason DIY cleanups appear to succeed initially and then fail within weeks.
References
- Mold Cleanup in Your Home — EPA
- Mold Basics — CDC
- Mold Remediation Course — EPA
- InterNACHI Mold Inspection Standards — InterNACHI
Front Range homeowners facing mold patches beyond easy DIY scope can reach a vetted remediation pro through our contact page.
Mold removal & cleanup picks
For a small, contained patch (under ~10 sq ft) these EPA-friendly removers handle surface mold. Larger or recurring growth warrants a professional assessment first.
| Product | Why | Buy |
|---|---|---|
 RMR-86 Instant Mold Stain Remover RMR-86 Instant Mold Stain Remover | Fast-acting on stains; ventilate and wear PPE. | Amazon — $18.38 |
 Concrobium Mold Control Concrobium Mold Control | No-bleach formula that also helps prevent regrowth. | Amazon — $13.47 |
 Mold Armor Mold & Mildew Remover Mold Armor Mold & Mildew Remover | Widely stocked bathroom/surface remover. | Amazon — $22.98 |